

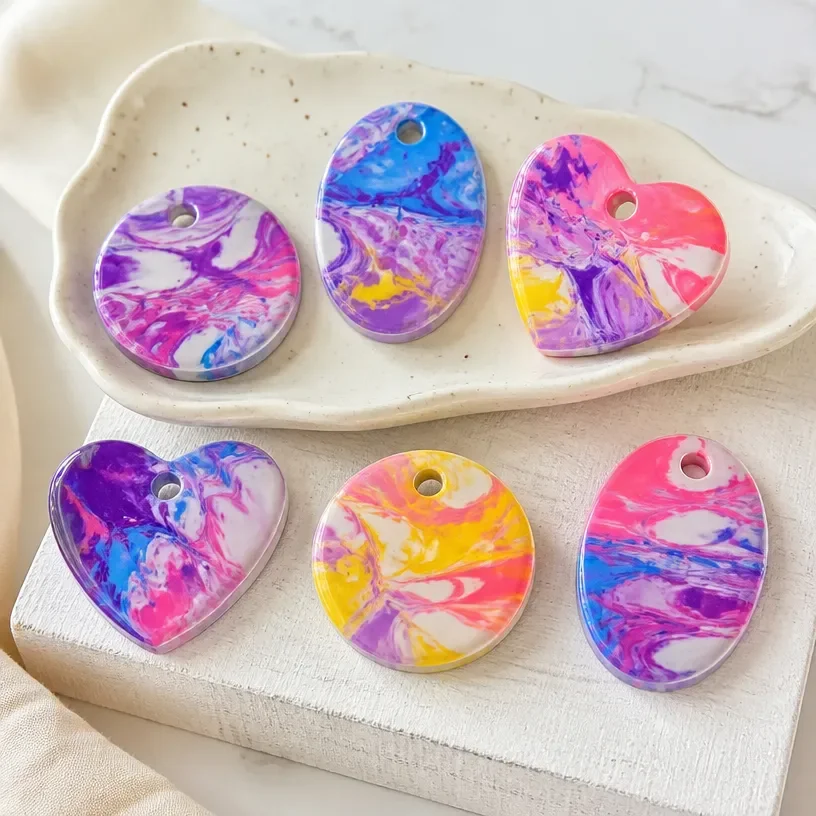
Writing a tutorial about DIY Nail Polish Marble Crafts is an exciting way to engage kids and unleash their creativity. Imagine it’s a busy afternoon; the kids are restless, and you need a quick activity to keep them entertained. The kitchen setup is simple, and with a few supplies on hand, you can dive right into the DIY Nail Polish Marble Crafts: Easy Marbling Tutorial. This project is perfect for those moments when the little ones want to create something beautiful without needing extensive prep work. You may also find Grow A Crystal Star At Home Easy Diy Tutorial useful.
Why This DIY Nail Polish Marble Crafts: Easy Marbling Tutorial Works So Well
You may also find Diy Beaded Snail Craft Pipe Cleaners useful.
This DIY project is low-prep and highly engaging, making it an ideal choice for real-life schedules. With easily accessible materials and straightforward steps, this craft allows for spontaneity while still delivering impressive results. It appeals to children because they get to experiment with color and design, becoming little artists in the process. Plus, the results are reliably beautiful, ensuring that even first-timers achieve success with ease. You may also find Diy Bioplastic Suncatchers Easy Recipe useful.
A Quick Look Before You Begin
This DIY marbling project can be completed in about an hour from start to finish, allowing plenty of time for cleanup afterward. You don’t need a huge area to work, as the setup can take place at your kitchen table. Mess levels are manageable with a bit of preparation. To keep things simple, have paper towels and a garbage bag at hand for quick cleanup. Adult involvement is minimal but helpful, as you can assist with setup and guide the children as they create. You may also find Diy Coffee Filter Jellyfish Craft Tutorial useful.
Materials You’ll Need
- Nail polish (various colors)
- Water (room temperature)
- A shallow dish or container
- Toothpicks or skewers for swirling
- Coffee filters or cardstock for adhering the design
- Paper towels (for quick cleanup)
- Plastic gloves (optional for messy hands)
These materials are mostly common household items, making it easy to gather everything before starting your creative adventure.
Step-by-Step Directions
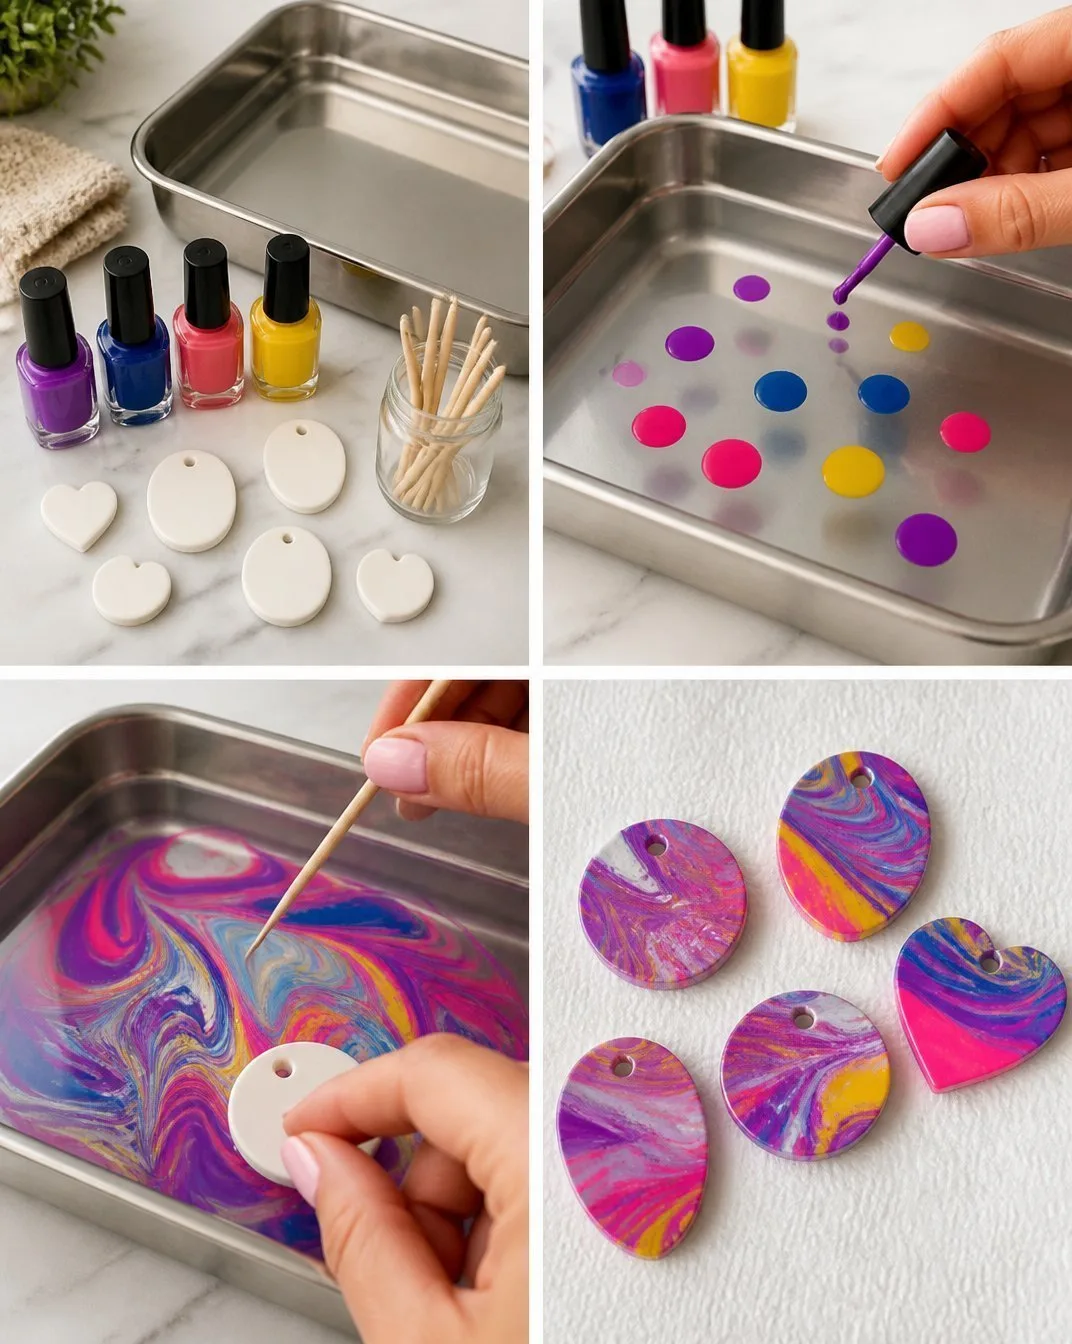
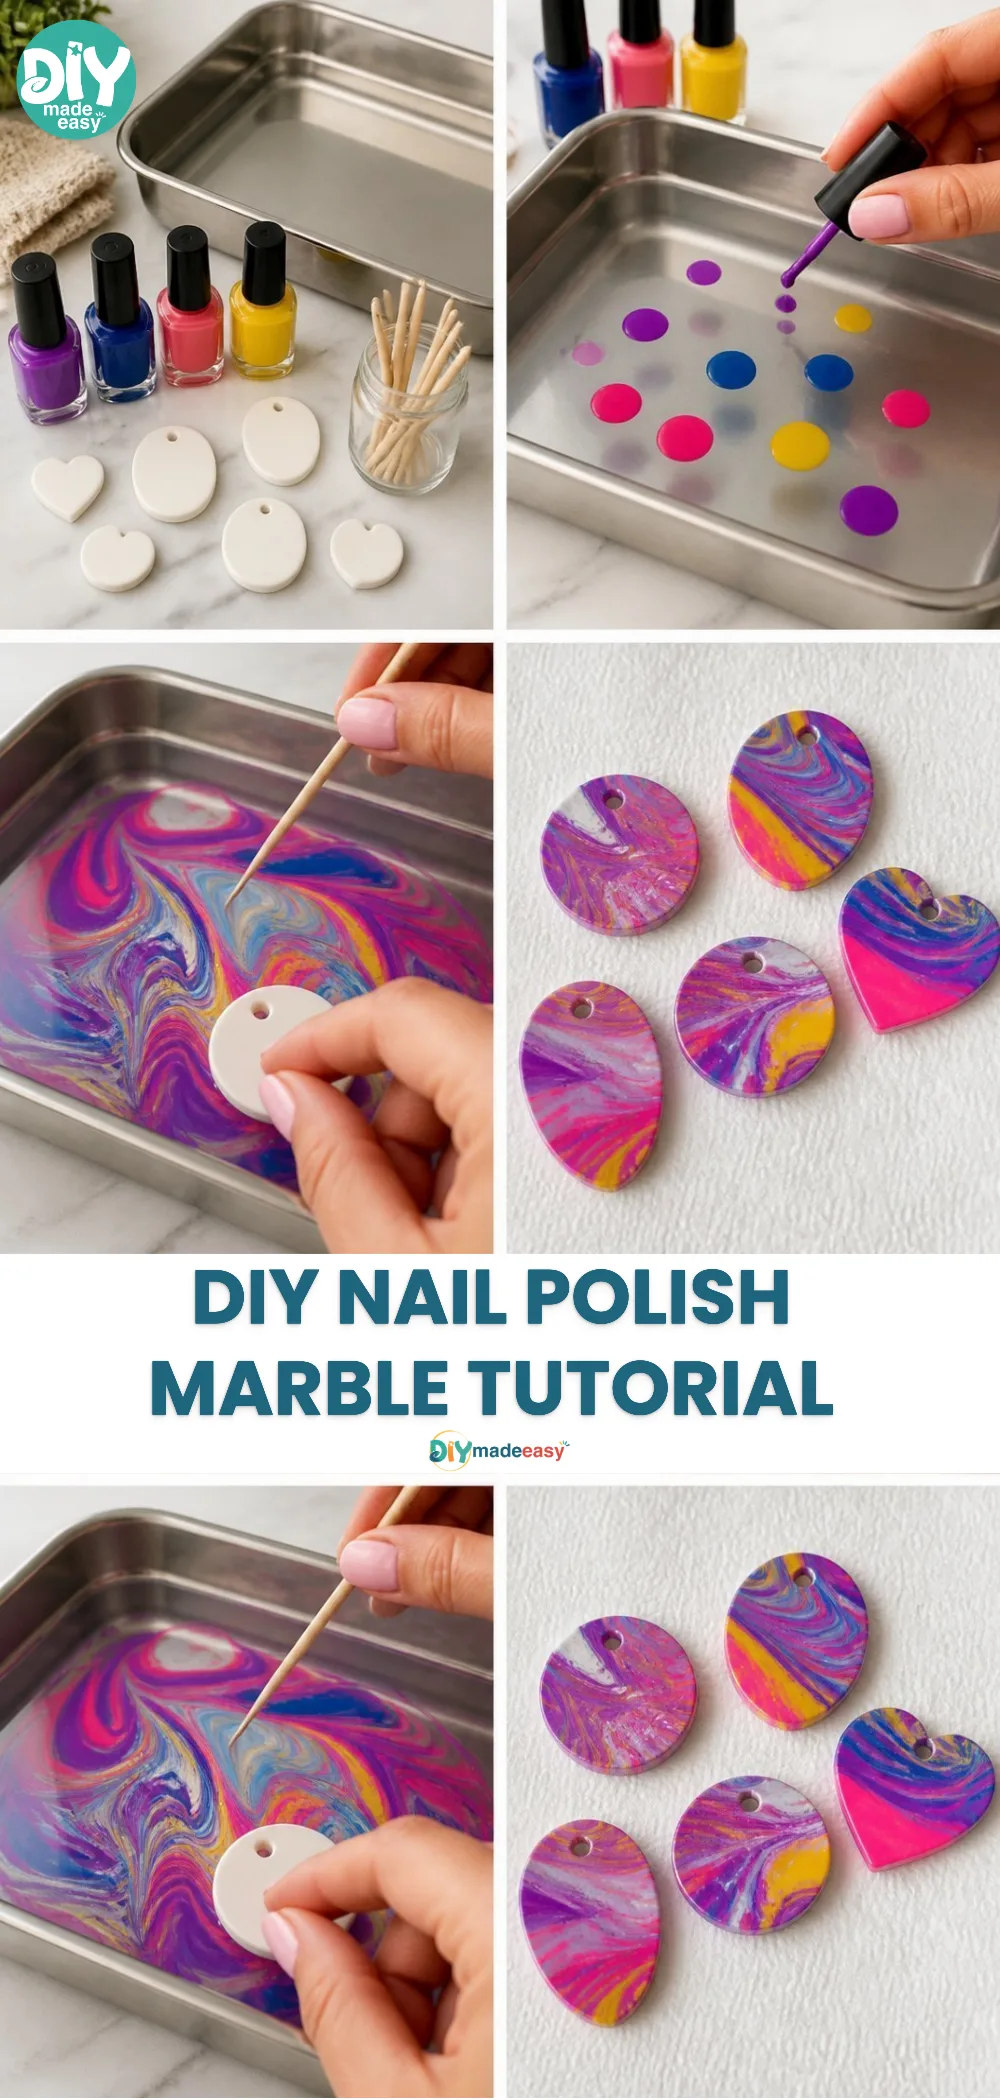
Prepare your workspace: Lay out newspaper or a plastic tablecloth to protect your surfaces from spills.
Pour the water: Fill a shallow dish with room temperature water, about an inch deep.
Add nail polish: Open your nail polish bottles and drip a few drops of different colors onto the water surface. Watch them spread out beautifully.
Swirl your colors: Use a toothpick or skewer to gently swirl the colors together, creating a marbled effect. Take your time, as this step determines your design.
Dip your paper: Carefully place your coffee filter or cardstock onto the surface of the water. Allow it to sit for a few seconds to absorb the nail polish design.
Lift and dry: Gently lift the paper straight up from the water, letting excess water drip off. Place it on paper towels to dry.
Cleanup time: After you finish, it’s time to clean your work area and wash any tools you used. Enjoy the beauty of your marbled creations!
Troubleshooting Common Issues
If something doesn’t go as planned, don’t worry! Sometimes the nail polish won’t spread as expected. This could be due to the water temperature being too cold or too warm. An ideal temperature is room temperature, as it allows nail polish to spread smoothly.
Another common issue is the colors blending too much. If this happens, try using fewer drops or swirling less aggressively. Remember, part of the fun is experimenting, so encourage the kids to try again until they find what works best for them!
Easy Variations to Try
- Use different bases: Instead of cardstock, try marbling on plastic or glass items for unique outcomes.
- Add glitter: Mix in some glitter before swirling to add sparkle to your art.
- Create layered effects: After the first layer dries, dip it again in a different marbling design for a more intricate look.
Storing or Reusing This Project
After the marbled pieces have dried, you can use them as decorative art pieces, bookmarks, or even gift tags. If you have leftover nail polish, try to store it in a cool, dark place to prolong its shelf life. Encourage the kids to think creatively about how to reuse their marbled designs, perhaps cutting them into shapes or incorporating them into other crafts.
FAQs About DIY Nail Polish Marble Crafts: Easy Marbling Tutorial
What if I make a mess?
It’s totally normal for crafts to become messy! Having paper towels and an easy-to-clean surface helps. Just remember, cleaning up is part of the fun! Is this project safe for young kids? While nail polish is generally safe, it’s advisable to supervise younger children closely and use gloves if necessary. This way, you can ensure they don’t accidentally swallow any materials.
Can I use any nail polish?
Yes! However, keep in mind that some polishes might not spread as well as others. Most standard brands will work, but experimenting can yield different results!
A Final Helpful Note
This DIY nail polish marbling project is designed to spark joy and creativity in a fun, low-pressure environment. Embrace imperfections and encourage imaginative exploration, allowing kids to express themselves freely. Simple, user-friendly crafts like this one can fill a busy afternoon with laughter and pride in their creations.
Conclusion
Crafting with your kids can be a delightful experience, and DIY marbling can lead to beautiful artistic expressions. For more inspiration on similar crafts, check out resources like the guide on how to marble with nail polish or this tutorial for marbling techniques. With a bit of patience and creativity, you’ll create memorable moments together that result in fun art pieces.
PrintDIY Nail Polish Marble Crafts: Easy Marbling Tutorial
Engaging DIY marbling project using nail polish to unleash creativity in kids.
- Prep Time: 15 minutes
- Cook Time: 15 minutes
- Total Time: 30 minutes
- Yield: 4-6 marbled designs
- Category: Crafts
- Method: DIY
- Cuisine: N/A
- Diet: N/A
Ingredients
- Nail polish (various colors)
- Water (room temperature)
- A shallow dish or container
- Toothpicks or skewers for swirling
- Coffee filters or cardstock for adhering the design
- Paper towels (for quick cleanup)
- Plastic gloves (optional for messy hands)
Instructions
- Prepare your workspace: Lay out newspaper or a plastic tablecloth to protect your surfaces from spills.
- Pour the water: Fill a shallow dish with room temperature water, about an inch deep.
- Add nail polish: Open your nail polish bottles and drip a few drops of different colors onto the water surface. Watch them spread out beautifully.
- Swirl your colors: Use a toothpick or skewer to gently swirl the colors together, creating a marbled effect. Take your time, as this step determines your design.
- Dip your paper: Carefully place your coffee filter or cardstock onto the surface of the water. Allow it to sit for a few seconds to absorb the nail polish design.
- Lift and dry: Gently lift the paper straight up from the water, letting excess water drip off. Place it on paper towels to dry.
- Cleanup time: After you finish, it’s time to clean your work area and wash any tools you used. Enjoy the beauty of your marbled creations!
Notes
Encourage kids to experiment with color and design. Use leftover marbled pieces creatively.
Nutrition
- Serving Size: 1 design
- Calories: 0
- Sugar: 0g
- Sodium: 0mg
- Fat: 0g
- Saturated Fat: 0g
- Unsaturated Fat: 0g
- Trans Fat: 0g
- Carbohydrates: 0g
- Fiber: 0g
- Protein: 0g
- Cholesterol: 0mg