DIY Nail Polish Marble Crafts: Easy Marbling Tutorial
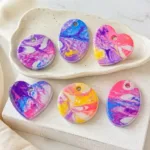
Engaging DIY marbling project using nail polish to unleash creativity in kids.
- Prep Time: 15 minutes
- Cook Time: 15 minutes
- Total Time: 30 minutes
- Yield: 4-6 marbled designs
- Category: Crafts
- Method: DIY
- Cuisine: N/A
- Diet: N/A
Ingredients
- Nail polish (various colors)
- Water (room temperature)
- A shallow dish or container
- Toothpicks or skewers for swirling
- Coffee filters or cardstock for adhering the design
- Paper towels (for quick cleanup)
- Plastic gloves (optional for messy hands)
Instructions
- Prepare your workspace: Lay out newspaper or a plastic tablecloth to protect your surfaces from spills.
- Pour the water: Fill a shallow dish with room temperature water, about an inch deep.
- Add nail polish: Open your nail polish bottles and drip a few drops of different colors onto the water surface. Watch them spread out beautifully.
- Swirl your colors: Use a toothpick or skewer to gently swirl the colors together, creating a marbled effect. Take your time, as this step determines your design.
- Dip your paper: Carefully place your coffee filter or cardstock onto the surface of the water. Allow it to sit for a few seconds to absorb the nail polish design.
- Lift and dry: Gently lift the paper straight up from the water, letting excess water drip off. Place it on paper towels to dry.
- Cleanup time: After you finish, it’s time to clean your work area and wash any tools you used. Enjoy the beauty of your marbled creations!
Notes
Encourage kids to experiment with color and design. Use leftover marbled pieces creatively.
Nutrition
- Serving Size: 1 design
- Calories: 0
- Sugar: 0g
- Sodium: 0mg
- Fat: 0g
- Saturated Fat: 0g
- Unsaturated Fat: 0g
- Trans Fat: 0g
- Carbohydrates: 0g
- Fiber: 0g
- Protein: 0g
- Cholesterol: 0mg
Find it online: https://www.diymadeeasy.com/diy-nail-polish-marble-tutorial/