

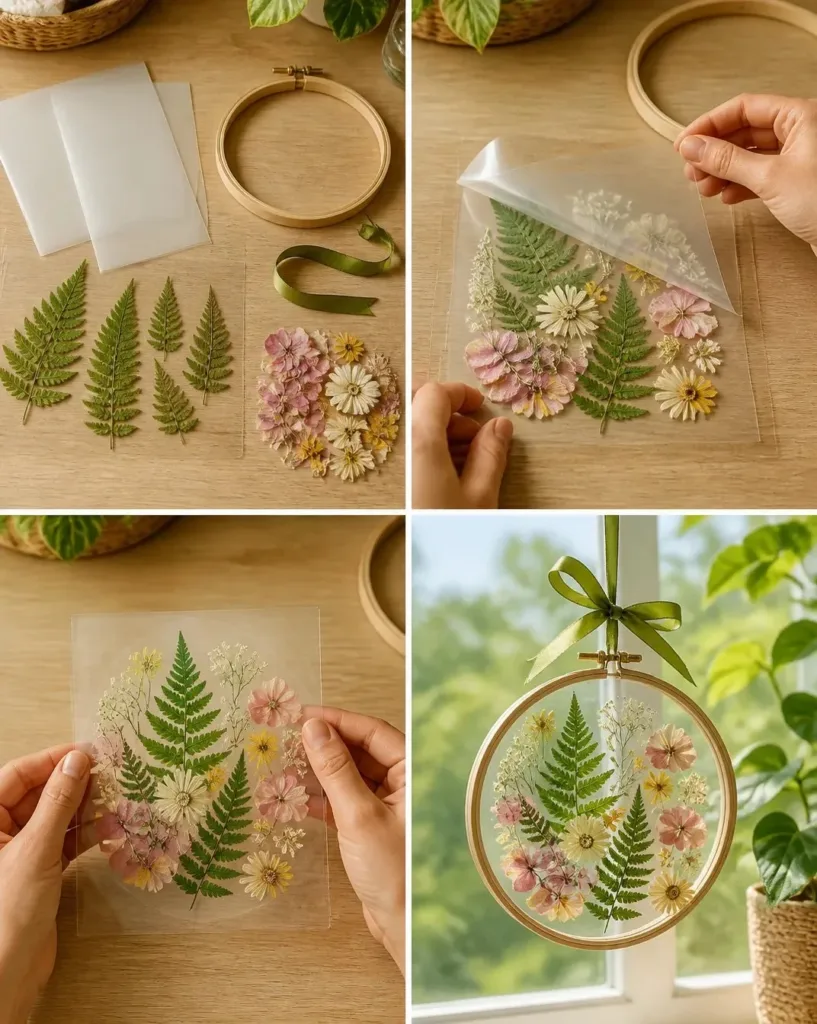
Creating a cheerful activity can be a refreshing break on a busy afternoon, especially when kids come rushing to you with their creative ideas. One project that combines fun and beauty is making a Pressed Fern Window Suncatcher with Botanical Leaves. This simple DIY allows them to create something stunning while also appreciating the beauty of nature. It’s an excellent way for families to spend time together, crafting a piece of art that brightens up any window and adds an ounce of color to the day. You may also find Create Colorful Rainbow Hearts With Pressed Flowers useful.
Why This Pressed Fern Window Suncatcher with Botanical Leaves Works So Well
You may also find Diy Glue Suncatchers Easy Window Decor useful.
This project stands out for its low-prep nature and approachability. You just need a few common materials, and the steps are straightforward enough for all ages. As a parent, you’ll appreciate how simple it is to get started without a lengthy setup. It fits right into your real-life schedule, allowing for creativity without the stress. Not only is it enjoyable, but it also gives satisfying results in a short time, making the Pressed Fern Window Suncatcher a perfect choice for last-minute crafting sessions. You may also find Diy Marble Effect Butterfly Suncatchers Window Decor useful.
The combination of pressed fern leaves and vibrant flower petals allow for personal expression, while also being a visually stunning piece of decor. You may want to check out other fun projects, like colorful window ornaments, to keep the creativity flowing!
A Quick Look Before You Begin
Before diving into the crafting, it can be helpful to know the flow of making a Pressed Fern Window Suncatcher. The entire process is engaging and generally takes about an hour or so, making it manageable even on a busy day. You’ll need a clear space to work, ideally at a table where spills or messes can easily be wiped up.
As for mess levels? It’s minimal! Just a few pressed leaves and petals should stay contained to your workspace. If you’re crafting with younger children, a little adult involvement can make a huge difference. You could assist with peeling the contact paper or trimming it down to size, ensuring the kids can focus on arranging their botanical designs without frustration.
Materials You’ll Need
For this delightful DIY, you’ll need the following simple supplies:
- 2 sheets clear contact paper
- 6 pressed fern leaves
- Dried flower petals
- 1 thin wooden embroidery hoop
- Ribbon
These items are mostly common household materials. The contact paper acts as the protective layer for your creation while the fern leaves and dried petals add a personal touch, showing that nature can be a stunning decor piece. You can find many of these items at home or purchase them easily, making this project budget-friendly and accessible.
STEP-BY-STEP DIRECTIONS
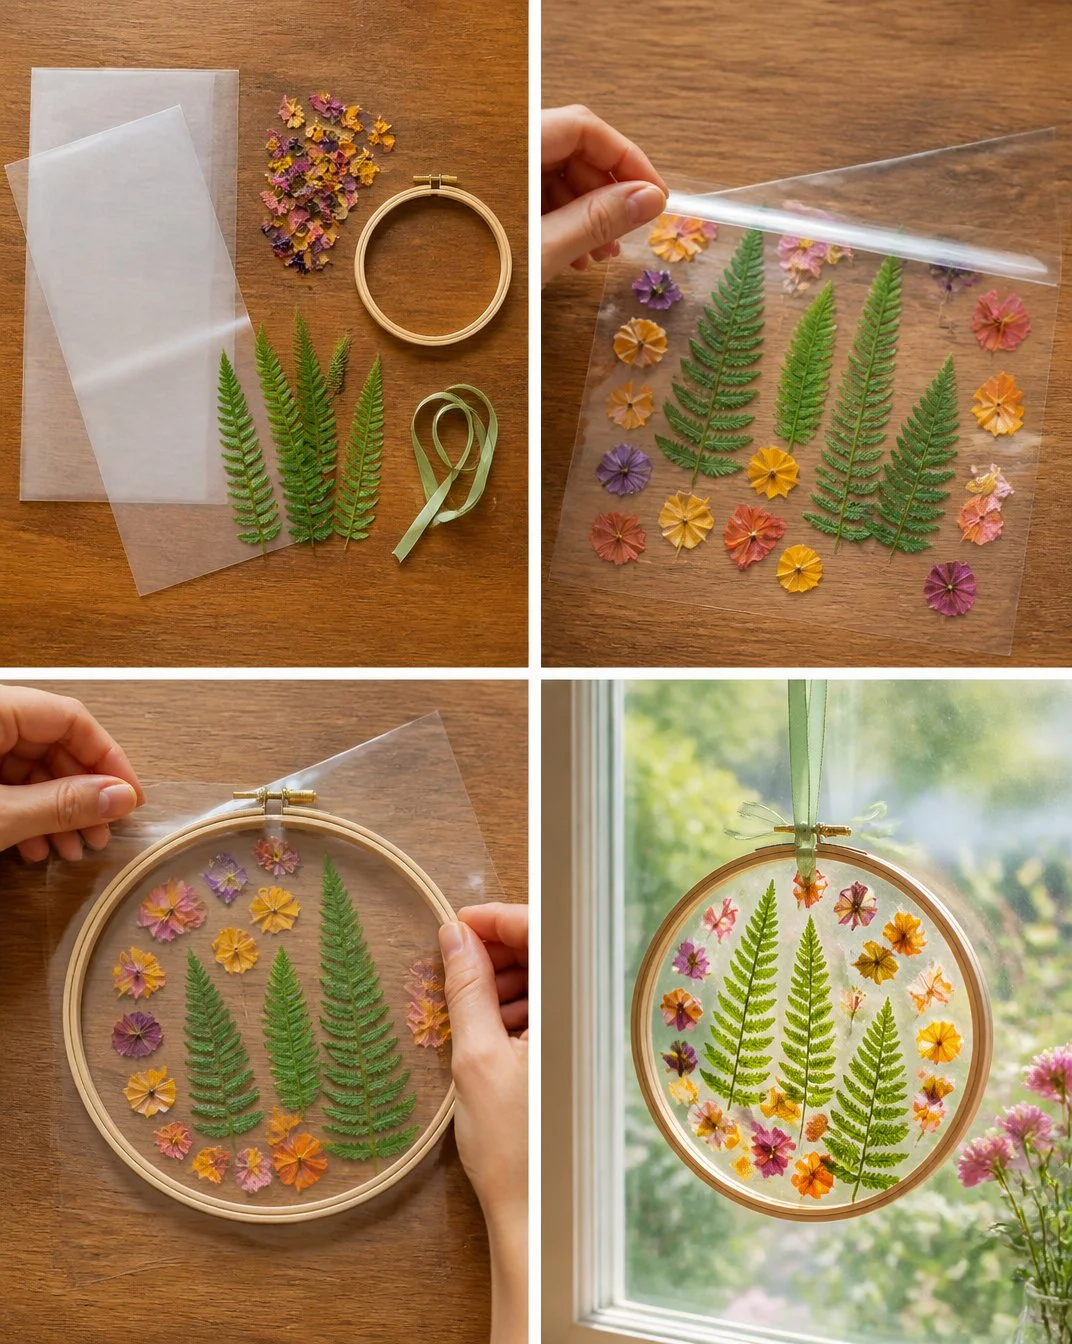
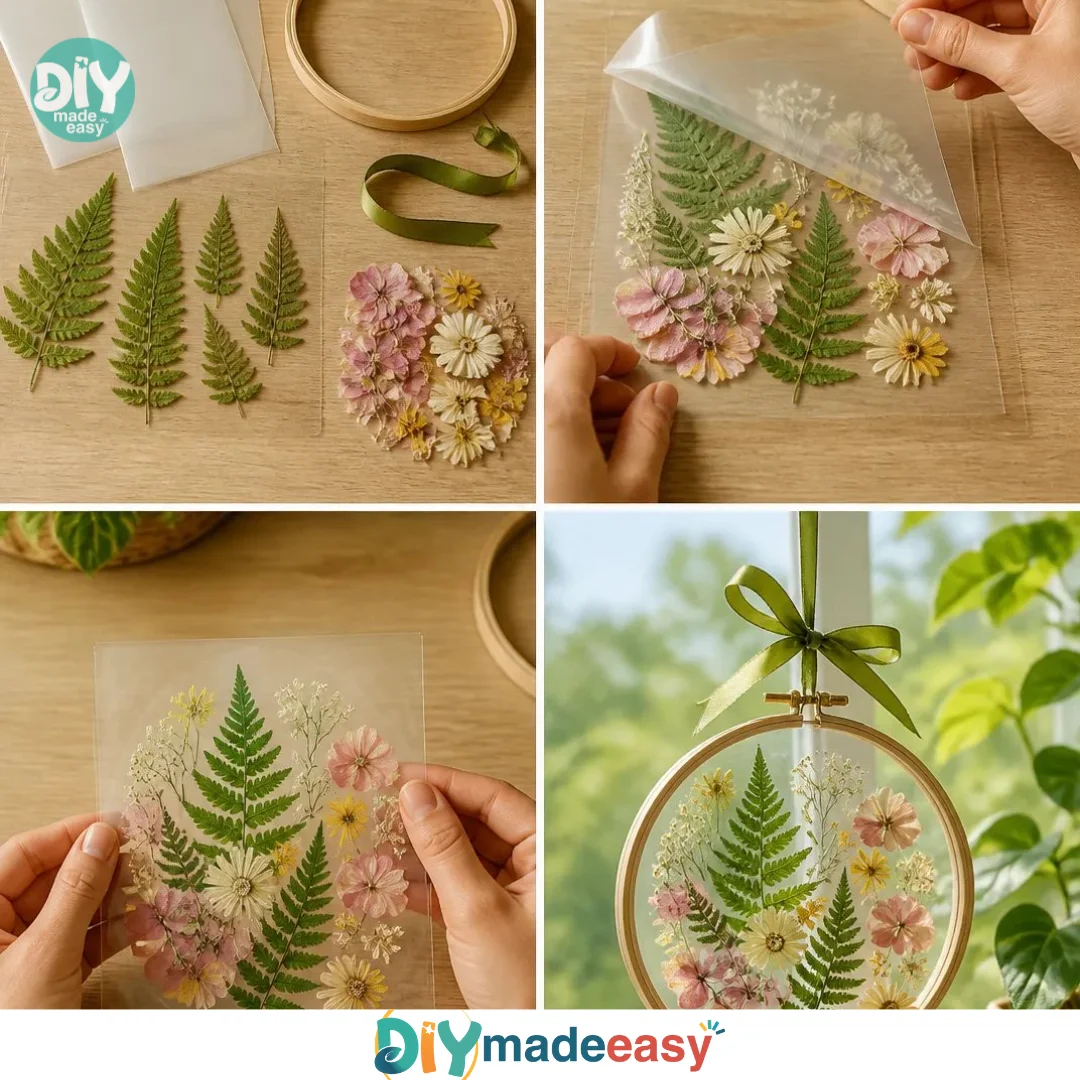
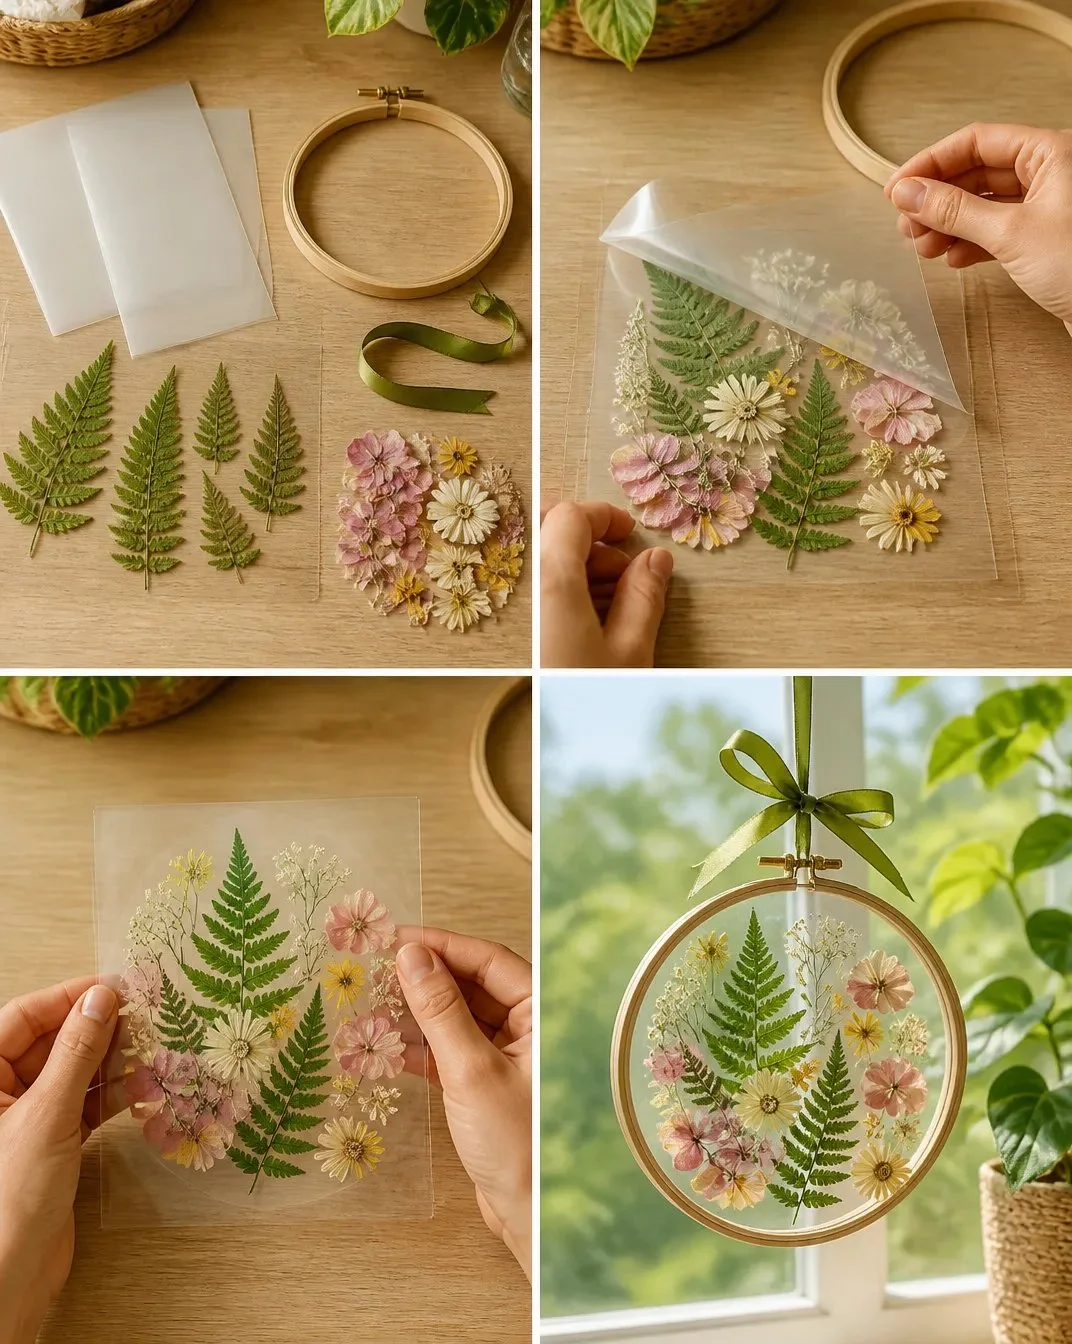
Cut two pieces of clear contact paper that are slightly larger than the embroidery hoop. This size gives enough space for your suncatcher to be secured without any awkward trimming later.
Peel the backing from one sheet and lay it sticky-side up. Take a moment to marvel at how sticky it is this will hold everything together!
Arrange your pressed fern leaves and dried flower petals on the contact paper. Play around with the layout, ensuring that all colors and shapes are balanced.
Carefully peel the second sheet’s backing and place it sticky-side down over your arrangement. Smoothing out any air bubbles is crucial here, so take your time to press it down gently.
Trim the sealed piece to fit inside the embroidery hoop and secure it. Feel free to adjust your botanical arrangement now that it’s sealed in; this allows for some last-minute tweaks based on what looks best.
Lastly, tie a ribbon onto the hoop and hang your beautiful suncatcher in a sunny window! Watching the light shine through your creation will be one of the most rewarding parts of this project.
The Learning Behind This DIY
This craft isn’t just about creating postcards of nature; it’s also a wonderful opportunity for kids to practice fine motor skills. From carefully arranging petals to figuring out how to handle sticky surfaces, this activity involves layers of learning. They’ll engage in both spatial awareness thinking about how their design flows and creative expression, as they personalize their suncatchers to reflect their individual style.
Additionally, through this hands-on project, children explore fundamental science concepts like light and color. As they hang their suncatcher in a sunny spot, they’ll observe how light interacts with different materials, deepening their understanding of the world around them.
Troubleshooting Common Issues
If there’s a hiccup during the making, don’t worry! Common problems might include air bubbles in the contact paper or leaves not sticking as expected. If air bubbles appear, gently lifting the contact paper and smoothing it again often does the trick. For leaves that seem to lift or curl, using a bit more contact paper or securing them with a tape can help keep everything in place.
If you’re not happy with the arrangement, it’s perfectly okay to pull pieces apart and rearrange them before sealing. Just take care to smooth everything out again before finalizing. Remember, crafting is about the process, and it’s okay if things don’t go perfectly.
Easy Variations to Try
Encouraging creativity can lead to fun twists on the original project. Here are some easy variations to consider:
- Mix different types of leaves or flowers; experiment with seasonal blooms or vibrant colors for holidays.
- Try adding layers by creating multiple suncatchers and hanging them at different lengths.
- Incorporate natural elements like small pebbles or twigs for a rustic touch.
These suggestions can inspire further exploration in crafting, making this more than just a one-time project.
Storing or Reusing This Project
Once your Pressed Fern Window Suncatcher is complete, consider how you might store or even reuse elements in the future. If you no longer want the suncatcher hanging in your window, try displaying it on a shelf or giving it as a gift to a loved one. Additionally, the materials can often be reused for other crafts, so keep those pressed leaves and contact paper on hand for new projects.
Cleanup after crafting can be quick if you use a damp cloth to wipe down your workspace. Given that the supplies are minimal, you’re likely to finish up without too many materials left behind.
FAQs About Pressed Fern Window Suncatcher with Botanical Leaves
A common concern is the mess when working with younger kids. Is it manageable?
Absolutely! The materials are contained, and using contact paper minimizes spills. Just have a damp cloth handy for easy cleanup.
What if my child is too young to do this independently?
No worries! This project is super flexible, so providing support wherever needed is perfectly fine.
Can we use different plants or flowers?
Certainly! Whatever pressed flowers or leaves you have will work beautifully, allowing for personal customization.
What happens if the suncatcher doesn’t turn out as expected?
Crafting is all about exploration, and imperfections often lead to creative solutions. Don’t worry if it’s not perfect!
How do we store the supplies once we’re done?
Keep your materials in a sealed container or a drawer so they’re easy to access for future projects. Less waste and more creativity!
Conclusion
Making a Pressed Fern Window Suncatcher with Botanical Leaves can be a truly rewarding family project, providing a blend of creativity and learning. You can find more stunning decor ideas like made-to-order botanical decor to inspire your next crafting session. If you’re looking for even more lovely suncatcher options, check out this Stained Glass Suncatcher Fern for a touch of elegance in your home. Enjoy bringing nature indoors through your personal handiwork!
PrintPressed Fern Window Suncatcher with Botanical Leaves
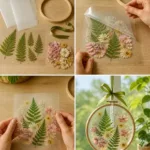
Create a beautiful window suncatcher using pressed fern leaves and flowers with this simple and engaging DIY project. Perfect for family crafting time!
- Prep Time: 15 minutes
- Cook Time: 45 minutes
- Total Time: 60 minutes
- Yield: 1 suncatcher 1x
- Category: Craft
- Method: Crafting
- Cuisine: N/A
- Diet: N/A
Ingredients
- 2 sheets clear contact paper
- 6 pressed fern leaves
- Dried flower petals
- 1 thin wooden embroidery hoop
- Ribbon
Instructions
- Cut two pieces of clear contact paper that are slightly larger than the embroidery hoop.
- Peel the backing from one sheet and lay it sticky-side up.
- Arrange your pressed fern leaves and dried flower petals on the contact paper.
- Carefully peel the second sheet’s backing and place it sticky-side down over your arrangement.
- Trim the sealed piece to fit inside the embroidery hoop and secure it.
- Lastly, tie a ribbon onto the hoop and hang your beautiful suncatcher in a sunny window!
Notes
Encourage creativity by trying different leaves or colors for seasonal variations. Cleanup is easy with minimal mess.
Nutrition
- Serving Size: 1 suncatcher
- Calories: 0
- Sugar: 0g
- Sodium: 0mg
- Fat: 0g
- Saturated Fat: 0g
- Unsaturated Fat: 0g
- Trans Fat: 0g
- Carbohydrates: 0g
- Fiber: 0g
- Protein: 0g
- Cholesterol: 0mg