

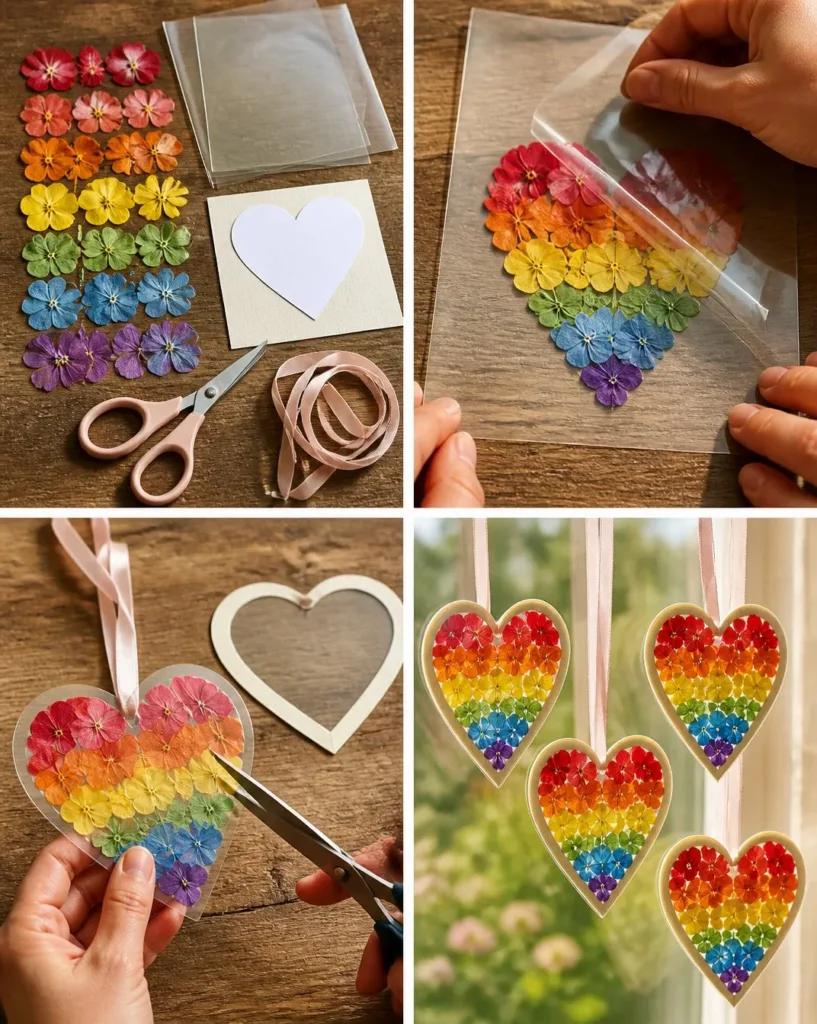
Pressed Flower Rainbow Hearts can transform an ordinary afternoon into a vibrant crafting experience. Imagine your kids bustling around, eager to create something beautiful right now. This DIY project fits the bill perfectly, combining colorful pressed flower petals with clear contact paper. With just a few simple materials, you can guide them through making stunning heart decorations that will brighten up your home. This activity not only sparks creativity but also provides an excellent opportunity for children to engage with nature and practice fine motor skills. You may also find Rainbow Heart Wall Art Pressed Flowers useful.
Why This Pressed Flower Rainbow Hearts Works So Well
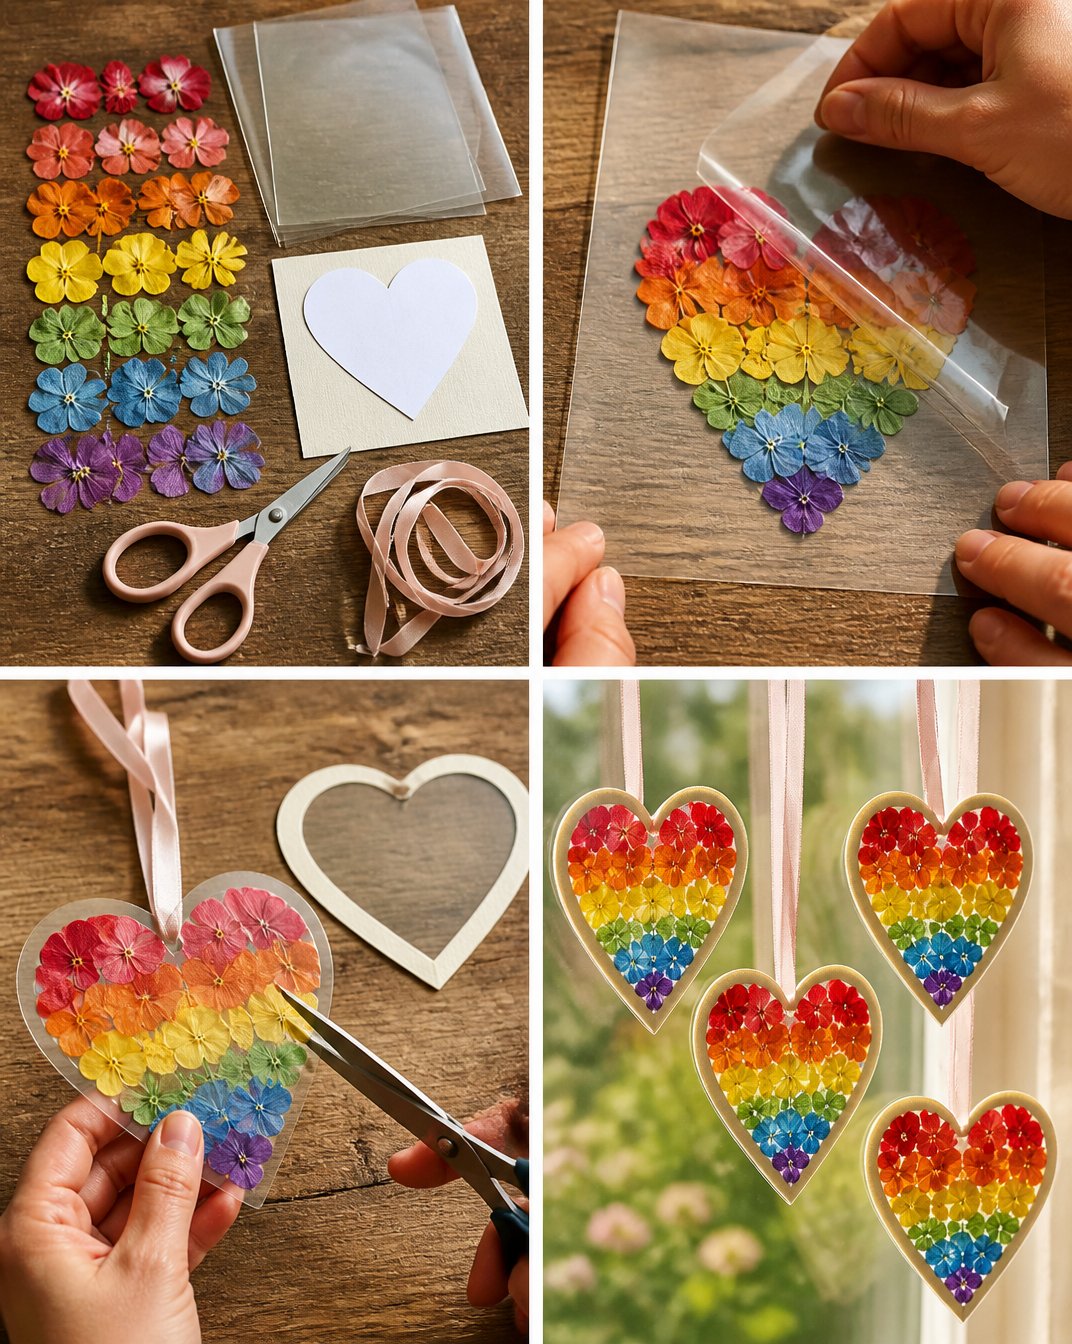
Pressed Flower Rainbow Hearts is a fantastic project for busy families because it’s low-prep and very approachable. You don’t need a lot of materials to get started; in fact, most items are common household staples that you likely have on hand. The focus on simple steps means that even young ones can enjoy the crafting process, making it a great way to spend quality time together without feeling overwhelmed. This project reliably yields satisfying results, which means you can count on your hearts looking lovely by the end of your crafting session. You may also find Diy Tropical Flower Bouquet Rainbow Cupcake Liners useful.
Moreover, the visual appeal of the finished product is hard to resist. The bright colors of the pressed flowers stand out against the clear contact paper, creating a stunning window display. Plus, this activity encourages kids to explore their creativity by arranging flowers in ways that please them. Whether your kids follow the rainbow pattern or make their own unique designs, they are sure to feel proud of their handiwork.
A Quick Look Before You Begin
The process of making Pressed Flower Rainbow Hearts comes together smoothly if you take a moment to prepare. The total time for this project can vary, but it often takes about 30-60 minutes from start to finish, depending on how many hearts you plan to create. It’s a low-mess activity; the main cleanup will involve any flower bits that might fall on the table.
To make it even easier, gather all your materials before you begin. Having everything ready will help keep the project flowing and make it enjoyable for everyone involved. While kids can take the lead, it’s wise for an adult to be nearby for any tricky parts, such as sealing the petals between the sheets of contact paper.
Materials You’ll Need
- Pressed flower petals in several colors
- Clear contact paper
- Heart template
- Cardstock
- Scissors
- Ribbon
Most of these materials are easy to find around the house. The pressed flower petals can often be obtained from previous crafting sessions or can be collected outside. If needed, you can find instructions on how to create your own pressed flowers by checking out this simple recipe. The heart template is also a quick item to make; you can easily draw one or print it from your favorite design.
Step-by-Step Directions
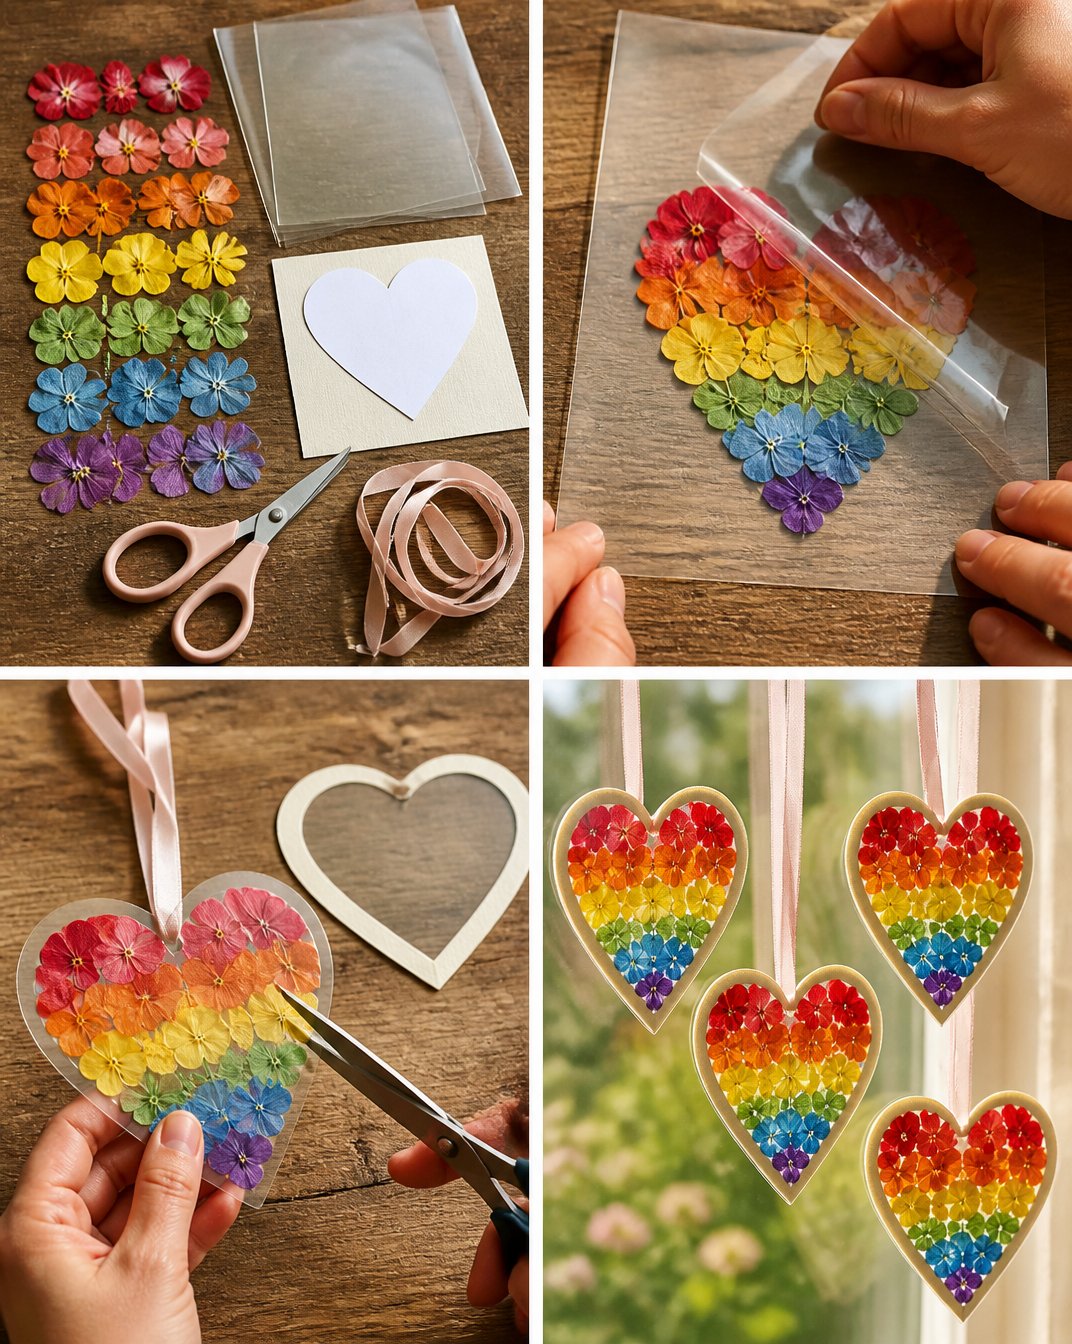
Start by placing one sheet of clear contact paper sticky-side up on a flat surface. Make sure it’s secured so that it doesn’t slide around while you’re arranging your flowers.
Arrange your pressed flower petals by color to create a rainbow gradient that makes you smile. This is where creativity shines; let the kids go wild with their floral designs, mixing and matching as they wish.
Take a second sheet of clear contact paper and carefully seal the petals, smoothing out any air bubbles. It’s important to take your time with this step to ensure that no bubbles remain.
Use your heart template to trace a heart shape over your beautiful sealed design. You can gently press down along the edges for more precise lines.
Carefully cut out the hearts. Kids can help with this part, but be sure they use scissors safely. It can also be fun to trim the edges in creative ways like scallops or zigzags.
Add a simple cardstock border to each heart for an extra pop! This border can be cut slightly larger than the heart shape to provide a nice contrast.
Attach a ribbon to each heart, and find a sunny spot to hang them where the light can shine through. This final touch not only completes the project but will also allow your crafts to come to life.
The Learning Behind This DIY
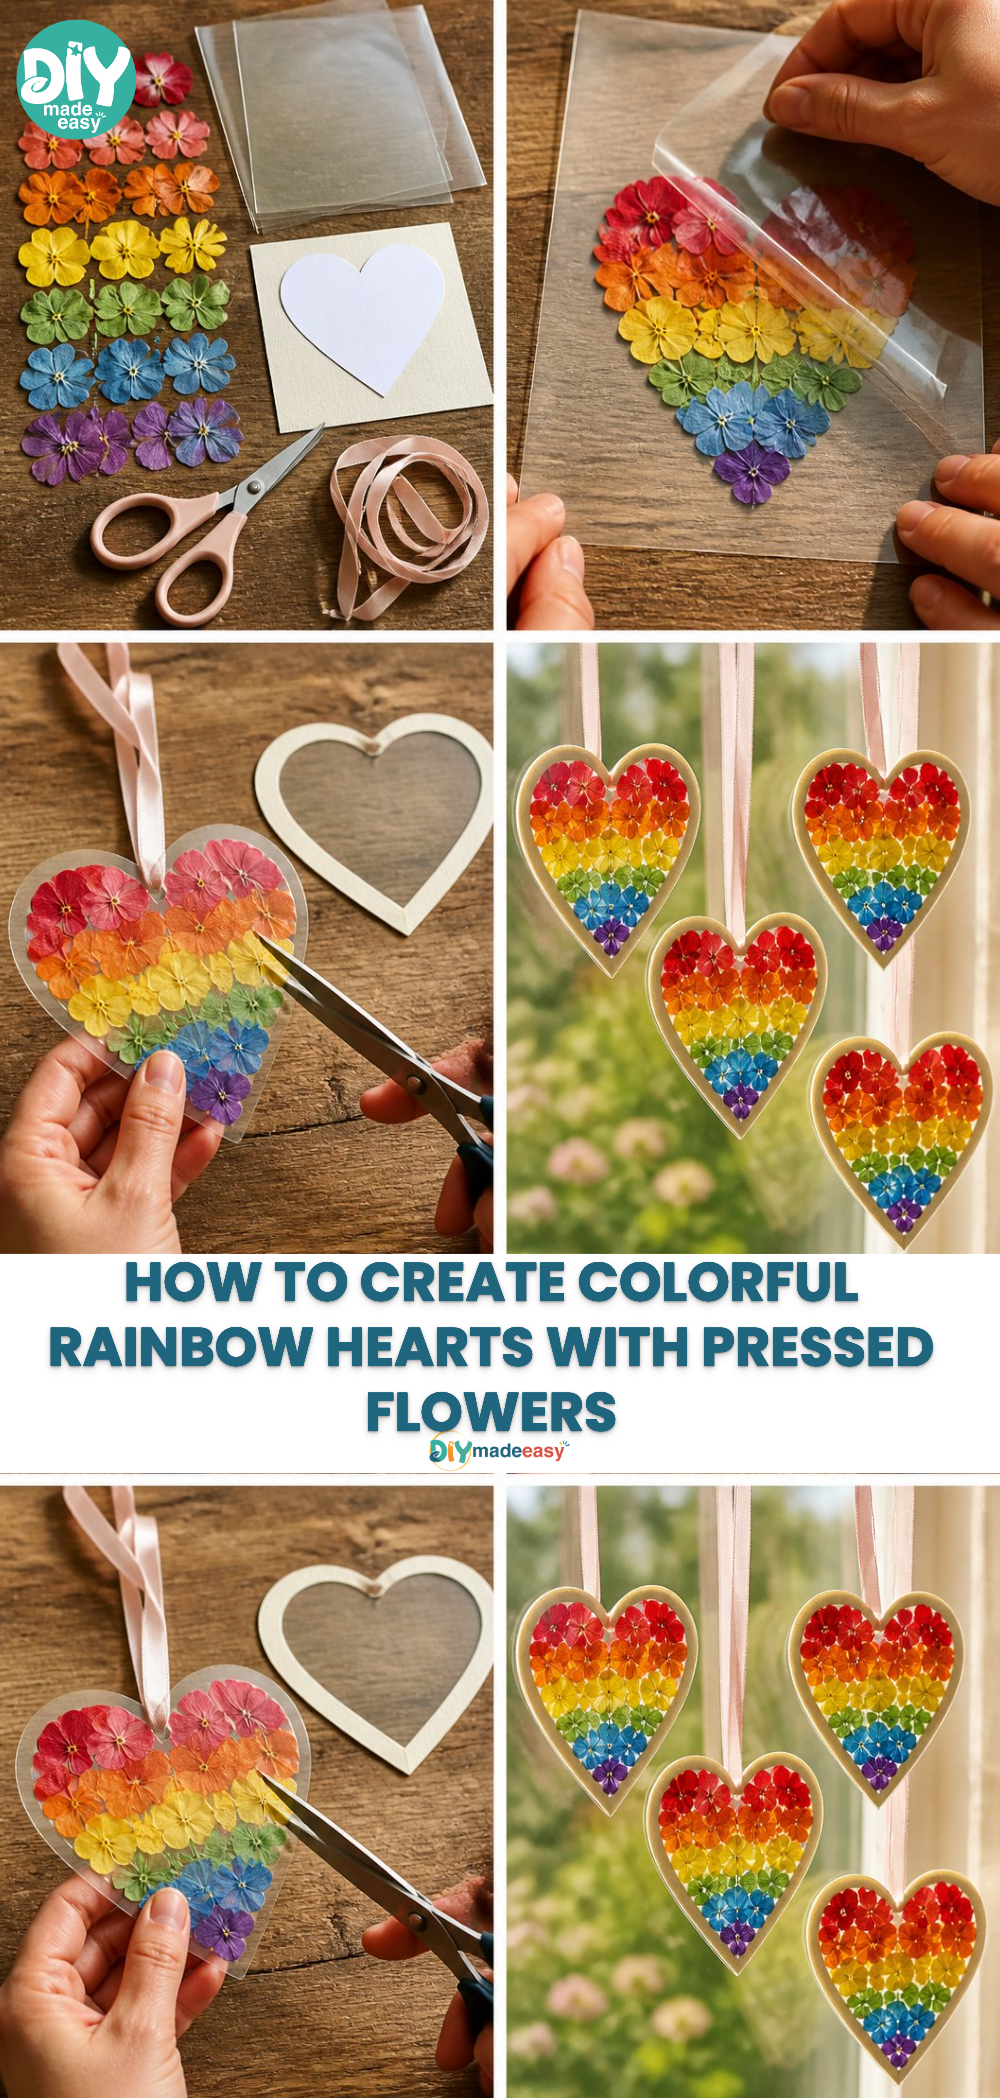
Making Pressed Flower Rainbow Hearts introduces kids to various concepts that extend beyond crafting. As they handle the flowers, they’ll practice fine motor skills, which are important for many daily tasks. The delicate arranging of flower petals also enhances their hand-eye coordination, as they need to be precise.
Additionally, this project engages children in discussions about nature and colors. They can explore different types of flowers, their colors, and even learn about the changing seasons. Moreover, arranging the flowers in a rainbow gradient teaches them about color theory and aesthetics, which can be a fun learning experience.
Troubleshooting Common Issues
If something doesn’t go as planned, it can be helpful to know what to do. Sometimes, air bubbles may form when sealing the petals, making the surface look uneven. If that happens, gently peel back the contact paper and then re-press it down, pushing from the center outward to get out the air.
Flowers might also shift while sealing, which can be frustrating. To avoid this, you can lay the top sheet of contact paper gently over the flowers and start from one side, smoothing it down while aligning the edges. If you don’t have enough flowers or you feel some colors are missing, using leftover pressed flowers can help fill in gaps beautifully.
Easy Variations to Try
If you want to mix things up, there are several fun variations to try! Here are some suggestions:
- Create seasonal themes by using fall leaves for autumn or winter colors for a festive feel.
- Instead of hearts, cut out different shapes like stars or circles for a more varied design.
- Use multiple layers of flowers for a 3D effect, adding more depth to your art.
- Have a themed color palette, such as using only cooler colors for a calming effect.
Storing or Reusing This Project
After creating your Pressed Flower Rainbow Hearts, you might wonder what to do next. If you want to keep your creations for a long time, storing them in a cool, dry place away from direct sunlight will help prevent fading. You can also consider hanging them temporarily in different spots to change the feel of your space without losing the charm they add.
To clean up, gently collect any fallen flower petals and dispose of or compost them. This not only keeps your space tidy but also teaches kids the importance of reducing waste.
FAQs About Pressed Flower Rainbow Hearts
Is this project messy?
While making Pressed Flower Rainbow Hearts doesn’t typically create a lot of mess, some flower bits may fall on your workspace. Keeping a damp cloth nearby can help quickly clean up spills or scattered flower petals.
What age range is this project suitable for?
Kids of all ages can participate, though younger ones may need more guidance. Older kids can take the lead, while adults can assist with more intricate tasks like cutting.
Can I use fresh flowers instead of pressed ones?
Fresh flowers are beautiful but can’t be sealed the same way. If you’d like fresh colors, consider pressing them beforehand, or you can still use them temporarily for a live display.
What happens if the flowers fade over time?
As with all art made from natural materials, fading can occur. To minimize fading, store your hearts in a dark, cool place or regularly rotate their location in your home.
Can I reuse the Contact Paper?
Once the contact paper has been sealed with flowers, it’s best not to attempt reuse. However, you can use it for other crafting projects.
Conclusion
Conclusion
Creating Pressed Flower Rainbow Hearts is a delightful and engaging way to spend time together as a family. It’s not only a project that bears beautiful results but also fosters creativity and allows children to explore their artistic inclinations. For those seeking even more creative inspiration, you might want to check out the enchanting range of Rainbow Makers and Spinners. Another excellent resource is the upcoming Pressed Flower Art on Black Mat Board Craft Night which offers a fantastic opportunity to refine your floral crafting skills. Enjoy the process of making these lovely decorations and be prepared to display your child’s creativity proudly!
PrintPressed Flower Rainbow Hearts
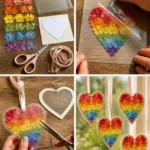
A fun and colorful DIY project for kids to create beautiful heart decorations using pressed flower petals and clear contact paper.
- Prep Time: 10 minutes
- Cook Time: 30 minutes
- Total Time: 40 minutes
- Yield: 6 hearts
- Category: Craft
- Method: Crafting
- Cuisine: N/A
- Diet: N/A
Ingredients
- Pressed flower petals in several colors
- Clear contact paper
- Heart template
- Cardstock
- Scissors
- Ribbon
Instructions
- Start by placing one sheet of clear contact paper sticky-side up on a flat surface.
- Arrange your pressed flower petals by color to create a rainbow gradient.
- Take a second sheet of clear contact paper and carefully seal the petals.
- Use your heart template to trace a heart shape over your sealed design.
- Carefully cut out the hearts using scissors.
- Add a cardstock border to each heart for a nice contrast.
- Attach a ribbon to each heart and hang them in a sunny spot.
Notes
For best results, ensure no air bubbles remain when sealing the petals. Kids can take the lead but should use scissors safely.
Nutrition
- Serving Size: 1 heart
- Calories: N/A
- Sugar: N/A
- Sodium: N/A
- Fat: N/A
- Saturated Fat: N/A
- Unsaturated Fat: N/A
- Trans Fat: N/A
- Carbohydrates: N/A
- Fiber: N/A
- Protein: N/A
- Cholesterol: N/A