

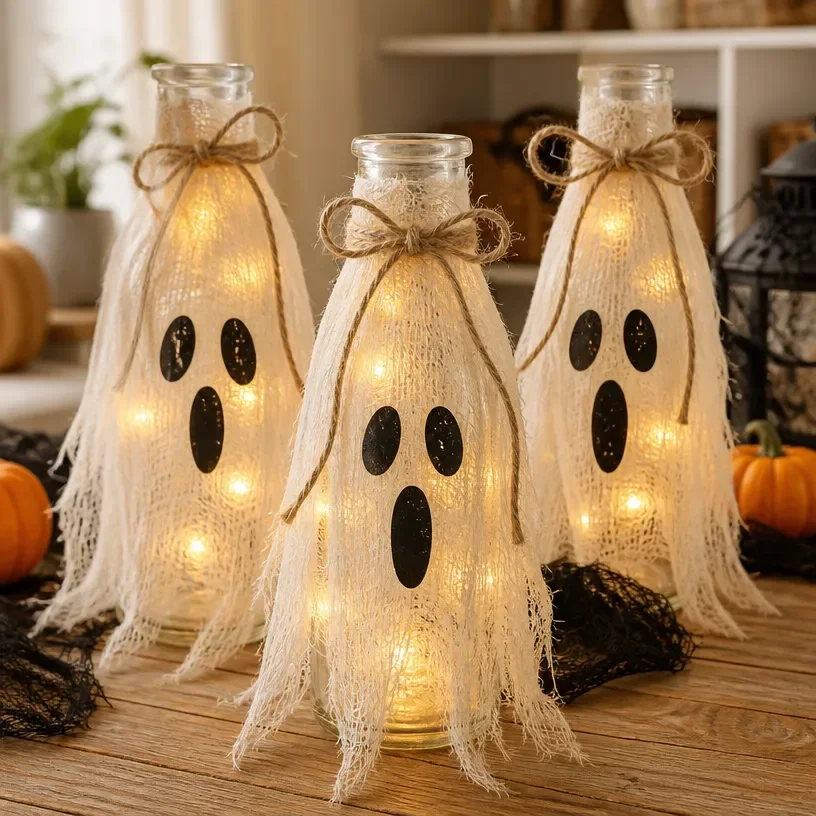
When you’re juggling a busy afternoon filled with kids asking for fun activities, finding an engaging and simple project can feel overwhelming. Luckily, creating spooky atmospheres with DIY crafts is an excellent way to get everyone involved. One great option is learning how to make spooky glass bottle lanterns. This project not only sparks creativity but also encourages teamwork and enhances fine motor skills, making it a fantastic choice for a last-minute family activity. You may also find How To Make A Suncatcher With Glass Beads useful.
Why This How to Make Spooky Glass Bottle Lanterns Works So Well
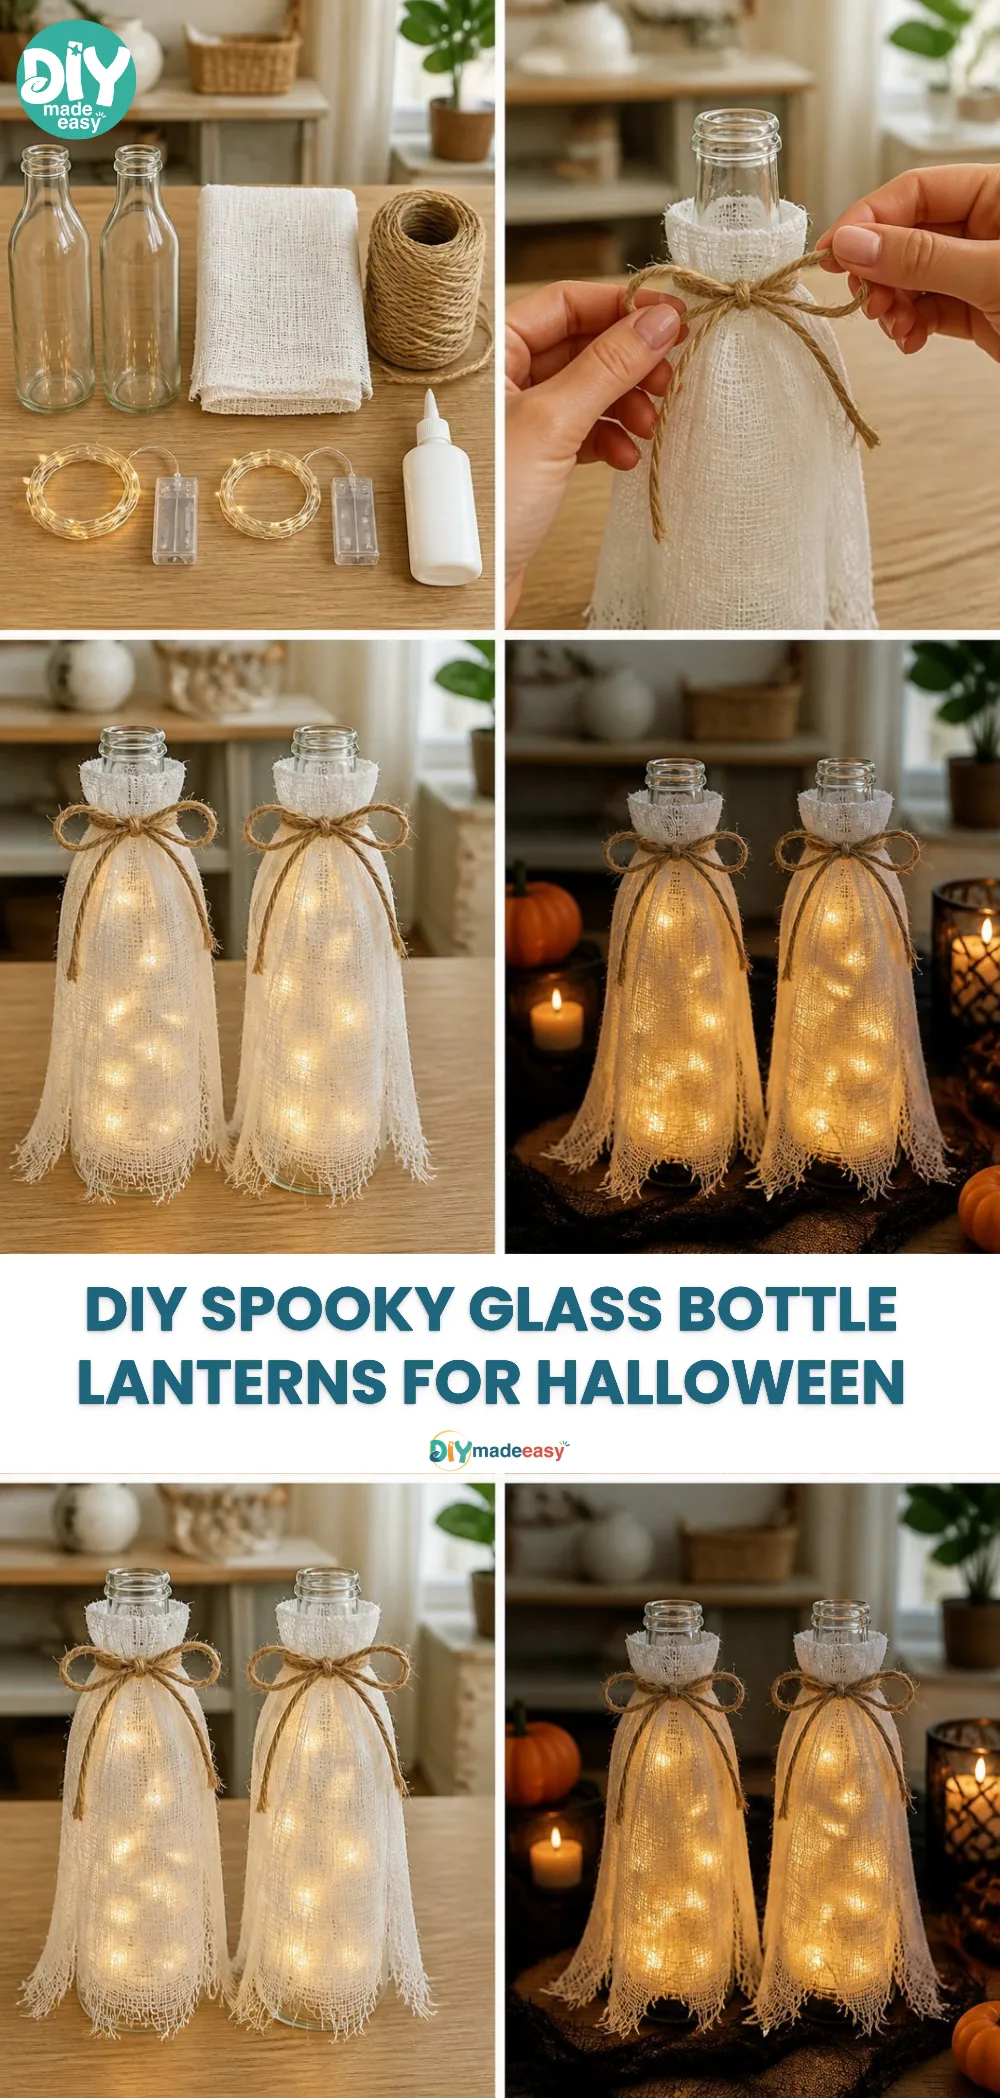
You may also find How To Make Faux Stained Glass Flowers Diy Tutorial useful.
The beauty of making spooky glass bottle lanterns lies in its accessibility. It uses simple materials that you likely already have at home, making it a low-prep project. This ensures that you can easily fit it into your day without needing to spend hours gathering supplies. Tasks are straightforward and cater to various ages, making it a versatile choice for families and crafting enthusiasts. You may also find Diy Halloween Glass Bottle Lanterns Halloween Lanterns useful.
Moreover, the lanterns are reliable in design, creating striking visual effects with minimal effort. The project promotes cooperation, as everyone can take part at their own level, making it an enjoyable shared experience. It’s a perfect fit for crafting amidst the chaos of real-life schedules! You may also find How To Create Faux Glass Rainbow Arch Home Decor useful.
A Quick Look Before You Begin
Before diving into the project, let’s set the scene with a calm overview of what to expect. It should take around an hour from start to finish, depending on the involvement and focus of your little artists. The setup is quick, and you can organize your space with just a few tools and a clear area to work on.
While there might be some mess involved with paint and glue, it’s easily manageable. Just lay down some newspaper or a spill cloth, and you’ll protect your surfaces. Adult supervision will help guide the younger ones through tricky steps or handle any sharp objects as needed, but this is a project best enjoyed together!
Materials You’ll Need
- Empty glass bottles (any kind will do)
- Acrylic paint (black, orange, or any spooky colors you prefer)
- Paintbrushes (various sizes)
- Tea lights (LED for safety)
- Craft glue (or glue dots)
- Optional: string lights or battery-operated candles for added effect
These materials are primarily common household items, making them budget-friendly. Acrylic paints are easy to work with and clean up, and if you don’t have a particular color on hand, swapping for something similar is an easy option!
Step-by-Step Directions
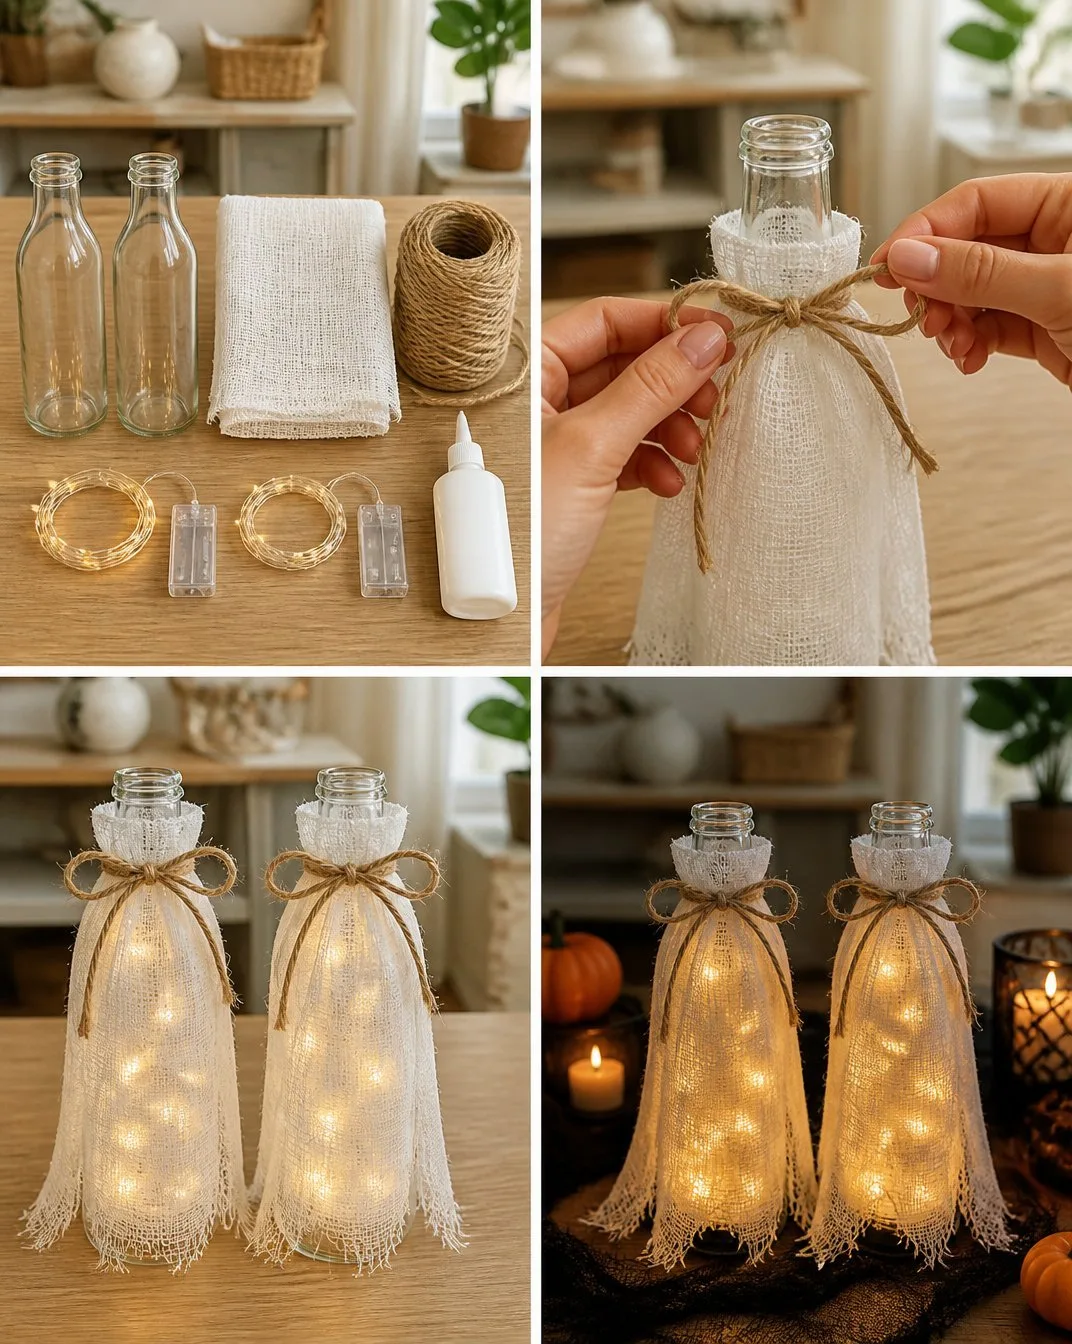
Prep Your Bottles: Start by cleaning and drying the glass bottles thoroughly. Remove any labels by soaking them in warm soapy water if needed.
Plan Your Design: Think about what spooky theme you want. It could be classic Halloween motifs like ghosts, pumpkins, or spiders. Drawing light pencil designs on the bottles can help guide your painting.
Start Painting: Using your paintbrush, apply a base coat of acrylic paint to the bottle. Aim for varied techniques like sponging or streaking for authentic texture. Let the first coat dry before adding additional layers or details.
Add Details: Once the base is dry, add smaller details or decorations. You can use different brush sizes for more intricate parts, like eyes or decorations. Don’t be afraid to mix colors for unique effects.
Include Light Sources: After painting is complete and dry, it’s time to add your light. Place an LED tea light inside the bottle or wrap battery-operated string lights around the neck for a magical glow.
Display Your Lanterns: Choose a festive spot to proudly display your creations! You can arrange them on a mantel, outside on a porch, or at a Halloween gathering.
What Kids Practice While Making This
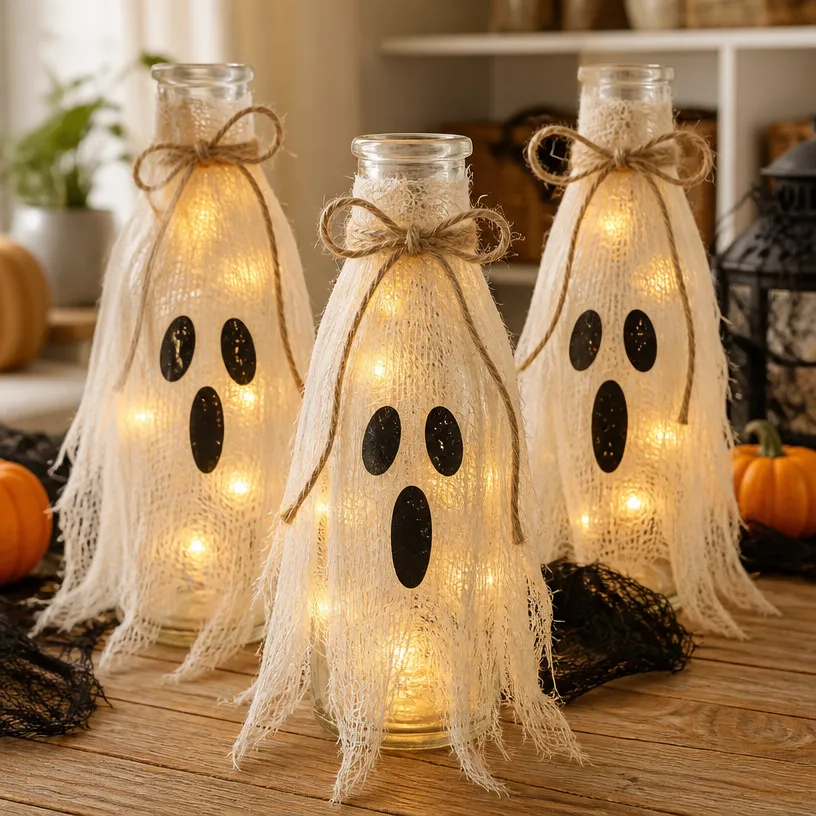
This DIY activity not only results in beautiful lanterns but also provides an excellent opportunity for kids to practice essential skills. They hone their fine motor skills with painting and detailing, which improves coordination and dexterity. The project invites children to think creatively, make decisions about designs, and understand some basic color theory as they mix paints.
Beyond physical skills, this craft involves following instructions and being patient throughout the drying process, which nurtures perseverance. Kids learn the importance of teamwork if they collaborate with friends or siblings.
Troubleshooting Common Issues
Sometimes things don’t go as planned, and that’s perfectly normal! If your paint is too thick, it might not dry properly. A quick fix is to dilute it slightly with water for a smoother texture. If you find that your design isn’t as vivid as you hoped, don’t worry! You can always add another layer once the initial coat has dried.
For those who accidentally smudge a design, embrace it! Adding to the smudge can create unique, spooky effects. If your LED lights don’t fit, try using a smaller candle or adjusting the bottle’s interior by removing extra materials.
Easy Variations to Try
To keep the creativity flowing, consider these simple variations:
- Themed Bottles: Create a series of different-themed bottles, each representing a favorite spooky character or symbol.
- Seasonal Updates: Swap designs for other holidays, such as winter-themed lanterns for the holiday season.
- Glow-in-the-Dark: Use glow-in-the-dark paint for added effect, so your lanterns shine even in the dark!
These variations allow you to make this activity work for different ages or seasonal events, ensuring it stays fresh and engaging for your family.
Storing or Reusing This Project
At the end of the spooky season, you might wonder what to do with the lanterns. Consider storing them for next year’s Halloween décor. If space is a concern, you could also reuse the bottles for other creative crafts or decor for different celebrations.
To clean up, gently wipe down any paint splatters off your workspace and store any unused materials in a labeled container for future projects.
FAQs About How to Make Spooky Glass Bottle Lanterns
Are these lanterns safe for young children?
As long as you supervise their use of paints and tools, most parts of the project are safe for kids. Use battery-operated lights to avoid fire hazards.
Can I substitute materials?
Absolutely! If you don’t have acrylic paint, try using markers or even colored tissue paper for decorating. Flexibility is part of the creative process!
How do I store my lanterns after Halloween?
Store them in a cool, dry place. If they are fragile, wrap them in bubble wrap or cloth to avoid breakage.
Can older kids do this project alone?
Definitely! Older kids can handle it with some setup assistance. It’s a great chance for them to showcase their creativity independently.
Conclusion
Conclusion
Making spooky glass bottle lanterns is a wonderfully engaging way to bring creativity into your home. This project can be an invigorating group activity that allows family members to bond, collaborate, and showcase their artistic flair. If you're looking for even more fun Halloween-inspired crafts, consider exploring how to make DIY Halloween lights with old bottles through this
informative article. For a craft twist on practical decor, check out how to make DIY creepy oui jar lanterns, shared in this
great guide. Happy crafting!