

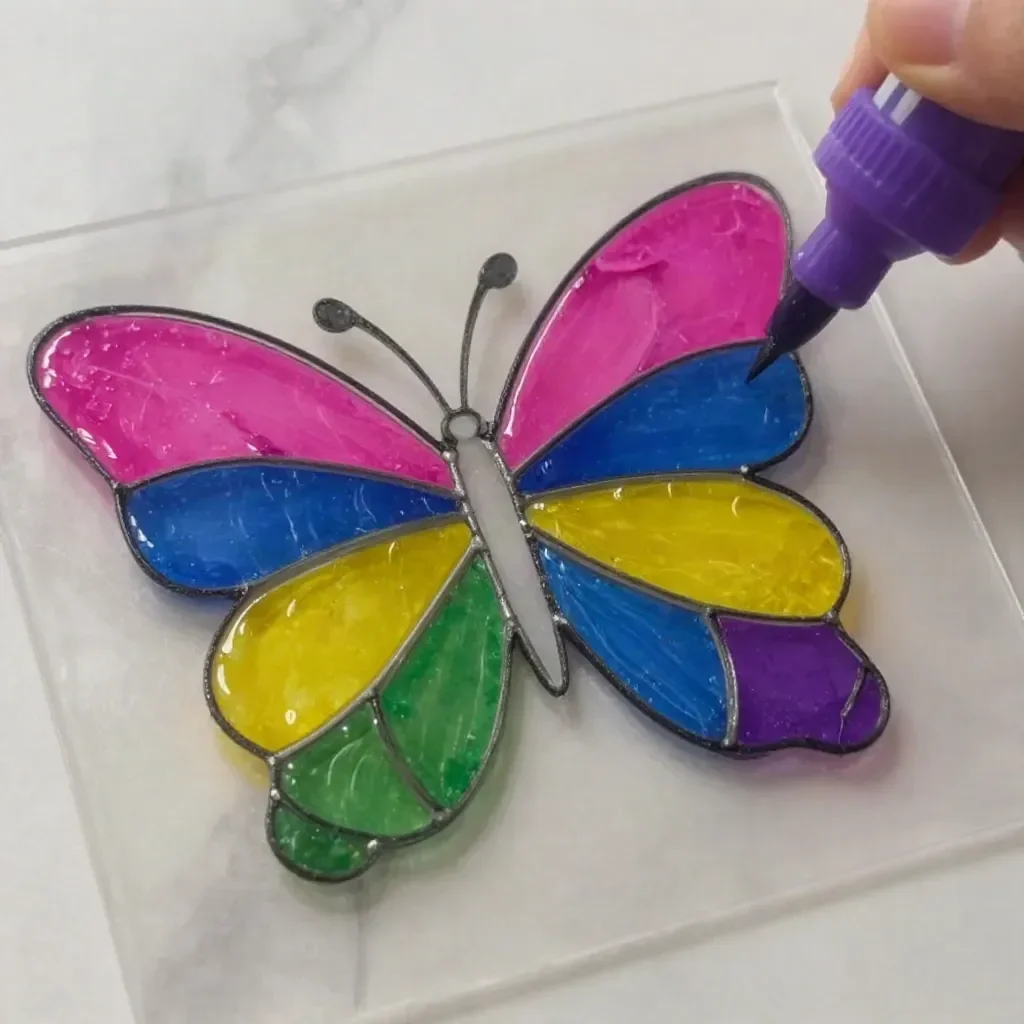
The afternoon sun streamed through the kitchen window, casting a warm glow on the table littered with art supplies. Your kids buzzed with energy, asking for something fun and creative to do. In moments like this, when you need a quick, easy, and enjoyable activity, the Rainbow Glue Butterfly Suncatcher comes to the rescue. This delightful project not only brightens up your workspace but also engages kids in a colorful and artistic way. It’s just the right mix of simple materials and clear steps, ensuring that everyone gets to unleash their inner artist without the stress of a complicated setup. You may also find Butterfly Suncatchers useful.
Why This Rainbow Glue Butterfly Suncatcher Works So Well
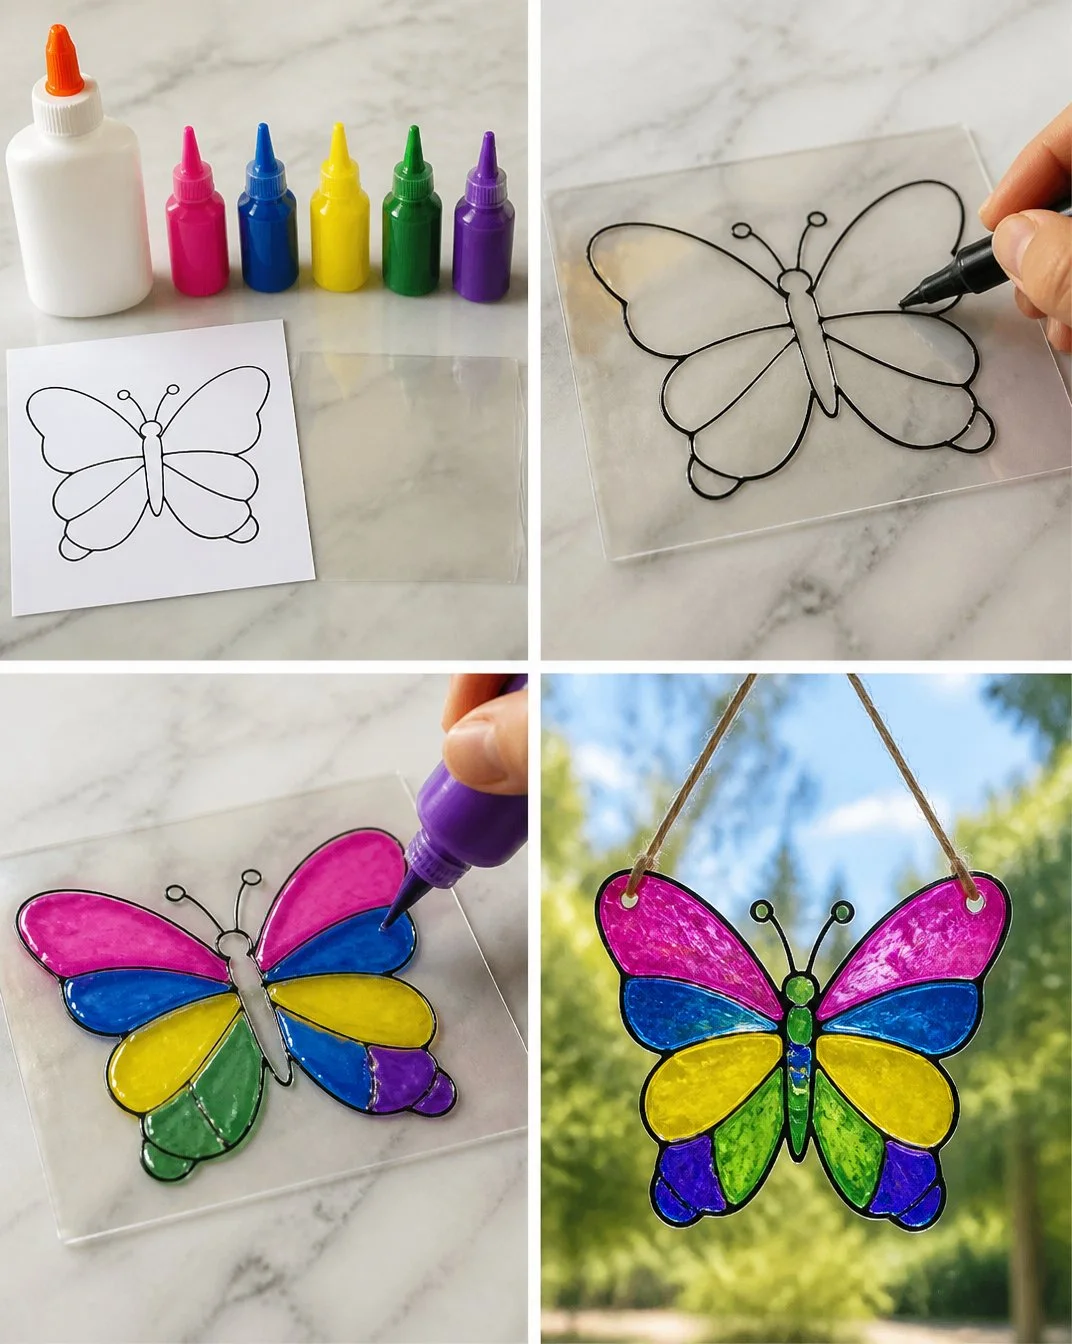
The Rainbow Glue Butterfly Suncatcher is a hit for numerous reasons. First, it’s incredibly low-prep—most of the materials can be found right at home. All you really need is clear school glue and food coloring, plus a few basic supplies like a clear plastic sheet and a butterfly template. This means you won’t have to make a special trip to the store, which can be a lifesaver on busy days. You may also find Clear Glue Mosaic Suncatcher useful.
Additionally, this project is highly approachable. Even children who may not see themselves as artists can dive in and create something beautiful. The simple act of mixing colors and applying them to the butterfly shape encourages creativity and artistic expression. Plus, watching their creation come to life as it dries is rewarding for kids. You may also find Clear Glue Suncatcher Quiet Joy Making useful.
Most importantly, this project is reliable and results-oriented. With clear instructions and minimal mess, both kids and parents will feel accomplished. The final product—a sunny suncatcher—makes for a lovely addition to any window, bringing a sense of joy and accomplishment. You may also find Clear Glue Suncatcher useful.
A Quick Look Before You Begin
You might wonder how much time to set aside for this activity or how messy it might get. The whole process doesn’t take long—perhaps an hour, including setup and clean-up time. The main drying time for the suncatcher is 24 hours, but you’ll find that the hands-on part is engaging enough to keep your kids focused and entertained.
As for the mess level, this project is manageable. You’ll likely have a few drips and spills, but nothing that a quick cleanup can’t handle. It’s beneficial to lay out some newspaper or an old tablecloth where the kids can work. Involving adults may mainly come into play for tracing and cutting, which young children might need help with, but older kids will take charge with ease.
Materials You’ll Need
To make your Rainbow Glue Butterfly Suncatcher, gather the following materials:
- 4 oz clear school glue
- 8–10 drops pink food coloring
- 8–10 drops blue food coloring
- 8–10 drops yellow food coloring
- 8–10 drops green food coloring
- 8–10 drops purple food coloring
- Butterfly template
- Clear plastic sheet
These items are common household items you probably have on hand, making this project both budget-friendly and easy to set up.
Step-by-Step Directions
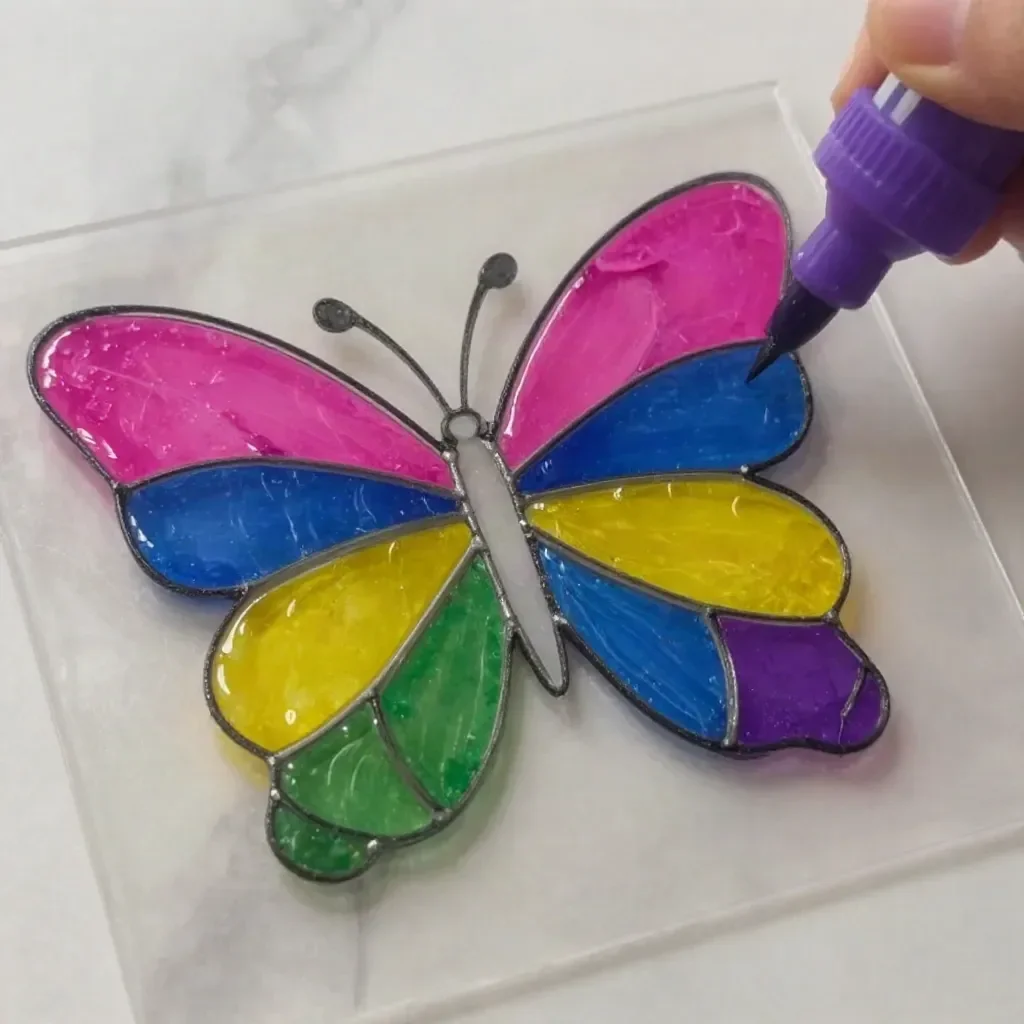
Once you’re ready, follow these clear steps to create your enchanting suncatcher:
Start by tracing the butterfly onto the clear plastic sheet. You can use the butterfly template for this, which helps maintain symmetry and ensures a fun shape.
In a bowl, mix the clear school glue with the different food colors. It’s exciting to watch the colors blend, and your kids can mix them as they like or create distinct sections.
Carefully fill in each section of the butterfly with your colorful glue mixtures. Let them use their creativity; there’s no right or wrong way to do this.
Once done, let your creation dry for 24 hours. It’s important to be patient at this stage! This time allows the glue to set properly so it can peel off easily later.
Finally, peel it off the plastic and hang it in a sunny window to enjoy! The colors will come to life in the sunlight, making for a delightful decoration.
This straightforward sequence makes it easy to follow along and keeps everyone focused on the task at hand.
The Learning Behind This DIY

While creating the Rainbow Glue Butterfly Suncatcher, your kids will naturally practice several essential skills. The hands-on experience with glue and colors enhances their fine motor skills. As they squeeze the glue and manage the food coloring, they’re strengthening their coordination and control.
Additionally, kids learn about color mixing—combining different food coloring to create a unique palette. This not only enhances their understanding of colors but also allows them to experiment and witness the transformations in real-time.
The project also incorporates some basic science concepts. As the glue dries, they can observe the change from a wet, sticky medium to a solid piece. This cause-and-effect relationship makes the activity both educational and fun.
Troubleshooting Common Issues
Sometimes things don’t go as planned, and that’s perfectly okay. Here are a few common problems you might encounter and how to elegantly fix them:
Gloppy or Overfilled Sections: If the glue spills over the edges or becomes too thick in some sections, it can cause a messy end result. The simplest fix is to use a toothpick to carefully remove excess glue while it’s still wet.
Color Bleeding: If colors start to mix where they shouldn’t, that’s a sign of too much glue in one area. Reassure the kids that this is part of the fun of art! Encourage them to embrace the colors blending—sometimes unexpected combinations can be beautiful.
Issues with Peeling Off the Plastic: If the suncatcher sticks to the plastic too much, it might need a bit of patience. Let it dry a little longer if it’s too wet. Next time, consider using a non-stick plastic sheet to ease the peeling process.
Easy Variations to Try
To keep the creativity flowing, consider these fun variations:
Add Glitter: Mixing in some glitter with the glue will elevate the project, giving it an extra sparkle when it catches the light.
Seasonal Themes: Change up the colors based on seasons or holidays. For example, pastels for spring or warm colors for fall can add a festive touch.
Multiple Shapes: Instead of sticking to just butterflies, use different templates like flowers or stars for diversity in designs.
Textured Effects: Encourage kids to use different tools, such as sponges or brushes, to apply glue, creating textured patterns on their suncatchers.
Glow-in-the-Dark: Try using glow-in-the-dark paint mixed with the glue to create a fun twist that can be appreciated at night.
These ideas promote further exploration and experimentation, allowing kids to adapt the project according to their moods or interests.
Storing or Reusing This Project
After the decorations are made, you may wonder what to do with them. If you have leftover supplies, consider saving the glue or food coloring for future projects. A small, sealed container can keep them fresh for a good period.
When it comes to storing the finished suncatcher, ensure it has a safe space away from direct sunlight to avoid any fading. If you decide to take a break from displaying it, you can gently remove it from the window and place it flat in a folder or box to keep it safe.
FAQs About Rainbow Glue Butterfly Suncatcher
What if my kids make a mess?
It’s natural for kids to get a little messy while crafting. Just set up a designated area for the activity and lay down some newspaper or placemats to catch spills. A damp cloth nearby can help quickly wipe away any unintended mess.
What ages is this project appropriate for?
This activity is suitable for various age ranges, but children aged 4 and up can especially enjoy it with varying levels of adult involvement. Younger kids will need help with tracing and mixing, while older kids can work more independently.
Can we use different types of glue?
Yes, while clear school glue is recommended for this project because of its ease of use and availability, you can experiment with other clear adhesives if you prefer. Just keep in mind that the drying times may vary.
How can I encourage my kids to be creative with colors?
You can provide a variety of color options, and suggest they explore color mixing. Let them know it’s perfectly okay if things get a little wild; the goal is creativity and having fun!
What should we do if the suncatcher starts to crack?
Sometimes, if the mixture dries too quickly, it may crack. If you see this happening, prevent future occurrences by ensuring you allow ample drying time in a cool, dry place.
Conclusion
Conclusion
Creating a Rainbow Glue Butterfly Suncatcher is not just a fun craft; it’s an engaging way for kids to learn while expressing their creativity. The vibrant colors and the magic of watching their creations come to life make the project worthwhile. For those looking for more butterfly-themed activities, explore the Black Glue & Sharpies Butterfly Suncatcher for a delightful twist. Additionally, consider incorporating elements from Colorful Butterfly Sun Catchers: Process Art for Preschoolers for further inspiration. Enjoy crafting and creating colorful memories!
PrintRainbow Glue Butterfly Suncatcher
Engage kids in a colorful and artistic way with this fun and simple Rainbow Glue Butterfly Suncatcher project.
- Prep Time: 10 minutes
- Cook Time: 1440 minutes
- Total Time: 1450 minutes
- Yield: 1 suncatcher 1x
- Category: Crafts
- Method: Arts and Crafts
- Cuisine: N/A
- Diet: N/A
Ingredients
- 4 oz clear school glue
- 8–10 drops pink food coloring
- 8–10 drops blue food coloring
- 8–10 drops yellow food coloring
- 8–10 drops green food coloring
- 8–10 drops purple food coloring
- Butterfly template
- Clear plastic sheet
Instructions
- Start by tracing the butterfly onto the clear plastic sheet.
- Mix the clear school glue with the different food colors in a bowl.
- Carefully fill in each section of the butterfly with your colorful glue mixtures.
- Let your creation dry for 24 hours.
- Peel it off the plastic and hang it in a sunny window to enjoy!
Notes
Encourage kids to express their creativity with color mixing and various artistic techniques.
Nutrition
- Serving Size: 1 project
- Calories: 0
- Sugar: 0g
- Sodium: 0mg
- Fat: 0g
- Saturated Fat: 0g
- Unsaturated Fat: 0g
- Trans Fat: 0g
- Carbohydrates: 0g
- Fiber: 0g
- Protein: 0g
- Cholesterol: 0mg