

It was one of those busy afternoons when the kids announced they needed a project right now, and the kitchen table already held snack bowls and a homework pile. I cleared a small spot, grabbed a few clear plastic lids and Mod Podge, and set a brush and tissue paper out.
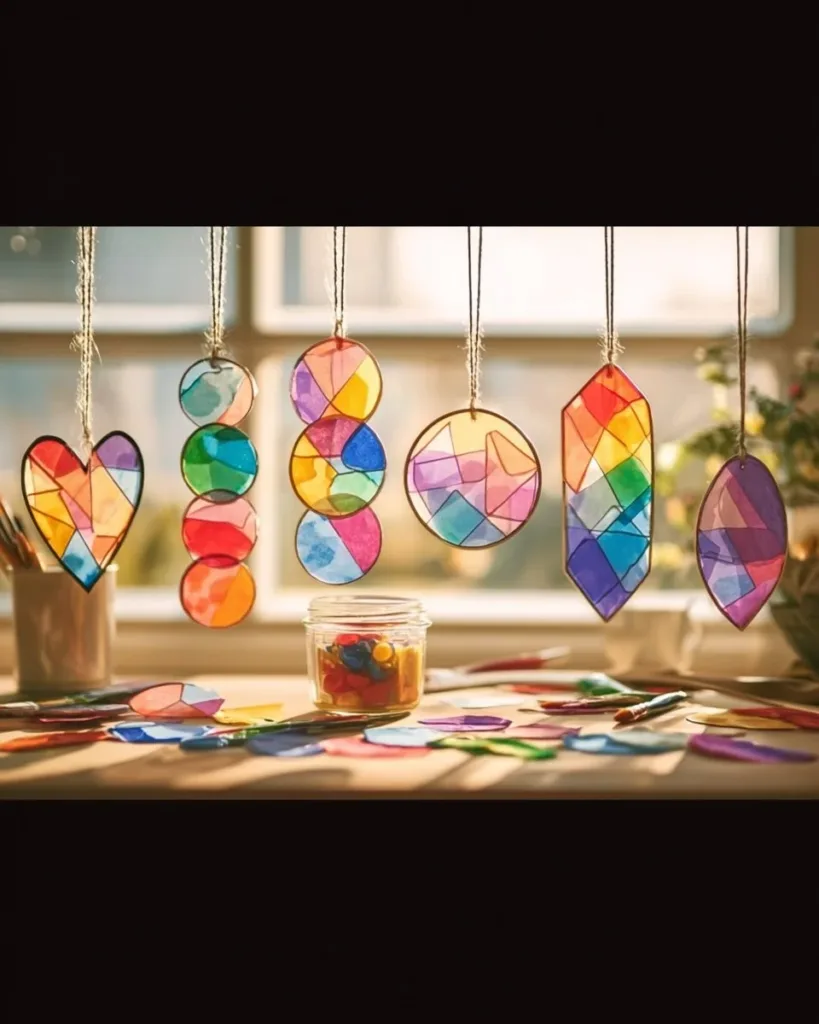
Within minutes we were making Mod Podge and Tissue Paper Suncatchers, and the whole room brightened as colored light spilled over the counter. If you want a quick, low-stress craft that fits into a hectic day, this is it; it feels easy, looks magical, and cleans up without fuss. If you enjoy how transparent projects glow in a sunny window, you might also like our bioplastic suncatchers with natural flowers for another slow, pretty option.
Why You’ll Love Making Mod Podge and Tissue Paper Suncatchers

This project works so well because it asks for very little prep and gives clear results fast. You use just Mod Podge, tissue paper, and a clear plastic surface. That simplicity keeps it approachable for kids and adults alike. It also fits real-life schedules: you can start right after school, during a nap window, or as a last-minute craft for guests.
The materials are forgiving. Tissue paper is thin, so it melds into a smooth sheet under Mod Podge. Clear lids act like tiny windows, and the glossy finish makes colors pop without extra varnish. Cleanup usually stays contained to the protected surface under your work, which means the job can end quickly when time runs out.
This craft gives reliable results even if you do not aim for perfection. Overlapping bits of tissue create beautiful layers. Imperfect edges and air bubbles often vanish under the final seal, and if something tears, you can cover it with another small piece. It feels satisfying to see a flat lid turn into something that catches light.
A Quick Look Before You Begin
This DIY comes together in about 2 to 24 hours depending on drying time you allow. Active work time sits around 15 to 30 minutes per suncatcher. The mess level stays low if you protect your table and keep wet Mod Podge in one jar. Adults should handle the Mod Podge application with younger children watching or helping with the tissue placement.
Set up a protected surface with an old placemat or newspaper, then lay out a small palette of tissue pieces. Expect a few wrinkles, some sticky fingers, and maybe a stray scrap of tissue that ends up on the floor. Those are normal and easy to manage.
If you want a similar transparent craft with a different material feel, try exploring our colorful bioplastic suncatchers for another fun afternoon activity. See colorful DIY bioplastic suncatchers for more ideas.
Materials You’ll Need
4 tablespoons Mod Podge (glossy)
- common household craft glue that dries clear
6 pieces tissue paper sheets (various colors), cut into small pieces
- easy to tear and budget-friendly
4 pieces clear plastic lids or acetate sheets
- plastic lid works well from a takeout container
1 paintbrush
- a medium flat brush helps spread Mod Podge smoothly
30 inches string or ribbon for hanging
- any light ribbon or twine will do
Keep the materials together so kids can grab one and add color. The list keeps things simple and flexible without requiring a trip to a specialty store.
STEP-BY-STEP DIRECTIONS

- Start by laying the plastic lids flat on a protected surface.
Place them upside up so the inside is the working side.
Protect the table with paper or a silicone mat. - Apply a generous layer of Mod Podge using a paintbrush.
Work in a thin, even coat that still looks wet and glossy.
You want enough to hold tissue, not a puddle of glue. - Press the small pieces of tissue paper onto the wet Mod Podge, creating a colorful overlapping effect.
Lay pieces gently and smooth them with your fingertips.
Overlap edges for depth and let colors blend where they touch. - Seal everything with another layer of Mod Podge, ensuring all edges are covered.
Brush lightly over the tissue so the color stays bright.
Make sure the outer edges receive a thin seal so nothing lifts later. - Allow it to dry completely for at least 120 minutes or overnight, then gently peel it off the lid.
Drying time depends on humidity and how thick the glue layer is.
If edges still feel tacky, wait longer rather than rush peeling. - Punch a hole at the top, thread the string or ribbon through, and hang your suncatcher in a sunny spot.
Use a small punch or a heated needle if the plastic is thick, with adult help.
Hang where it catches bright light and enjoy the color.
What Kids Practice While Making This
This activity supports fine motor coordination as children tear and place small tissue pieces. Pressing the paper down and smoothing with fingertips builds hand control and gentle pressure awareness. Choosing colors and layering teaches simple design thinking and decision making.
Kids also learn cause and effect. They see that a thin layer of Mod Podge dries clear and that overlapping colors change the look. Waiting while the suncatcher dries introduces patience and helps them understand timing in craft projects.
Working with sticky glue and thin paper gives sensory feedback. They feel textures change from soft tissue to a smooth glossy finish. That sensory detail makes the project memorable and helps kids repeat the steps with growing confidence. If you want a slightly different challenge, check this alternative that uses recycled supplies to make suncatchers that kids love.
Troubleshooting Common Issues
If the tissue wrinkles too much while placing it, do not panic. Smooth gently with a finger or add another small drop of Mod Podge on top to flatten it. Wrinkles that are small often disappear under the sealer.
If bubbles form under the tissue, press them toward the edge with a brush or your finger before the seal dries. Tiny air pockets usually flatten under the second coat. If a large bubble stays, lift the tissue carefully, add a dab of Mod Podge, and reset it.
If the suncatcher does not peel off the lid cleanly, it probably needs more drying time. Leave it overnight and try again. If a corner still sticks, use a thin knife or a plastic spatula to lift it gently while pulling slowly. Rushing can tear the sheet and make clean edging harder.
If edges look rough after peeling, trim them with small scissors. That step often makes the finished piece look intentional and neat. If colors seem dull, the glossy Mod Podge will deepen slightly as it cures over a day.
Easy Variations to Try
Try a monochrome version using shades of one color for a calm, stained-glass effect. It feels elegant and suits a quiet corner.
Cut tissue into simple shapes before placing them hearts, stars, or leaves for a themed suncatcher. This adds a gentle cutting practice for older children.
Use recycled acetate sheets from report covers instead of lids for larger pieces. They hold up well and give a smoother finish for bigger displays.
Create a set and hang them at different heights for a layered window display that moves with the breeze.
For a seasonal touch, pick colors that match a holiday or season and mix in small torn paper shapes that match the theme. These options let you adapt the project for any age and time of year without changing the method.
Storing or Reusing This Project
Store finished suncatchers flat between sheets of paper to avoid scratching the glossy surface. A shallow box or a drawer keeps them safe until you hang them again.
Leftover tissue scraps keep well in a small zip bag or envelope for future projects. Mod Podge seals in a tight container and lasts a long time if you keep the lid closed.
If a suncatcher dulls over time, a fresh thin coat of Mod Podge will restore shine. You can also turn older pieces into gift tags or mobile pieces by trimming and punching new holes.
Reuse plastic lids that still have life for another craft instead of recycling immediately, as they make handy palettes and molds for other projects.
FAQs About Mod Podge and Tissue Paper Suncatchers
Can this activity be done with very young kids and still stay safe?
Yes, with supervision. Young children enjoy placing tissue pieces, but an adult should handle Mod Podge and the final hole punching. Work in short bursts, and keep a wet wipe handy for sticky fingers. If a little Mod Podge gets on skin, it rinses off easily with soap and water.
I am worried about the mess. How much cleanup will this actually need?
The mess stays small if you cover the table. Mod Podge sits in one jar, tissue scraps stay on a paper mat, and a damp cloth cleans the brush between pieces. If a little glue ends up on the table, it wipes away once it dries a bit, or with warm soapy water right after use.
What if I do not have plastic lids the exact size in the materials list?
Use the four clear plastic lids listed in the materials as your starting point. If you must adapt later, acetate sheets work but follow the same method. The key is to be careful when peeling and to allow enough drying time. Do not substitute other adhesives for Mod Podge if you want the same finish and ease.
Will the colors fade or the tissue tear in sunlight?
Tissue colors can soften a bit over very long exposure, but indoor window light usually keeps them bright for a long time. If you hang them in very strong direct sun every day, expect some gradual change. The glossy Mod Podge protects the paper and reduces tearing under normal handling.
How long will these suncatchers last?
With normal indoor use, they hold well for months or even years. If they get dusty, wipe gently with a soft, dry cloth. If a piece does become damaged, you can layer another small piece of tissue and a thin coat of Mod Podge to refresh it.
A Final Helpful Note
This project invites flexibility more than perfection. If a piece does not look like the picture, that is part of the charm. Kids learn more from imperfect attempts than from flawless results. Take pictures of the work as you go; kids love seeing their pieces in the sunlight and feeling proud of the finished view.
Work at a relaxed pace. If you need to pause because dinner calls, cover your jars and lay tissue flat in a small tray. Return later and pick up from the sealed setup. That way the craft fits real life instead of stretching it.
If you ever want to expand this idea, try pairing suncatchers with a simple window display or a small handmade card. Little additions often turn a single afternoon craft into a memorable keepsake.
Conclusion
If you want another straightforward tissue paper approach, this Tissue Paper Suncatchers – Sarah Titus tutorial shows a similar kid-friendly method that can spark new color ideas. For ideas that reuse common household items and lean into recycled materials, this Kid-Friendly DIY Suncatchers Using Recycled Supplies post offers practical inspiration and variations to try next.
This project fits short pockets of time, uses simple materials, and delivers bright results that feel like a small win. Keep the list handy, protect your tabletop, and let the kids pick the colors. You will find that a quick setup and a little Mod Podge can turn a busy afternoon into something colorful and calm.
PrintMod Podge and Tissue Paper Suncatchers

A fun and easy craft project for kids that creates colorful suncatchers using Mod Podge and tissue paper.
- Prep Time: 15 minutes
- Cook Time: 120 minutes
- Total Time: 135 minutes
- Yield: 4 suncatchers 1x
- Category: Crafts
- Method: DIY
- Cuisine: American
- Diet: N/A
Ingredients
- 4 tablespoons Mod Podge (glossy)
- 6 pieces tissue paper sheets (various colors), cut into small pieces
- 4 pieces clear plastic lids or acetate sheets
- 1 paintbrush
- 30 inches string or ribbon for hanging
Instructions
- Start by laying the plastic lids flat on a protected surface.
- Place them upside up so the inside is the working side.
- Protect the table with paper or a silicone mat.
- Apply a generous layer of Mod Podge using a paintbrush.
- Work in a thin, even coat that still looks wet and glossy.
- Press the small pieces of tissue paper onto the wet Mod Podge, creating a colorful overlapping effect.
- Seal everything with another layer of Mod Podge, ensuring all edges are covered.
- Allow it to dry completely for at least 120 minutes or overnight, then gently peel it off the lid.
- Punch a hole at the top, thread the string or ribbon through, and hang your suncatcher in a sunny spot.
Notes
This craft supports fine motor skills and design thinking while being fun and engaging. Cleanup is manageable if you protect your work surface.
Nutrition
- Serving Size: 1 suncatcher
- Calories: N/A
- Sugar: N/A
- Sodium: N/A
- Fat: N/A
- Saturated Fat: N/A
- Unsaturated Fat: N/A
- Trans Fat: N/A
- Carbohydrates: N/A
- Fiber: N/A
- Protein: N/A
- Cholesterol: N/A