

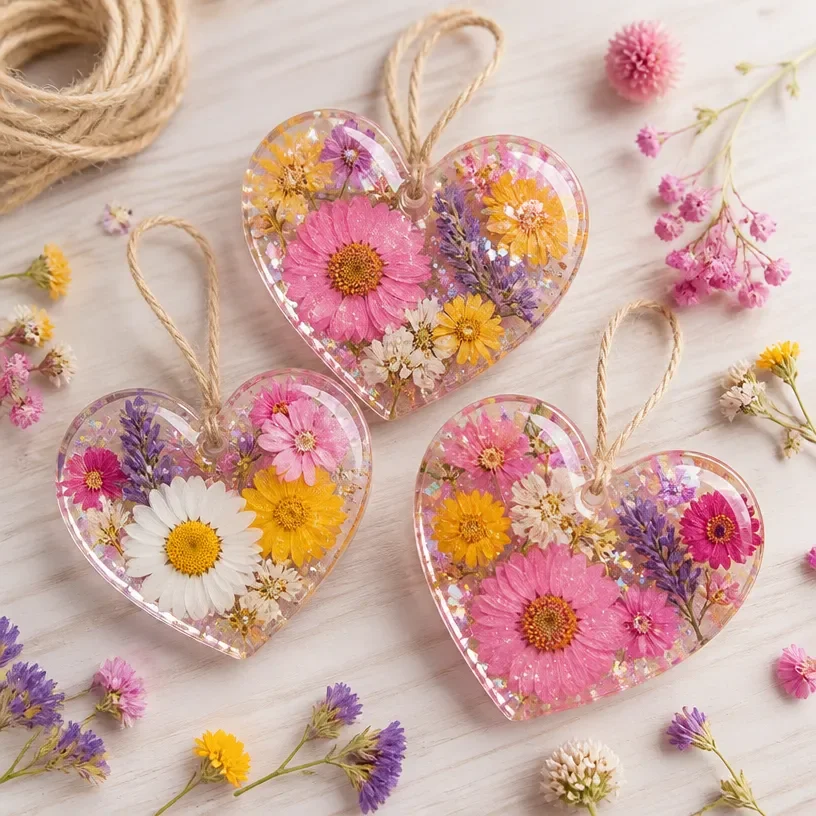
DIY Flower Hearts with Clear Glue You may also find Create Colorful Rainbow Hearts With Pressed Flowers useful.
Picture a busy afternoon where your kids are bursting with energy, asking if there’s something fun they can create right now. You want to encourage their creativity without spending hours on planning or gathering materials. Enter the DIY Flower Hearts with Clear Glue project—a simple yet enchanting way to turn dried flowers into beautiful heart shapes. This hands-on activity not only sparks imagination but also allows for a meaningful crafting experience that is low on stress but high on results. You may also find Clear Glue Mosaic Suncatcher useful.
Why You’ll Love Making DIY Flower Hearts with Clear Glue
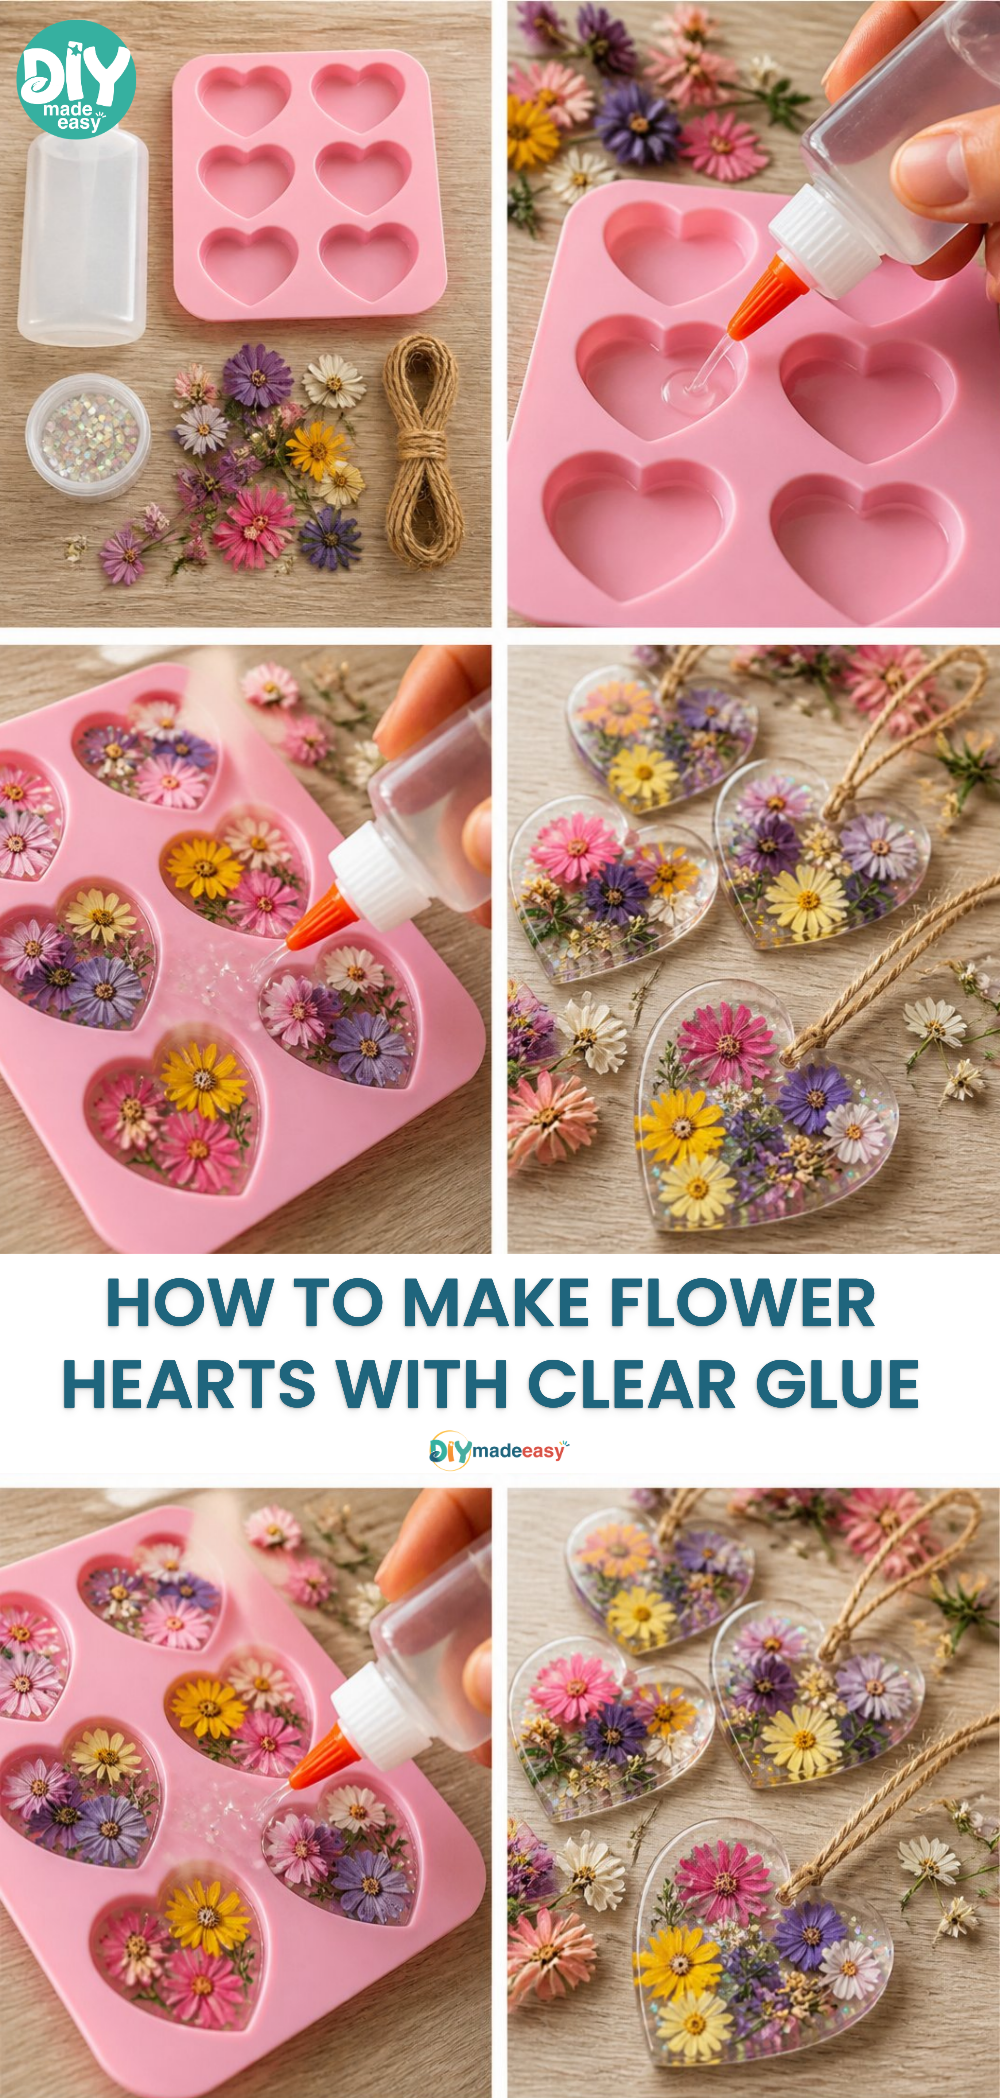
You may also find Clear Glue Suncatcher Quiet Joy Making useful.
This DIY project shines because it’s remarkably low-prep. You can gather your materials in a snap, making it ideal for a last-minute activity that can fit into even the busiest schedules. The use of clear glue allows the delicate beauty of the flowers to come through, creating vibrant pieces of art with minimal effort. Plus, the outcome is reliably delightful; you’ll feel proud displaying or gifting these creations. It’s all about enjoyment without the pressure of perfection, making it a perfect choice for both kids and adults alike. You may also find Clear Glue Suncatcher useful.
A Quick Look Before You Begin
Before diving into this creative endeavor, it’s helpful to understand what you’re getting into. This project takes roughly 30-60 minutes, depending on how intricate you want your designs to be. You’ll need some space set up to work in—perhaps at the kitchen table, where you can easily clean up afterward. The mess level is light; just be prepared for a few flower petals and a touch of glue, which is easily wiped away! This activity requires adult supervision primarily for helping with the glue application, ensuring that young children are safe and can focus on crafting without frustration.
Materials You’ll Need
- Clear Glue: A common household item that’s essential for this project; it bonds well and dries clear.
- Dried Flowers: Use any flowers you love; creating a unique arrangement works best.
- Cardstock or Heavy Paper: This provides a sturdy base for your hearts.
- Wax Paper: Protects your work area and prevents sticking.
- Scissors: For trimming the flowers or shaping your heart outlines.
Make sure to have exploring options for various colors and types of dried flowers, as they can greatly influence the end result of your heart designs.
Step-by-Step Directions
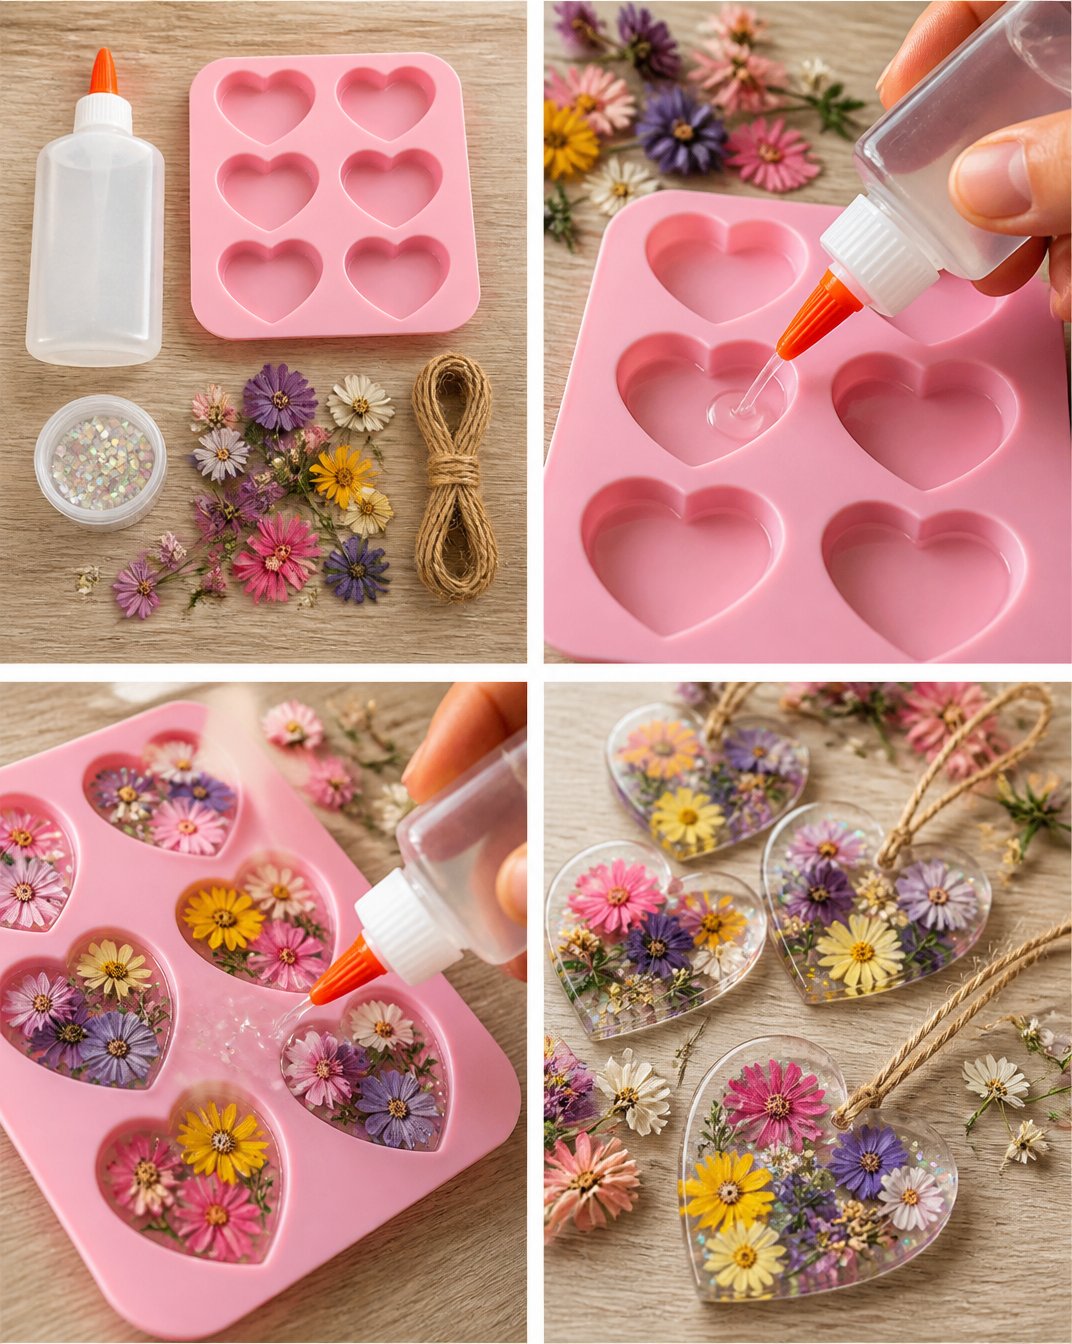
- Begin by laying out your dried flowers and selecting your favorites for the project. This is a great moment to talk about colors and shapes.
- Cut out heart shapes from the cardstock or heavy paper. You can do this freehand or trace a template for neat results.
- Place a piece of wax paper on your work surface to prevent sticking. This will also make cleanup easier later on.
- Apply a thin layer of clear glue onto one side of the heart shape, making sure it covers the area where the flowers will go.
- Start placing the dried flowers onto the glue-covered heart. You can overlap them for more texture or arrange them in a pattern.
- Once you’ve arranged the flowers, add more clear glue on top to secure them into place. Be careful to cover the petals gently, as you don’t want to saturate them too much.
- Allow your heart creations to dry for a few hours or overnight to ensure they are fully set before removing them from the wax paper.
- Once dried, peel the hearts off the wax paper carefully and admire your beautiful work! You can display them as decorations or use them in cards.
The Learning Behind This DIY
This project is not just about creating something pretty; it’s also an excellent opportunity for kids to practice a range of skills. As they arrange the flowers, they engage in fine motor skills, improving their hand-eye coordination. The sensory experience of feeling different textures—from the smooth glue to the delicate petals—can be very grounding and rewarding. Additionally, this DIY encourages creativity and decision-making, as they choose floral placements and colors. It naturally introduces concepts like color mixing and shape recognition, making it enjoyable on multiple learning levels.
Troubleshooting Common Issues
If something goes off-course during your crafting session, don’t worry; it’s all part of the creative process! One common issue is the flowers slipping around before the glue dries. If this happens, simply press them gently into place and allow a bit more drying time. Another issue could be glue visibility; if you find the glue shows more than expected, try applying thinner layers or using a clear-drying glue specifically made for crafts. Always remember to have paper towels handy for unexpected spills, keeping the workspace tidy and manageable.
Easy Variations to Try
- Seasonal Decorations: Change the flowers based on the season—think autumn leaves for fall or bright daisies for spring.
- Add Glitter or Sequins: Sprinkle in some extra sparkle to the glue layer before it dries to create shimmering accents.
- Mixed Media: Combine your hearts with other media, like watercolor backgrounds or fabric scraps, for added texture and depth.
- Size Variation: Experiment with different heart sizes or create a garland of hearts for a larger display.
Storing or Reusing This Project
When it comes to storing your lovely creations, consider placing them in a flat box or a portfolio to avoid bending. If you want to reuse materials, gently peel off the dried flowers from the heart shapes, and refresh the hearts with new flowers. Clean the workspace thoroughly and save any unglued flower parts for future projects.
FAQs About DIY Flower Hearts with Clear Glue
How messy is this project?
This project involves minimal mess. You might have some flower petals and glue, which can be easily cleaned up with a damp cloth.
Is clear glue safe for kids?
Yes, clear glue is generally safe for kids, but adult supervision is recommended, especially regarding application and keeping it away from their mouths or eyes.
Can I use fresh flowers instead of dried ones?
While dried flowers are best, you can experiment with fresh flowers, but keep in mind that they may wilt quickly and can make the project messier.
How can I store my flower hearts?
Store your finished hearts in a flat box or portfolio to keep them safe from bending.
What if my results are not perfect?
It’s okay! Embrace the imperfections, as they make each piece unique. The beauty of crafting lies in enjoying the process, not just the outcome.
Conclusion
Making DIY Flower Hearts with Clear Glue is not only a fun project for children and adults alike, but it also fosters creativity and learning in a relaxed environment. For more inspiring craft ideas, check out this guide on clear glue and watercolor art, or discover how to create beautiful projects like stunning pine cone flower heart decorations. Embrace the joy of crafting together and create lasting memories!
PrintDIY Flower Hearts with Clear Glue
A simple and enchanting project to turn dried flowers into beautiful heart shapes, perfect for kids and adults alike.
- Prep Time: 15 minutes
- Cook Time: 30 minutes
- Total Time: 45 minutes
- Yield: Varies based on heart size
- Category: Craft
- Method: Crafting
- Cuisine: N/A
- Diet: N/A
Ingredients
- Clear Glue
- Dried Flowers
- Cardstock or Heavy Paper
- Wax Paper
- Scissors
Instructions
- Begin by laying out your dried flowers and selecting your favorites for the project.
- Cut out heart shapes from the cardstock or heavy paper.
- Place a piece of wax paper on your work surface to prevent sticking.
- Apply a thin layer of clear glue onto one side of the heart shape.
- Start placing the dried flowers onto the glue-covered heart.
- Once you’ve arranged the flowers, add more clear glue on top to secure them into place.
- Allow your heart creations to dry for a few hours or overnight.
- Once dried, peel the hearts off the wax paper carefully and admire your beautiful work!
Notes
This project allows for creativity and decision-making while practicing fine motor skills.
Nutrition
- Serving Size: N/A
- Calories: 0
- Sugar: 0g
- Sodium: 0mg
- Fat: 0g
- Saturated Fat: 0g
- Unsaturated Fat: 0g
- Trans Fat: 0g
- Carbohydrates: 0g
- Fiber: 0g
- Protein: 0g
- Cholesterol: 0mg