

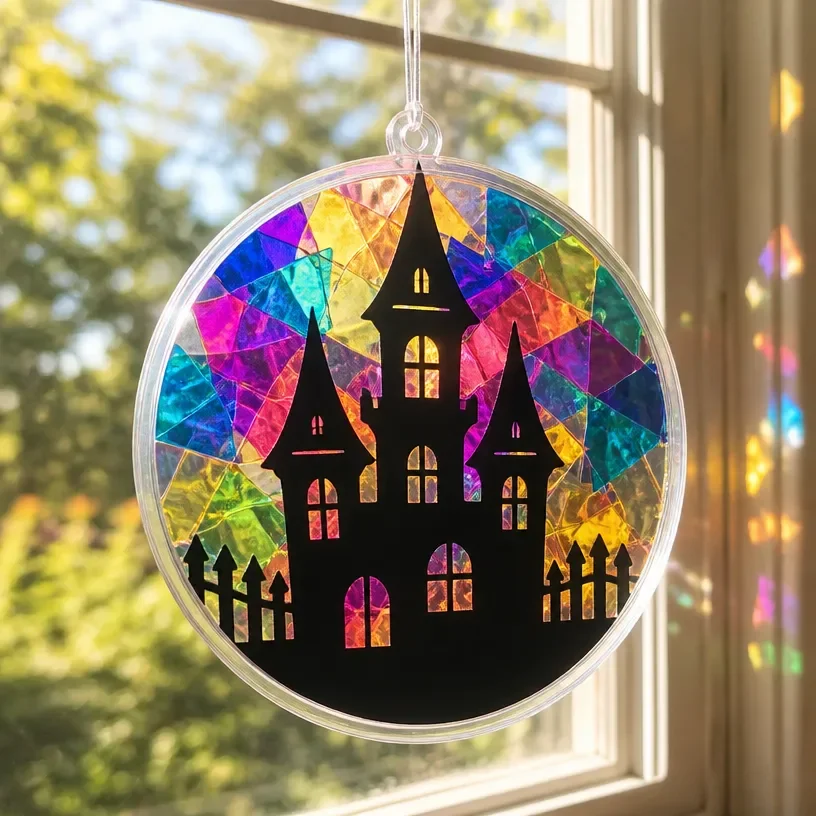
The afternoon shadows stretch lazily across the room when your kids spot an empty window. “Can we make it spooky?” they ask, their excitement palpable. You glance at the bits and pieces available around the house, and then you remember it’s the perfect opportunity to create a Holographic Haunted House Window Ornament. This project is not just fun; it’s also a fantastic way to get everyone involved in the spirit of Halloween without a massive prep time. You can transform any plain window into a colorful scene with some simple materials, and you’ll love how engaging it can be for the little ones. You may also find Colorful Rainbow Crayon Decor Haunted House Theme useful.
Why This Holographic Haunted House Window Ornament Works So Well
You may also find Colorful Rainbow Crayon Haunted House Suncatcher useful.
This project is approachable and perfect for real-life schedules. The Holographic Haunted House Window Ornament utilizes materials that are often found at home, making it low-prep and cost-effective. When you gather items from around the house, like paper and colors, it’s like putting together a family puzzle. Plus, there’s a delightful reward at the end after all the collective effort an eye-catching ornament that glows with creativity. You’ll appreciate that this project comes together without requiring extensive planning or specialized equipment, allowing for a relaxed creation process. You may also find Glowing Holographic Lantern Schoolhouse Decor useful.
A Quick Look Before You Begin
Creating a Holographic Haunted House Window Ornament is not only simple, but also enjoyable! Plan for about an hour to assemble everything, depending on how involved everyone wants to be. Set up in a space with good lighting, preferably a big table where materials can be spread out safely. The mess level is manageable, especially if you lay down a few newspapers beforehand. Adult supervision is recommended for younger children during any cutting, ensuring safety as they express their creativity.
Materials You’ll Need
- Black construction paper
- Colored markers or crayons (choose bright ones for the best effect)
- Scissors (adult supervision recommended)
- Glue or tape
- Optional: glitter for extra sparkle
Gathering these materials is a breeze. The majority are common household items, which means you won’t need to run out for anything special, and you can easily substitute colors based on what you have at home.
Step-by-Step Directions
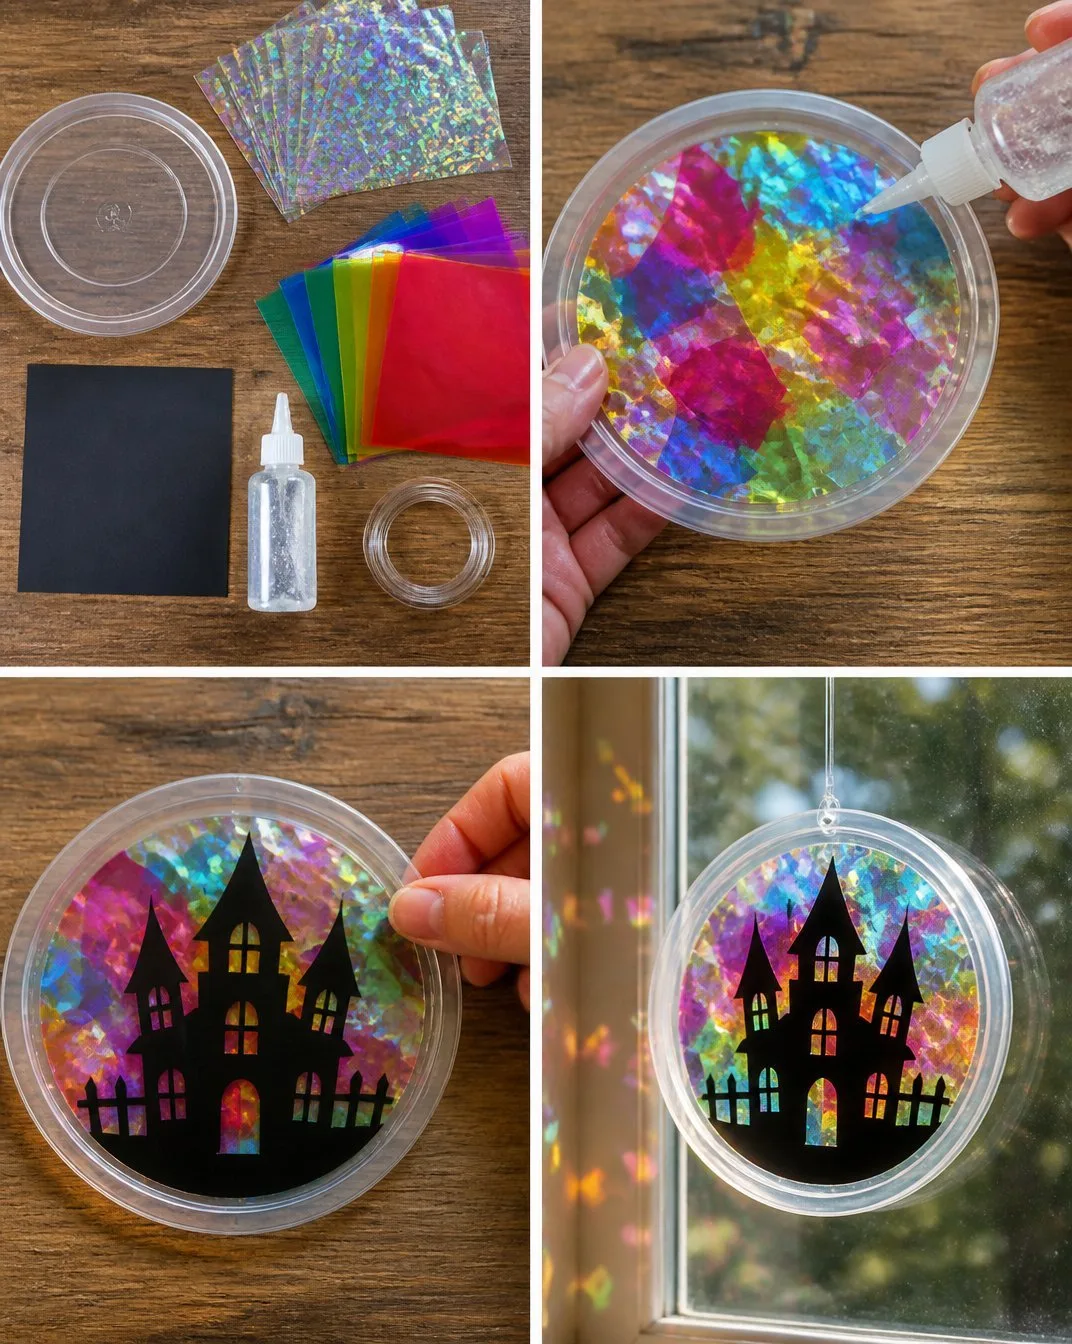
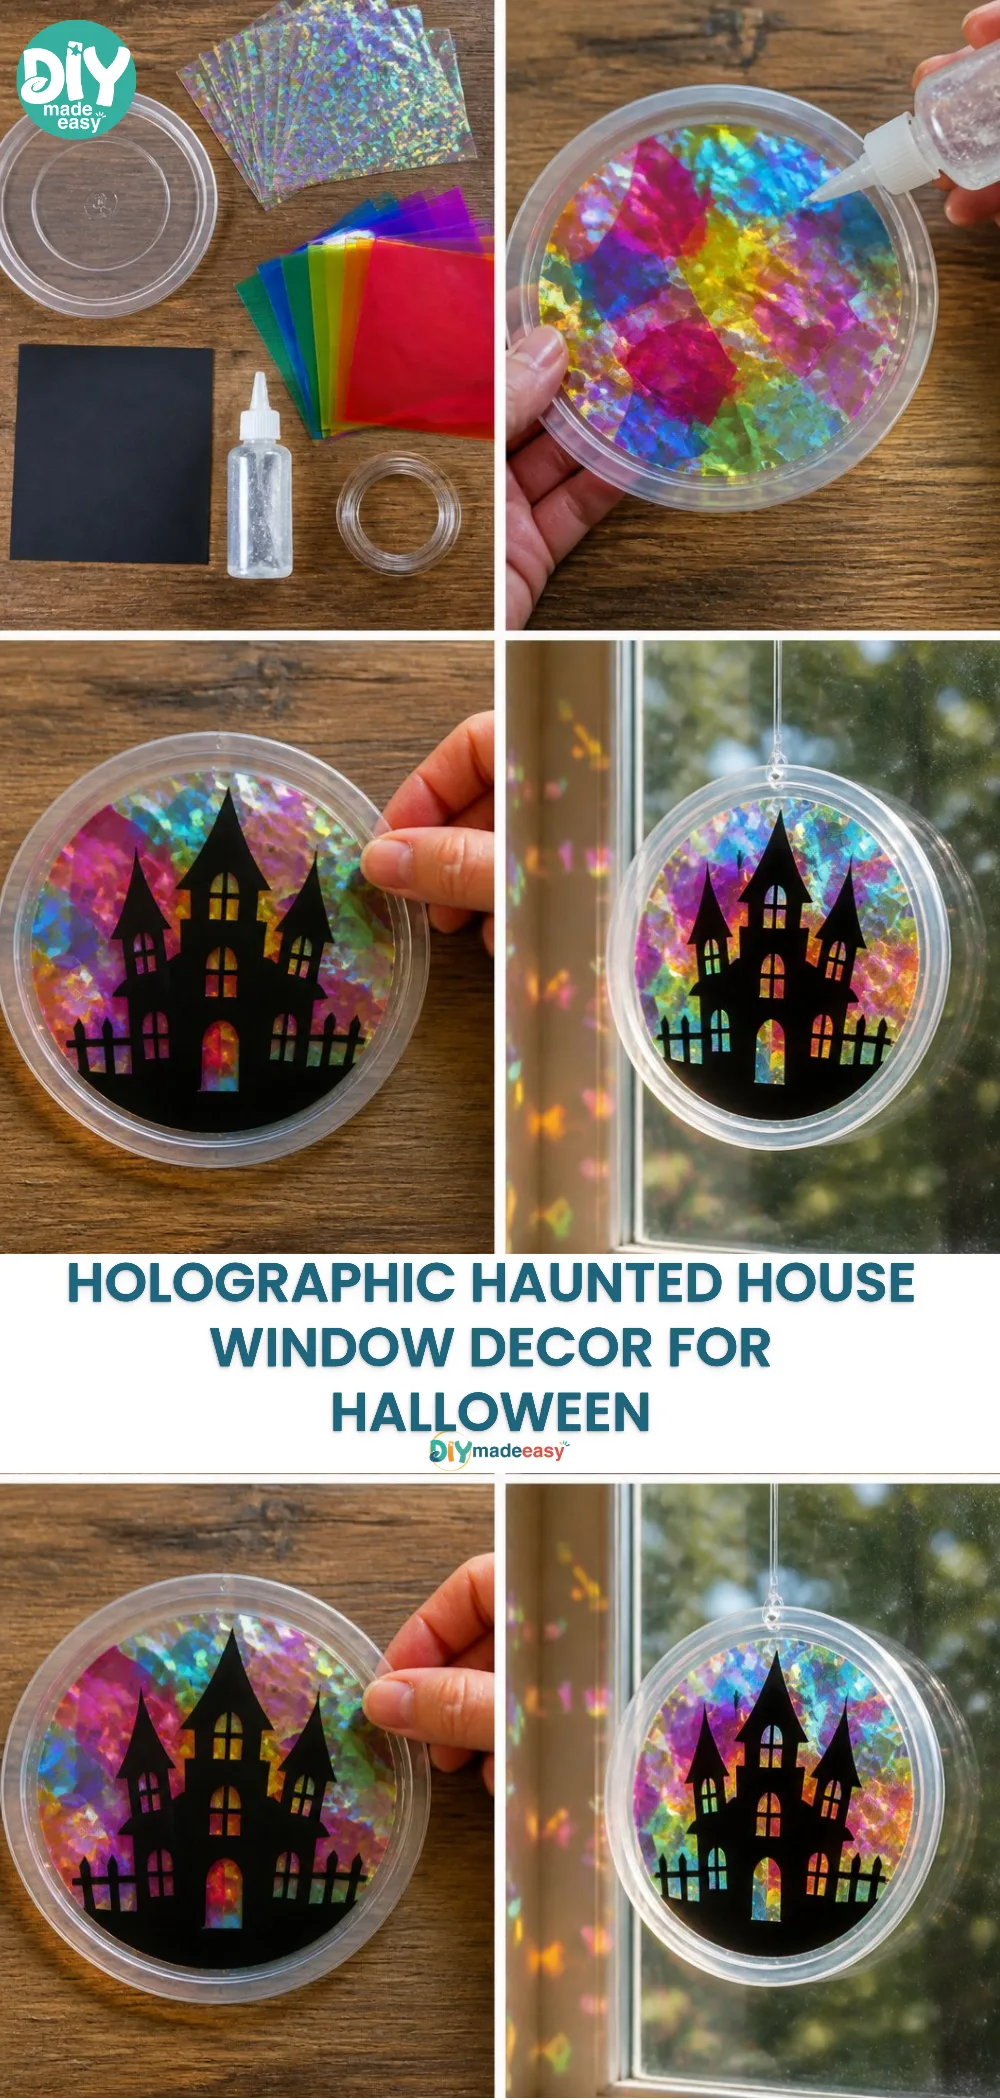
- Start by cutting different shapes from the black construction paper. Create spooky silhouettes such as haunted houses, trees, and ghosts.
- Once you’ve shaped your figures, time to decorate! Use the colored markers or crayons to add fun details and textures to your cutouts.
- If desired, sprinkle some glitter onto the shapes while the glue is still wet to create some Halloween shimmer.
- Now, it’s time to hang your creations. Choose a window that gets plenty of light. Use glue or tape to attach the cutouts to the glass.
- As the light shines through, your window will come alive with color and design. Stand back and admire your handiwork!
The Learning Behind This DIY
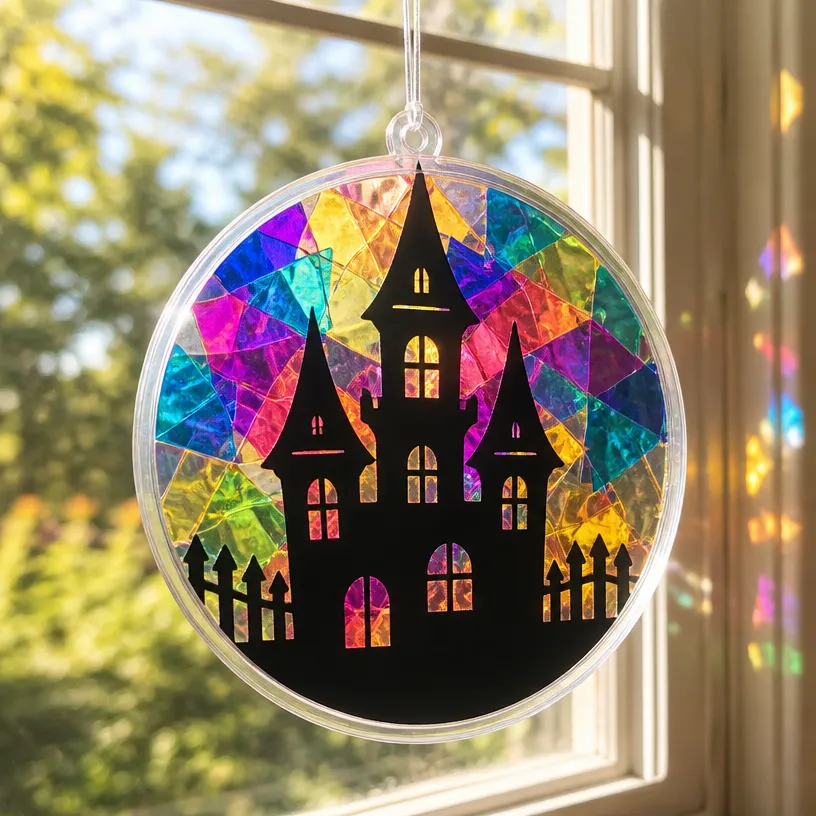
While creating this Holographic Haunted House Window Ornament, children practice various skills. They engage fine motor skills when cutting and coloring, refining their hand-eye coordination. Additionally, they learn cause and effect as they discover how light interacts with different materials. There’s a satisfying moment when they see their hard work result in a colorful display that brightens up their space, boosting their confidence.
Troubleshooting Common Issues
If something seems off during your project, don’t worry! Sometimes, the glue can be too watery, leading to a messy scenario. Allow it to dry a bit before applying it for better control. If the colors appear dull, that can usually be fixed by adding more layers or trying a different angle for the light, which can enhance visibility and vibrancy.
Easy Variations to Try
Looking for ways to switch things up? Here are a few ideas:
- Incorporate seasonal themes by creating ornaments for different holidays.
- Use alternative materials, like colored tissue paper, to create a different texture.
- Combine this project with the DIY melted crayon rainbow suncatcher to add some rainbow flair.
Storing or Reusing This Project
After Halloween, you can choose to keep your spooky decorations or repurpose the supplies creatively for another project. If you plan to clean up, stack the flat pieces safely for next year. This not only reduces waste but encourages sustainability.
FAQs About Holographic Haunted House Window Ornament
“How messy is this project?
” This project is relatively mess-free if you lay down a covering like newspapers. Most materials are easy to clean up.
“Is it safe for younger kids?
” Absolutely! With adult supervision during cutting, younger children can participate in decorating and gluing.
“What if I don’t have colored markers?
” You can use any other coloring tools like colored pencils or even paints as alternatives.
“Can I store the decorations for next year?
” Yes! Store them carefully to reuse next Halloween, fostering a sense of tradition.
A Final Helpful Note
Feel encouraged to adapt this project to fit your family’s needs and preferences. Whether it’s the colors you choose or the shapes you create, allow flexibility to shine through. With creativity and teamwork, making a Holographic Haunted House Window Ornament can be a highlight of your Halloween season. Enjoy the process, and have fun making special memories that last!
Conclusion
Conclusion
As you look to enhance your Halloween decor, consider the charm of a
Halloween Window Projector Hologram Haunted Mansionfor an extra touch of whimsy. For even more atmospheric effects, you might check out the
12″ Lighted Holographic Ghost Halloween Window Silhouette. These additions can complement your handmade projects and create a wonderfully spooky ambiance for the season!