

Glowing Bottle Lanterns can transform any ordinary space into a magical corner filled with light. Imagine a busy afternoon, with kids eager to make something new and exciting. Instead of simply turning on the lamp, why not engage them in a delightful DIY project that will not only occupy their time but also ignite their creativity? With just a few clear glass bottles, some LED string lights, and a splash of paint, you can make these glowing lanterns. Watching their faces light up as they see their finished creations shines a little extra warmth into the day. You may also find Broken Crayons Glowing Rainbow Flowers 2 useful.
Why This Glowing Bottle Lanterns Works So Well
You may also find Broken Crayons Glowing Rainbow Flowers useful.
The allure of Glowing Bottle Lanterns lies in their simplicity and the joy of creation. This project requires minimal preparation, making it ideal for those last-minute crafting sessions. You don’t need to gather a complicated array of supplies; in fact, you probably have most of what you need at home. It’s easy to get started, even if you’re short on time, as the steps are straightforward and quick to execute. You may also find Diy Self Watering Planters Recycled Bottles useful.
Furthermore, this DIY project allows everyone to personalize their lanterns. Whether it’s bold colors, soft pastels, or a touch of sparkle with glitter, the options are endless. This creative freedom fosters confidence in kids and adults alike. When things go well, the project brings satisfaction and encouragement to explore even more crafts. You may also find Glowing Ball Activity useful.
A Quick Look Before You Begin
This DIY is about making memories as much as it is about creating something beautiful. Before diving into assembling materials or setting up stations, let’s look at what you can expect in terms of timing and cleanup. This project can take about an hour from start to finish, depending on the drying time of the paint.
Prepare for some mess, especially if you’re working with younger kids. A drop cloth can be your best friend! Adult involvement is recommended for initial setup, particularly during the painting phase to ensure safety with supplies. However, as soon as the bottles are set aside to dry, kids can take charge, allowing their creativity to flow!
Materials You’ll Need
- Clear glass bottles (recycled or new)
- LED string lights (battery-operated)
- Acrylic or glass paint
- Soft-bristle paintbrushes
- Optional: Decorative materials like glitter, dried flowers, or colored beads
- Small funnel (for ease of pouring)
- Water (if using for painting or creating textures)
This list of materials is very budget-friendly. Most of these items can be sourced from what you already have at home or can be found easily at craft stores.
Step-by-Step Directions
Start by selecting and cleaning your glass bottles. Make sure they are completely dry to allow for proper adhesion of the paint. Eager hands can often overlook a few specks of dust, so check again to ensure a clean surface.
Decide on the colors or patterns for your lanterns. As you apply paint inside the bottle using a soft-bristle brush, think about layering colors or creating a tie-dye effect. The wetter the paint, the more it’ll swirl about, creating interesting patterns.
Allow the paint to dry completely. This step is crucial as it prevents smudging when inserting lights and ensures that your lanterns hold their vibrant colors.
Once dry, carefully insert the LED string lights through the neck of the bottle. A small funnel can be very helpful here as it guides the lights without causing damage to your craft.
Turn on the lights and enjoy your beautiful creations. Position your glowing lanterns in places where their light can be appreciated, whether that be on a mantle, bedside table, or even in the backyard.
The Learning Behind This DIY
While making Glowing Bottle Lanterns, kids practice invaluable skills that can aid in their development. This project engages fine motor skills, as applying paint and manipulating small items, like LED lights, requires coordination. They also get to see the cause-and-effect relationship in action—when they brush the paint into the bottle, the glow from the lights showcases their hard work.
Beyond just crafting, children also explore creative thought and problem-solving as they decide how to merge colors or incorporate decorative materials.
Troubleshooting Common Issues
If something doesn’t go as planned, don’t fret! One common issue is the paint running or sliding down the bottle. This can happen if the paint is too diluted or if you didn’t let previous layers dry. Allowing each layer to dry thoroughly before adding more can solve this issue.
Another concern may be about how the lights fit. If the LED string doesn’t fit well through the neck, consider trying a narrower light strand or gently trimming the string to better fit.
Easy Variations to Try
To make Glowing Bottle Lanterns even more fun, consider these creative twists:
- Use themed colors for holidays—red and green for Christmas or orange and black for Halloween.
- Incorporate natural materials like dried flowers or beads inside the bottle before adding lights for an extra touch of elegance.
- Explore textures by adding some sand or glitter for a sparkling effect.
Storing or Reusing This Project
After your crafting session, consider how best to store your lanterns. If the lights are removable, you can keep the painted bottles safe and sound for future use. Alternatively, if you’d like to repurpose the materials, think about turning these lanterns into centerpieces for events or seasonal decorations.
Cleaning up after is straightforward—just be sure to dispose of any paint responsibly and wipe down surfaces as needed to keep everything tidy.
FAQs About Glowing Bottle Lanterns
Q: Can I use any bottle for this project?
A: Yes! You can use any type of clear glass bottle that suits your design. Just ensure it’s clean and dry!
Q: Is this project messy?
A: Like most crafts, there can be some mess, but using a drop cloth can help contain spills. Paint can easily wash off surfaces if done promptly.
Q: How safe are the LED lights?
A: Battery-operated LED lights are generally safe, but always supervise little ones when they are handling electronic components.
Q: Can I alter the paint colors after it dries?
A: Once paint has dried, adding more might not work as effectively. It’s best to experiment with colors before the paint completely sets!
Q: How should I store my supplies after making the lanterns?
A: Clean brushes and store them for next time. Make sure all materials are tucked away in a dry place to keep them in great shape for future projects.
Conclusion
Conclusion
Creating Glowing Bottle Lanterns provides a wonderful opportunity for family bonding and creativity. These glowing masterpieces can brighten your home and your hearts. If you’re looking for more exciting craft ideas, check out this Magic Bottle Lanterns project or consider another engaging craft like this Cute Camping Craft for Kids. Embrace the fun of DIY and enjoy making memories with your loved ones!
PrintGlowing Bottle Lanterns
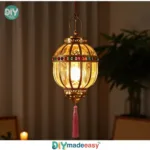
Transform ordinary glass bottles into glowing lanterns with this easy DIY project, perfect for kids and adults alike.
- Prep Time: 10 minutes
- Cook Time: 50 minutes
- Total Time: 60 minutes
- Yield: 1 lantern
- Category: Craft
- Method: Crafting
- Cuisine: N/A
- Diet: N/A
Ingredients
- Clear glass bottles (recycled or new)
- LED string lights (battery-operated)
- Acrylic or glass paint
- Soft-bristle paintbrushes
- Optional: Decorative materials like glitter, dried flowers, or colored beads
- Small funnel (for ease of pouring)
- Water (if using for painting or creating textures)
Instructions
- Start by selecting and cleaning your glass bottles. Make sure they are completely dry.
- Decide on the colors or patterns for your lanterns.
- Allow the paint to dry completely.
- Once dry, carefully insert the LED string lights through the neck of the bottle.
- Turn on the lights and enjoy your beautiful creations.
Notes
This project promotes creativity and fine motor skills for children. Adult supervision is recommended during the painting phase.
Nutrition
- Serving Size: 1 lantern
- Calories: 0
- Sugar: 0g
- Sodium: 0mg
- Fat: 0g
- Saturated Fat: 0g
- Unsaturated Fat: 0g
- Trans Fat: 0g
- Carbohydrates: 0g
- Fiber: 0g
- Protein: 0g
- Cholesterol: 0mg