

A rainy afternoon stretched out and the kids wanted to make something right now. I cleared a small corner of the kitchen counter, gathered a few familiar pantry items and tried an Easy Simple Cornstarch Bioplastic recipe that fits into a busy afternoon.
It took minutes to mix, a little stirring at the stove, and soon we had a warm, glossy gel to press into shapes while a snack baked. If you want the full step-by-step, our guide shows the basic recipe and it links to a few variations to try as you get comfortable with the feel of the material. Try this simple cornstarch bioplastic DIY page when you need a quick kitchen project that still feels like real making.
Why You’ll Love Making Easy Simple Cornstarch Bioplastic

This project works so well because it needs very little prep and uses things you probably already have. Cornstarch and water meet in a saucepan and change into something new with nothing fancier than a spoon. The whole process fits into the gaps in a busy day. You can start it between chores, during a TV show, or while dinner simmers.
It feels approachable because you do just a couple of things. You mix, you stir, you cool, and you shape. That keeps adults involved without making the activity complicated. Kids can help measure, stir, and press the cooled material into molds. That gives them a real role without overwhelm.
It stays reliable because small changes do not ruin the final product. If the mixture gets a touch thicker or thinner, simple adjustments fix it. Vinegar and glycerin play quiet, steady roles to make the material flexible and less likely to crack. That means less frustration and more chances for a quick success.
A Quick Look Before You Begin
This recipe takes about 10 minutes of active time at the stove and a longer cooling or hardening time, depending on how thick or firm you want the final pieces. Count on setting aside at least an hour total if you want firm pieces, although thinner shapes can harden faster.
Setup is low fuss. Clear a small area of counter, pull out a saucepan, a spoon, and a small bowl or tray for cooling and shaping. Cover your work surface if you want easier cleanup. Have a damp cloth or sponge handy for spills. Mess level stays low if you measure at the sink and wipe as you go.
Adult supervision matters at the stove. The hot mixture looks glossy and will bubble gently as it thickens. That is normal. Keep sleeves and hair away from the pan and use pot holders if you lift or move it. Most of the sensory fun happens after the heat, so you can hand the cooled gel to kids for pressing and molding.
Materials You’ll Need
1 cup cornstarch
common household pantry item
1 cup water
tap water works fine
1 teaspoon vinegar
helps with stability; plain white vinegar is fine
1 tablespoon glycerin
adds flexibility; often sold at pharmacies
Food coloring (optional)
optional for color; a few drops go a long way
STEP-BY-STEP DIRECTIONS

- In a saucepan, mix together the cornstarch, water, vinegar, and glycerin over medium heat.
Measure carefully and stir the dry cornstarch with the water first to avoid lumps, then add the vinegar and glycerin. Keep the pan steady on medium heat so the mixture warms evenly. - Stir continuously until the mixture thickens into a gel-like consistency.
You will see the mix go from cloudy to glossy and start to pull away from the sides. Keep stirring to prevent sticking. Expect small, slow bubbles and a texture like thick pudding when it is ready. - If you want to add a touch of color, mix in food coloring now.
Work quickly but gently so you do not overheat the pan. A drop or two makes subtle color. Stir until the color looks even and smooth. - Remove from heat and let it cool, then mold or shape as desired.
Spoon the warm gel onto a clean tray, into molds, or press it between layers of wax paper. The gel feels warm and slightly tacky at first. You can shape it with your hands once it cools enough to handle. - Allow it to harden completely before using.
Leave shaped pieces on a flat surface to dry. Thin items may harden in a few hours. Thicker ones need longer, sometimes overnight. Check firmness by pressing gently; it should feel firm and not sticky when fully set.
What Kids Practice While Making This

This activity builds fine motor skills in real ways. Measuring 1 cup of cornstarch and 1 cup of water asks for steady hands and simple eye-hand coordination. Stirring the pan gives kids a chance to practice controlled motion and timing. Pressing shapes into molds supports finger strength and precision.
It also teaches cause and effect. The cornstarch mixture changes as heat goes in. That visible change helps kids link an action to a result. When color appears after a few drops of food coloring, that little magic moment reinforces curiosity and confidence.
Finally, it supports planning and patience. Cooling and waiting to harden gives kids practice in delayed gratification. You can make thin shapes for quick satisfaction and thicker pieces when they want to wait for a sturdier result. Either route rewards their effort.
Troubleshooting Common Issues
If your mixture stays lumpy, it usually means the cornstarch did not dissolve fully before heating. Try whisking vigorously while the pan is warm to smooth it out. If that does not work, pour the lumpy mix into a fine mesh sieve and press it through with a spatula while warm.
If the mix gets too thick and feels dry, add a teaspoon of warm water at a time off heat and stir until the texture softens. Small adjustments help; avoid big pours of water that thin it too much.
If pieces crack after hardening, they likely lost too much moisture or the glycerin was low. For future batches, double-check that you measured 1 tablespoon of glycerin. If you have brittle pieces already, try rubbing a tiny bit of glycerin or a light coating of vegetable oil on the surface to reduce surface dryness. Test a small area first.
If the finished item stays sticky after what seems like enough drying time, it might need more time. Put the piece on a clean, dry surface in a warm, ventilated spot. Thin pieces take less time, while thick ones can take a full day to firm fully.
Easy Variations to Try
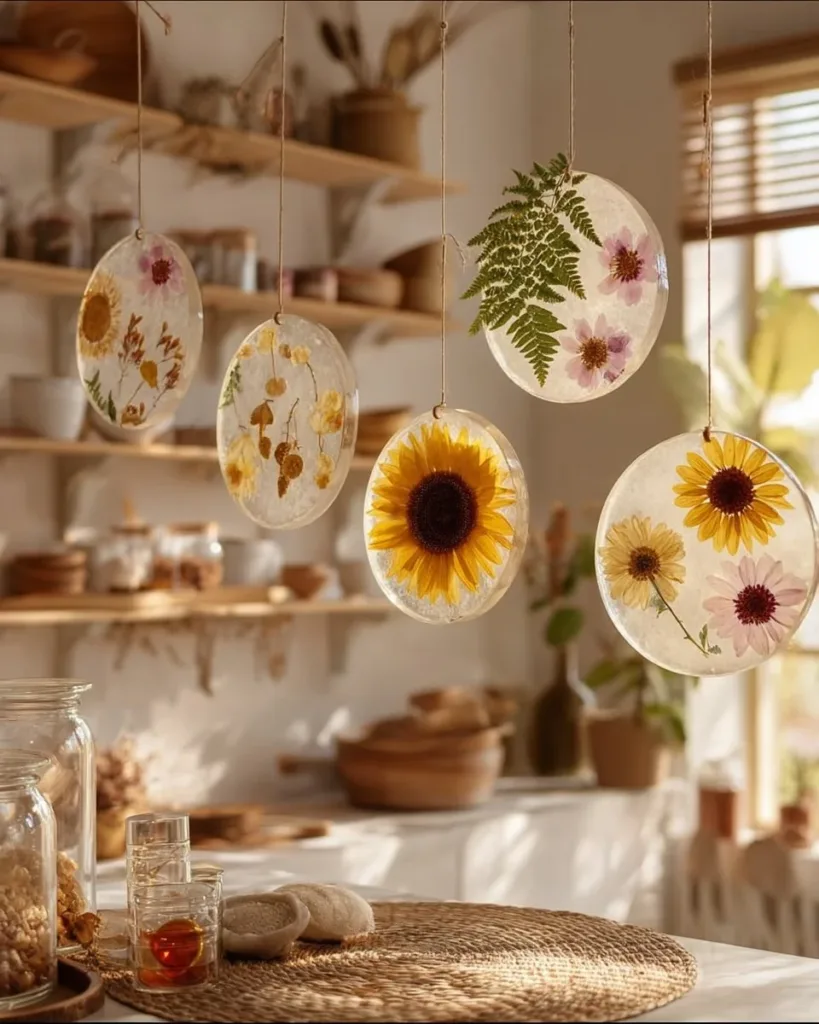
Add pressed flowers or small leaves between thin sheets for a decorative look. Press them lightly while the material is still warm and thin. That creates keepsakes that show texture and pattern.
Make tiny charms or beads by rolling thin ropes and slicing them. Poke a hole with a skewer while the piece is still a little soft if you want to string them later. Work on a tray so they retain shape while cooling.
Try simple texture stamps from household objects. Fork tines, bottle caps, or small cookie cutters give clear patterns. Press once and lift, then let the impression stay as the material hardens. These small touches make the pieces feel special without extra mess.
Storing or Reusing This Project
Keep unused cornstarch and the dry measuring cup in a dry place for your next session. The small amount of leftover mixed gel usually does not store well in the fridge unless you plan to use it within a day.
If you want to save a partially used piece, wrap it in plastic wrap and store it in an airtight container to slow moisture loss. That helps keep flexibility for a short time. Over days the texture changes and you will notice gradual hardening.
Clean up is straightforward. Wash pans and spoons with warm water and dish soap soon after use. If any dried bits cling to tools or the pan, soak them for a few minutes and the residue will come off easily. Wipe counters with a damp cloth.
A few times I stored finished pieces in a small box with parchment paper between them. That kept shapes from sticking together and made a nice little collection for craft display or gift tags.
FAQs About Easy Simple Cornstarch Bioplastic
Is this safe for kids to touch and shape?
Yes. The ingredients are common and non-toxic in small, handle-safe amounts. Keep kids away from the hot pan and do the heating step yourself. Once the material cools enough to handle, children can shape it. If you have a child who mouths objects, treat finished pieces as not food and supervise closely.
How messy will this get and how do I clean up?
You will see some cornstarch dust while measuring, which wipes up easily. The pot may have some stickiness that loosens with warm, soapy water. If a small spill gets on clothing, rinse with water and wash as usual. Lay down a sheet of paper or placemat under your work area to make cleanup faster.
Can I skip the glycerin or use something else?
Glycerin helps the final piece stay a little flexible and resist cracking. Leaving it out can still create a usable material, but it may be more brittle. I recommend using the 1 tablespoon called for for the best balance. If you have no glycerin, consider trying the recipe once as written when you can get glycerin later for comparison.
How long will finished pieces last?
These items keep their form for several weeks when kept dry and away from extreme heat. Over time they will slowly harden more. Treat them like simple keepsakes rather than long-term toys. If you want to reuse the idea, making a fresh batch is fast and satisfying.
What if my child wants a colorful project?
Add food coloring in step 3 while the mix is still warm. A drop or two is enough for pale color; use more slowly for deeper shades. When you use bright colors, work on a tray you can wash. Some strong colors may stain light surfaces, so test a small amount on a spare dish if you worry about staining.
A Final Helpful Note
Be gentle with yourself on the first try. Expect a few imperfect shapes and small differences in texture. Those small surprises are part of the fun and a good chance to learn what thinner or thicker pieces feel like. Once you make the recipe once you’ll know the warming cues, the feel under your spoon, and how long cooling takes in your home.
If you enjoy exploring textures, keep a small notebook or phone photo log of what worked. Note how long items took to harden and whether you used molds or pressed shapes by hand. Those little notes make the next session quicker and more confident.
Most of all, make space for the mess and the waiting. The recipe honors busy schedules because it has a short active time and gives you options for quick results or slow-dried keepsakes. It stays friendly whether you have five minutes or an hour.
Conclusion
If you want a different method and photos to compare, the Instructables tutorial offers step-by-step pictures that can help you visualize variations: DIY Bio-plastics : 6 Steps (with Pictures) – Instructables. For more recipe ideas and printable collections to try later, this small bioplastic guide collects several approaches and inspiration: Bioplastic Cook Book – Issuu.
If you want another take from our site with pressed-flower ideas or slight shaping tips, see our pressed flowers recipe and ideas, and for the core recipe and extras check the main cornstarch bioplastic page for more photos and notes. Pressed flowers approach Simple cornstarch bioplastic overview More DIY cornstarch bioplastic
Enjoy the experiment. Keep it simple, trust the small cues, and celebrate the pieces you make.
PrintEasy Simple Cornstarch Bioplastic

A fun and simple DIY project to make bioplastic using cornstarch, ideal for kids and quick crafting.
- Prep Time: 10 minutes
- Cook Time: 10 minutes
- Total Time: 60 minutes
- Yield: Varies based on thickness of shapes
- Category: Craft
- Method: Stovetop
- Cuisine: N/A
- Diet: N/A
Ingredients
- 1 cup cornstarch
- 1 cup water
- 1 teaspoon vinegar
- 1 tablespoon glycerin
- Food coloring (optional)
Instructions
- Mix together the cornstarch, water, vinegar, and glycerin in a saucepan over medium heat.
- Stir continuously until the mixture thickens into a gel-like consistency.
- Add food coloring if desired, and stir until even.
- Remove from heat and let cool, then mold or shape as desired.
- Allow it to harden completely before using.
Notes
Keep a damp cloth handy for easy cleanup, and use adult supervision at the stove due to hot mixtures.
Nutrition
- Serving Size: N/A
- Calories: Minimal (not intended for consumption)
- Sugar: 0g
- Sodium: 0mg
- Fat: 0g
- Saturated Fat: 0g
- Unsaturated Fat: 0g
- Trans Fat: 0g
- Carbohydrates: 80g
- Fiber: 0g
- Protein: 0g
- Cholesterol: 0mg