

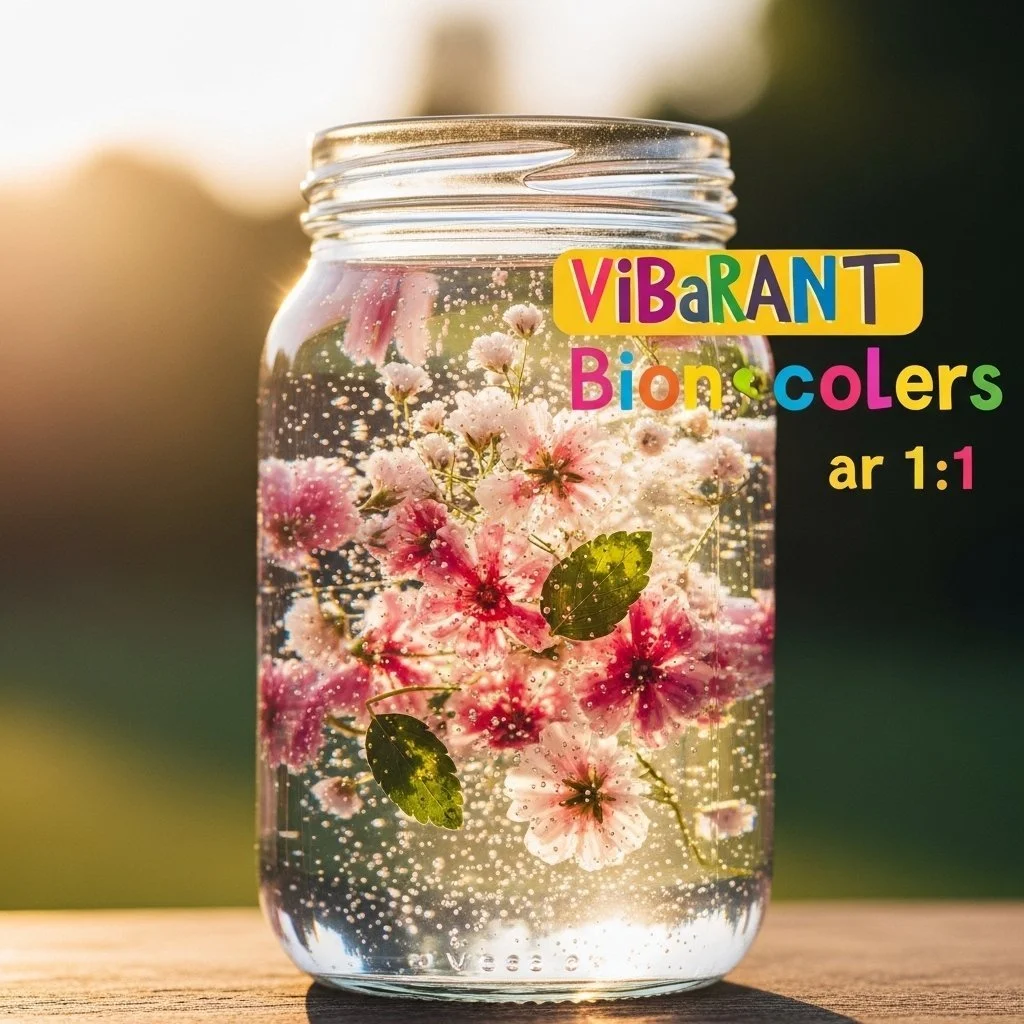
A busy afternoon, a little person asking to make something colorful right now, and a cupboard with plain gelatin. That is often how DIY Vibrant Bioplastic Suncatchers begin at my house. I set out a small saucepan, some measuring spoons, and a tray, and we turn a handful of pantry items into glowing pieces that catch the sun. If you want a simple recipe with clear steps and reliable results, try this version and follow the small tips that make it easier than it looks. For more background on the recipe, you can take a look at the full walkthrough here: DIY bioplastic suncatchers recipe.
Why You’ll Love Making DIY Vibrant Bioplastic Suncatchers

This project works well because it uses things you already have and it moves quickly from start to finish. You do not need special tools or long prep. The materials are safe and familiar, and the steps give visible progress every few minutes. That reliable pace helps kids stay interested and keeps the grown-up stress low.
You can make these suncatchers in one afternoon, or set them up and let them dry overnight while you do other things. The texture is forgiving. If a piece bubbles or a color blurs, that imperfection often becomes a charming detail. You get bright color, a lightweight finished piece, and plenty of chances to try a second round without much cost.
This activity fits into real-life schedules. You can do the warm part while supervising a snack, and then let the suncatchers firm up while dinner cooks. The cleanup stays simple because everything washes out of the saucepan and spoon with warm water. If you want step-by-step photos and a slightly different angle on the technique, we have another version to compare here: bioplastic suncatchers project.
A Quick Look Before You Begin
This project takes a little patient stirring up front, and then waiting while the pieces set. Plan about 10 to 15 minutes of hands-on time for mixing and pouring, then several hours to overnight for drying and firming. Work on a surface you can wipe or cover with parchment paper.
The mess level stays low if you keep a small bowl of warm soapy water nearby for drips and a damp cloth for quick wiping. Adult help is needed for the warming step. Kids can do the measuring, coloring, and pouring under supervision. Expect some trial and error the first time with thickness and color intensity. That is normal and part of the fun.
Set a timer for checking the shapes once they feel cool to the touch. You will know they are nearly ready when the surface looks matte and not wet. If you want a visual guide for a similar craft using crayons, which helps with color play ideas, check out this post: blue crayon suncatchers.
Materials You’ll Need
Gelatin powder, unflavored
- common household item, the main ingredient for the bioplastic
Distilled or filtered water
- optional for clarity, tap water usually works too
White vinegar or lemon juice
- a teaspoon; helps the pieces set clear
Food coloring or liquid watercolor (optional)
- bright, easy to use
Natural pigments like beet powder or turmeric (optional)
- food-safe color alternatives
Silicone molds or flat tray lined with nonstick paper
- easy release; a flat tray gives larger shapes
Measuring spoons and cups
- accurate measure keeps results consistent
Small saucepan
- for gentle warming
Wooden spoon
- for stirring without scratching cookware
Dropper or small spoon
- for precise color drops and filling small molds
Scissors
- to trim edges after drying
Hole punch
- to make hanging holes
Thin ribbon, cotton thread, or fishing line
- for hanging finished suncatchers
All of these items are easy to find and budget-friendly. Use silicone molds you already own or a lined tray for a low-cost option.
Step-by-Step Directions

- Measure and hydrate the gelatin by sprinkling it over cold water and letting it sit for 5-10 minutes.
- You will see the powder absorb the water and puff up slightly.
- It should look like thick flakes, not dry dust.
- Warm the gelatin and water mixture in a saucepan on low heat, stirring until it becomes silky.
- Keep the heat low and stir slowly to avoid lumps.
- Look for a clear, smooth texture, not boiling.
- Stir in a teaspoon of white vinegar or lemon juice for clarity.
- Mix it in fully; this helps the final piece look less cloudy.
- You will not taste much acidity once the suncatcher dries.
- Add a few drops of food coloring or natural pigments, stirring gently.
- Start with one or two drops and add more if you want deeper color.
- Stir softly to keep the mixture even and avoid foam.
- Pour the mixture into molds or onto parchment paper, ensuring an even flow.
- Tilt molds gently or use a dropper for small shapes.
- Try to pour slowly for neat edges and even thickness.
- Use a toothpick to remove bubbles and create details.
- Pop any visible bubbles right away with a toothpick tip.
- You can also drag the toothpick to make swirls or patterns.
- Allow the pieces to set at room temperature for several hours or overnight.
- Place them somewhere warm but out of direct dust and drafts.
- They firm up and become less sticky as they dry.
- Once firm, peel from the mold and trim edges.
- The pieces should lift from silicone easily; use scissors for small nubs.
- If edges feel soft, let them dry a bit longer before trimming.
- Punch holes for hanging and attach ribbons or threads.
- Use a standard hole punch on a firm piece; choose a place away from thin edges.
- Tie on ribbon, thread, or fine fishing line for a neat hang.
- Hang your suncatcher in a warm spot to enjoy the light.
- A sunny window works well; avoid direct heat like a radiator.
- Watch how the color changes through the day and how shadows fall.
The Learning Behind This DIY

Making these suncatchers teaches simple science and useful skills. You notice cause and effect when gelatin softens in cold water then melts into a smooth liquid with heat. That change from solid to liquid and back again gives a clear example of reversible physical change that kids can see and touch.
Fine motor skills improve with measuring, pouring, and pushing a toothpick to fix bubbles. Those small motions help coordination and patience. Mixing colors helps with visual choices and prediction guessing what happens when two colors blend and then checking the result later.
The vinegar or lemon juice tip gives a chance to explain how a small ingredient can change clarity by affecting the gelatin structure. Keep the explanation short and concrete: a little acid makes the pieces less cloudy, so the light passes through better. These are bite-sized lessons you can mention in the moment while keeping the project playful.
Troubleshooting Common Issues
If the mixture starts to foam while warming, lower the heat and stir gently.
- Foam makes cloudy spots in the finished piece and can trap bubbles.
- Skimming foam with a spoon before pouring helps.
If the suncatcher feels sticky after several hours, it likely needs more drying time.
- Place it in a slightly warmer, dry spot for a few more hours or overnight.
- Avoid direct sunlight that could warp thin pieces.
If colors look washed out, try adding a few more drops next time.
- Color often fades slightly as the piece dries.
- Make a test shape first if you want a specific, bright tone.
If edges tear when you remove the shape, it may be too thin or not fully set.
- Let the piece dry longer and avoid pulling at thin corners.
- For delicate shapes, leave them in the mold a little longer and trim after a day.
If you want sturdier shapes, pour a slightly thicker layer.
- A thickness of a few millimeters usually holds well for small hangers.
- If a shape breaks, keep the pieces and try a mosaic-style hanger with glued edges.
If you need inspiration for a slightly different look, such as mixing wax for sturdiness, you can find a related idea in our post about crayons and suncatchers which gives color ideas and handling tips: blue crayon suncatchers.
Easy Variations to Try
- Layered colors: Pour a thin layer, let it set until tacky, then add a second color.
- This creates clear bands and a stained-glass look.
- Work quickly so layers bond but do not mix completely.
- Patterned swirls: Use a toothpick or skewer to drag colors into spirals.
- Make one spot a bold contrast color for a focal point.
- Swirls look great when light passes through them.
- Natural pigments only: Use beet powder or turmeric for soft, subtle tones.
- These create more muted, earthy colors.
- They stain hands more than food coloring, so wear old clothes.
- Mixed media: After drying, glue on small beads or thread a few small charms.
- This adds weight and texture for a different hanging style.
- Keep additions light so the bioplastic still hangs flat.
These variations keep the project fresh while staying simple and low-prep. They work for a range of ages and let kids choose how much complexity they want.
Storing or Reusing This Project
When you store finished suncatchers, keep them flat and away from heat.
- A shallow box lined with tissue keeps shapes from rubbing.
- Avoid stacking heavy items on top of them.
Leftover clear bioplastic pieces can be gently warmed and reshaped if you like.
- Warm a small piece very gently over low steam to soften, then press into a new mold.
- Reuse saves materials and lets you experiment without wasting pieces.
Clean tools right away with warm water and a sponge.
- Gelatin rinses off when warm; dry tools to avoid moisture buildup.
- Parchment or nonstick liners save cleanup and can be composted if you used paper liners.
If you like making sun art in different materials, we also use a crystal seashell process to give similar preservation ideas and storage tips; it may spark ways to display and reuse fragile pieces: crystal seashells recipe.
FAQs About DIY Vibrant Bioplastic Suncatchers
Will this make a big mess?
I have a toddler who touches everything. Mess is usually minimal. The trick is one adult handling the saucepan and the child doing coloring and pouring with supervision. Keep a damp cloth and a bowl of warm soapy water nearby for drips. If a toddler pokes a drying piece, it will probably bend a little, but that often fixes when it fully dries. Expect small spills and plan to wipe right away.
Is this safe for kids to help with?
Yes, if an adult does the warm step. The ingredients are food-safe gelatin and kitchen acids like lemon or vinegar. Let kids measure, stir before warming, and add color. Keep them away from the hot pan. I watch closely during the warming and pouring, and then hand over the safe tasks.
Can I use something other than gelatin?
I stick to unflavored gelatin for this exact method because it sets predictably and is easy to find. If you need a different medium, look up a specific recipe for that material. For success on the first try, use the materials list here and avoid substitutions until you feel comfortable with the process.
How long will the suncatchers last?
They last well indoors out of direct heat. Over time they can become brittle in very dry heat or soften in humidity. If one piece warps a bit, you can gently flatten it under a heavy book for a day or remelt it and reshape. They are not indestructible like glass, but they hold up nicely as window decorations.
A Final Helpful Note
This project rewards patience more than speed. Take your time with the warm part and watch the mixture change textures. Small imperfections make these suncatchers feel handmade and lived-in. If something does not look perfect the first time, save the pieces and try another batch the next day. Enjoy the light and the colors rather than chasing perfection.
Conclusion
If you want more variations and a slightly different take on bioplastic suncatchers, this tutorial offers a nice comparison: DIY Bioplastic Suncatchers: Eco-Friendly Art That Shines Bright!.
For a printable, in-depth guide you can use again and again, this PDF tutorial is handy: DIY Bioplastic Suncatchers PDF Tutorial | Fun Science Craft for Kids.
PrintDIY Vibrant Bioplastic Suncatchers

Create colorful bioplastic suncatchers using basic pantry ingredients and simple steps, perfect for engaging kids in a fun craft project.
- Prep Time: 15 minutes
- Cook Time: 10 minutes
- Total Time: 360 minutes
- Yield: 4 suncatchers 1x
- Category: Craft
- Method: DIY Crafting
- Cuisine: N/A
- Diet: N/A
Ingredients
- 2 tablespoons gelatin powder, unflavored
- 1 cup distilled or filtered water
- 1 teaspoon white vinegar or lemon juice
- Food coloring or liquid watercolor (optional)
- Natural pigments like beet powder or turmeric (optional)
- Silicone molds or flat tray lined with nonstick paper
- Measuring spoons and cups
- Small saucepan
- Wooden spoon
- Dropper or small spoon
- Scissors
- Hole punch
- Thin ribbon, cotton thread, or fishing line
Instructions
- Measure and hydrate the gelatin by sprinkling it over cold water and letting it sit for 5-10 minutes.
- Warm the gelatin and water mixture in a saucepan on low heat, stirring until it becomes silky.
- Stir in a teaspoon of white vinegar or lemon juice for clarity.
- Add a few drops of food coloring or natural pigments, stirring gently.
- Pour the mixture into molds or onto parchment paper, ensuring an even flow.
- Use a toothpick to remove bubbles and create details.
- Allow the pieces to set at room temperature for several hours or overnight.
- Once firm, peel from the mold and trim edges.
- Punch holes for hanging and attach ribbons or threads.
- Hang your suncatcher in a warm spot to enjoy the light.
Notes
Adult supervision is recommended during the warming step. Keep a bowl of warm soapy water nearby for easy cleanup.
Nutrition
- Serving Size: 1 suncatcher
- Calories: 50
- Sugar: 0g
- Sodium: 0mg
- Fat: 0g
- Saturated Fat: 0g
- Unsaturated Fat: 0g
- Trans Fat: 0g
- Carbohydrates: 10g
- Fiber: 0g
- Protein: 0g
- Cholesterol: 0mg