How to Make a Tiny Doll Bag: Easy Craft Tutorial
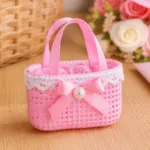
A simple and creative project for kids to make tiny doll bags using basic materials.
- Prep Time: 10 minutes
- Cook Time: 30 minutes
- Total Time: 40 minutes
- Yield: 1 tiny doll bag
- Category: Craft
- Method: Crafting
- Cuisine: N/A
- Diet: N/A
Ingredients
- Fabric scraps (cotton works well)
- Scissors (adult supervision recommended)
- Needle and thread (or fabric glue)
- Ribbon or string (for handles)
- Optional: embellishments like buttons or stickers
Instructions
- Cut the fabric into two rectangles, about 5×7 inches.
- Prepare the sides by placing the rectangles with inside sides facing out.
- Sew the bottom edge securely using needle and thread or fabric glue.
- Form the sides by folding inward and securing them.
- Add ribbon handles, attaching it securely to the inside of the bag.
- Turn the bag inside out to reveal the finished shape.
- Decorate the bags with buttons or stickers for a personal touch.
- Fill the bags with doll accessories for playtime.
Notes
Make sure to supervise younger children during cutting and sewing.
Nutrition
- Serving Size: 1 bag
- Calories: 0
- Sugar: 0g
- Sodium: 0mg
- Fat: 0g
- Saturated Fat: 0g
- Unsaturated Fat: 0g
- Trans Fat: 0g
- Carbohydrates: 0g
- Fiber: 0g
- Protein: 0g
- Cholesterol: 0mg