

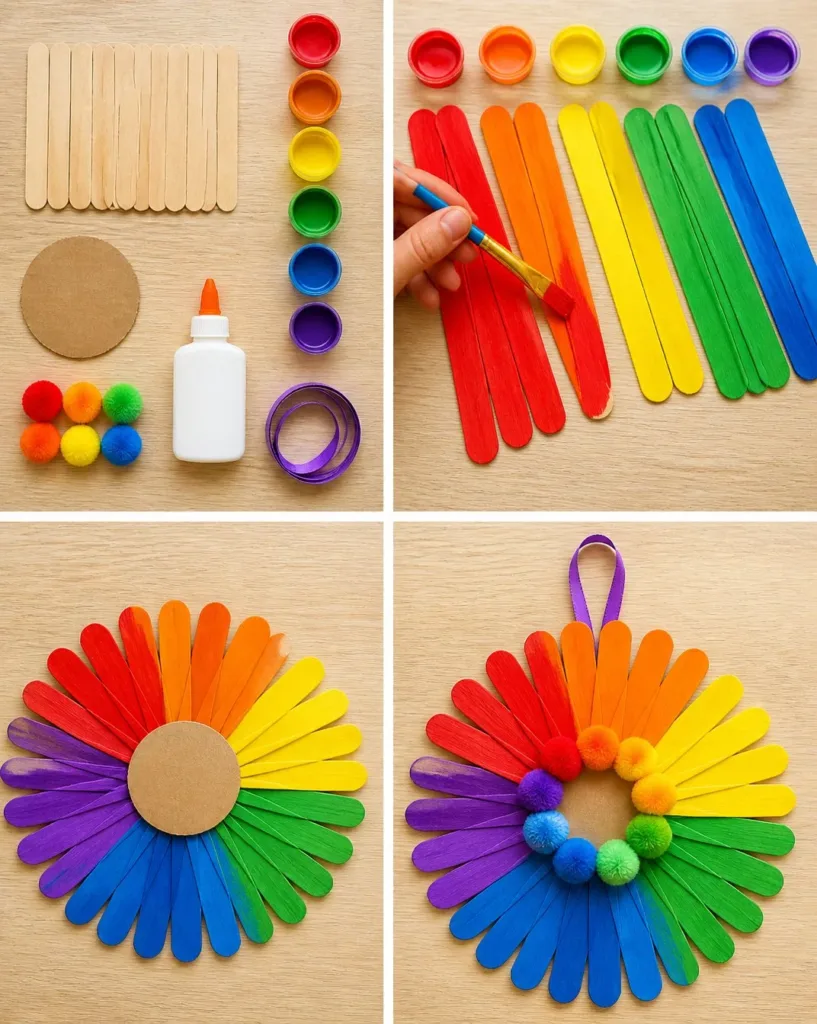
The busy afternoons often lead to spontaneous moments of creativity. Picture this: your kids come rushing in, eager to make something bright and cheerful with whatever you have at hand. That’s when the idea of crafting a DIY Rainbow Popsicle Stick Daisy Wheel comes to the rescue! This simple, colorful project is perfect for using up some craft supplies and keeping little hands engaged. Plus, it’s an excellent opportunity to explore colors while working together on something fun and decorative. You may also find Diy Rainbow Bottle Cap Daisy Wreath Tutorial useful.
Why This DIY Rainbow Popsicle Stick Daisy Wheel Works So Well
Creating a DIY Rainbow Popsicle Stick Daisy Wheel is a beautiful way to engage children while being incredibly low-prep. You don’t need any fancy equipment or specialized tools to get started. The materials are easily accessible and are likely already hanging around your home. You may also find Big Rainbow Pinwheel Garden Stake Outdoor Yard Decor useful.
This activity is reliable, demanding minimal adult intervention. You can set everything up and let the kids dive into the process, embracing their natural creativity. It’s satisfying to see them overcome challenges and celebrate their colorful creations. The joy of crafting in this way fits perfectly into real-life schedules, ensuring you can enjoy quality time together without the stress of complicated procedures. You may also find Diy Butterfly Craft Rainbow Magic useful.
A Quick Look Before You Begin
Before you set off on making your Rainbow Popsicle Stick Daisy Wheel, let’s have a brief overview of what lies ahead. Expect to dedicate around thirty to forty-five minutes to complete the project. There might be a bit of mess with paint and glue, but with a few paper towels or old newspapers spread out, you’ll keep everything manageable. You may also find Diy Epoxy Resin Stickers Step By Step Guide useful.
Adult involvement mainly consists of gathering materials and guiding your kids through steps that might require an extra hand, such as aligning the painted sticks. It’s a chance for you to bond and grow together through creating something beautiful.
Materials You’ll Need
To make your DIY Rainbow Popsicle Stick Daisy Wheel, gather the following materials:
- 30 craft sticks
- 6 acrylic paint colors
- Cardboard circle
- 6 pom-poms
- Glue
- Ribbon
Each of these items is typically easy to find. Craft sticks and glue are common household items, while acrylic paints can often be found lying around from previous projects. The ribbon might come from gift wrap supplies, making this project budget-friendly and accessible.
Step-by-Step Directions
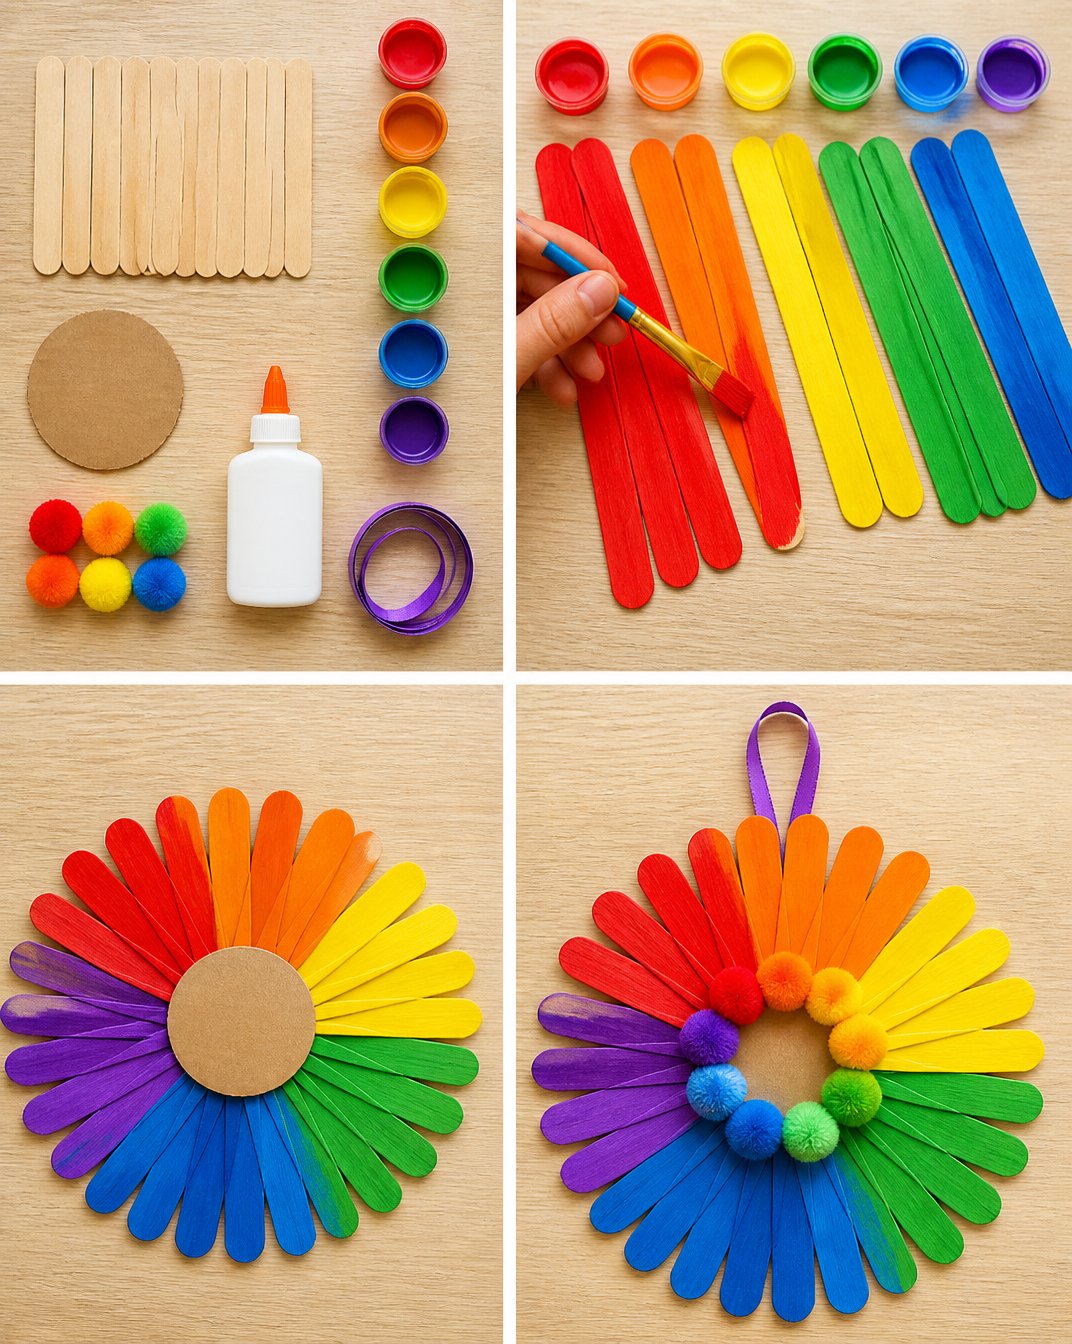
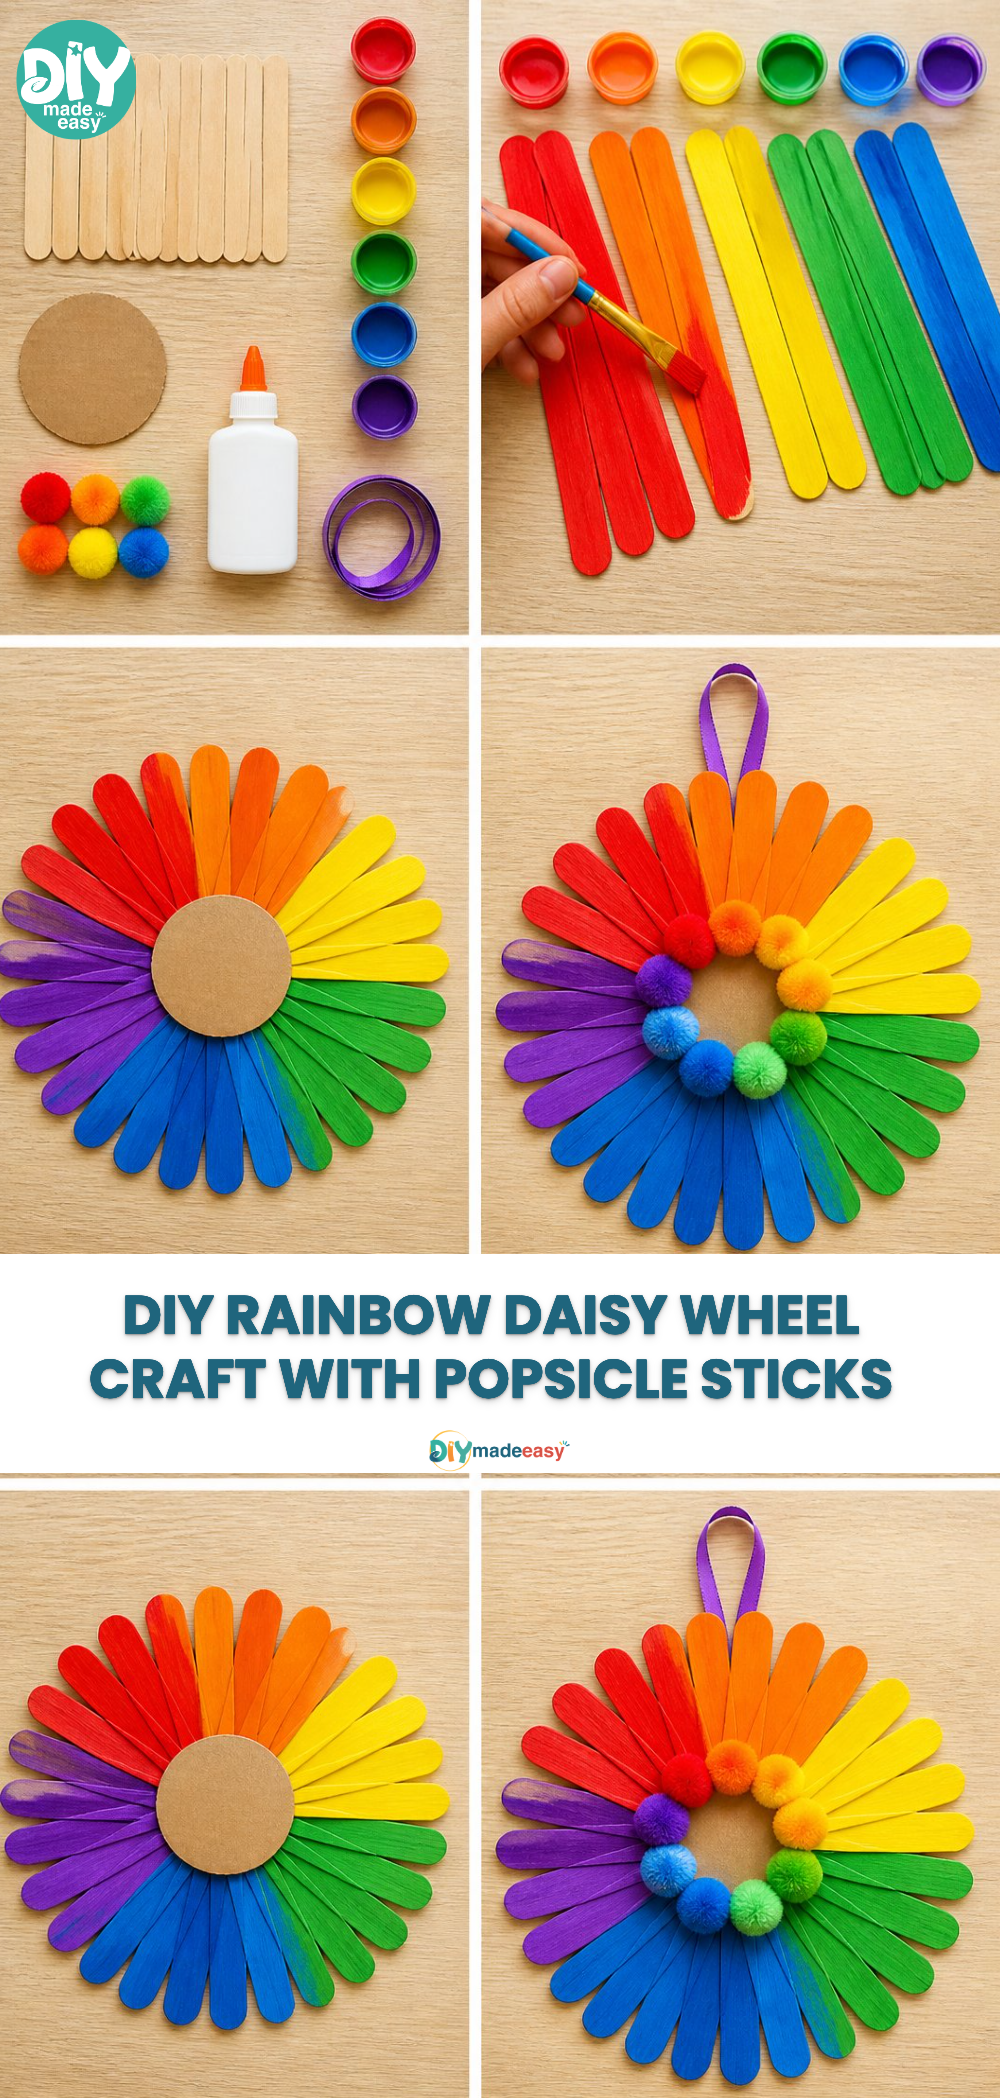
Start by painting groups of craft sticks in six different colors from the rainbow. Think of red, orange, yellow, green, blue, and purple. Let the kids choose the colors they like best! Using multiple brushes can speed up the drying time.
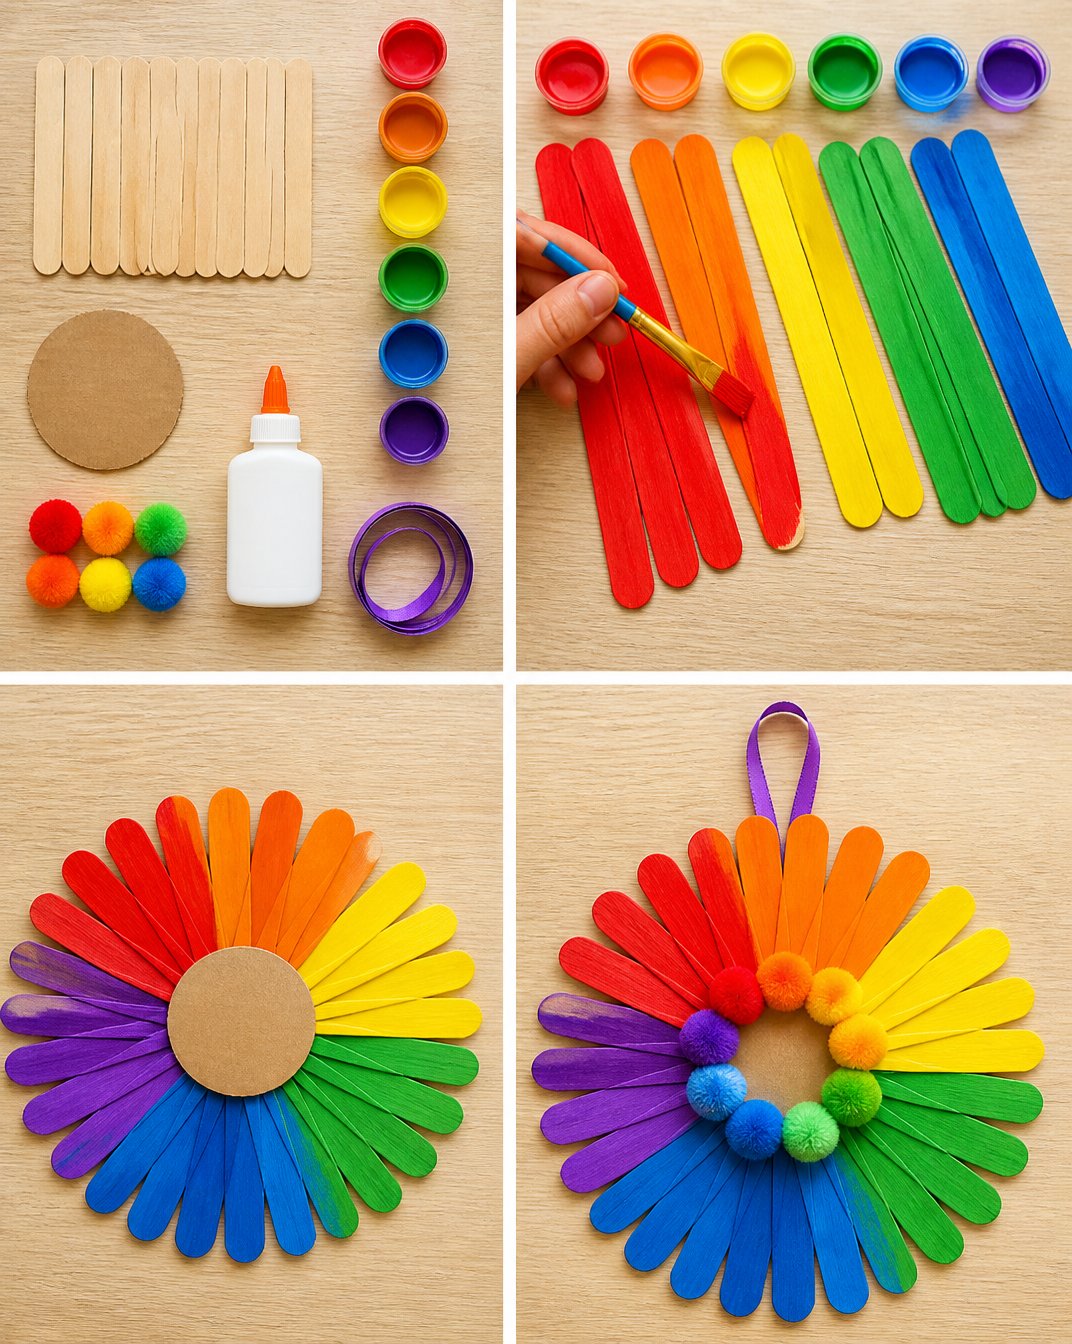
Once the painted craft sticks are dry, arrange them into overlapping flower petals around your cardboard circle. This not only creates a delightful daisy shape but also allows little ones to explore arrangements and symmetry.
Finally, attach colorful pom-poms to the center of the flower as the “pollen” and use a piece of ribbon to create a hanging loop. This part adds an extra touch of fun and allows the kids to make their designs personal and unique.
The Learning Behind This DIY
While crafting, your kids will unknowingly practice a variety of skills. They will develop fine motor skills as they manipulate craft sticks, paint, and glue. This activity helps nurture hand-eye coordination as they align and secure each piece into place.
Moreover, kids will learn about colors and shapes, enhancing their cognitive skills. Through trial and error in arranging the petals symmetrically, they’ll also grasp fundamental concepts of cause and effect—seeing what happens when designs vary and how to fix any mistakes.
Troubleshooting Common Issues
If something doesn’t go as planned, don’t worry. One common issue is if the paint doesn’t dry quickly enough, leading to smudging. To mitigate this, try ensuring that the painted craft sticks are laid flat and in a well-ventilated area.
If the sticks aren’t sticking together very well, double-check that you’re using enough glue and letting it dry fully. If small parts of the project come apart later, reassure the kids that it’s easy to fix and a common part of creating. Simply add a bit more glue, let it dry, and they’ll be right back on track!
Easy Variations to Try
Here are a few optional twists to make the project even more enjoyable:
- Use glitter or sequins on the petals for a sparkly effect.
- Create seasonal versions: add leaves for a spring feel or use autumn colors.
- Repurpose the project for different occasions, giving it a holiday theme with themed colors or embellishments.
Each variation allows your kids to express their creativity while exploring different artistic outcomes.
Storing or Reusing This Project
Your DIY Rainbow Popsicle Stick Daisy Wheel can be proudly displayed at home or saved for future crafting sessions. Make sure it’s in a dry place to avoid any moisture damage. If you’d like to clean up or repurpose materials afterward, consider reusing the craft sticks or the cardboard circle for new projects. This helps minimize waste and teaches kids the value of reusing materials.
FAQs About DIY Rainbow Popsicle Stick Daisy Wheel
Is the paint going to make a mess?
While kids can be a bit messy during craft projects, keeping some paper towels or an old newspaper handy can help catch spills easily. Just remind them to work carefully and have fun!
Are the materials safe for my younger children?
All the materials listed are kid-friendly, but always supervise younger children, especially while they use glue. Make sure to choose non-toxic paints to keep everything safe.
What if my child struggles to keep the sticks in place while gluing?
If your little one is having trouble, you can hold the pieces together until the glue starts to set. Alternatively, using a bit of tape to hold them together temporarily can also help while the glue dries.
Do we have to stick with a rainbow theme?
Not at all! Feel free to use any color scheme that your child prefers. Exploring colors differently makes this project even more personal and special.
A Final Helpful Note
Before you dive into creating your DIY Rainbow Popsicle Stick Daisy Wheel, remember that the goal here is to have fun and enjoy the process. Creativity can flourish in flexible ways. Each unique project will reflect the personality of your children, bringing their colorful ideas to life. Embrace the moments of laughter, creativity, and learning as you craft together.
Conclusion
Crafting provides a wonderful opportunity for children to express themselves and develop various skills. If you’re interested in expanding your crafting repertoire, consider check out these embroidery ideas for great projects. Additionally, if you’re looking for tips to enhance your gaming experience, the guide for Everafter Falls may offer you some intriguing insights. Enjoy your crafting adventures!
PrintDIY Rainbow Popsicle Stick Daisy Wheel
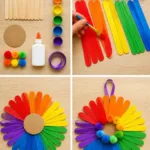
A fun and colorful crafting project that engages kids in creating a rainbow daisy wheel using simple materials.
- Prep Time: 15 minutes
- Cook Time: 30 minutes
- Total Time: 45 minutes
- Yield: 1 decorative daisy wheel 1x
- Category: Craft
- Method: Crafting
- Cuisine: N/A
- Diet: N/A
Ingredients
- 30 craft sticks
- 6 acrylic paint colors
- Cardboard circle
- 6 pom-poms
- Glue
- Ribbon
Instructions
- Start by painting groups of craft sticks in six different colors from the rainbow.
- Once the painted craft sticks are dry, arrange them into overlapping flower petals around your cardboard circle.
- Finally, attach colorful pom-poms to the center of the flower as the “pollen” and use a piece of ribbon to create a hanging loop.
Notes
Ensure all materials are kid-friendly and supervise younger children when using glue. Keep paper towels handy to manage messes.
Nutrition
- Serving Size: 1 project
- Calories: 0
- Sugar: 0g
- Sodium: 0mg
- Fat: 0g
- Saturated Fat: 0g
- Unsaturated Fat: 0g
- Trans Fat: 0g
- Carbohydrates: 0g
- Fiber: 0g
- Protein: 0g
- Cholesterol: 0mg