

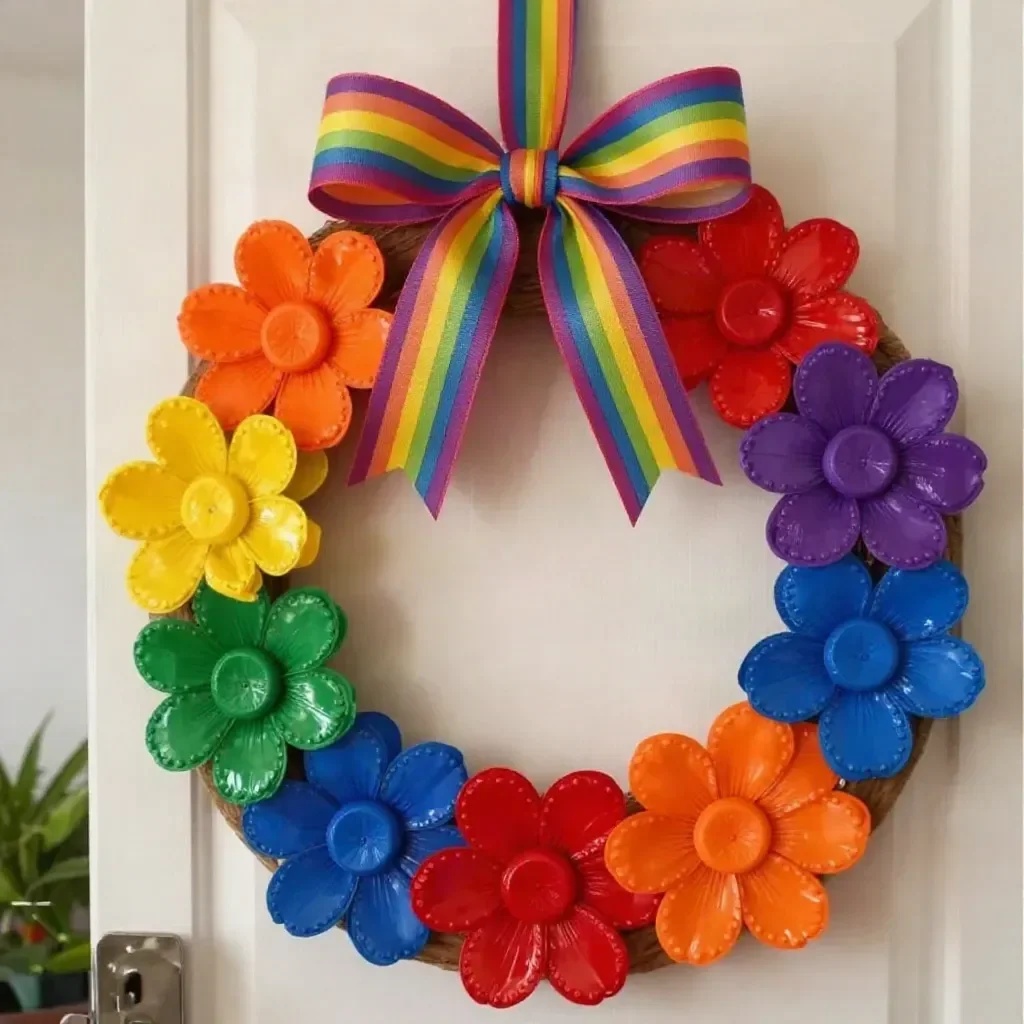
It’s a busy afternoon, and your little ones are buzzing with creative energy, eager to make something that will brighten up your home. With just some plastic bottle caps and a cardboard ring, you can easily create a Rainbow Bottle Cap Daisy Wreath. This delightful project brings together colors and fun, perfect for those moments when craft time is needed immediately. It’s all about tapping into their imagination while keeping the steps simple and enjoyable. You may also find Baking Soda Rainbow Crystal Forest useful.
Why This Rainbow Bottle Cap Daisy Wreath Works So Well
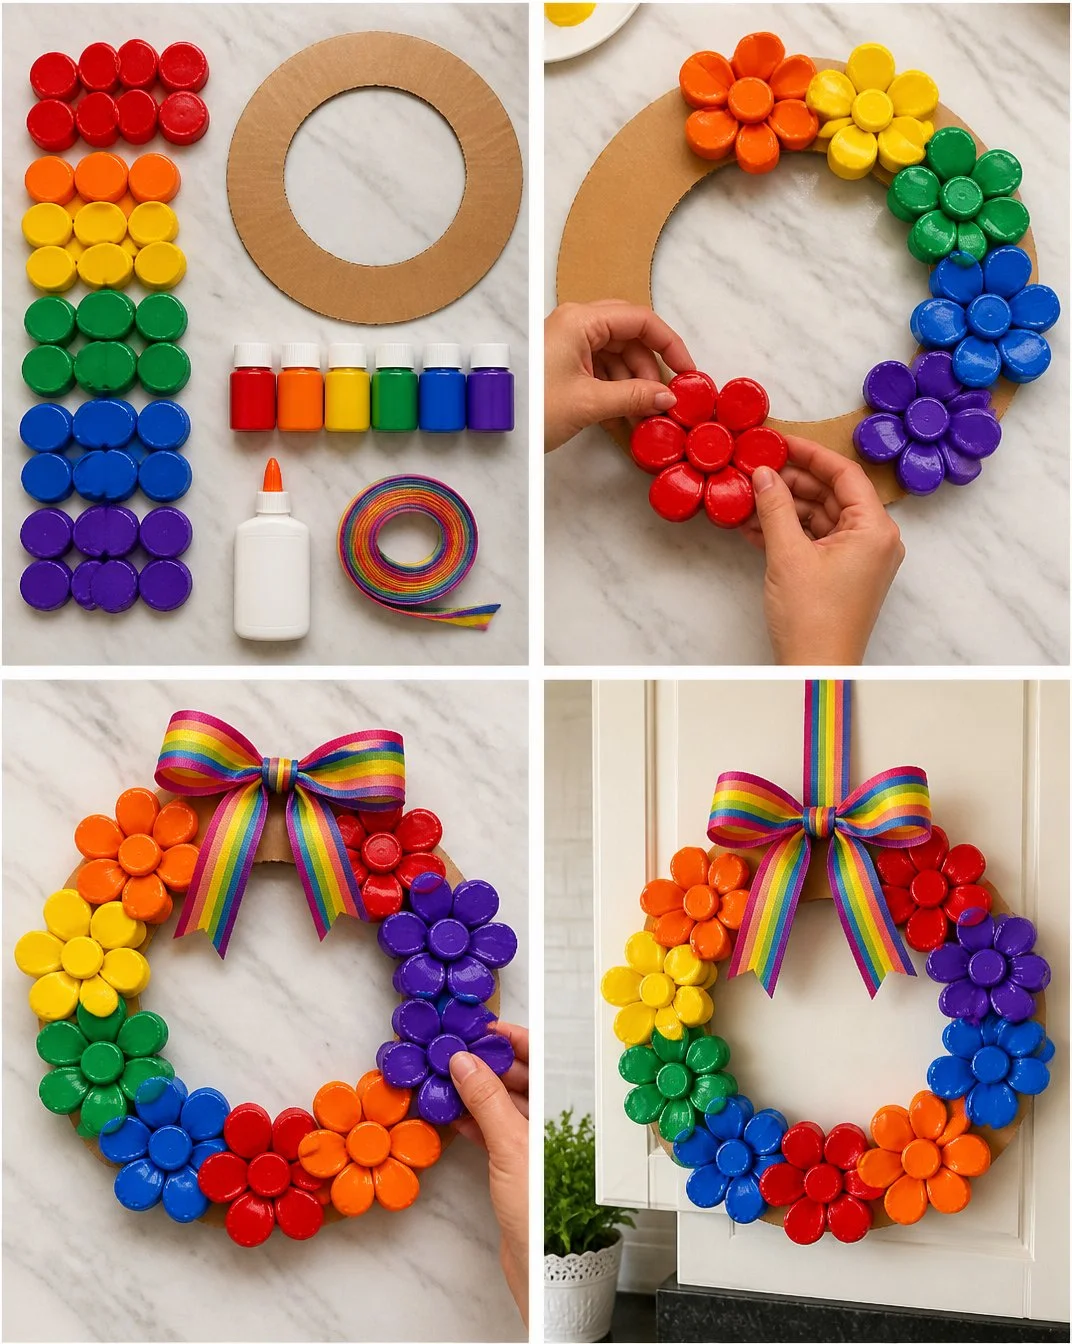
This project is not just colorful; it’s low-prep, making it ideal for anyone with a tight schedule. You won’t need to spend hours gathering supplies or prepping complex steps. Most importantly, you can create this wreath with items found around the house, like plastic bottle caps and cardboard ring. When kids dive into art projects, they thrive on expression and creativity. As they see the cap colors come together, they’ll develop a sense of accomplishment that makes crafting so fulfilling. You may also find Cornstarch Rainbow Suncatchers useful.
A Quick Look Before You Begin
You can complete this project in under an hour, which is quite manageable even on busy days. Set up a clean workspace at the kitchen table or in a dedicated craft corner. Since acrylic paint can be used, there might be some mess, so consider laying down newspaper or an old tablecloth for easy cleanup. All ages can participate in this activity, but younger children may need some adult supervision, particularly when using glue. You may also find Creative Science Craft Kids Rainbow Light Show useful.
Materials You’ll Need
- Plastic bottle caps – common household item, budget-friendly
- Cardboard ring – often found in recycled materials
- Acrylic paint – vibrant colors add life to the project
- White glue – for secure bonding
- Ribbon – to add a cheerful finishing touch
By gathering these materials ahead of time, you will create an inviting atmosphere perfect for developing creativity. You may also find Crystal Pinecones Frozen Rainbows useful.
Step-by-Step Directions
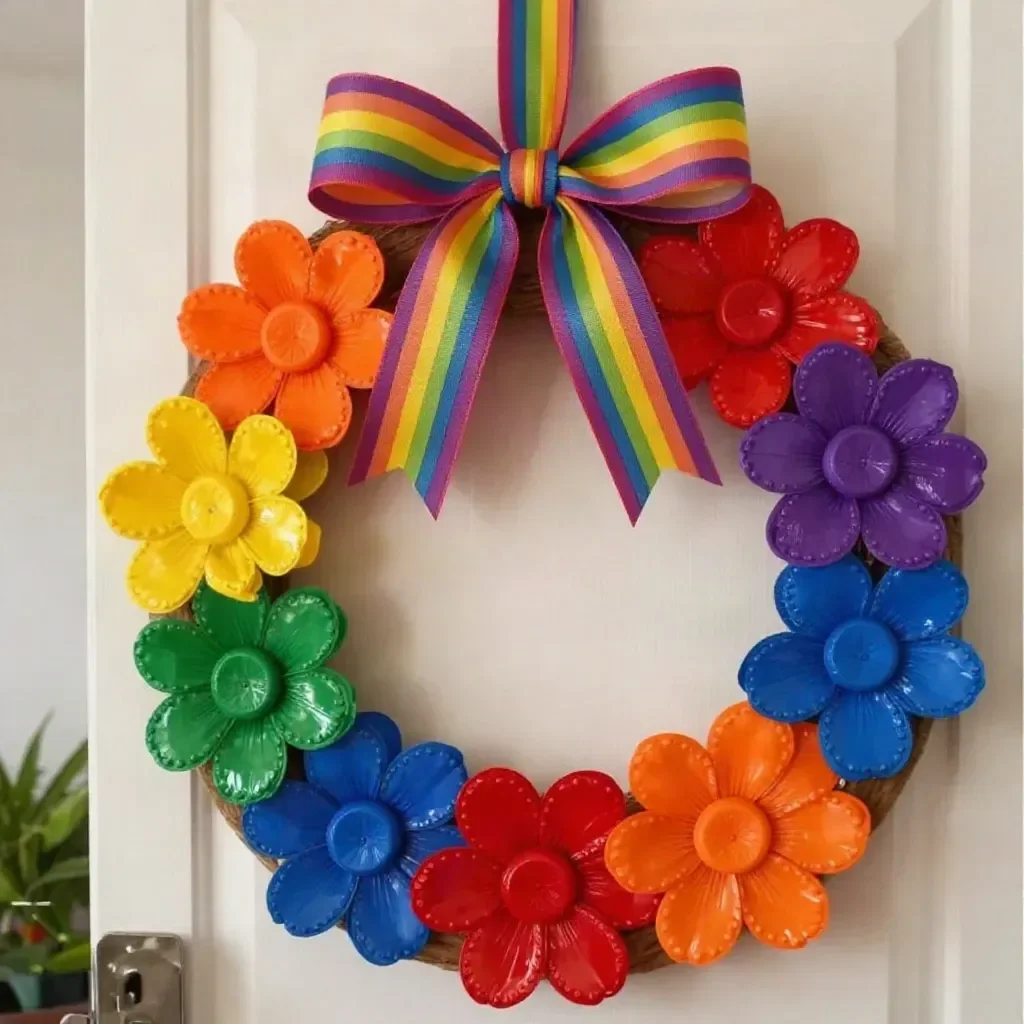
Start by painting the bottle caps in bright rainbow colors. Get creative with your color choices! Allow the little ones to express their personalities by choosing their favorite shades.
Once the paint is dry, take the cardboard ring and begin gluing the bottle caps onto it, overlapping them to form daisy flowers. This step is where the wreath starts to come to life!
Keep gluing until the entire ring is adorned with your lovely flowers. Encourage your kids to arrange the colors in patterns or random bursts—whatever feels right to them.
Finish off your wreath by tying a cheerful ribbon bow at the top. This small detail adds a personal touch that makes the wreath even more special.
Find a special spot to hang your vibrant creation and admire your handiwork! Each time you see it, it will remind you of that fun crafting time.
The Learning Behind This DIY

Creating the Rainbow Bottle Cap Daisy Wreath helps kids practice fine motor skills as they handle the glue and paint. It also encourages creativity and color recognition. As they learn to arrange the caps and understand overlapping designs, they gain insight into basic design principles and cause and effect, such as how colors interact with one another. Whether it’s a burst of red beside a calming blue or how the shape of the caps creates a flower effect, this activity nurtures both artistic and critical thinking skills.
Troubleshooting Common Issues
If something doesn’t go as planned, don’t worry—everyone has faced challenges in crafting. Here are some common problems and easy solutions:
Paint Clumping: If you notice the paint clumping, add a drop of water to thin it out. This helps the color spread more evenly on the bottle caps.
Caps Not Sticking: If the caps are falling off, ensure to give ample drying time for the glue. Using a stronger adhesive can also help.
Messy Hands: Keep wet wipes nearby during the project to quickly clean up any paint or glue that gets on little hands or the table.
Easy Variations to Try
If you’re looking to change things up, consider these variations:
- Use seasonal colors for different holidays, like pastels for spring or warm hues for autumn.
- Create a two-sided wreath with designs on both sides for added fun.
- Incorporate other materials, such as glitter or small artificial flowers, to embellish the wreath even further.
Storing or Reusing This Project
After your creative session, think about how to store or reuse materials. You can keep any leftover bottle caps for future projects or save the cardboard ring for your next craft endeavor. The wreath itself can be a temporary decoration that you adjust each season or holiday. This not only reduces waste but also encourages your kids to engage in continuous creative activity.
FAQs About Rainbow Bottle Cap Daisy Wreath
What if my kids make a mess with the paint?
It’s perfectly normal for young ones to get paint on hands, clothes, or surfaces. Lay down a protective layer before starting, and keep some wipes handy for quick cleanup. Encourage them to have fun!
Is this activity safe for toddlers?
With adult supervision, this project can be safe for young children. Just ensure that glue and scissors are handled by an adult, and opt for non-toxic paint.
Can I use other materials besides bottle caps?
Yes! If you don’t have bottle caps, any round, lightweight objects can work. Consider sponge shapes or paper circles as alternatives.
How do I store the wreath after making it?
Place the wreath in a cardboard box or wrap it in tissue paper to prevent damage when not in use.
Will the paint hold up over time?
If cured properly, the paint should last for quite a while, but keep the wreath indoors and away from moisture for the best results.
Conclusion
Conclusion
Crafting together is a wonderful experience that allows for quality time spent with loved ones. The Rainbow Bottle Cap Daisy Wreath not only nurtures creativity but also fosters a sense of accomplishment in young crafters. If you’re looking for stunning floral designs, consider sending a Sunrise Daisy Wreath™ in Alpena, MI for a touch of cheer. For those interested in a wider selection, explore the option for flowers over $80 in Santa Clarita, CA. Enjoy crafting and celebrating your vibrant creations together!
PrintRainbow Bottle Cap Daisy Wreath
A fun and colorful DIY project for kids to create a cheerful wreath using bottle caps and cardboard.
- Prep Time: 10 minutes
- Cook Time: 30 minutes
- Total Time: 40 minutes
- Yield: 1 wreath
- Category: Crafts
- Method: Crafting
- Cuisine: N/A
- Diet: N/A
Ingredients
- Plastic bottle caps
- Cardboard ring
- Acrylic paint
- White glue
- Ribbon
Instructions
- Start by painting the bottle caps in bright rainbow colors.
- Once the paint is dry, take the cardboard ring and begin gluing the bottle caps onto it.
- Keep gluing until the entire ring is adorned with your lovely flowers.
- Finish off your wreath by tying a cheerful ribbon bow at the top.
- Find a special spot to hang your vibrant creation and admire your handiwork!
Notes
Supervision may be needed for younger children, especially when using glue.
Nutrition
- Serving Size: 1 wreath
- Calories: 0
- Sugar: 0g
- Sodium: 0mg
- Fat: 0g
- Saturated Fat: 0g
- Unsaturated Fat: 0g
- Trans Fat: 0g
- Carbohydrates: 0g
- Fiber: 0g
- Protein: 0g
- Cholesterol: 0mg