

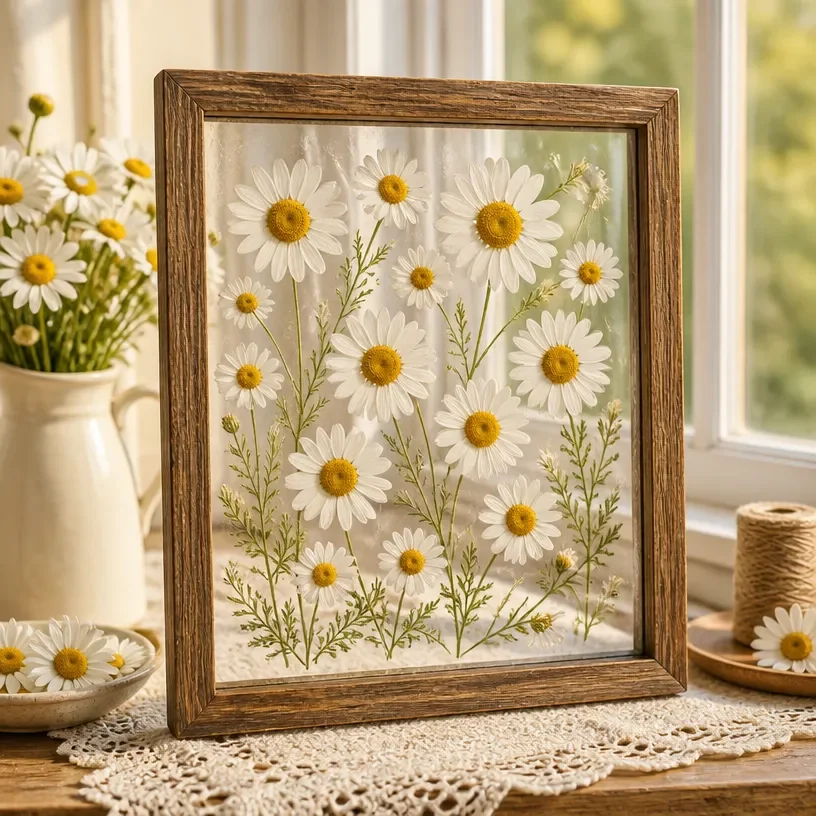
Daisy Window Art: Stunning Floral Decor Ideas You may also find Creative Bottle Window Art Easy Upcycled Decor useful.
A busy afternoon often calls for a quick and engaging craft to keep kids entertained. When they’re eager to create something beautiful right now, Daisy Window Art is the perfect choice. Using minimal materials, this project transforms ordinary glass into stunning floral displays that will brighten up any space. The joy of seeing flowers bloom through the window, especially with the sunlight streaming through, is a delightful bonus. You may also find Diy Glue Suncatchers Easy Window Decor useful.
Why This Daisy Window Art: Stunning Floral Decor Ideas Works So Well
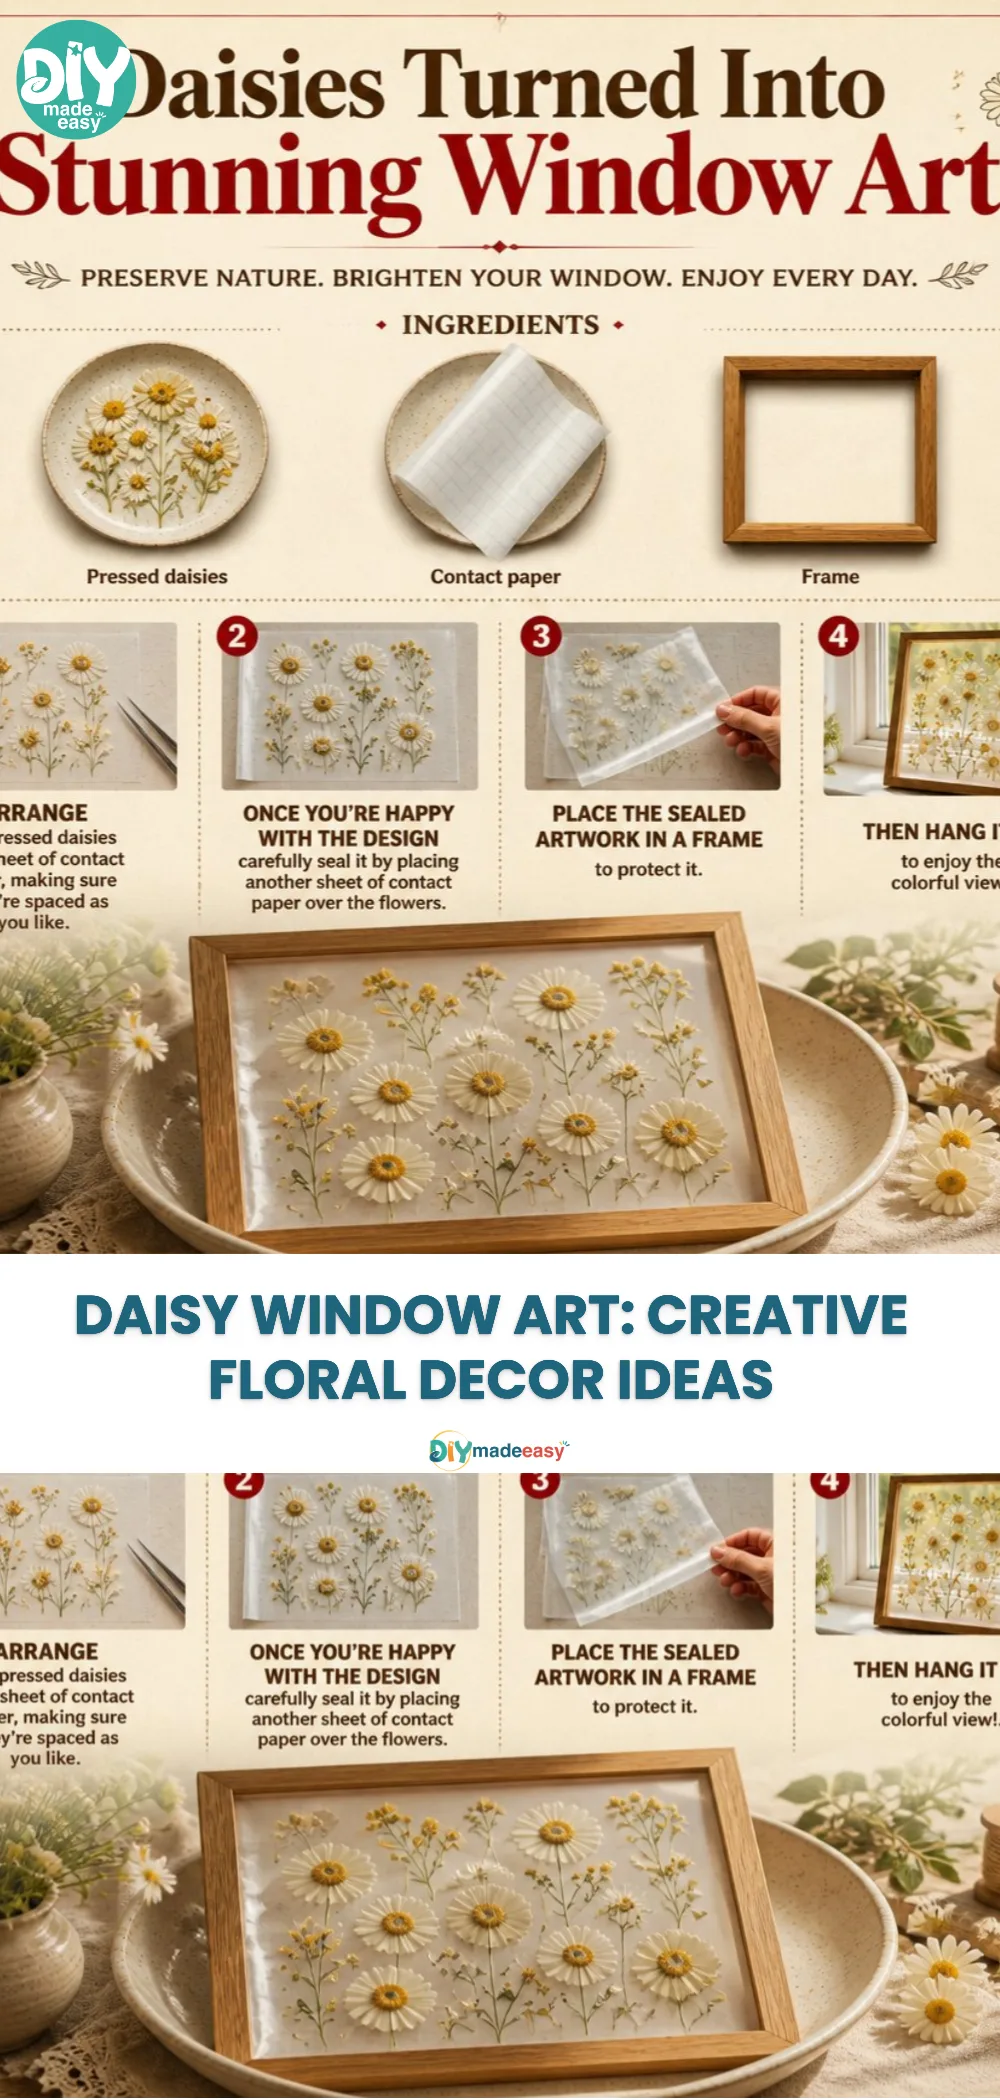
You may also find Diy Pressed Flower Rainbow Window Medallions Home Decor useful.
This project is exceptionally low-prep, making it ideal for parents juggling many tasks during the day. With just a few materials that are likely already in your home, crafting can be seamless and enjoyable. The step-by-step process for Daisy Window Art ensures that even young children can take part with adult supervision, which makes it a wonderful family activity. Its simplicity allows you to get started without feeling overwhelmed, creating a reliable creative outlet for any busy schedule. You may also find Diy Upcycled Tin Can Garden Decor Ideas useful.
A Quick Look Before You Begin
Getting started with Daisy Window Art is surprisingly easy. Dedicate about 30 minutes to an hour for the entire project, offering plenty of time for preparation, crafting, and clean-up. Set up a comfortable workspace on a table or at the window, laying down some newspaper or plastic to catch any spills. The mess level is minimal, allowing for a creative experience without the need for extensive cleaning afterward. This project can be tackled mostly by kids, as adults can assist when needed, ensuring everyone is involved.
Materials You’ll Need
To successfully create your Daisy Window Art, gather the following materials:
- Contact paper – a common household item that will serve as the base.
- Flower petals or leaves – optional, but they add wonderful natural elements.
- Scissors – for cutting shapes and designs.
- Marker – to outline or design elements on the contact paper.
- A clean window – to attach your art once completed.
These accessible supplies ensure that you’re well-equipped to begin without excessive shopping.
Step-by-Step Directions
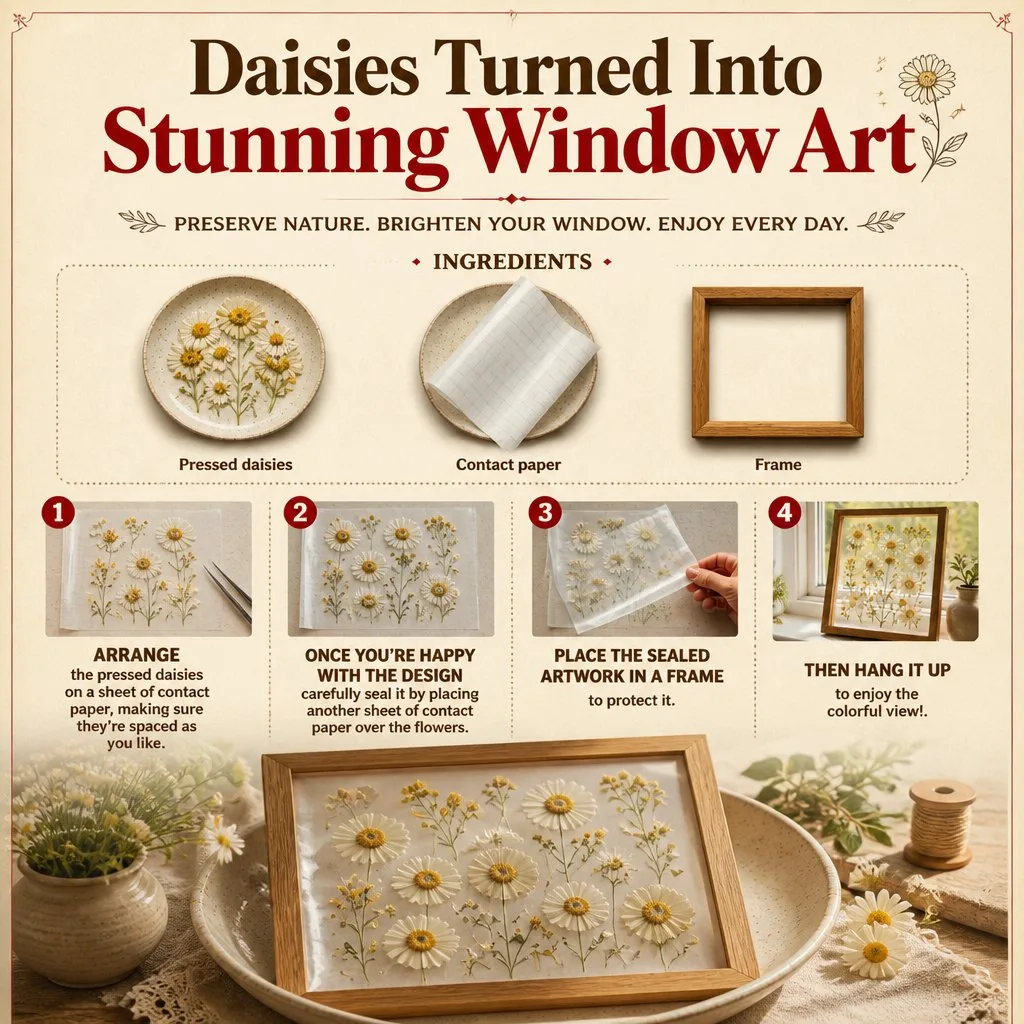
Prepare Your Workspace: Clear a flat surface and lay out your materials. Ensure the area is clean for a hassle-free crafting experience.
Cut Contact Paper: Take the contact paper and cut it to your desired window size. Remember, this will be the canvas for your art.
Design Your Art: With a marker, outline flower shapes or any design you like directly onto the non-sticky side of the contact paper. This will guide your placement.
Prepare Floral Elements: Gather flowers or petals. Press them gently to flatten, or use real blooms for a fresh touch.
Arrange on Contact Paper: Start arranging your flowers on the sticky side of the contact paper. Feel free to reposition them until you find a layout you love.
Seal Your Design: Once you’re satisfied with your arrangement, carefully lay another piece of clear contact paper over the top to seal it.
Peel and Place: Peel off any backing, then stick your new art masterpiece on the clean window where it can catch the sunlight.
Admire Your Creation: Step back and enjoy the colorful floral display that adds vibrance to your room.
The Learning Behind This DIY
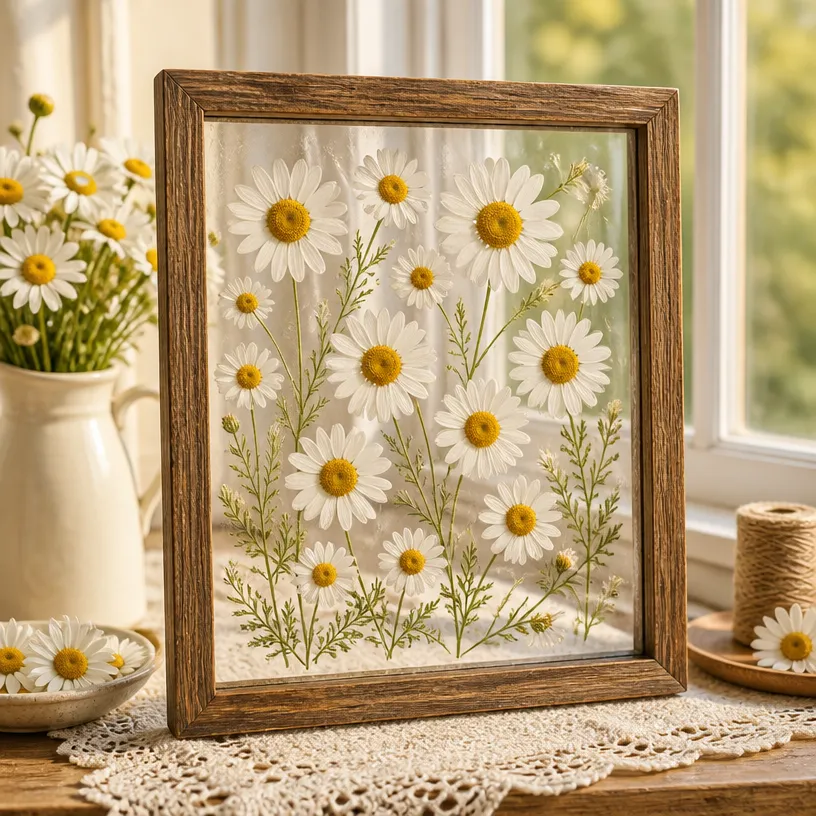
Creating Daisy Window Art isn’t just about looks; it also helps kids develop essential skills. The tactile experience supports fine motor skills as they manipulate small pieces and arrange them precisely. Moreover, understanding how flowers can be used to create art introduces basic concepts of nature and biology. This fun and straightforward project also encourages creativity, as everyone can express themselves differently in their designs, promoting a sense of pride in their unique creations.
Troubleshooting Common Issues
If something doesn’t go as planned while creating your Daisy Window Art, don’t worry. Sometimes, if the contact paper is too sticky, it can attract dust or debris before use. To counter this, make sure to keep it covered until you’re ready to use it. If your flower petals seem to wilt before your art is complete, consider using faux petals. They maintain their appearance better and still add a lovely touch to your project.
Easy Variations to Try
This project can be easily adapted to suit different events or seasons. For a spring feel, use pastel colors and tiny blossoms, while in the fall, consider orange leaves or darker blooms. If you’re feeling extra creative, try adding glitter or colored plastic to enhance visual appeal. You could even create themed art for holidays such as Halloween or Christmas by incorporating relevant colors and shapes.
Storing or Reusing This Project
After completing your Daisy Window Art, think about how to store or reuse your materials. If you decide to take it down, you can carefully peel the contact paper from the window and store it flat in a folder for future displays. This way, you can create seasonal decorations without the need to purchase new supplies every time.
FAQs About Daisy Window Art: Stunning Floral Decor Ideas
Can I use dried flowers instead of fresh ones?
Yes, dried flowers work perfectly! They maintain their shape and color, making them an excellent substitution that can also last longer.
Will the art hold up in sunlight?
The contact paper is designed to be durable, but constant direct sunlight may fade the colors over time. It’s best to place it where it can be enjoyed without extreme exposure.
What can I do with leftover materials?
You can save leftover contact paper and flowers for future projects. Consider using them in other fun crafts, like creating homemade cards or decorating notebooks.
Conclusion
Creating Daisy Window Art is a rewarding experience that allows for creativity while using simple household items. If you’re seeking inspiration for floral-themed decorations, you might find the Contact Paper Flower Art project informative as well. For those looking to incorporate more nature-inspired décor in your home, check out the Framed Farmhouse Vintage Daisy Floral Canvas Wall Art. These projects and resources will help you on your journey of creating stunning decorations while having quality hands-on fun!
PrintDaisy Window Art: Stunning Floral Decor Ideas
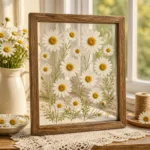
An engaging and creative craft project that transforms ordinary glass into stunning floral displays using simple materials.
- Prep Time: 30 minutes
- Cook Time: 0 minutes
- Total Time: 30 minutes
- Yield: 1 window art display
- Category: Craft
- Method: Crafting
- Cuisine: N/A
- Diet: N/A
Ingredients
- Contact paper
- Flower petals or leaves (optional)
- Scissors
- Marker
- A clean window
Instructions
- Prepare Your Workspace: Clear a flat surface and lay out your materials.
- Cut Contact Paper: Cut the contact paper to your desired window size.
- Design Your Art: Outline flower shapes or any design onto the non-sticky side of the contact paper.
- Prepare Floral Elements: Gather and press flowers or petals gently.
- Arrange on Contact Paper: Start placing flowers on the sticky side of the contact paper.
- Seal Your Design: Lay another piece of contact paper over the top to seal it.
- Peel and Place: Stick your art masterpiece on the clean window.
- Admire Your Creation: Enjoy the colorful floral display.
Notes
This project is suitable for children aged 5 and above, with adult supervision recommended.
Nutrition
- Serving Size: 1 display
- Calories: 0
- Sugar: 0g
- Sodium: 0mg
- Fat: 0g
- Saturated Fat: 0g
- Unsaturated Fat: 0g
- Trans Fat: 0g
- Carbohydrates: 0g
- Fiber: 0g
- Protein: 0g
- Cholesterol: 0mg