

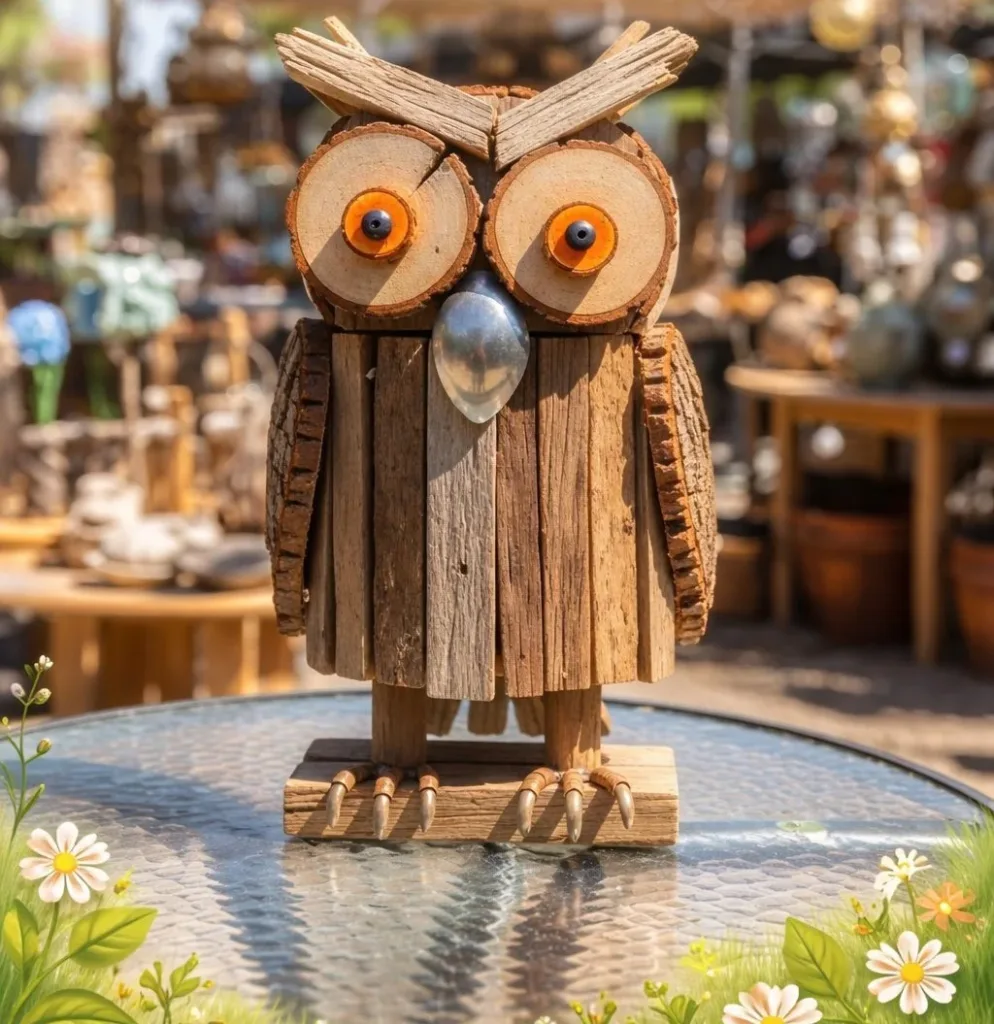
A busy afternoon slowed to a stop when the kids announced they wanted to make something right now. The counter emptied of snacks and a pile of scrap wood showed up by the back door. We picked a simple plan that fit the moment and the materials: Rustic Wood Owl Made from Scrap Wood Garden Art. I sketched a friendly owl, kids chose the grain patterns, and we made a small garden guardian before dinner.
This project suits those impulsive moments because it uses what you already have, takes one relaxed afternoon, and leaves you with something honest and useful. If you like projects that finish quickly and feel good to touch, this is for you. For another quick family-friendly build that uses simple materials and gives big satisfaction, try the Heart Stem Challenge for an easy alternate craft idea.
Why You’ll Love Making Rustic Wood Owl Made from Scrap Wood Garden Art

This owl works because it focuses on basics. You choose a board with grain you like, cut a shape that feels right, and layer a few pieces for eyes and wings. The steps stay the same whether your boards came from a thrift pile or a leftover fence board.
It suits busy days because you can break the work into short sessions. Choose wood and sketch in 10 minutes. Cut and sand in another 20. Glue and let it rest while you cook dinner. Little hands can help with sanding and dry-fitting, while an adult handles the saw and screws.
It also feels forgiving. If a wing piece looks off, you swap it for another scrap. If paint drips, a light sanding and a second coat will smooth it out. The result looks rustic by design, so small flaws fit in and add character.
A Quick Look Before You Begin
This project runs on short blocks of time and low prep. Set aside about two hours total for a simple version, more if you add carving or paint layers. Most families finish a small owl in one afternoon with breaks.
Setup stays minimal. Clear a table or garage floor, gather the small tool list, and keep a damp cloth and trash bin handy for quick cleanup. Expect light dust from sanding and a tiny bit of glue squeeze-out when you press pieces together.
Mess stays small. Sanding fills a small area with sawdust. Wipe or vacuum afterward. Paint is optional. If kids paint, cover the table and use washable outdoor paint or a light water-based stain.
Adult involvement depends on tools you use. An adult should cut with the saw and handle screws or nails. Older kids can trace, sand, hold pieces for glue, and do the gentle carving if supervised.
Materials You’ll Need
Scrap wood boards, varied widths and thicknesses
common household item, look for stable boards with good grain
Pencil and ruler or small template for owl shape
simple tracing tools, use a printout if you prefer
Hand saw or jigsaw
hand saw works fine for small boards, jigsaw speeds curves
Sandpaper in 80, 120, and 220 grits
start coarse and finish smooth for outdoor glue and paint
Wood glue (outdoor rated)
outdoor rated for weather resistance
Small outdoor screws or galvanized nails
small fasteners prevent rust outdoors
Wooden stake or short 2×2 piece for garden mount (optional)
optional for planting in soil or a pot
Small carving knife or chisel for detail (optional)
optional for feather or facial details with care
Outdoor paint or clear sealer, natural stains or beeswax finish (optional)
optional protection, choose finishes suitable for outdoor use
Gloves and safety glasses
safety basics for cutting and sanding
Soft cloth and small brush for dusting and finishing
for cleanup and applying finishes
STEP-BY-STEP DIRECTIONS

- Choose and prepare your wood by selecting stable boards with interesting grain.
Pick boards without major rot or deep cracks.
Lay them flat and wipe off loose dirt and nails before tracing. - Draw a simple owl silhouette on the selected board.
Use a pencil and a ruler or a small template for the shape.
Keep the silhouette simple; round body and a small head work well. - Cut the body and head pieces using a hand saw or jigsaw.
Follow the pencil line slowly and steadily for smooth curves.
Pause if the cut binds and trim small mistakes with the saw. - Sand the rough edges starting with 80-grit sandpaper, then use 120 and finish with 220 grits.
Work from coarse to fine to remove saw marks and splinters.
Feel the edges often; when they stop grabbing your skin, they are ready. - Select contrasting pieces for the owl’s eyes and wing detail.
Look for knots or darker grain for eye shapes and a lighter piece for wings.
Trim those scrap pieces to small circles or ovals that balance the body. - Carve or shape small details using a carving knife if desired.
Take light passes and keep the wood supported under your hand.
Stop if the blade binds and file the area smooth with sandpaper. - Dry-fit the pieces to make sure they look balanced before gluing.
Place eyes and wings on the body and step back to check proportions.
Adjust placement until the owl looks natural to your eye. - Glue and secure the layers, applying modest amounts of outdoor wood glue.
Apply glue thinly where pieces touch and press together firmly.
Clamp or weight the pieces for the glue to set if you have clamps. - Attach the stake or base underneath the body and secure it with screws or glue.
Center the stake under the owl and pre-drill if using screws to avoid splitting.
Countersink screw heads slightly and fill with a dab of glue or wood putty if desired. - Finish the surface with a clear sealer or a light wash of paint, if desired.
Use a single light coat of sealer and wait the recommended time between coats.
If painting, thin the paint for a washed look and let each coat dry fully. - Let the owl rest and cure before installing it in the garden.
Place it somewhere dry and out of direct sun while finishes cure.
Wait at least 24 hours for glue and sealer, longer for thicker paint.
While you follow these steps, remember small things that help. Press glued pieces and wipe squeeze-out right away with a damp cloth. If glue dries on a face, a light scrape with a chisel and a fine sand will remove it. For more ideas on simple finishing approaches and low-prep crafts, check a related quick project like the crystal heart craft for inspiration on finishes and kid-friendly touches.
Skills This Activity Supports

This build practices shape recognition and hand-eye coordination.
Kids learn to judge size and symmetry when choosing pieces.
They gain fine motor strength while sanding small edges and while handling small screws or nails.
It also teaches cause and effect in a gentle way.
Applying too much glue shows up as squeeze-out you must clean.
Skipping a pilot hole can lead to a split board, which shows why steps matter.
There is simple science too. Sanding gradually smooths wood because coarser grit quickly removes material while finer grit polishes the surface. Finishes slow water absorption because they fill small pores in the wood, which helps outdoors.
Troubleshooting Common Issues
If your cut line wandered, you can sand back the edge to smooth the curve.
Cut a small straight shim and glue it behind the area to add thickness if the piece got too thin.
For small gaps between layers, a thin bead of glue and a tight clamp will pull things together.
If paint looks blotchy on rough grain, sand lightly with 220 grit and apply a thin first coat.
If the owl tips on its stake, shorten or trim the stake and re-center it under the body.
If screws raise a split, back them out and use a slightly narrower screw or drill a larger pilot hole.
If a piece cracks while you carve, stop and glue the crack with minimal adhesive.
Clamp gently and let it dry fully before continuing.
That small repair often disappears under a wash of stain or a coat of sealer.
If the glue bond feels weak after curing, add a small screw through the joint.
Screws and glue together make a durable fix for outdoor use.
Easy Variations to Try
Try a painted look. Use a light color wash over the grain so the wood still shows.
Add a small plaque under the owl with a painted initial or family name.
Make a family of owls in different sizes. Cut one big body and a few small ones for a garden grouping.
Vary the eyes with bottle caps, small wooden discs, or stacked wood circles for a playful face.
Seasonal accents work well. Tie a small fabric scarf around the neck for fall, or glue a tiny felt heart for Valentine decorations.
Change finishes by trying beeswax or an outdoor stain for a more natural, muted finish.
For younger kids, simplify by using a pre-cut plywood shape that you trace and sand together.
Let them choose wing scraps and press them on with glue while an adult screws the base.
Storing or Reusing This Project
If you need to take the owl down for winter, store it in a cool, dry place to preserve finishes.
Wrap it in a cloth to prevent scratches and keep small screws in a labeled bag.
Re-use tells a good story. If a wing falls off, save the pieces for another owl or make a small sign from the leftover board.
Leftover scrap pieces make great mini tags or plant markers for the garden.
Clean gently with a soft brush to remove dust before refinishing.
If you plan to update the finish yearly, a light sanding followed by another coat of sealer keeps it fresh.
FAQs About Rustic Wood Owl Made from Scrap Wood Garden Art
Can my kids do most of this on their own or do they need an adult the whole time?
Kids can do plenty of the project safely. They can draw the owl, sand the edges with supervision, and choose eye and wing pieces. An adult should handle saw cuts and the driving of screws. For carving, an adult should guide or do that step depending on the child’s skill. This keeps the experience fun and safe without slowing the project.
What if I only have odd sizes of scrap?
Will the owl still look okay? Yes. Odd sizes give character. Choose the largest stable piece for the body and balance the eyes and wings with smaller scraps. If a piece feels too thin for a stake, glue two thin pieces together. The rustic look welcomes mismatched pieces, and small fixes like a shim or thin glue bead usually solve fit problems.
How messy is sanding and painting with kids around?
Sanding makes a bit of dust, but it stays local to your work surface. Lay down a drop cloth or work in the garage. Wipe down hands and clean surfaces with a damp cloth when you finish. Painting creates some drips if you use thick paint. Use thin washes or a small brush, and keep a damp rag close to clean hands and drips quickly.
What if my glue joint fails after a week outside?
Outdoor glue sometimes needs extra help on rough or oily wood. If a joint loosens, re-glue with an outdoor-rated adhesive and clamp or screw the pieces together. Use a small screw and pre-drill a pilot hole to avoid splits. This usually fixes the problem and makes the owl last longer.
A Final Helpful Note
Take your time and enjoy the texture of the wood as you work. This project rewards patience as much as speed. If something feels off, step back and look at it from a distance. Rustic work often looks best a little imperfect, so focus on making something you love to see in your garden.
Conclusion
If you want to see how someone else used reclaimed materials to make a rustic owl, the Reclaimed Wood Owl – Etsy page shows different styles and finishes for inspiration. For a step-by-step gallery of similar scrap wood stakes and ideas you can adapt, check the Scrap Wood Owl Garden Stakes – Homeroad post for more visuals and variations.
PrintRustic Wood Owl Made from Scrap Wood Garden Art

An engaging garden art project that teaches kids basic woodworking skills while creating a charming rustic owl from scrap wood.
- Prep Time: 10 minutes
- Cook Time: 30 minutes
- Total Time: 120 minutes
- Yield: 1 owl
- Category: Craft
- Method: Crafting
- Cuisine: N/A
- Diet: N/A
Ingredients
- Scrap wood boards, varied widths and thicknesses
- Pencil and ruler or small template for owl shape
- Hand saw or jigsaw
- Sandpaper (80, 120, and 220 grit)
- Outdoor wood glue
- Small outdoor screws or galvanized nails
- Wooden stake or short 2×2 piece for garden mount (optional)
- Small carving knife or chisel for detail (optional)
- Outdoor paint or clear sealer, natural stains or beeswax finish (optional)
- Gloves and safety glasses
- Soft cloth and small brush for dusting and finishing
Instructions
- Choose and prepare your wood by selecting stable boards with interesting grain.
- Draw a simple owl silhouette on the selected board.
- Cut the body and head pieces using a hand saw or jigsaw.
- Sand the rough edges starting with 80-grit sandpaper.
- Select contrasting pieces for the owl’s eyes and wing detail.
- Carve or shape small details using a carving knife if desired.
- Dry-fit the pieces to make sure they look balanced before gluing.
- Glue and secure the layers.
- Attach the stake or base underneath the body.
- Finish the surface with a clear sealer or a light wash of paint.
- Let the owl rest and cure before installing it in the garden.
Notes
This project is forgiving; small flaws fit in with the rustic look. Supervision is required for cutting and using tools.
Nutrition
- Serving Size: 1 owl
- Calories: 0
- Sugar: 0g
- Sodium: 0mg
- Fat: 0g
- Saturated Fat: 0g
- Unsaturated Fat: 0g
- Trans Fat: 0g
- Carbohydrates: 0g
- Fiber: 0g
- Protein: 0g
- Cholesterol: 0mg