

Rainbow Sand is a delightful project that can bring a splash of color and creativity to any busy afternoon. Picture your kids gathering around the kitchen table, excited and eager to make something with their own hands, and you realize it’s one of those moments where you need a quick activity. You want something that keeps them engaged but doesn’t require a lot of complicated supplies or setup. That’s where Rainbow Sand comes in. With just a few simple materials, you can create vibrant layered sand jars that not only look beautiful but also serve as a peaceful reminder of a fun day spent together.
Why You’ll Love Making Rainbow Sand

Making Rainbow Sand is a uniquely satisfying experience for both kids and adults. The beauty of this project lies in its low-prep nature and the delightful results that come with it. You don’t need to spend hours gathering supplies or cleaning up afterward. With minimal materials and a straightforward process, you can dive right into a colorful crafting adventure. Plus, there’s something mesmerizing about the mixing of fine sand with vibrant colors.
It’s approachable for everyone, making it a fantastic choice for a last-minute weekend activity or even a relaxing after-school project. The best part? You get to craft one-of-a-kind pieces that can brighten up your home decor or become thoughtful gifts. There’s something magical about watching the colors blend together in layers; it’s a visual and tactile experience that encourages creativity without overwhelming anyone involved.
A Quick Look Before You Begin

Before you jump in, take a moment to gather your thoughts and materials. The process goes smoothly when the setup is done right. You’ll want to allocate about 30 to 60 minutes for the entire project, depending on how many colors you’d like to mix. The mess level is surprisingly low, especially if you prepare a clean space where spills are easy to manage. It’s enjoyable and relaxing, likely with a few giggles along the way.
You don’t need to worry about being overly involved as an adult. You can guide and supervise while letting the kids explore their creativity. Plus, sharing in the fun creates wonderful memories together. Just be sure to keep a damp cloth nearby for any little spills, and you will wind up loving this calm but colorful activity.
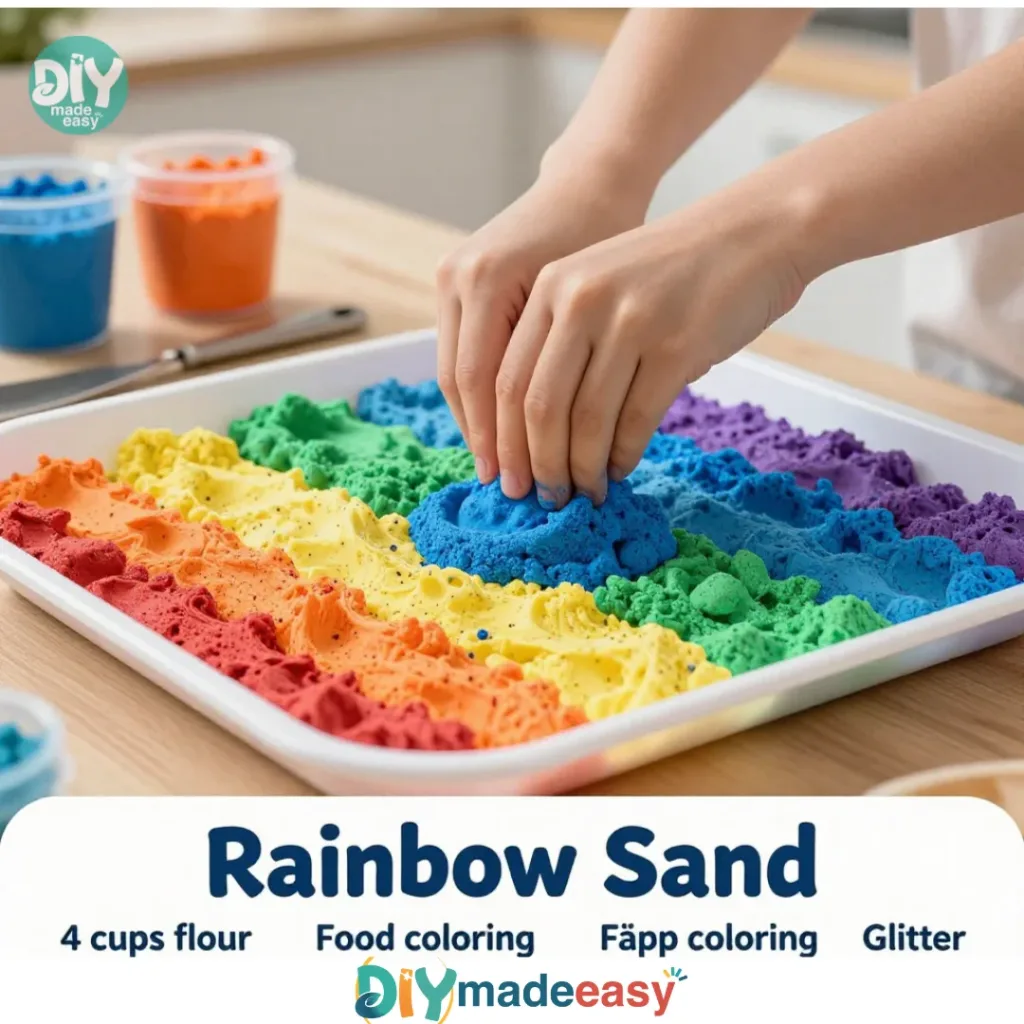
Materials You’ll Need
- Fine sand (natural or play) – a common household item
- Non-toxic color powder (such as food coloring or powdered pigments) – easy to find
- Empty containers or jars (for separating colors)
- A large bowl (for mixing)
- Gloves (optional, for protecting your hands)
- A spoon or stick (for mixing)
- A funnel or paper cone (to help pour sand) – super helpful
These materials are budget-friendly, and you might already have them at home, making this project even more accessible.
Step-by-Step Directions
- Gather your materials in a clean space where you can spread out. Make sure you have ample room to enjoy the process. Clear surfaces help everyone concentrate on the fun.
- Divide the fine sand into separate containers according to the number of colors you want to create. A clear separation helps keep the colors distinct later on. Gather the containers and number them if needed.
- Add the chosen color powder to each container one at a time; start with a small amount. You can always add more, but starting small ensures you don’t overpower the sand. Observe how the colors interact with the sand as you mix.
- Using a spoon or stick, mix the sand and color gently until fully blended. Feel the texture shift between your fingers as the sand takes on the new hue. Take your time to enjoy the transformation.
- Use a funnel or paper cone to pour the colored sand into jars or larger containers, creating beautiful layers. Watch as the colors form distinct layers. You can tilt the jars slightly to get creative with how the sand settles.
- Admire your work; display the jars as decoration, gifts, or for a calming reminder. These pieces can bring joy to any space in your home or be sweet tokens for friends and family.
The Simple Science or Skills at Work

When making Rainbow Sand, various concepts seamlessly blend creative expression with learning opportunities. Kids exercise fine motor skills as they pour and mix. The simple action of stirring helps improve coordination, engaging small hand muscles.
Additionally, there is a bit of science at play. As kids mix the sand with color, they see firsthand how their choices create new shades and visual effects. It’s fascinating to witness cause and effect right before their eyes. Bright colors blend and contrast showing them how different elements interact.
This project encourages critical thinking as children decide how to layer their sand and the order to feature their colors. It’s a fun, sensory experience filled with learning opportunities, all while having a blast.
Troubleshooting Common Issues
If something doesn’t go as planned, don’t worry. Here are some common issues and quick fixes that can help.
Sometimes, the colors may not mix as well as you hoped, resulting in grainy textures. This often happens if too much color powder is added at once. If you notice this, simply add a little more sand to tone it down. Mixing with a stick can also help you distribute the color better.
Another concern might be spills. They happen, especially with eager hands. If sand spills out, a damp cloth can quickly clear up the mistake. You can also simply pour the spilled sand back into your container.
Finally, if the layers do not stay distinct in the jars, this could be due to shaking or moving. Make sure to keep your jars stable once prepared, allowing the sand to settle naturally.
Easy Variations to Try
To keep things fresh and exciting, consider trying these simple variations:
- Seasonal Themes: Use colors that resonate with holidays or changes in season, like earthy tones for autumn or pastels for spring.
- Scented Sand: Add a few drops of essential oils or vanilla extract to the sand before coloring for a pleasant aroma.
- Glow-in-the-Dark Sand: Use glow powder for a funky twist that lights up in dark spaces.
- Add Miniatures: Once set, place tiny figurines or decorations within the layers for an added touch of fun!
- Collaborative Pieces: Encourage family members to create their own jars and combine them into one larger piece, showcasing everyone’s creativity.
Storing or Reusing This Project
Once you’ve created your lovely sand jars, you may wonder about storage or reuse. The layered sand can serve as a beautiful decor piece for years. You can keep them on shelves, desks, or anywhere they can bring a smile.
If you find that you need to clean up or rearrange, the sand can be returned to its original containers for reuse. It remains in good condition for future projects. Additionally, breaking down the material allows you to experiment with new colors or techniques later on, reducing waste.
Discover Easy Kids Activities
Looking for simple, fun ideas for kids? Explore our Low Prep Kids Activities and find quick projects that spark creativity without long prep time.
FAQs About Rainbow Sand
What is the best age for kids to start making Rainbow Sand?
Rainbow Sand is suitable for kids aged 4 and up. Younger children may need some adult supervision, especially to manage color mixing and pouring.
Will this project create a big mess?
While sand can spill, the mess is manageable. Setting up in a clean area with newspaper or a tablecloth can help contain any spills.
Are the materials safe for children to handle?
Yes, using non-toxic color powders ensures safety while providing easy cleanup. Adults should supervise, especially when handling any potentially messy parts.
Can I use salt instead of sand?
You could experiment with salt, but the texture will be different. Fine sand works best for a smoother look and feel.
How do I store the jars if I want to keep them unused for a while?
You can simply seal the jars with lids to keep the sand dry and protect the layers. Store them in a cool, dry place to maintain their vibrant colors.
Conclusion
Creating Rainbow Sand is a joyful experience filled with color and creativity. This project invites you to immerse yourself in the simple pleasures of crafting together. Whether it’s for decoration or a thoughtful gift, you are making something unique that reflects your family’s personality.
Don’t shy away from exploring more ideas on crafting with your kids. Check out this wonderful guide on Rainbow Sand Art or see how easy it can be to make colorful creations with Rainbow Sand. Enjoy the process, make memories, and watch as your kids revel in the sheer joy of creating!
PrintRainbow Sand

A fun and colorful project for kids to create beautiful layered sand jars that can brighten up any space.
- Prep Time: 15 minutes
- Cook Time: 30 minutes
- Total Time: 45 minutes
- Yield: Multiple jars
- Category: Craft
- Method: Crafting
- Cuisine: N/A
- Diet: N/A
Ingredients
- Fine sand (natural or play)
- Non-toxic color powder (such as food coloring or powdered pigments)
- Empty containers or jars
- A large bowl
- Gloves (optional)
- A spoon or stick
- A funnel or paper cone
Instructions
- Gather your materials in a clean space where you can spread out.
- Divide the fine sand into separate containers according to the number of colors you want to create.
- Add the chosen color powder to each container one at a time.
- Using a spoon or stick, mix the sand and color gently until fully blended.
- Use a funnel or paper cone to pour the colored sand into jars or larger containers.
- Admire your work; display the jars as decoration or gifts.
Notes
Keep a damp cloth nearby for any little spills during the crafting process.
Nutrition
- Serving Size: 1 jar
- Calories: N/A
- Sugar: 0g
- Sodium: 0mg
- Fat: 0g
- Saturated Fat: 0g
- Unsaturated Fat: 0g
- Trans Fat: 0g
- Carbohydrates: 0g
- Fiber: 0g
- Protein: 0g
- Cholesterol: 0mg