

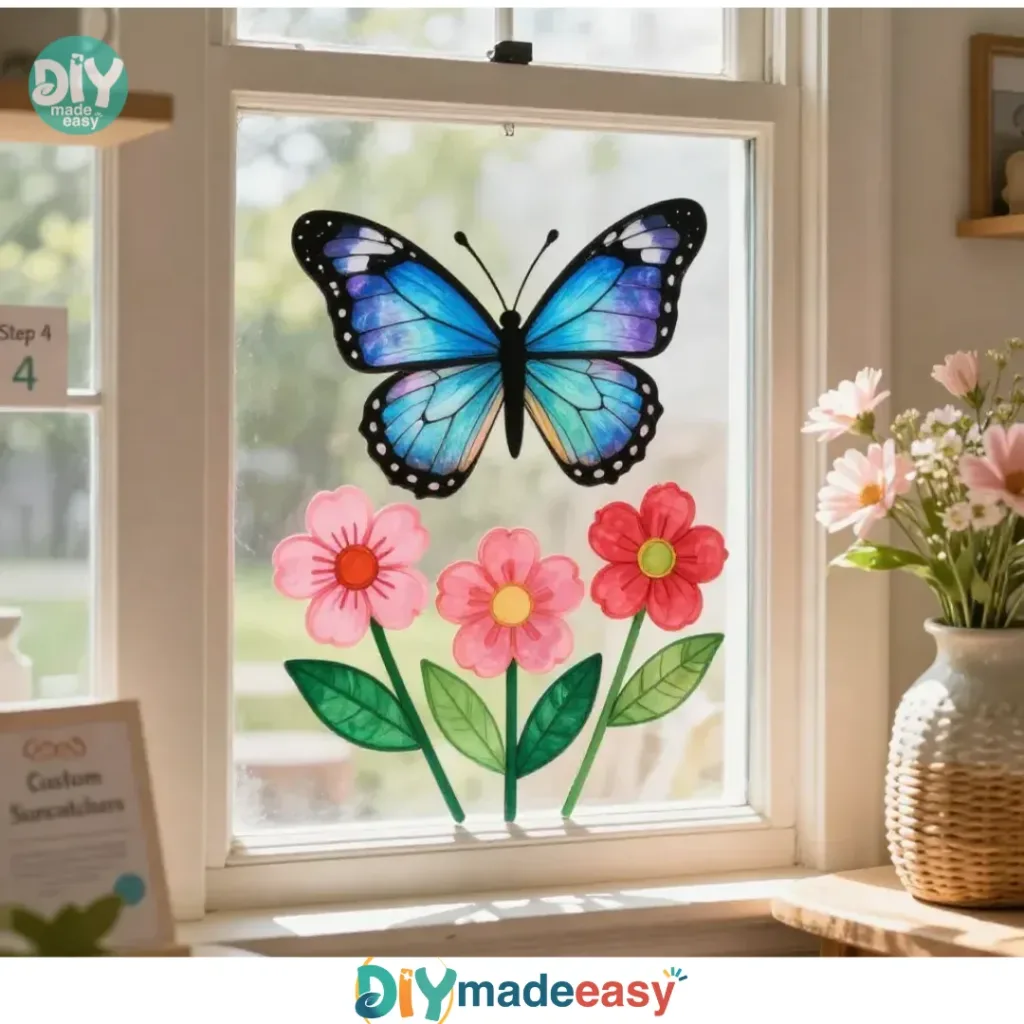
Creating a special moment with your family can be as simple as a busy afternoon spent at home. Maybe the kids are looking for something fun to do. Perhaps you just need a quick, engaging activity to add some creativity to the day. Magic Window Clings are an excellent way to bring a splash of color and imagination right into your home. These clingy decorations not only allow kids to express their artistic flair, but they also transform your windows into beautiful canvases. And the best part? You can easily whip them up with household items, making it a perfect last-minute activity.

Why This Magic Window Clings Works So Well

Magic Window Clings are easy to make and fun to use. This project doesn’t require a lot of preparation or fancy materials. You will only need a few simple supplies, making it approachable for anyone unlike more complex crafts that can feel overwhelming.
This project is also reliable. Once you follow the steps, you’ll see results. Even if you’re dealing with a hectic schedule, creating these window clings doesn’t demand hours of your time. Just mix, paint, dry, and peel. It’s genuinely a manageable task for busy days.
Discover Easy Kids Activities
Looking for simple, fun ideas for kids? Explore our Low Prep Kids Activities and find quick projects that spark creativity without long prep time.
Magic Window Clings bring a sense of accomplishment when kids see their designs come to life. You’ll create playful adventures right on your glass surfaces, all while working together as a family.
A Quick Look Before You Begin
In preparing for your Magic Window Clings, you’ll want to set aside a little time. The actual active crafting time is short, just around 30 minutes. However, you’ll need to wait overnight for your clings to dry.
Setting up is simple; all you need is a flat surface to work on. An old tablecloth or newspaper makes for easy cleanup and helps minimize any mess. This project doesn’t involve messy paints or heavy tools.
You might want to assist younger children with certain tasks like pouring glue or using the paintbrush. It’s an excellent bonding moment and a way to ensure everyone stays safe while crafting.
Materials You’ll Need
- 2 tablespoons of white glue
Common household item. - 1 drop of dish soap
Helps with the adhesion without making it too slippery. - A few drops of food coloring
Optional, but they create lovely colorful designs.
These materials are easy to find at home. If you’ve got kids, the chances are you already have everything you need.
STEP-BY-STEP DIRECTIONS
- In a bowl, mix the white glue with the drop of dish soap. Start by squeezing the glue into the bowl first, then add the dish soap. Stir gently but thoroughly. You’ll notice a thicker consistency that’s perfect for clinging.
- Add a few drops of food coloring and stir until it’s blended. The color will enhance the visibility of your designs. Take this moment to get creative; you can even mix colors to see what happens.
- Use a paintbrush to create your designs on a clear plastic sheet protector and let it dry overnight. Be generous with designs but remember to leave some space between them. Experiment with lines, swirls, or shapes.
- Once dry, carefully peel off your creations and stick them onto glass surfaces. They should come off easily. If they resist, just peel from one corner gently.
The Learning Behind This DIY

While making these window clings, kids practice several skills without even realizing it. There’s a lot of fine motor movement involved in mixing and painting. Stirring the glue and painting the designs helps develop coordination and control.
This project teaches cause and effect, too. Children see how the glue dries into something solid and how it can easily stick to a window, reinforcing their understanding of properties in materials.
There’s a certain science in the air, and kids are learning while playing. All these skills blend seamlessly into a delightful activity, making learning feel effortless.
Troubleshooting Common Issues
If something doesn’t go as planned, it’s okay. Sometimes the glue may not dry properly. This often happens if it’s layered too thick. If that’s the case, leave the designs to dry longer or place them in a warmer area to speed up the process.
Another common issue might be colors bleeding into one another. If this happens, don’t worry! That’s part of the fun. Each creation becomes a unique design through happy accidents. Just encourage them to try again with more careful application.
Easy Variations to Try
- Try using different sheets for clings, like transparency sheets or thicker plastic. Each material yields different results.
- Experiment with shapes. Instead of swirling patterns, cut out specific shapes like stars or hearts and use them as stencils for designs.
- Have seasonal themes! Use colors and shapes that match holidays or upcoming birthdays for a fun twist.
- Add glitter to the mix for some sparkly effects. Just make sure it’s mixed well to avoid a mess.
- Make it a family competition! Set a timer and see who can design the most creative cling in a fixed time.
Storing or Reusing This Project
Once you’ve made your window clings, you’ll want to think about storage or reuse. If you have leftovers that never made it to the windows, simply keep them in a sealed plastic bag. They’ll last for a few weeks if kept at room temperature.
As for cleanup, simply rinse brushes and bowls with soap and water. It’s a simple process that doesn’t require heavy-duty scrubbing.
You can also make this a regular activity using different colors each time or letting kids create new designs as the seasons change.
FAQs About Magic Window Clings
How messy is this project?
This project is relatively low in mess since it mainly involves glue and food coloring. Use a tablecloth or newspaper to catch spills. If you notice any drips, they can easily be wiped away with a damp cloth. Just keep everything contained.
Is it safe for young kids?
Yes, the materials are safe, but adult supervision is important, especially with younger kids who might try to taste or touch the glue. Make it a fun learning moment about the materials they’re working with.
Can I substitute any ingredients?
If you don’t have food coloring, you could try using watercolor paints instead. Just ensure they mix well and won’t bleed too much into your designs. The crucial part is maintaining a thicker consistency to hold the shapes while drying.
What results can I realistically expect?
Every creation will be unique. Don’t stress about perfection. Each piece will have its personality. Sometimes, things might not turn out like you envisioned, but that’s part of the creative journey.
Can I store leftover supplies?
Absolutely! Keep any mixed materials in sealed containers if there is any left over. Just remember that the glue can thicken over time, so it’s best to use it fresh whenever possible.
A Final Helpful Note
Always remember that creativity thrives with flexibility. Magic Window Clings offer a simple way to make art without the pressure of perfection. Take your time with the process. Enjoy the creativity flowing, and embrace the imperfections. Crafting isn’t just about the final product; it’s about the joyful moments created along the way. So, gather your materials, gather the kids, and let the fun begin!
PrintMagic Window Clings

A fun and engaging activity to create colorful window clings using household items, perfect for kids and family bonding.
- Prep Time: 15 minutes
- Cook Time: 30 minutes
- Total Time: 45 minutes
- Yield: Variable, depending on design sizes
- Category: Craft
- Method: Crafting
- Cuisine: N/A
- Diet: N/A
Ingredients
- 2 tablespoons of white glue
- 1 drop of dish soap
- A few drops of food coloring
Instructions
- Mix the white glue with the drop of dish soap in a bowl and stir gently.
- Add a few drops of food coloring and stir until blended.
- Use a paintbrush to create designs on a clear plastic sheet protector and let it dry overnight.
- Peel off your creations and stick them onto glass surfaces.
Notes
Supervise younger children while crafting and help with tasks like pouring glue and using the paintbrush.
Nutrition
- Serving Size: 1 creation
- Calories: N/A
- Sugar: N/A
- Sodium: N/A
- Fat: N/A
- Saturated Fat: N/A
- Unsaturated Fat: N/A
- Trans Fat: N/A
- Carbohydrates: N/A
- Fiber: N/A
- Protein: N/A
- Cholesterol: N/A