DIY Crayon Melt Wind Spinner
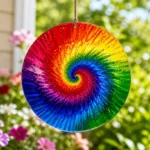
Engage your kids in a fun and artistic project by creating a DIY Crayon Melt Wind Spinner using colorful melted crayons.
- Prep Time: 10 minutes
- Cook Time: 15 minutes
- Total Time: 45 minutes
- Yield: 1 wind spinner
- Category: Craft
- Method: Melting
- Cuisine: N/A
- Diet: N/A
Ingredients
- Crayons (any colors you prefer)
- Oven-safe molds (silicone molds work great)
- A spoon or stick for stirring
- Baking sheet
- Parchment paper
- Twine or string for hanging
Instructions
- Preheat your oven to 200°F (93°C).
- Gather your crayons and remove the wrappers.
- Place the crayon pieces into your silicone molds, filling each cavity about halfway.
- Arrange the molds on a baking sheet with parchment paper underneath.
- Put the baking sheet in the oven and melt the crayons for about 10-15 minutes.
- Once melted, carefully remove the molds from the oven and let them cool for a few minutes before transferring them to the freezer for about 30 minutes.
- Once hardened, gently pop the melted crayons out of the molds.
- Take your twine or string and tie it securely through the top of the wind spinner.
- Find a suitable hanging spot that catches the wind and enjoy watching your creation spin.
- For an added touch, personalize the spinner by decorating the string or adding embellishments.
Notes
This project allows children to practice fine motor skills and introduces basic science concepts.
Nutrition
- Serving Size: 1 spinner
- Calories: 50
- Sugar: 0g
- Sodium: 0mg
- Fat: 0g
- Saturated Fat: 0g
- Unsaturated Fat: 0g
- Trans Fat: 0g
- Carbohydrates: 0g
- Fiber: 0g
- Protein: 0g
- Cholesterol: 0mg