Flower Resin Art
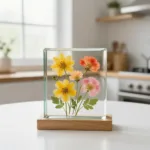
Transform ordinary flowers into stunning keepsakes with this easy flower resin art project, perfect for kids and adults alike.
- Prep Time: 30 minutes
- Cook Time: 1440 minutes
- Total Time: 1470 minutes
- Yield: 1 decorative art piece
- Category: Craft
- Method: DIY
- Cuisine: N/A
- Diet: N/A
Ingredients
- Epoxy resin
- Fresh or dried flowers
- Mixing cups
- Stir sticks
- Silicone mold
- Protective gloves
- Drop cloth
Instructions
- Prepare your workspace: Lay down a drop cloth to avoid spills and ensure proper ventilation.
- Mix the resin: Combine the resin and hardener in a mixing cup as per package instructions.
- Stir thoroughly: Use a stir stick to mix until clear and bubble-free.
- Pour a layer into the mold: Fill the silicone mold halfway with the mixed resin.
- Arrange your flowers: Position the flowers in the mold as desired.
- Cover the flowers: Pour more resin over the flowers until the mold is filled.
- Remove bubbles: Use a toothpick or heat source to eliminate any bubbles.
- Cure the resin: Let it sit as per the instructions, usually around 24 hours.
- Demold: Gently flex the mold to release your art piece.
- Finish your piece: Sand edges or add hooks as needed.
Notes
This project is suitable for children ages 8 and up, with adult supervision recommended.
Nutrition
- Serving Size: 1 piece
- Calories: 250
- Sugar: 0g
- Sodium: 50mg
- Fat: 5g
- Saturated Fat: 0g
- Unsaturated Fat: 5g
- Trans Fat: 0g
- Carbohydrates: 30g
- Fiber: 0g
- Protein: 0g
- Cholesterol: 0mg