

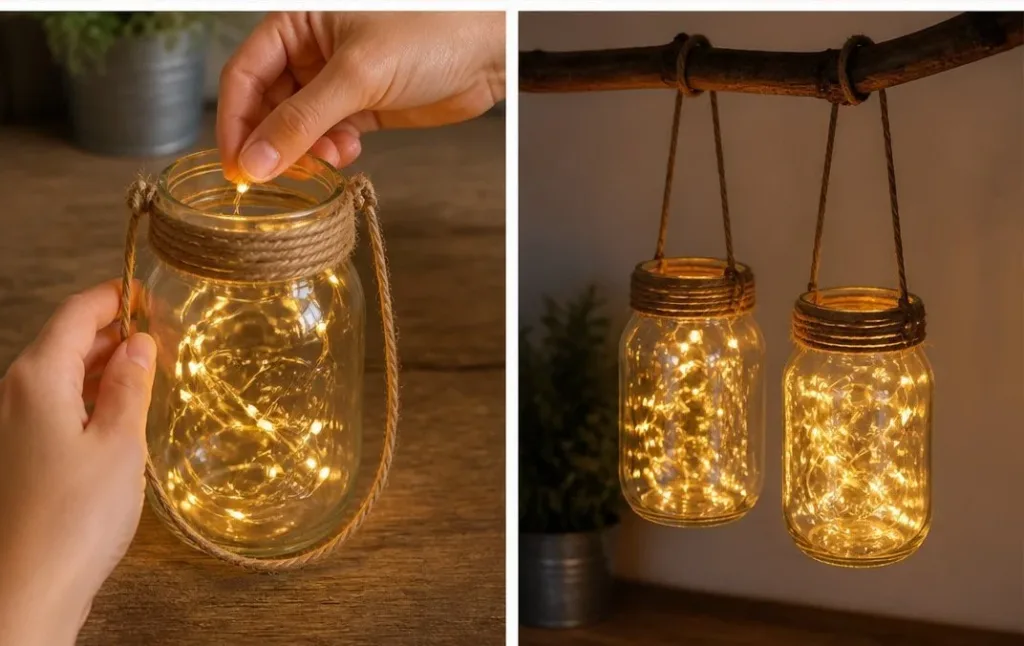
Hanging Mason Jar Lights are a delightful project that can brighten up any space in your home. Imagine a busy afternoon where your kids are eager to create something unique and beautiful. Maybe you have friends coming over and need a whimsical decoration to set the mood. This project is perfect for moments like these, as it combines creativity with charm effortlessly. You may also find Diy Lightning Storm In A Jar useful.
You can gather your family around and get started on these Hanging Mason Jar Lights, which not only illuminate your space but also provides an opportunity for bonding and fun. You’ll use simple materials, and the steps are straightforward, making it accessible for everyone, even those new to crafting. As you embark on this project, you may also want to explore other engaging DIY activities like creating a magic glitter jar or a glowing glitter jar for even more fun!
Why You’ll Love Making Hanging Mason Jar Lights
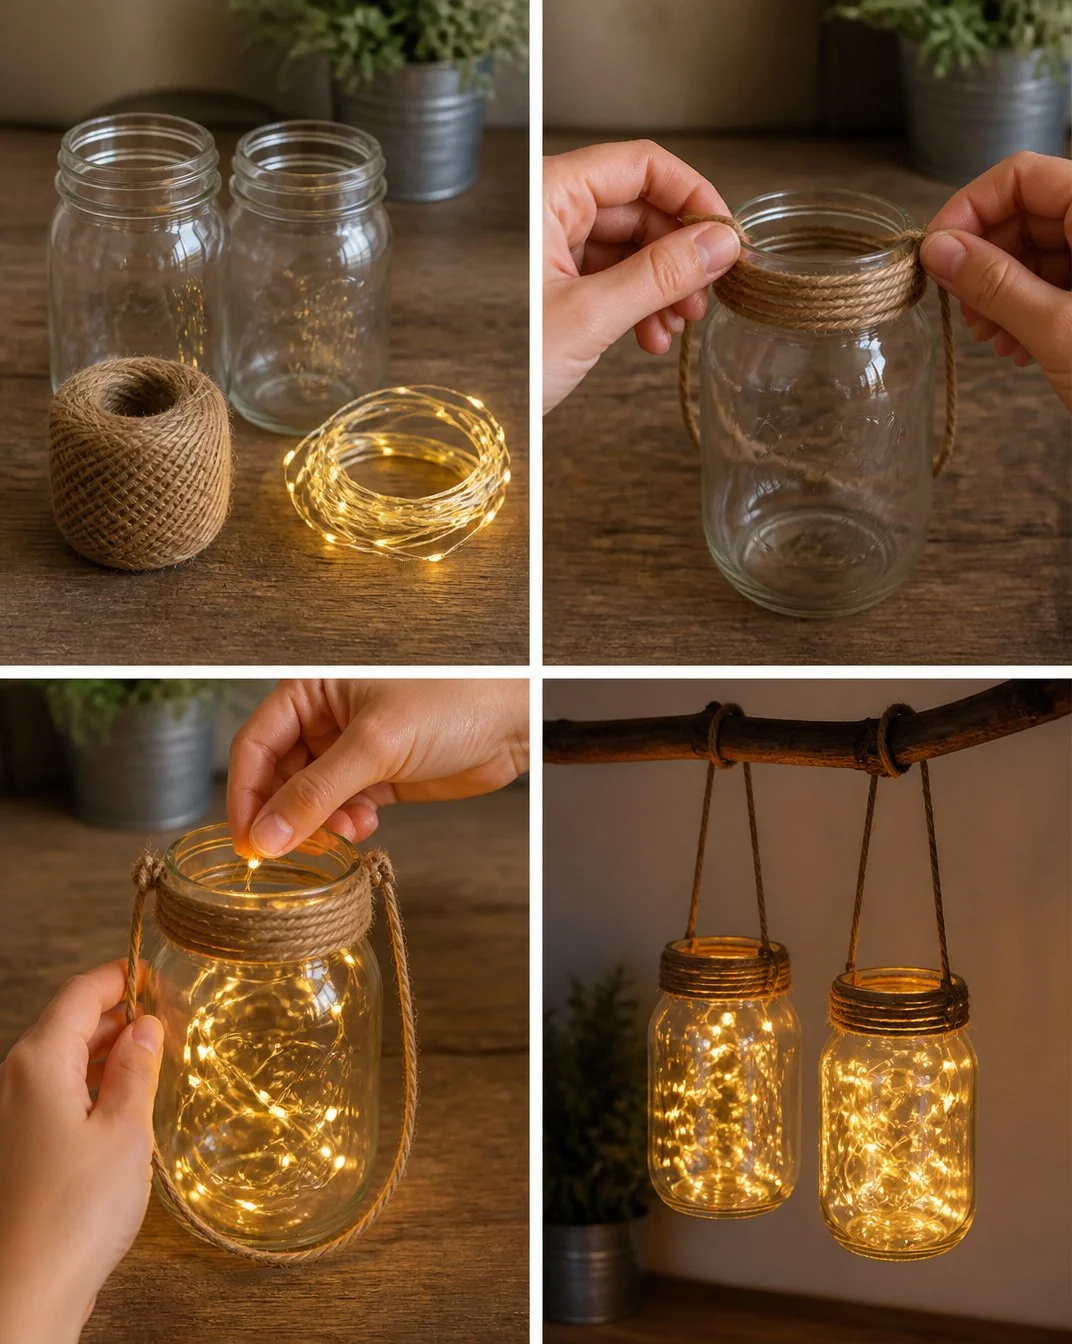
Making Hanging Mason Jar Lights is a low-prep and enjoyable activity. You don’t need advanced crafting skills; just a few basic items from around your home will do the trick. The entire project fits into a busy day because it doesn’t require extensive setup or cleanup. Plus, the result is a visually appealing light feature that can elevate any area in your home, whether it’s your garden, patio, or living room. You may also find Magical Snowstorm In A Jar Diy Winter Craft useful.
This project is also reliable. You can count on beautifully glowing lights when you finish, as long as you follow the simple steps. It’s a stress-free experience that invites creativity without overwhelming anyone involved. You can personalize the design to fit your aesthetics, leaving room for truly unique expressions.
A Quick Look Before You Begin
Creating these mason jar lights is an experience you can complete in a short amount of time, usually around 30 minutes to an hour, depending on your desired complexity. The setup is minimal—you only need to gather your materials, which makes getting started easy. As for mess, you’ll find this DIY to be quite tidy since no messy substances are involved, unlike some other home crafts.
Adult supervision may be needed while handling twine and lights, but children can certainly participate in the wrapping and placement of decorations. This ensures a group experience where everyone can contribute. Once everything is set, the payoff is the glow of your lovely jars.
Materials You’ll Need
- Mason jars: Common household item; versatile and budget-friendly.
- Twine: An easy substitute for ribbon if you desire a rustic feel.
- Fairy lights: Battery-operated ones are convenient and safe for most settings.
Having these materials on hand makes this activity approachable, ensuring a smooth process from start to finish.
Step-by-Step Directions
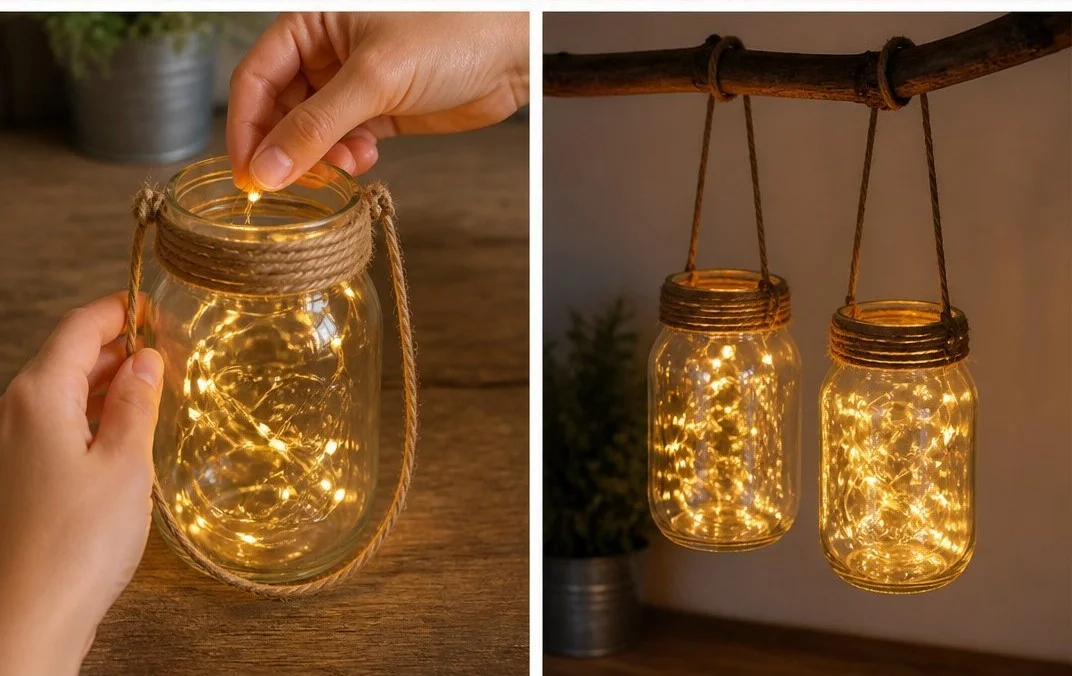
Start by gently wrapping the twine around the neck of the mason jar, creating a lovely little handle for your lights. It adds a personal touch. Make sure to secure it well so it can hold the jar safely.
Next, carefully place your fairy lights inside the jar, letting them twinkle and dance. Leave a bit of twine at the top for hanging if you wish—it adds a charming rustic feel.
Once you’ve completed these steps, you will have a stunning light feature that radiates warmth and character.
The Learning Behind This DIY

Making Hanging Mason Jar Lights introduces essential skills while fostering creativity. Children develop fine motor skills while wrapping twine and placing lights inside jars. It requires coordination to manage the twine while ensuring the lights are properly arranged.
Additionally, this project acts as a gentle introduction to cause and effect; twisting the twine creates a handle, which directly influences how you can hang your work of art. So while it may appear simple, the lessons learned are significant and foundation-building.
Troubleshooting Common Issues
If you encounter any hitches during your crafting session, don’t worry; you’re not alone. One common issue is that the lights might not turn on. This usually happens if the batteries are dead or if the connection is loose. Take a moment to check the batteries and ensure all connections are secure.
If you find that the twine isn’t holding well, consider adding a small dab of hot glue to secure it further. Just be cautious, as glue can be hot and may require adult supervision if children are helping. Lastly, if the lights appear dim, check the wattage rating on your fairy lights; you may need brighter ones for better visibility.
Easy Variations to Try
You can get creative with your mason jar lights in various ways. Here are a few suggestions to inspire you:
- Use colored twine or ribbon to match your home decor.
- Experiment with different types of jars, such as wide-mouth to fit larger lights or clear glass for a brighter effect.
- Add embellishments like dried flowers inside the jar for a beautiful touch.
These variations allow you to play with the design and tailor the jars to suit different occasions or seasons.
Storing or Reusing This Project
After the fun is over, think about how to care for your mason jar lights. If you decide to store them, keep them in a cool, dry place to prevent any damage. You can reuse the jars for other purposes like candle holders or decorative containers for plants. This helps reduce waste while allowing you to enjoy your lovely creations long after the original project is finished.
FAQs About Hanging Mason Jar Lights
“Will this project be too messy for my kids?” It’s quite a clean activity; the most that might accumulate is a few bits of twine.
“What age group is this suitable for?” Kids aged 5 and up can participate, but younger children may need more adult assistance with certain tasks.
“Can I use regular string instead of twine?” Yes, you can! Just ensure it’s sturdy enough to hold the jar.
“Is there a way to make these lights safe for outdoors?” Make sure to use battery-operated lights designed for outdoor conditions, and check the jars and twine for durability.
“How do I store these once I’m done?” Store them in their original spot, and make sure they’re clean and dry to preserve their beauty for future use.
Conclusion
Conclusion
Making your own Hanging Mason Jar Lights is a simple and rewarding project that adds character to any setting. These creations can serve as beautiful decor for your home, especially during gatherings or cozy family evenings. To enhance your lighting experience, consider browsing through options like Mason Jar Lights – Amazon.com or explore attractive designs at Mason Jar Lights | Hanging Kitchen Lights & More – The Lamp Goods. Enjoy your crafting!
PrintHanging Mason Jar Lights
Create beautiful and glowing mason jar lights that add charm to any space in your home.
- Prep Time: 15 minutes
- Cook Time: 0 minutes
- Total Time: 30 minutes
- Yield: 3-4 lights
- Category: Craft
- Method: Crafting
- Cuisine: N/A
- Diet: N/A
Ingredients
- Mason jars
- Twine
- Fairy lights (battery-operated)
Instructions
- Start by gently wrapping the twine around the neck of the mason jar, creating a lovely little handle.
- Next, carefully place your fairy lights inside the jar, letting them twinkle and dance.
- Once you’ve completed these steps, you will have a stunning light feature that radiates warmth and character.
Notes
Consider using colored twine or adding embellishments for a personal touch. Adult supervision is recommended during assembly.
Nutrition
- Serving Size: 1 light
- Calories: 0
- Sugar: 0g
- Sodium: 0mg
- Fat: 0g
- Saturated Fat: 0g
- Unsaturated Fat: 0g
- Trans Fat: 0g
- Carbohydrates: 0g
- Fiber: 0g
- Protein: 0g
- Cholesterol: 0mg