Resin Bookmarks
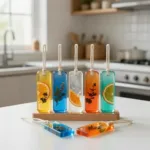
A delightful DIY project for kids to create personalized resin bookmarks, fostering creativity and hands-on skills.
- Prep Time: 15 minutes
- Cook Time: 1440 minutes
- Total Time: 1455 minutes
- Yield: 4 bookmarks
- Category: Crafts
- Method: Crafting
- Diet: Kid-Friendly
Ingredients
- Epoxy resin (kid-safe option)
- Mixing cups
- Stir sticks
- Silicone molds (variety of shapes)
- Glitter, dried flowers, or coloring agents
- Protective gloves
- Craft knife or scissors
Instructions
- Prepare your workspace: Cover the surface with newspaper or plastic to catch spills.
- Measure the resin: Follow the package instructions for resin and hardener amounts.
- Mix the resin: Combine in a cup and stir for 2-3 minutes until streak-free.
- Add colors and decorations: Mix in desired colors, glitter, or dried flowers.
- Pour into molds: Fill silicone molds with the resin mixture.
- Let it cure: Allow bookmarks to set for 24 hours without disturbance.
- Remove from molds: Pop out bookmarks and trim excess resin with a knife or scissors.
- Finish and gift: Sand edges for a smooth finish and they are ready to be used or gifted!
Notes
Ensure adult supervision while kids are handling resin. Follow safety guidelines.
Nutrition
- Serving Size: 1 bookmark
- Calories: 50
- Sugar: 0g
- Sodium: 0mg
- Fat: 0g
- Saturated Fat: 0g
- Unsaturated Fat: 0g
- Trans Fat: 0g
- Carbohydrates: 0g
- Fiber: 0g
- Protein: 0g
- Cholesterol: 0mg