

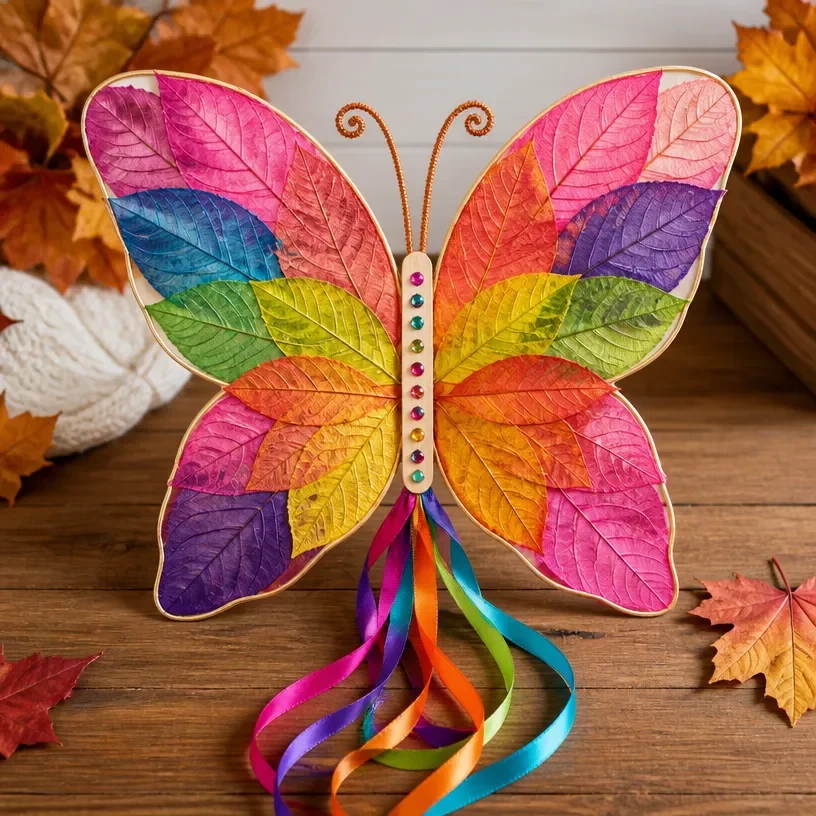
Creating a special project with the kids can be a delightful experience, especially on those busy afternoons when you need something creative to occupy their time. Imagine gathering with your little ones as they eagerly express their desire to make something magical. Why not transform some simple materials into beautiful, enchanting pieces such as the Enchanted Multicolor Leaf Fairy Wings for Fantasy Costumes? This project captures the essence of creativity and can open up their imaginations as they play pretend as fairies in their very own fantasy world. You may also find Build Heart Stem Challenge Affordable useful.
Why This Enchanted Multicolor Leaf Fairy Wings for Fantasy Costumes Works So Well
You may also find Colorful Monster Pencil Organizers For Desk useful.
This DIY project is appealing because it requires minimal preparation while being incredibly fun and engaging for children. The wings are not only visually striking but are adaptable to various sizes and colors, ensuring they cater to your child’s preferences. Moreover, unlike many craft projects, this one can be completed within an hour, making it approachable for busy families. With household items and basic crafting supplies, you can create something truly special without spending a lot of time or money.
A Quick Look Before You Begin
Before diving into the crafting process, take a moment to gather your materials and clear a workspace. This project requires an easy setup, and the mess level is relatively low, focusing mainly on using glue and colors. Expect to spend about 30 to 60 minutes on the entire task, depending on your child’s pace. Make sure to be involved in the project as needed, offering assistance while allowing them the freedom to explore their creativity.
Materials You’ll Need
- A large piece of cardstock paper (common household item)
- Tissue paper in various colors (optional, adds a fun touch)
- Scissors
- Glue or Mod Podge
- A pencil for tracing
- Ribbon or elastic bands for wearing the wings (easy substitute)
- Decorative items like glitter or stickers (budget-friendly and fun to use)
Step-by-Step Directions
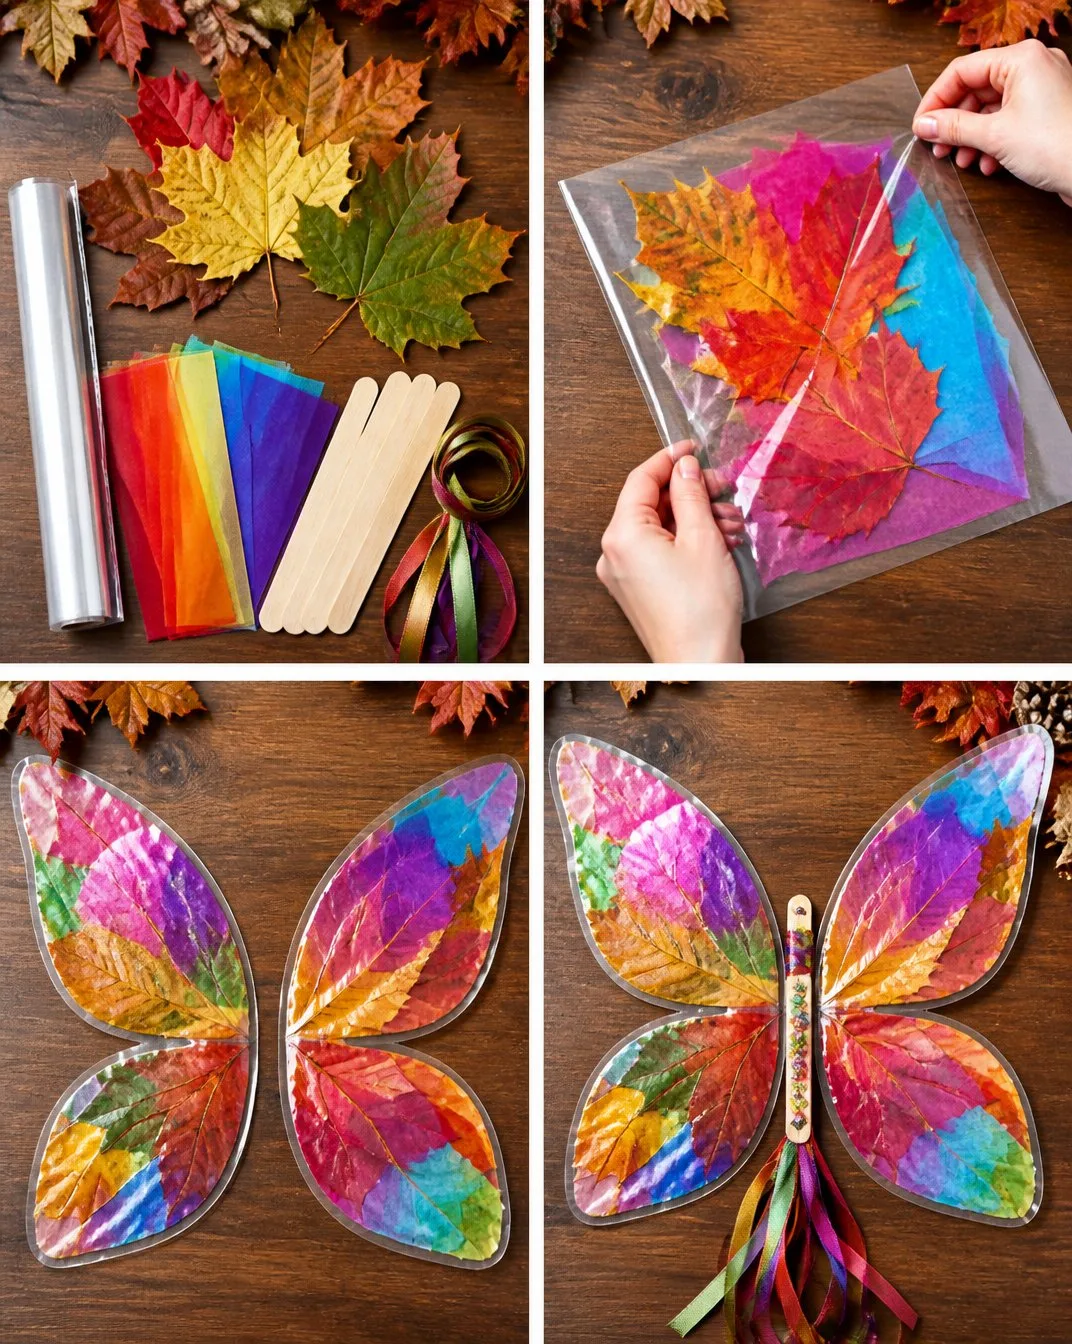
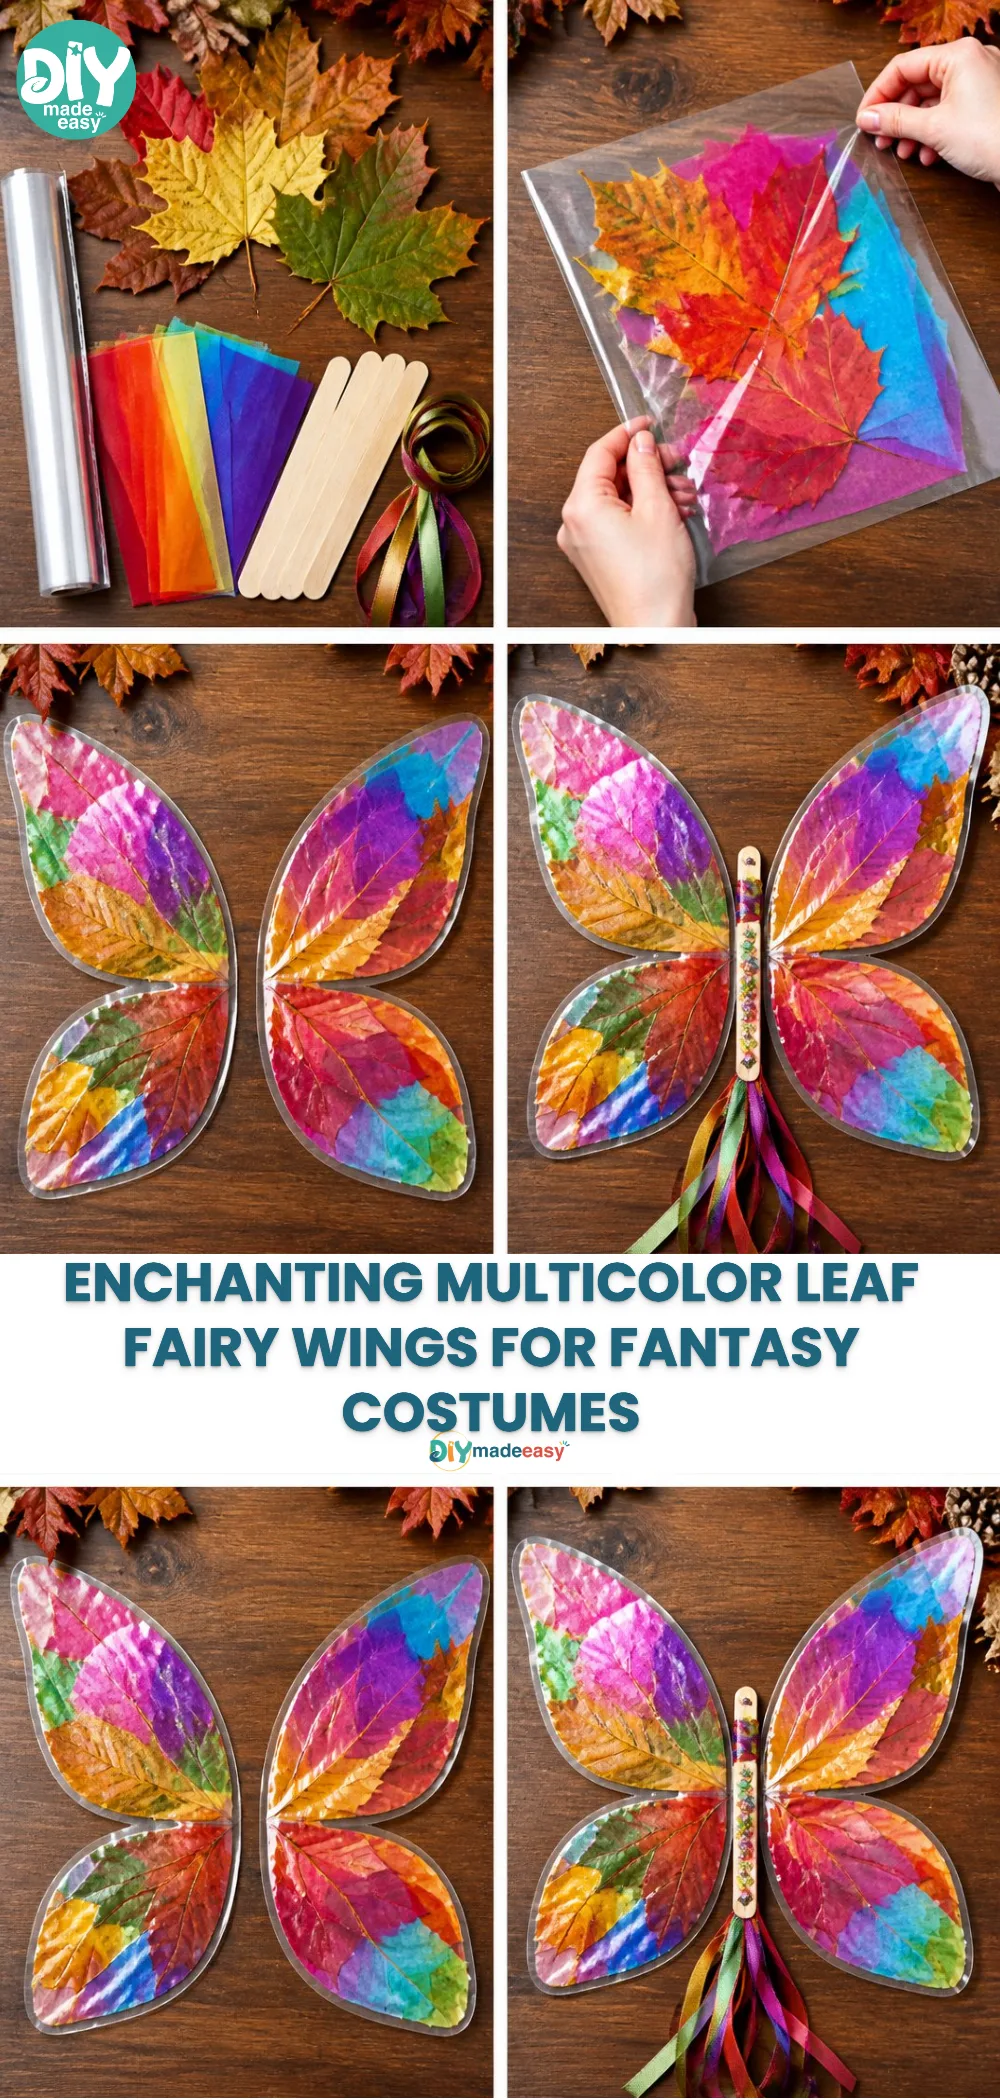
Prepare the Base: Start by cutting a large wing shape from the cardstock paper. Trace the outline using a pencil to achieve smooth edges. Aim for a size that fits comfortably on the child’s back.
Add Color: Cut various shapes from the tissue paper. These can resemble leaves, petals, or abstract shapes. Allow your child to choose their favorite colors and arrange them on the cardstock.
Secure the Shapes: Use glue or Mod Podge to attach the tissue paper to the cardstock. Encourage your child to overlap the colors for a beautiful layered effect.
Let It Dry: Once all shapes are securely glued, allow the wings to dry completely before moving on. This step is essential to prevent any slipping when adding additional decorations.
Decorate: After the wings are dry, your child can use glitter, stickers, or other embellishments to personalize their creation. Remind them that less is sometimes more; focusing on a few accents can be stunning.
Attach the Straps: Cut two pieces of ribbon or elastic bands. Attach them to the top corners of the wings, secure with glue, ensuring they are long enough to fit comfortably around the child’s shoulders.
Final Touches: Once everything is fully dry and secure, let your child try on the wings! Adjust the straps as needed for comfort.
The Learning Behind This DIY
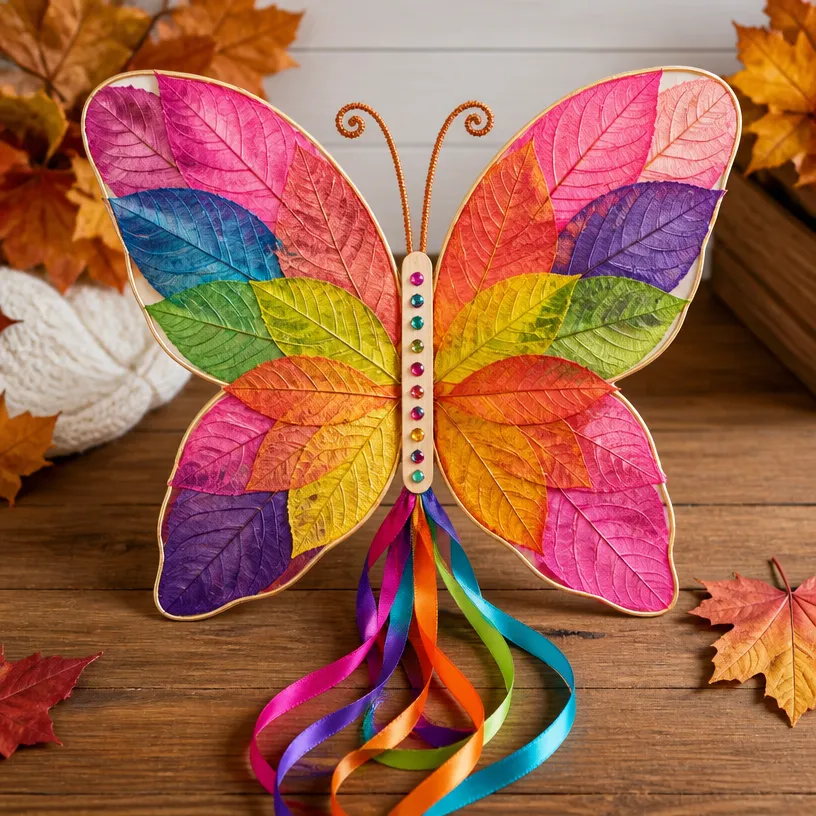
Making the Enchanted Multicolor Leaf Fairy Wings engages children in several ways. First, they practice fine motor skills as they cut, glue, and position their creations. They learn about color mixing as they combine different shades of tissue paper. This DIY also provides an opportunity to explore concepts like symmetry and design balance. The tactile nature of the craft offers sensory experiences, with different textures contributing to their excitement.
Troubleshooting Common Issues
If something doesn’t go as planned, don’t worry! It’s common for glue to take longer to dry than expected. If the wings seem droopy, reinforce the shapes with extra adhesive or use weights (like books) to help flatten them as they dry. If tissue paper tears, simply layer another piece over it and glue it down; creativity can often be spontaneous!
Easy Variations to Try
Here are a few suggestions to keep things fresh and engaging:
- Experiment with different colors from seasonal palettes; think autumn leaves for a fall theme or pastels in spring.
- Include extra decorations specific to interests, like butterflies for a nature lover or sparkles for a fairy-tale theme.
- Craft smaller versions of the wings for dolls, inspiring imaginative play.
- Turn this project into a party activity for birthdays, where each child can craft their unique wings.
Storing or Reusing This Project
Once the fun is over, think about ways to store the wings. If they are in good condition, consider keeping them for another playtime. Alternatively, you can repurpose the wings into new crafts, such as wall decorations or art projects, ensuring that nothing goes to waste and keeping the creativity flowing.
FAQs About Enchanted Multicolor Leaf Fairy Wings for Fantasy Costumes
What if my home gets messy during the project?
It’s normal for a bit of glue or glitter to end up where it shouldn’t. Lay down newspaper or an old tablecloth to catch spills. This way, cleanup becomes a breeze!
At what age is this project suitable?
This DIY is great for kids aged 5 and up, but younger children can participate, too, with adult supervision just be careful with scissors and glue.
Can I substitute any materials?
Absolutely! If you don’t have tissue paper, consider colored paper or fabric scraps. The essence is creativity, so use what you have.
How can we decorate the wings further?
Encourage additional creative flair with drawings, stickers, or light embellishments like sequins. The more personalized, the better!
What’s the best way to store these wings?
Once the project is complete, keep the wings flat in a container or hang them vertically if space allows, to maintain their shape.
Conclusion
Creating the Enchanted Multicolor Leaf Fairy Wings can be a delightful experience that fosters creativity in your child while providing joyful moments together. Don’t hesitate to explore related DIY ideas to further inspire your child consider checking out baking soda crystals or rainbow crystal forests for wonderful additions to their craft activities. When you want to take the whimsy a step further, look into enchanting costumes from Princess Factory® Girl’s Costumes or find unique accents like Enchanting Soft Rose Rainbow Fairy Wings & Flower Crown. Embrace the joy of crafting and the magic of imagination today!
PrintEnchanted Multicolor Leaf Fairy Wings for Fantasy Costumes
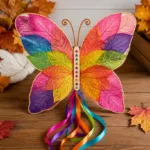
A delightful DIY project for kids to create enchanting leaf fairy wings using simple materials.
- Prep Time: 15 minutes
- Cook Time: 45 minutes
- Total Time: 60 minutes
- Yield: 1 set of wings
- Category: Craft
- Method: Crafting
- Cuisine: N/A
- Diet: N/A
Ingredients
- A large piece of cardstock paper
- Tissue paper in various colors
- Scissors
- Glue or Mod Podge
- A pencil for tracing
- Ribbon or elastic bands for wearing the wings
- Decorative items like glitter or stickers
Instructions
- Prepare the base by cutting a large wing shape from the cardstock paper.
- Add color by cutting various shapes from the tissue paper.
- Secure the shapes using glue or Mod Podge.
- Let the wings dry completely before decorating.
- Decorate the wings with glitter, stickers, and other embellishments.
- Attach the straps securely to the wings.
- Final touches involve trying on the wings and adjusting the straps.
Notes
Encourage kids to explore their creativity by mixing colors and experimenting with designs.
Nutrition
- Serving Size: 1 set
- Calories: 0
- Sugar: 0g
- Sodium: 0mg
- Fat: 0g
- Saturated Fat: 0g
- Unsaturated Fat: 0g
- Trans Fat: 0g
- Carbohydrates: 0g
- Fiber: 0g
- Protein: 0g
- Cholesterol: 0mg