Easy Sponge Painted Ice Cream Craft
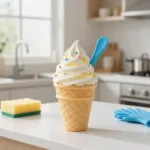
A fun and engaging sponge painting activity for kids that transforms everyday materials into colorful ice cream masterpieces.
- Prep Time: 15 minutes
- Cook Time: 0 minutes
- Total Time: 15 minutes
- Yield: 1 project
- Category: Craft
- Method: Painting
- Cuisine: N/A
- Diet: N/A
Ingredients
- Sponge: Common household item, look for a clean kitchen sponge.
- Non-toxic paint: Safe for little hands and easily washable.
- Paper or cardstock: A sturdy surface to create your ice cream cone.
- Scissors: For cutting the shape of the cone.
- Glue: To adhere different elements together.
- Optional embellishments: Items like sequins or glitter to add a fun touch.
Instructions
- Prepare your space: Set up a clean, flat surface covered with newspaper for easy cleanup.
- Cut the cone shape: Use scissors to cut a triangle from the paper or cardstock for the ice cream cone.
- Select sponge colors: Choose non-toxic paint colors that represent different ice cream flavors.
- Dip the sponge: Have the kids dip the sponge into the paint, making sure it’s not overly soaked to avoid spills.
- Stamp on the paper: Press the sponge onto the cardstock to create a colorful ice cream scoop on top of the cut-out cone.
- Create layers: Use various sponge pieces to build layers, representing multiple scoops of ice cream.
- Dry the paint: Allow the paint to dry completely before moving the artwork.
- Add final touches: Once dry, decorate your creations with optional embellishments for extra flair.
- Display your work: Find a prominent place to showcase these delightful ice cream crafts.
- Enjoy the process: Don’t forget to admire each other’s unique creations and share giggles over any happy accidents.
Notes
Encourage creativity and exploration in children while allowing for some mess. Supervise younger kids to ensure safety.
Nutrition
- Serving Size: 1 craft
- Calories: 0
- Sugar: 0g
- Sodium: 0mg
- Fat: 0g
- Saturated Fat: 0g
- Unsaturated Fat: 0g
- Trans Fat: 0g
- Carbohydrates: 0g
- Fiber: 0g
- Protein: 0g
- Cholesterol: 0mg