

Making DIY Magic Marble Bounce Balls can turn an ordinary afternoon into something fun and creative. Picture this: your kids come to you, bubbling with energy, wanting to create something special right now. The kitchen works as a center for imagination and excitement. You reach for some common household ingredients, knowing they can magically transform into colorful, bouncy balls. This simple craft doesn’t just fill the time; it also creates cherished memories and encourages playful experimentation. Let’s explore how making these DIY Magic Marble Bounce Balls can bring smiles and laughter to your family.
Why This DIY Magic Marble Bounce Balls Works So Well

This project is designed for ease, with a low-prep nature that fits well into the busiest of schedules. Instead of a long shopping list, you only need a handful of everyday ingredients. Flour, cornstarch, water, baking soda, and food coloring come together to create something magical. This simplicity makes it approachable for everyone, whether you’re seasoned in DIY or just starting.
The ingredients mix together effortlessly. Kids can help stir and roll, keeping them engaged without too much fuss. You won’t be overwhelmed with complicated techniques or hard-to-find supplies. And, just as important, the project yields reliable results. After drying, these colorful balls bounces quite well, providing instant gratification and a sense of accomplishment.
Making DIY Magic Marble Bounce Balls also becomes a shared experience. You can spend time together as a family, each taking part in the steps. Even the smallest hands can help shape the balls or add colors. There’s joy in collaboration, and this project promotes teamwork.
Discover Easy Kids Activities
Looking for simple, fun ideas for kids? Explore our Low Prep Kids Activities and find quick projects that spark creativity without long prep time.
A Quick Look Before You Begin
Crafting these bouncing balls is a straightforward process. The estimated time commitment tops around 25 minutes, with a full drying time of 24 hours. Kids, eager to see results, will be excited to check back in on their creations the next day.
Prepare your workspace by cutting some plastic wrap or wax paper ahead of time to minimize mess. While working with flour and cornstarch can bring a few spills, you can easily tackle them as they happen. Just keep a damp cloth nearby for quick cleanup. Setting up your baking sheet with the wraps can also help contain any material that tries to escape during rolling.
Adults need only to step in when necessary, letting children take the lead. It gives them a sense of responsibility, enhancing the overall experience. You will see their faces light up when they drop the balls and watch them bounce with pride.
Materials You’ll Need
To make DIY Magic Marble Bounce Balls, gather the following materials:
- 1 cup of flour
- 1 cup of water
- 1 cup of cornstarch
- 2 tablespoons of food coloring
- 1 tablespoon of baking soda
- Mixing bowl
- Spoon or whisk
- Plastic wrap or wax paper
- Baking sheet
These are all common household items that require no special trips to the store. If you want to explore different colors, feel free to use various shades of food coloring.
Step-by-Step Directions

Follow these simple steps to create your magic bounce balls:
- Place flour, water, cornstarch, and baking soda into a mixing bowl. Watch as the ingredients come together in a creamy texture.
- Stir the mixture slowly using a spoon or whisk. The blending should feel smooth, and you won’t see clumps. Keep stirring until everything is fully incorporated.
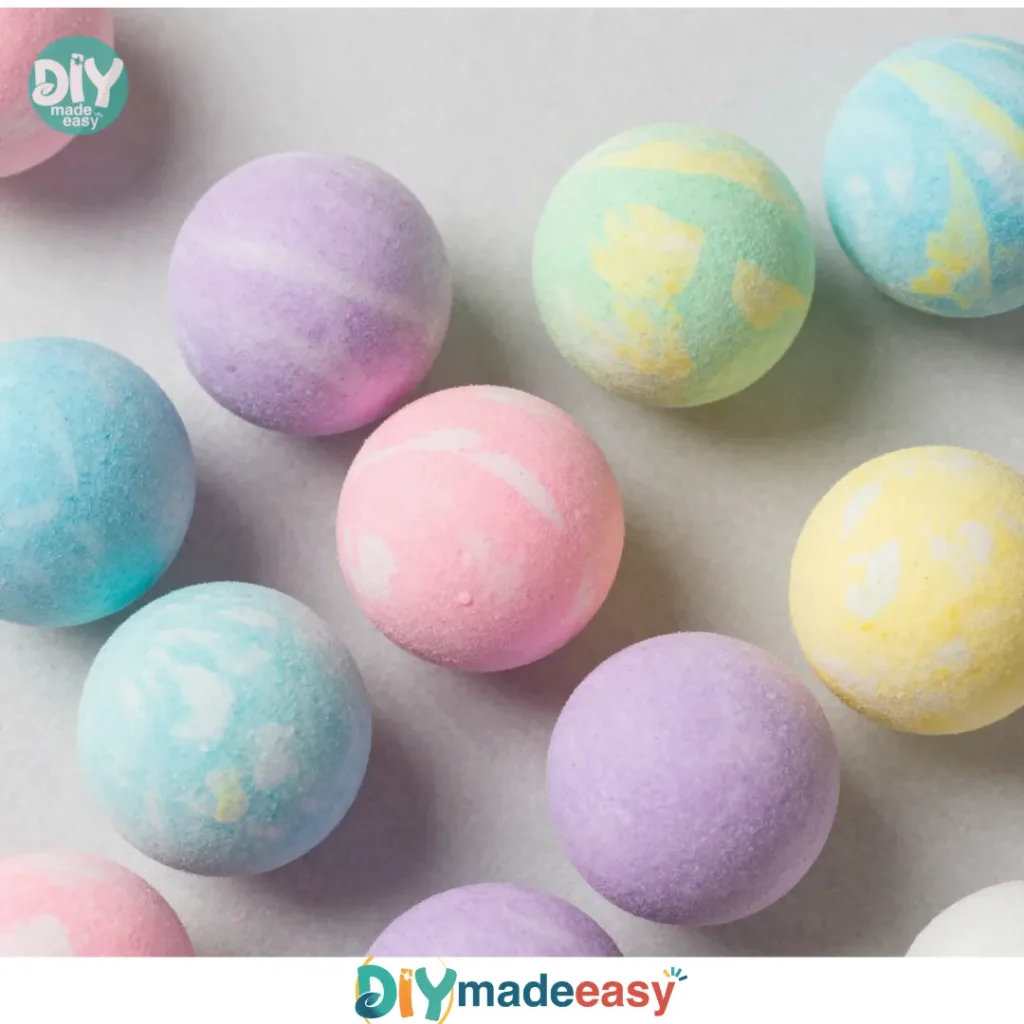
- Add food coloring and mix until blended. This is where the fun starts! Let the kids pick their favorite colors, and swirl them in for beautiful, vibrant balls.
- Scoop out small portions of the mixture and roll them into balls. Each ball should be roughly the size of a marble, and the texture should feel slightly sticky in your hands.
- Place the balls onto a baking sheet lined with plastic wrap or wax paper. This step is crucial; it helps avoid any sticking while the balls dry.
- Allow the balls to dry for 24 hours. Be patient, as this is where the magic happens! Keep them in a safe spot away from little hands eager to test their bounce too early.
- Test the bounce of the balls by dropping one from a low height. Gather everyone around to marvel at the results. Watch their excitement as the balls bounce back!
The Simple Science or Skills at Work

While making these bounce balls, children engage in various learning opportunities. They practice measuring ingredients, which fosters basic math skills. Stirring the mixture helps develop fine motor skills as they gain control over the spoon or whisk. Rolling the mixture into balls enhances hand coordination and spatial awareness.
The whole process also introduces simple science concepts. Children witness the combination of ingredients creating an entirely new item. The chemical reaction from the baking soda and cornstarch contributes to the texture change, allowing for bouncing. This experiential learning can spark curiosity about other science experiments or crafts you might explore together.
Troubleshooting Common Issues
If something doesn’t go as planned, don’t worry. Sometimes the mixture might feel too sticky or too crumbly. If it’s too sticky, simply add a bit more flour. Conversely, if it’s too dry, a spoonful of water can help. It’s okay to tweak the ingredients a little!
If your balls don’t bounce as expected, they might not have dried completely. Make sure to let them sit for the full 24 hours for the best results. If they still seem off, ensuring even sizing when rolling can affect bounce too. Smaller balls tend to bounce better.
Easy Variations to Try
If you want to mix things up, here are some fun variations:
- Glow in the Dark: Add glow-in-the-dark powder to the mixture to create exciting nighttime playtime.
- Seasonal Colors: Use colors that match the holidays. Think pastels for Easter or rich reds and greens for Christmas.
- Shapes Instead of Balls: Use cookie cutters to mold shapes instead of rolling them into balls. This allows creativity to flourish!
- Add Glitter: For some sparkle, incorporate glitter into the mix. Kids adore shiny things, and it takes the fun factor up a notch.
- Mix Textures: Consider adding small beads or sequins to the mixture before shaping. It can give a delightful texture to the balls.
Storing or Reusing This Project
After a successful play session, you might wonder how to keep things organized. To preserve your bounce balls, store them in a cool, dry place in an airtight container. If they start to lose bounce, leaving them out for a bit can help rehydrate them.
Evaluate if you can reuse the ingredients if making them again. As long as you have new food coloring or dust-free items, you’re set to go.
FAQs About DIY Magic Marble Bounce Balls
Is this messy, and how do I clean up afterwards?
It can get a bit messy with flour and cornstarch. Keep a damp cloth nearby for quick cleanup whenever spills happen. It’s all part of the fun!
Are the ingredients safe for young children?
Yes, these ingredients are safe for kids to handle. However, always supervise younger children, especially during rolling, to prevent choking.
Can I use different colors?
Absolutely! Get creative with food coloring. Mixing colors can lead to beautiful swirls as well.
What if they don’t bounce well?
This can happen if they didn’t dry long enough. Always ensure they set for the full 24 hours for optimal bounce.
What do I do with them after?
You can continue playing with the balls, or store them as crafts. They can even double as decorations if done in seasonal themes.
Conclusion
Making DIY Magic Marble Bounce Balls is a delightful activity that is sure to foster creativity and learning in your family. The process is straightforward, requiring familiar household ingredients that create a playful end product. Encouraging kids to take part from beginning to end not only brings fun but strengthens their confidence as little creators.
For those looking to expand their fun-filled endeavors, consider a complete Bouncy Ball Kit, or jump into the joy of color with JOYIN’s 28 Packs of Valentine’s Day Marble Bouncing Balls. Embrace the joy of creation, and let the bouncing begin!
PrintDIY Magic Marble Bounce Balls

Create colorful and bouncy balls using simple household ingredients, perfect for a fun family activity.
- Prep Time: 10 minutes
- Cook Time: 0 minutes
- Total Time: 1440 minutes
- Yield: 8 balls 1x
- Category: Craft
- Method: DIY
- Cuisine: N/A
- Diet: N/A
Ingredients
- 1 cup of flour
- 1 cup of water
- 1 cup of cornstarch
- 2 tablespoons of food coloring
- 1 tablespoon of baking soda
- Mixing bowl
- Spoon or whisk
- Plastic wrap or wax paper
- Baking sheet
Instructions
- Place flour, water, cornstarch, and baking soda into a mixing bowl. Watch as the ingredients come together in a creamy texture.
- Stir the mixture slowly using a spoon or whisk until everything is fully incorporated.
- Add food coloring and mix until blended.
- Scoop out small portions of the mixture and roll them into balls.
- Place the balls onto a baking sheet lined with plastic wrap or wax paper.
- Allow the balls to dry for 24 hours.
- Test the bounce of the balls by dropping one from a low height.
Notes
Keep a damp cloth nearby for quick cleanup. Ensure the balls dry for the full 24 hours for optimal bounce.
Nutrition
- Serving Size: 1 ball
- Calories: 50
- Sugar: 0g
- Sodium: 5mg
- Fat: 0g
- Saturated Fat: 0g
- Unsaturated Fat: 0g
- Trans Fat: 0g
- Carbohydrates: 12g
- Fiber: 0g
- Protein: 1g
- Cholesterol: 0mg