

It was one of those busy afternoons when homework sits on the table and the kids call out for something quick and fun to do. I set a cup of tea down, pulled a shallow dish of smooth glass beads from the craft bin, and within minutes we were tracing a loose heart shape with wire and laughter.
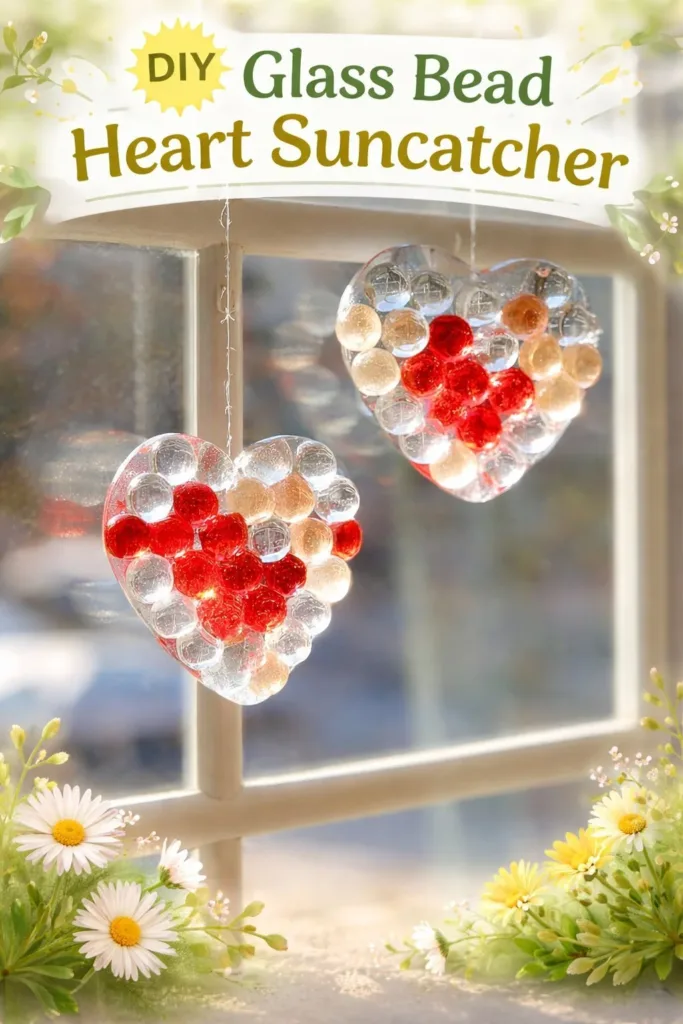
This easy kitchen-table activity turned into a lovely DIY Glass Bead Heart Suncatcher that brightened the window and kept everyone happy for half an hour. If you want something low-fuss that still looks special, this is it and if you like other simple heart projects, you might enjoy our take on no-curl swirled heart suncatchers for a different texture and finish: no-curl swirled heart suncatchers.
Why This DIY Glass Bead Heart Suncatcher Works So Well

This project works because it uses what you already have and needs only a small, tidy setup. Smooth glass beads and a length of sturdy craft wire do most of the work, so you avoid long prep and tricky tools. The craft feels immediate. Kids see progress as the beads slide onto the wire and an actual heart takes shape within minutes.
This suncatcher is approachable because the steps are simple and forgiving. If a bead slips or the curve looks off, you can reshape the wire or swap beads. The materials hold their shape and stay pretty even when a small hand nudges them. That reliability makes the project real for busy days.
It fits real-life schedules because you can stop and start easily. You can thread a few beads, set the piece aside, and come back fifteen minutes later. The finished piece rewards little efforts with a display that catches light and smiles. It suits quick crafts at the kitchen table and calm afternoon sessions after school.
A Quick Look Before You Begin
This project takes about 30 to 60 minutes depending on how detailed you get. Setup needs one small tray of beads, a soft cloth, wire cutters, and pliers. You can do it with one adult supervising kids and handling the wire cutting.
Mess level stays low if you use a bead tray or shallow dish and work on a soft cloth. Stray beads are the main cleanup task, and they usually sweep up in a second. Bead sorting takes the longest up front, but it doubles as a calm, tactile activity that kids love.
Plan for light supervision for ages under eight. Older kids can do most steps independently once an adult handles the wire cutting. If you want a slightly different challenge, try the build heart stem challenge for a sturdier wire form and a kid-friendly twist: build heart stem challenge.
Materials You’ll Need
- Smooth glass beads in assorted colors and sizes common craft stash item, very visual.
- Sturdy craft wire, 20–24 gauge flexible but holds shape, choose based on bead hole size.
- Wire cutters for clean, safe cuts.
- Round-nose pliers make neat loops and gentle curves.
- Flat-nose pliers flatten, twist, and tidy wire ends.
- A bead tray or shallow dish keeps beads from rolling away.
- A soft cloth or small piece of felt catches stray beads, protects your table.
- Fishing line, thin ribbon, or fine chain for hanging choose a hanger that suits the window.
- A small bead or charm for the center or dangle (optional) simple accent, optional.
- A permanent marker to sketch a heart outline on paper (optional guide) helpful for consistent shapes.
- A clear workspace with good natural light and a cup of tea for company small comfort that keeps craft calm.
Step-by-Step Directions

- Prepare your workspace and sort beads by color.
Lay out beads in small piles or a tray so choices are easy to see.
Sorts calm kids and speeds threading when you are ready. - Place a soft cloth under your work area to catch stray beads.
A felt square stops rolling and keeps beads from clinking across the table.
You will thank yourself at cleanup time. - Measure and cut your wire to size, leaving extra wire for shaping and finishing loops.
Cut a length roughly twice the size of the finished heart plus an inch.
This gives room to shape and make tidy looped ends. - Make a small loop at one end with round-nose pliers.
A starting loop keeps beads from slipping off as you work.
Make it tight enough to hold the first bead but not so tight it kinks the wire. - Begin threading beads onto the wire, following your color plan.
Slide beads in your chosen order, feeling the weight and balance as you go.
If beads slide awkwardly, stop and adjust spacing or bead sizes. - Pause to shape the wire into a gentle curve, creating the top lobes of the heart.
Use your hands and pliers to make soft, even curves where the top lobes sit.
Work slowly; small adjustments change the look more than big tugs. - Continue adding beads until you reach the bottom point. Leave about an inch of wire free for the tip and loop.
Stop before the tip so you can form a neat point and final loop.
The free inch helps you twist and finish without squeezing beads. - Twist the ends of the wire together neatly, keeping the bead line snug.
Wrap the tail around the main wire a couple of turns so the beads stay tight.
Use flat-nose pliers to press the twist flat and smooth. - Make a small finishing loop with round-nose pliers and trim any excess wire.
A rounded loop looks tidy and keeps the wire from snagging fingers or fabric.
Trim close to the loop and tuck any sharp bits down with the pliers. - If desired, add a small bead or charm to the hanging line.
Thread the charm onto fishing line, ribbon, or chain before tying the hanger.
This little addition adds movement and interest when light hits the glass. - Test the balance by holding the suncatcher up to light.
Hold it at the planned hanging spot to see how it hangs and spins.
Adjust bead placement slightly if one side droops. - Clean the glass beads gently with a soft cloth and hang the finished piece where it catches the light.
A quick polish brings out the shine and the color depth of the glass.
Hang in a sunny window and enjoy the gentle sparkle.
What Kids Practice While Making This

This activity supports fine motor skills every step of the way. Picking up beads, lining them up, and sliding them onto wire strengthens pincer grip and hand-eye coordination. Those small, repetitive actions build control without feeling like a lesson.
Kids also learn simple cause and effect. When they add a heavy bead to one side, the hanger tilts. When they make a loop too big, beads can slip off. These moments teach balance, weight, and the value of small adjustments.
There is a touch of kitchen-table science, too. Glass beads refract and reflect light differently based on shape and thickness. Children notice that a clear bead shines differently from a deep blue one, and that a clustered curve scatters light in pretty ways. You can use this to ask gentle questions: Which bead catches the light most? Why does the red bead look darker near the edge?
Finally, patience and planning get a soft workout. Sorting beads, choosing a pattern, and finishing loops all reward calm focus. The craft gives children a clear sequence to follow, which helps build confidence in multi-step projects.
Troubleshooting Common Issues
If beads slide off the wire at the start, check your beginning loop.
Make the loop slightly smaller or add a tiny crimp bead at the start if you have one.
A small change here stops beads from escaping.
If the heart looks lopsided, look for uneven bead sizes or spacing.
Slide a few beads back and rebalance by swapping a larger bead to the lighter side.
Tweaking a bead or two usually fixes the hang.
If the wire kinks or resists bending, you might be using a wire that is too thick.
Switch to a 22 or 24 gauge wire for easier shaping while keeping strength.
Work slowly and use the round-nose pliers for smoother curves.
If wire ends feel sharp after trimming, flatten them with flat-nose pliers.
Tuck the cut end under a loop or press it flat against the wrapped section.
Sharp bits cause discomfort and can catch on clothes, so finish carefully.
If the suncatcher swings unevenly when hanging, test balance by holding different spots on the hanger.
Adjust where the hanging line attaches or move beads slightly until the piece hangs steady.
A tiny shift makes a big difference in even rotation.
Easy Variations to Try
Try alternating bead sizes to create a textured outline that catches light differently.
Large beads at the top and small ones at the point give a pleasing weight and shape contrast.
Use a single color palette for a minimalist look that reads as elegant in a sunny window.
Monochrome palettes work well in rooms with simple decor and let light do the show.
Add a dangling charm or a crystal at the bottom for extra sparkle and movement.
A small charm makes the piece feel finished and offers a chance to personalize.
Turn the heart into a pair and hang them at different heights for a layered look.
Two hearts create a small window installation that moves with the breeze.
If you like mixing crafts, pair this with a crystal heart craft activity to explore different light effects and textures: crystal heart craft. Treat these as suggestions, not rules, and let your taste guide the choices.
Storing or Reusing This Project
Store leftover beads in small resealable bags or a divided craft box.
Label them by color or size so you can grab what you need next time.
If you change your mind about a design, unhook the hanging string and gently unwind the twisted wire.
Most beads come off easily, and the wire can be reshaped into another heart later.
Keep wire scraps and very small leftover pieces in a container for practice loops.
Kids can use them for trial runs without risking the finished piece.
When you remove the suncatcher for cleaning, wrap it in a soft cloth or tissue to prevent scratches.
Glass beads are sturdy but can dull if left in direct sun without occasional cleaning.
Reduce waste by reusing charms and hangers across multiple projects.
A charm can move from one suncatcher to another and still feel fresh.
FAQs About DIY Glass Bead Heart Suncatcher
Will this craft make a big mess? I need something tidy.
The mess stays small if you work on a soft cloth and use a bead tray. Most stray beads collect on the cloth and small ones tuck back into the dish. Cleaning takes a minute. If you worry about tiny beads, give each child a small tray so pieces stay contained.
What age is this right for? I have a preschooler and an older child.
Children around six and up can thread beads with some help. Younger children enjoy sorting beads and choosing colors while an adult handles the wire cutting and loops. Supervised toddler participation works when you keep beads larger and use blunt-ended wire or pre-looped starts.
Can I swap materials if I do not have certain tools or beads?
You can use slightly different bead sizes as long as they fit the wire. Do not skip the round-nose pliers; they make safer loops. If you lack craft-specific pliers, use small jewelry pliers from a basic kit, but do not use household pliers that have rough edges.
What if the finished piece does not look like the example?
That is normal and fine. Each set of beads and each bend of wire creates its own look. The charm of this craft is its individuality. If one side droops, adjust bead placement. Small changes often make the piece look more balanced without starting over.
How should I store the suncatcher so it lasts?
Hang it away from constant direct weather or strong outdoor sun if it will be exposed. Indoor window spots are ideal. If you need to store it, wrap it in tissue or soft cloth and keep it in a box. That keeps beads from getting dusty or scratched.
A Final Helpful Note
Take your time and enjoy the rhythm of the project. The simple act of choosing colors and sliding beads builds a small, steady focus. If a step feels fiddly, make a fresh loop or take a sip of tea and return. This craft rewards gentle adjustments and calm attention.
Remember that small imperfections add character. A slightly unequal curve or one bead sitting a bit higher shows this piece has hands on it. That human touch is what makes a DIY Glass Bead Heart Suncatcher feel like home. Be confident, be flexible, and have fun with the light it brings.
Conclusion
If you want another example or step-by-step inspiration, this Glass Bead Heart Suncatcher – One Little Project shows a similar approach and photo guide that may spark ideas. For a version that uses bright pony beads and a prism-style finish, see Hanging Heart Prism Beaded Suncatcher Crafts – Rhythms of Play.
PrintDIY Glass Bead Heart Suncatcher

Create a beautiful and simple glass bead heart suncatcher that adds a splash of color to your window.
- Prep Time: 15 minutes
- Cook Time: 45 minutes
- Total Time: 60 minutes
- Yield: 1 suncatcher
- Category: Crafts
- Method: Crafting
- Cuisine: N/A
- Diet: N/A
Ingredients
- Smooth glass beads in assorted colors and sizes
- Sturdy craft wire (20–24 gauge)
- Wire cutters
- Round-nose pliers
- Flat-nose pliers
- A bead tray or shallow dish
- A soft cloth or small piece of felt
- Fishing line, thin ribbon, or fine chain for hanging
- A small bead or charm for the center (optional)
- A permanent marker (optional)
Instructions
- Prepare your workspace and sort beads by color.
- Place a soft cloth under your work area to catch stray beads.
- Measure and cut your wire to size, leaving extra wire for shaping.
- Make a small loop at one end with round-nose pliers.
- Begin threading beads onto the wire, following your color plan.
- Pause to shape the wire into a gentle curve.
- Continue adding beads until you reach the bottom point, leaving an inch of wire free.
- Twist the ends of the wire together neatly.
- Make a small finishing loop with round-nose pliers and trim any excess wire.
- If desired, add a small bead or charm to the hanging line.
- Test the balance by holding the suncatcher up to light.
- Clean the glass beads gently with a soft cloth and hang the finished piece where it catches the light.
Notes
This project encourages fine motor skills and creativity in children.
Nutrition
- Serving Size: 1 suncatcher
- Calories: 0
- Sugar: 0g
- Sodium: 0mg
- Fat: 0g
- Saturated Fat: 0g
- Unsaturated Fat: 0g
- Trans Fat: 0g
- Carbohydrates: 0g
- Fiber: 0g
- Protein: 0g
- Cholesterol: 0mg