How to Make Epoxy Resin Stickers
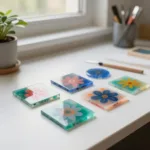
A fun and easy DIY project for creating unique epoxy resin stickers that encourages creativity and bonding time with family.
- Prep Time: 15 minutes
- Cook Time: 1440 minutes
- Total Time: 1455 minutes
- Yield: Varies (multiple stickers)
- Category: Arts & Crafts
- Method: Crafting
- Cuisine: N/A
- Diet: N/A
Ingredients
- Epoxy resin
- Mixing cups
- Stirring sticks
- Silicone molds or sticker sheets
- Decorative items (glitter, charms, colorful powders)
- Safety gloves
- Plastic sheet or table cover
Instructions
- Prepare your workspace by covering it with a plastic sheet.
- Gather all materials within reach, including your resin kit.
- Measure the epoxy resin and hardener in accordance with the resin kit instructions.
- Mix the resin and hardener in a mixing cup for 2-3 minutes until uniform.
- Add decorations like glitter or charms into the mixed resin.
- Pour the mixture into molds or onto sticker sheets.
- Let it cure as per instructions, usually 24 hours.
- Demold your stickers gently after curing.
- Trim any excess edges if necessary.
- Enjoy your creations on crafts or as decorative items.
Notes
Use gloves while handling epoxy resin and supervise children during the activity.
Nutrition
- Serving Size: As needed
- Calories: N/A
- Sugar: N/A
- Sodium: N/A
- Fat: N/A
- Saturated Fat: N/A
- Unsaturated Fat: N/A
- Trans Fat: N/A
- Carbohydrates: N/A
- Fiber: N/A
- Protein: N/A
- Cholesterol: N/A