DIY Crystal Garden: Watch Science Bloom!
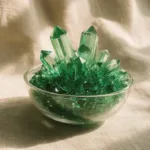
A fun and educational project for kids to grow crystal gardens using a DIY kit, combining art and science.
- Prep Time: 15 minutes
- Cook Time: 0 minutes
- Total Time: 1440 minutes
- Yield: Varies (depends on size and number of crystals grown)
- Category: Craft
- Method: DIY Project
- Cuisine: N/A
- Diet: N/A
Ingredients
- Crystal growing mix packet (included in kit)
- Plastic growing tray or dish (included in kit)
- Measuring spoon or scoop (included in kit)
- Mixing cup or beaker (included in kit)
- Stirrer or wooden stick (included in kit)
- Decorative base pieces (included in kit)
- Warm water (household)
- Paper towel or tray liner
- Plastic gloves (optional)
Instructions
- Lay out a towel on the table and place the plastic growing tray on top.
- Open one packet of the crystal mix and pour it into the measuring cup.
- Carefully add the warm water specified by the kit to the crystal mix, then stir until mostly dissolved.
- Arrange the decorative base pieces in the tray where you want crystals to form.
- Pour the mixed solution slowly into the tray to cover the bases.
- Move the tray to a quiet spot indoors to sit level for 24 to 48 hours.
- Check after several hours for tiny seeds forming, then larger crystals by the next day.
- When growth looks complete, gently lift out saved pieces to dry.
- Dispose of leftover solution as your kit suggests and clean the tray.
Notes
Ideal for kids with adult supervision for the hot water step. Keep the area tidy to manage messiness during the activity.
Nutrition
- Serving Size: N/A
- Calories: 0
- Sugar: 0g
- Sodium: 0mg
- Fat: 0g
- Saturated Fat: 0g
- Unsaturated Fat: 0g
- Trans Fat: 0g
- Carbohydrates: 0g
- Fiber: 0g
- Protein: 0g
- Cholesterol: 0mg