

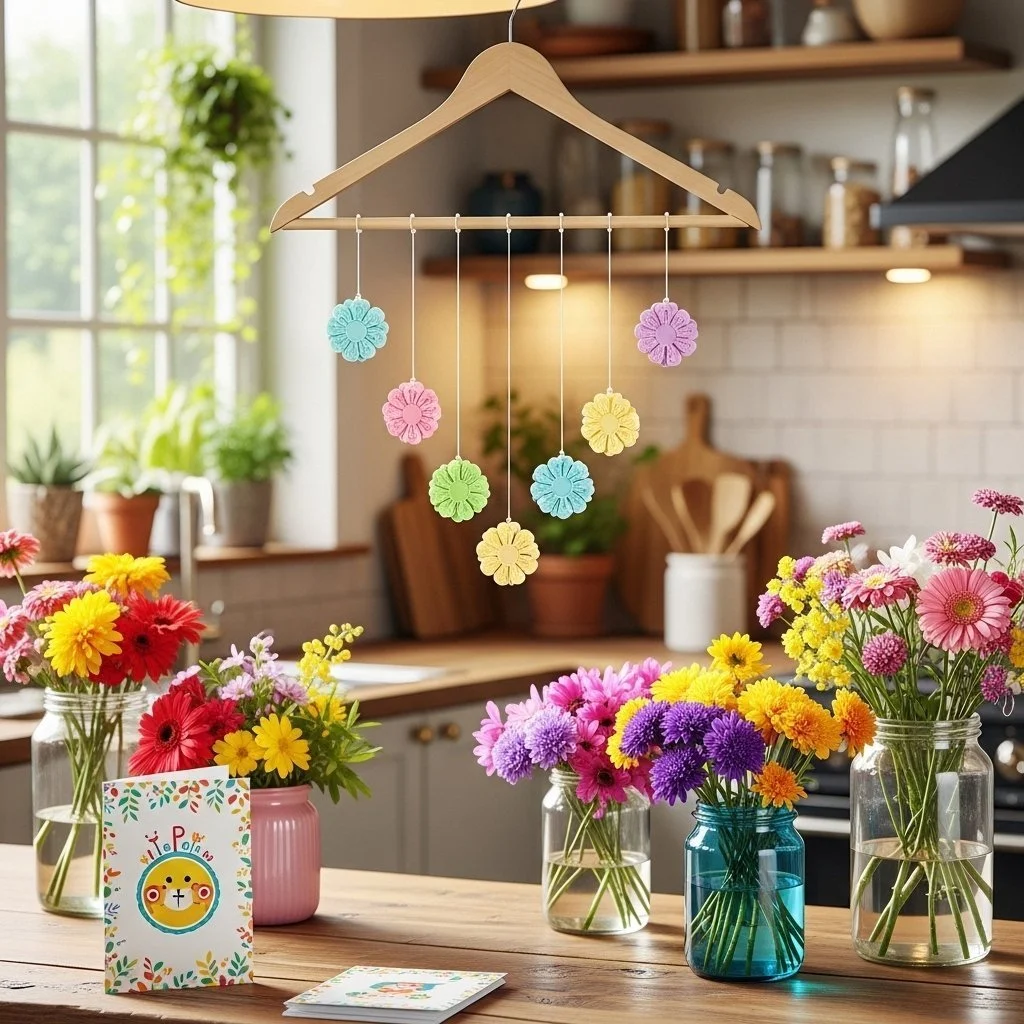
A late afternoon popsicle drip and a chorus of “Can we make something now?” often sets the scene in our house. I pull out a saucepan, the kids stand on stools, and we turn a few pantry staples into small, bright windows stars. DIY Bioplastic Suncatchers with Colorful Swirls fit that moment perfectly: low-prep, quick to start, and full of color without a lot of fuss. If you want the exact measurements handy on your phone while you work, you can open our step-by-step recipe page before you begin and keep it beside the stove.
This project feels like a warm kitchen experiment and a craft all at once. You heat, stir, pour, and marble with simple tools, and the results dry into translucent suncatchers that catch light and smiles. The process teaches patience, offers a calm way to use color, and leaves you with a small keepsake the kids can hang at the window. It works well on a weekday when you need something that fits into a real family rhythm.
Why This DIY Bioplastic Suncatchers with Colorful Swirls Works So Well

This craft uses things you already keep in the kitchen, so no last-minute store run. Cornstarch, water, a little vinegar, and optional glycerin give a predictable texture when heated. That predictability makes the project reliable even when helpers are small.
It stays low-prep. You measure, stir, and pour. No molds, no oven, no special drying cabinet. The trickiest part is watching the mixture thicken, which is a short, hands-on moment that keeps kids engaged without long waiting.
It fits real-life schedules. You heat and swirl in under 20 minutes, then let the pieces dry during a nap or overnight. You still get a neat result with modest adult help. The method gives you a soft, pudding-like starting texture that becomes firm and slightly bendy when dry, which feels satisfying to peel off.
It keeps the mess manageable. You work on a silicone mat or parchment, and cleanup needs only a soft cloth and mild soap. The small jars mean minimal splatters, and the kids can each have a jar to mix colors safely.
A Quick Look Before You Begin
Set aside about 10 to 20 minutes for the cooking and pouring part, plus about 24 hours for drying. You will mostly stand at the stove for a short, focused stretch while stirring.
Plan for light adult supervision from heating through the pour. Kids can do the coloring, marbling, and hole-making. Expect a low-to-moderate mess level if you use a silicone mat or parchment. A damp cloth nearby makes quick cleanup easy.
Prepare jars and coloring before you heat. That way you move smoothly from cooking to pouring and keep the mixture workable. A single adult can do this with one or two kids helping. If you have more children, give each child a small ramekin to swirl color in later.
If you want a quick background on why bioplastic suncatchers work and other ways to make them, check out this project overview for more ideas and photos to inspire your setup project overview and tips.
Materials You’ll Need
1 cup distilled water
4 tablespoons cornstarch
1 tablespoon vegetable glycerin (optional) helps keep pieces a bit more flexible and long-lasting
1 teaspoon white vinegar stabilizes the bioplastic and helps clarity
Food coloring or liquid watercolor paints small drops give great swirls
Silicone baking mat or parchment paper nonstick base for drying
Small glass jars or ramekins for holding and pouring colors
Toothpicks or fine brushes for marbling for gentle swirls and detail
Straw or skewer for making hanging holes punch while still soft
Soft cloth and gentle soap for cleanup simple clean up after play
These are the exact materials you need. The items are common and budget friendly. The glycerin is optional but useful if you want softer, less brittle pieces. If you do not have distilled water, the craft still works with tap water, though distilled can give a slightly clearer finish.
Step-by-Step Directions

- Measure 1 cup of water and 4 tablespoons of cornstarch in a saucepan, stirring until smooth.
Work quickly to dissolve the starch so you do not see lumps. Keep the pan dry on the outside. - Heat over medium-low, stirring constantly until the mixture thickens and becomes glossy.
You will see it change from milky to clear and shiny. This takes a few minutes; keep the heat gentle. - Add glycerin and vinegar, stirring until blended.
The glycerin will make the mix feel slightly slick and stretchy. Stir for a few seconds to combine. - Remove from heat when the mixture pulls away from the sides and has a pudding-like texture.
The pan will look shiny and the paste will come together in a mass. That is your cue to stop heating. - Let it cool for a minute and pour into jars.
Cool just enough to avoid steam and burns, but pour before it sets. Use small jars or ramekins for controlled pours. - Add food coloring drops and swirl gently with a toothpick.
Drop one or two small drops per jar and pull colors lightly. Overmixing will muddy the colors. - Use the straw to make a hanging hole.
Do this while the plastic is still soft. Aim near the top and twist gently to leave a neat hole. - Allow to dry for 24 hours on a nonstick surface.
Keep the pieces flat and out of direct drafts. A sunny windowsill works if pets and curious hands stay away. - Once dry, peel off gently and trim edges as necessary.
Edges will peel away cleanly from silicone. Use scissors to smooth any rough bits. - Thread a ribbon through the hole and hang the suncatcher.
Use lightweight ribbon or twine to display them where light can shine through.
The Simple Science or Skills at Work

Making these suncatchers mixes a little kitchen chemistry with fine motor work. Heating cornstarch and water causes the starch molecules to swell and link, creating a gel that firms when it cools and dries. Vinegar helps slightly by changing the pH so the gel sets clearly. Glycerin keeps the final piece less brittle by holding some moisture in the material.
Kids practice measuring and pouring precisely when they help with the water and cornstarch. Stirring at the stove builds hand-eye coordination and rhythm. Marbling with a toothpick hones small hand motions and decision making about color placement.
You also get a gentle lesson in cause and effect. The mixture changes visibly as it heats. Kids learn that continued stirring matters and that removing the pan at the right look makes a big difference. Those tactile cues glossy shine, thick pull, pudding-like feel become part of the learning.
If you enjoy kitchen science activities, this project pairs well with a simple acid-base reaction like our colorful baking soda and vinegar experiment to explore cause and effect and fizz reactions in a playful way. See one of our related activities here a related kitchen science activity.
Troubleshooting Common Issues
If the mixture stays lumpy after you stir it, you probably did not mix the starch fully into the water before heating. Try whisking vigorously when the pan is off heat; for future batches, whisk until smooth before turning on the stove.
If it cooks too fast and burns or smells odd, the heat was too high. Turn off the burner and start over with a clean pan. A scorched batch will darken and smell and will not clear up.
If the colors sink and separate oddly, you may have dropped too much food coloring or stirred too hard. Use smaller drops next time and do gentle swirls. Liquid watercolors or diluted food colors spread more evenly than very concentrated drops.
If the pieces crack when dry, the environment was too dry or you used no glycerin. Try adding the optional glycerin next time or dry the pieces in a slightly more humid spot. Also, thicker pieces take longer to dry and can crack if the outer layer dries and the inner part shrinks. Make shallower pieces for a smoother finish.
If the hole rips when you thread ribbon, the hole may have been too close to the edge or too small. Make the hole slightly larger while the piece is still soft or reinforce with a dab of leftover mixture and let it dry again.
Easy Variations to Try
Try small shapes with a cookie cutter placed on parchment and pour inside the cutters for defined edges. The cutters work like simple molds if you press them gently onto the parchment.
Use a single color per jar for a stained-glass look. Let kids pick a palette of two or three colors and keep the swirls loose for a watercolor feel.
Mix in tiny bits of dried flower petals or glitter sparingly. Small items can sit on top while drying, but avoid large pieces that create holes or cause tears.
Turn the same method into holiday ornaments by choosing seasonal colors and hanging them on a low branch. For another bright window craft that uses crayons and heat, try this blue crayon suncatcher idea for a waxy look and different texture blue crayon suncatchers variation.
Use the optional glycerin to make pieces that bend a little when dry. That makes them less likely to break if a windy day hits the window.
These ideas do not change the basic steps. They let you adapt color, thickness, and embellishment for different ages and occasions.
Storing or Reusing This Project
Store finished suncatchers out of direct sun when you are not displaying them. Prolonged direct heat can soften glycerin-added pieces over time. A flat box lined with tissue keeps them safe.
You can gently wipe finished pieces with a soft damp cloth if they pick up dust. Avoid soaking or harsh cleaners; the bioplastic may soften back a little with lots of moisture.
Leftover uncured mixture that cooled too much to pour will not be usable. It dries into a film that does not remelt. Save only small amounts to avoid waste. For scraps you do not use, wrap them in paper and toss them in the trash rather than the sink.
If you have extra jars and tools, clean them right away with warm soapy water. The cornstarch mix clears easily while warm. A little soak loosens any residue. This quick cleanup supports a tidy kitchen and makes the next craft day faster.
FAQs About DIY Bioplastic Suncatchers
Will this project make a big mess if my child helps?
It can stay tidy if you set up a silicone mat or parchment and keep a damp cloth handy. Expect a few dots of color and a little sticky on fingers. That is normal. I let kids have a little station with their own ramekin and a toothpick. If a spill happens, wipe it up right away with warm soapy water and the mark comes off the mat or table easily.
Is this safe for young children to do? What age is okay?
This activity needs adult help at the stove. Kids aged five and up can do the mixing, coloring, and hole-punching with supervision. For younger children, you can do the cooking and pouring while they focus on the coloring and marbling in the jars. Always supervise when heat is present.
Can I skip the glycerin or use another oil?
You can skip the glycerin and still get a solid suncatcher. Glycerin helps the finished piece stay a bit flexible. Do not swap in cooking oils or vegetable shortening; they do not mix the same way and change the finish. Glycerin is a simple optional add-in that improves feel but does not change the core method.
How long will the suncatchers last?
With normal indoor display, they last months to a year depending on light and humidity. Pieces with glycerin resist cracking longer but may soften if left in strong sun. Be realistic: they are fragile keepsakes, not permanent glass. Treat them gently and enjoy them for what they are.
What if my pieces look cloudy or brittle?
Cloudiness can come from uneven heating or using tap water instead of distilled water. Brittleness often happens when no glycerin is used or the piece dried too quickly. For clearer pieces, keep the heat gentle and consider distilled water. For less brittle results, add the optional glycerin.
A Final Helpful Note
Take your time with the stirring moments and let the cooking be interactive. Those short stretches of careful stirring and watching the mix change are where it feels like cooking and crafting meet. If a batch does not look perfect, that is okay. Each piece will be unique and often the little flaws make the finished suncatcher more charming.
Trust that the simple steps and common materials will carry you through. Keep cleanup simple with a warm, soapy cloth and you will be ready for the next batch. Enjoy the colors as they catch the light and the quiet satisfaction of turning kitchen staples into something bright.
Conclusion
If you want a science-backed walk-through that explains the steps with photos, the guide from STEAM Powered Family gives a clear visual which complements this method bioplastic suncatcher guide from STEAM Powered Family. For a different take on bright, window-hanging pieces using glue, this tutorial offers more techniques and ideas to mix into your crafting time DIY glue suncatchers tutorial.
PrintDIY Bioplastic Suncatchers with Colorful Swirls

Create beautiful, colorful suncatchers using simple kitchen ingredients. This fun and engaging craft is perfect for kids.
- Prep Time: 10 minutes
- Cook Time: 20 minutes
- Total Time: 24 hours 30 minutes
- Yield: Up to 10 suncatchers 1x
- Category: Craft
- Method: Stovetop Craft
- Cuisine: N/A
- Diet: N/A
Ingredients
- 1 cup distilled water
- 4 tablespoons cornstarch
- 1 tablespoon vegetable glycerin (optional)
- 1 teaspoon white vinegar
- Food coloring or liquid watercolor paints
- Silicone baking mat or parchment paper
- Small glass jars or ramekins
- Toothpicks or fine brushes for marbling
- Straw or skewer for making hanging holes
- Soft cloth and gentle soap for cleanup
Instructions
- Measure 1 cup of water and 4 tablespoons of cornstarch in a saucepan, stirring until smooth.
- Heat over medium-low, stirring constantly until the mixture thickens and becomes glossy.
- Add glycerin and vinegar, stirring until blended.
- Remove from heat when the mixture pulls away from the sides and has a pudding-like texture.
- Let it cool for a minute and pour into jars.
- Add food coloring drops and swirl gently with a toothpick.
- Use the straw to make a hanging hole.
- Allow to dry for 24 hours on a nonstick surface.
- Once dry, peel off gently and trim edges as necessary.
- Thread a ribbon through the hole and hang the suncatcher.
Notes
Glycerin is optional but will help keep pieces flexible. Use distilled water for clearer results.
Nutrition
- Serving Size: 1 suncatcher
- Calories: Variable (based on coloring materials)
- Sugar: 0g
- Sodium: 0mg
- Fat: 0g
- Saturated Fat: 0g
- Unsaturated Fat: 0g
- Trans Fat: 0g
- Carbohydrates: 0g
- Fiber: 0g
- Protein: 0g
- Cholesterol: 0mg