

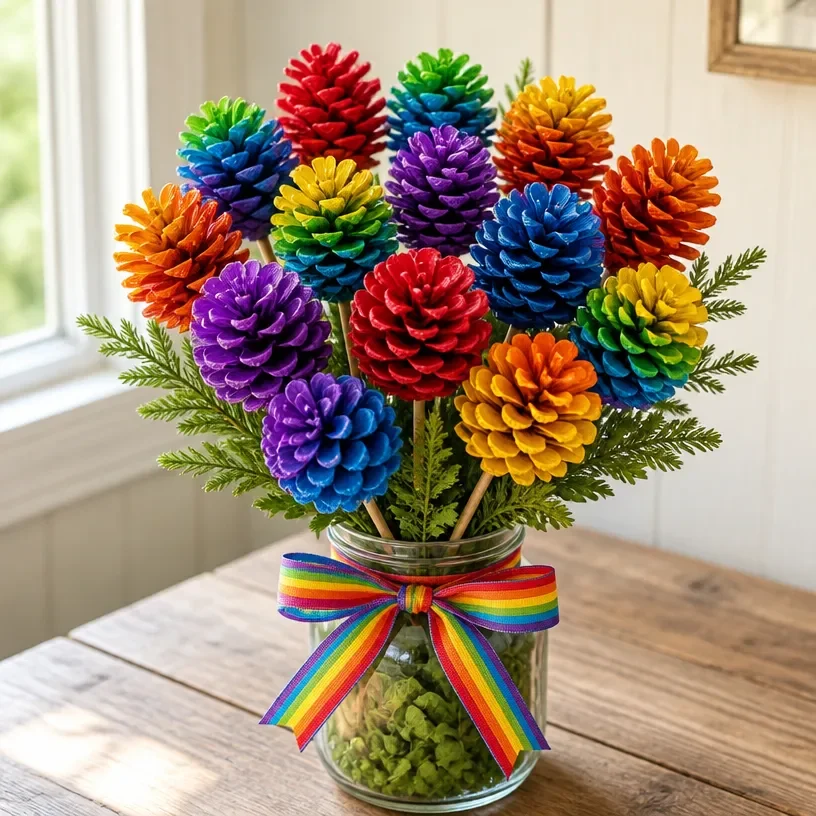
Creating a vibrant rainbow pinecone bouquet can brighten up any space and add a touch of creativity to your home decor. Imagine it’s a busy afternoon with kids restless in the living room, looking for a last-minute project to engage their creativity. They want to make something colorful and fun right away, and this is where the Vibrant Rainbow Pinecone Bouquet for Home Decor comes to the rescue. It’s an incredible way to channel their energy into crafting something special that can be displayed proudly. You may also find Vibrant Rainbow Feather Window Art Home Decor useful.
Why This Vibrant Rainbow Pinecone Bouquet for Home Decor Works So Well
You may also find Vibrant Rainbow Mandala Window Art Home Decor useful.
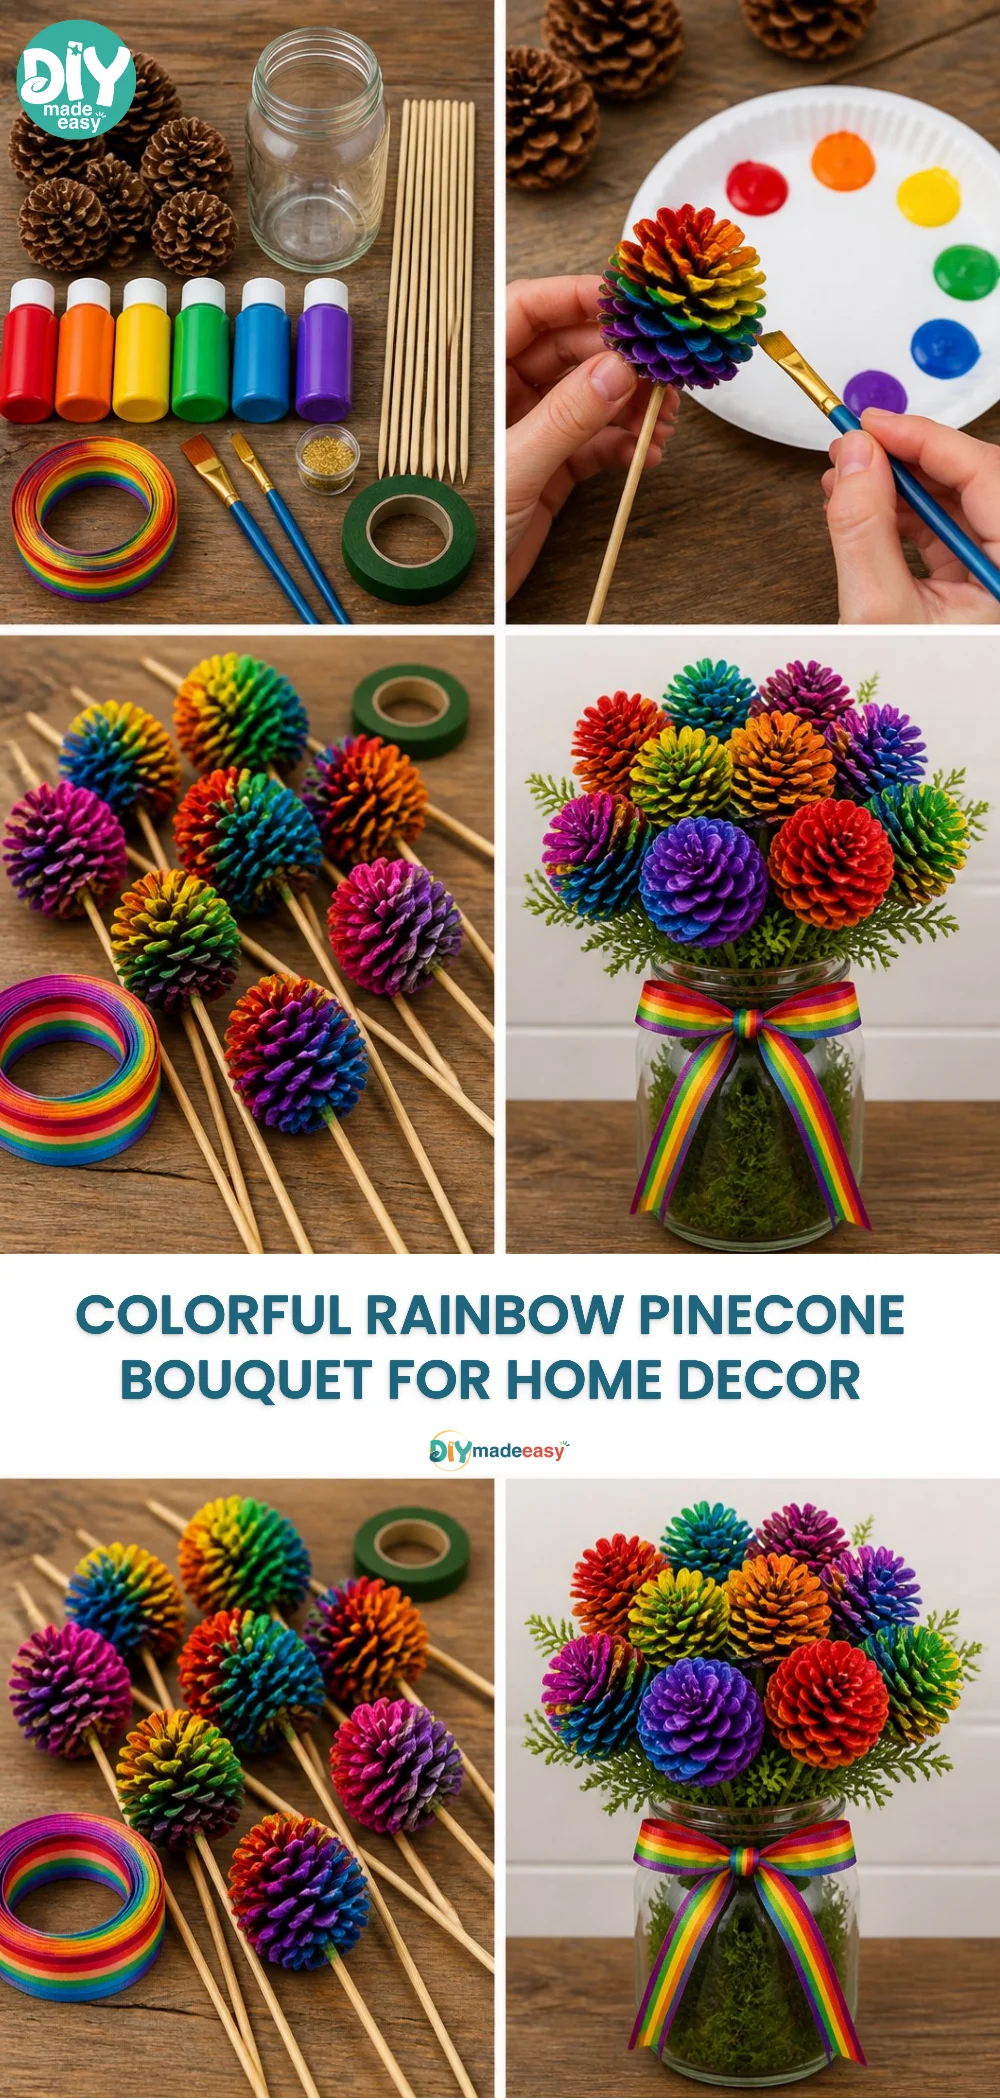
The charm of the Vibrant Rainbow Pinecone Bouquet lies in its simplicity and accessibility. The project requires minimal setup, making it perfect for those busy days when you might not have much time to spare. Plus, it uses materials you likely already have at home or can easily acquire, making it an excellent choice for a spontaneous crafting session. You won’t feel overwhelmed by complicated instructions or excessive time commitments, allowing everyone to focus on having fun while creating a stunning piece for home decor. If you’re looking for something with a similar spirit, you might also enjoy making vibrant rainbow feather window art, which offers a buoyant and light-filled effect. You may also find Colorful Home Decor Diy Rainbow Spoon Petal Wreath useful.
A Quick Look Before You Begin
To ensure your crafting session flows smoothly, it’s good to have an overview of what you’ll experience during this DIY. The overall timing depends on how quickly your little ones work, but setting aside about an hour is usually sufficient. The mess level is manageable, especially if you lay down some newspaper or a drop cloth to catch any spills or paint drips. Adult involvement can be helpful, particularly when using hot glue, so it’s wise to lend a hand when necessary. Overall, it’s a straightforward endeavor that encourages kids to express themselves through color and creativity. You may also find Diy Pressed Flower Rainbow Window Medallions Home Decor useful.
Materials You’ll Need
For this DIY project, gather the following materials:
- Pinecones (preferably large and open)
- Paint in vibrant colors (acrylic works best)
- Paintbrushes (various sizes)
- A hot glue gun (with supervision)
- Floral wire or sturdy twine
- Faux flowers or other decorations (optional)
These materials are common household items that are readily available, with the paint and pinecones being budget-friendly options that won’t break the bank.
Step-by-Step Directions
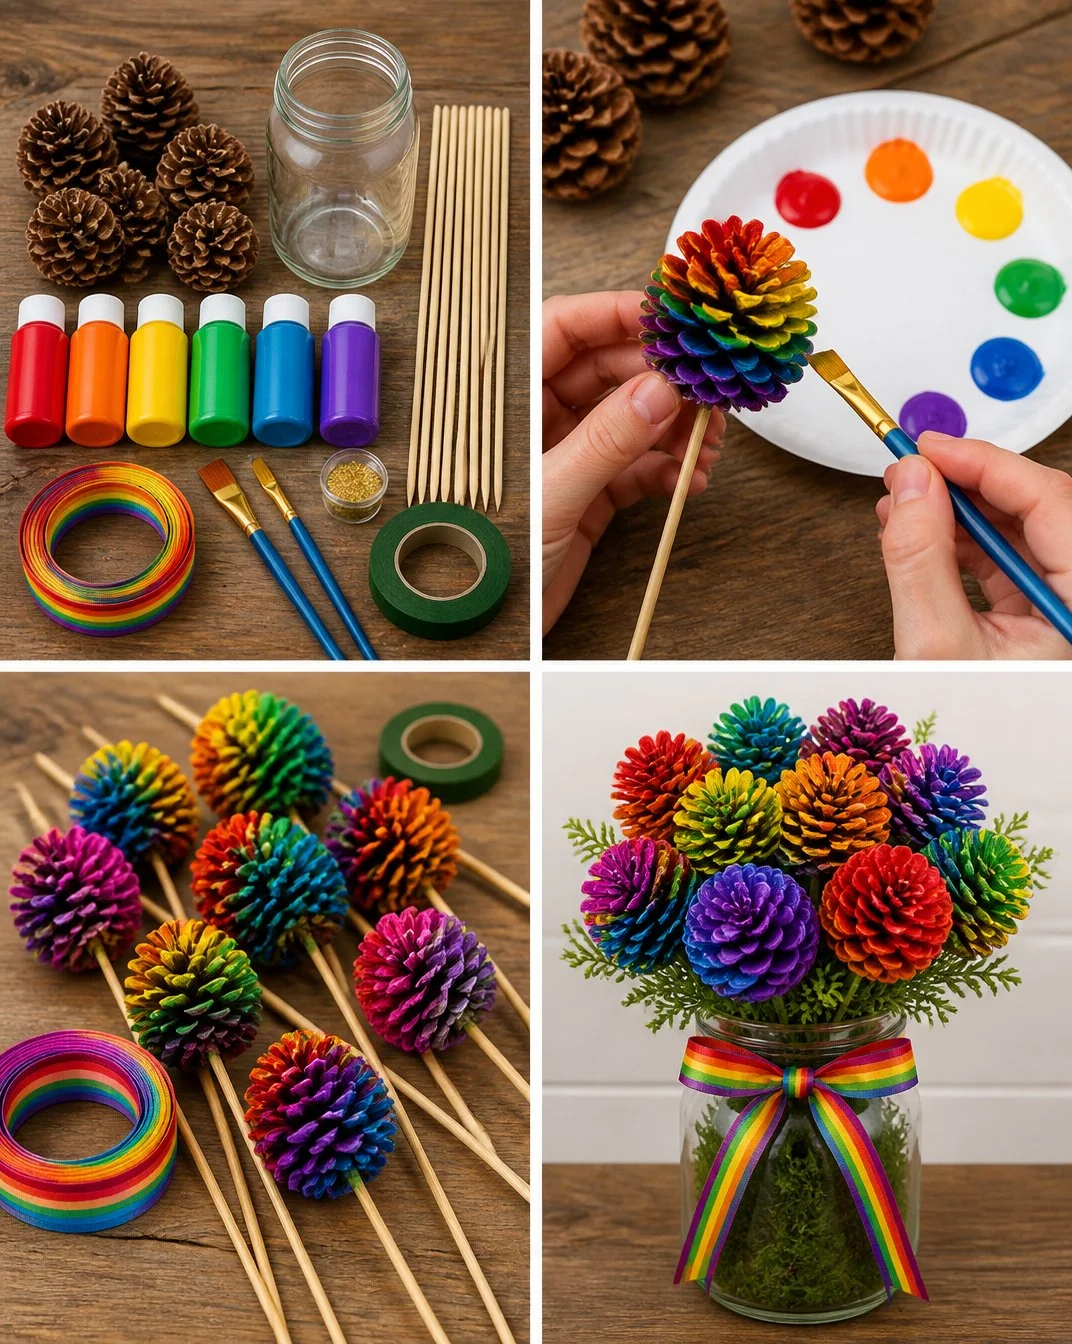
Start by collecting pinecones from your backyard or a local park. Look for those that are large and nicely shaped.
Once you have your pinecones, clean them thoroughly to remove any dirt or debris. If they are wet, let them dry completely before proceeding.
Set up your workspace by laying out some newspaper or a protective cover for the table. This helps with easy cleanup later.
Choose your favorite colors and pour them onto plates or paint palettes.
Using the paintbrushes, begin applying the paint to the pinecones. You can create a gradient effect or go for bold, solid colors. Encourage your kids to explore their creativity!
Allow the paint to dry completely. This may take around 30 minutes depending on how thickly the paint is applied.
Once dry, you can add decorative touches like faux flowers or glitter.
For a fuller bouquet, take wire or twine and bind several painted pinecones together at the base.
Arrange the pinecone bouquet in a vase or pot, and display it where you can all admire the vibrant colors.
Optionally, consider adding other decorative elements or layers to your bouquet for added pizzazz.
What Kids Practice While Making This
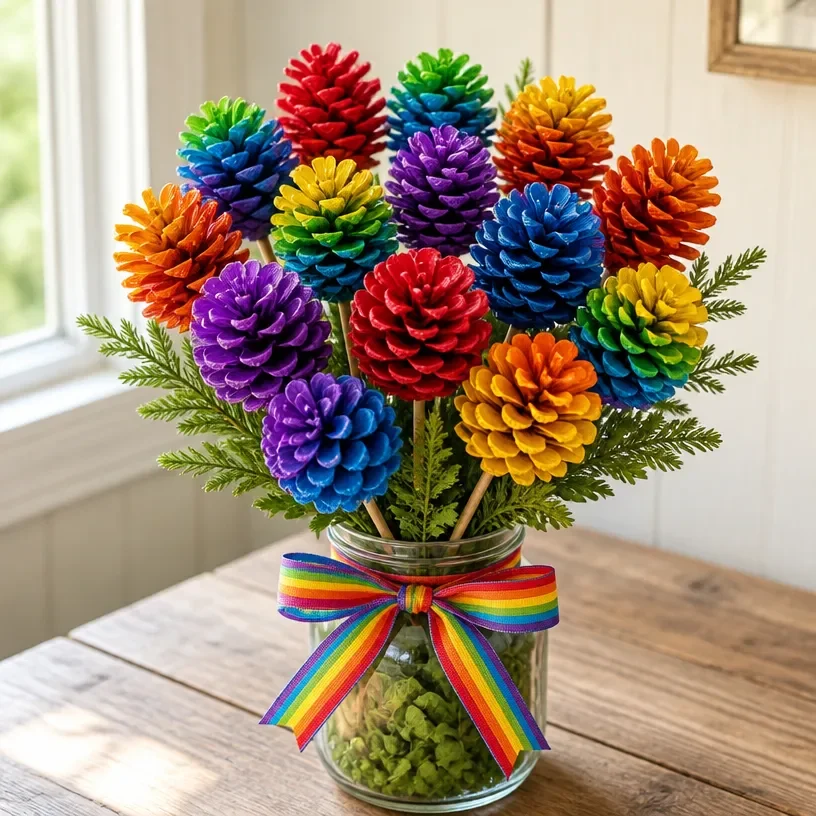
While engaging in this project, children will practice several essential skills. Manipulating the paintbrush helps develop their fine motor coordination, while the act of decorating the pinecones allows for a fun exploration of colors and shapes. This hands-on activity also introduces them to fundamental concepts of art, such as color mixing and design, providing a rich sensory experience that’s both enjoyable and educational.
Troubleshooting Common Issues
Sometimes, crafting doesn’t go as planned. If the paint doesn’t stick to the pinecones, you might not have cleaned them adequately beforehand. Make sure to remove any residues thoroughly. If the colors look dull once dry, consider applying a second coat of paint to enhance vibrancy. These minor hiccups are common, and you can easily adjust as you go. Remember, it’s all part of the learning process!
Easy Variations to Try
Experiment with different types of paint, such as metallic or glow-in-the-dark, for a unique effect.
Introduce natural elements by incorporating fresh or dried flowers into your bouquet.
Create themed bouquets for seasonal decorations, such as autumn colors or holiday themes.
Use the same painting technique on other materials, like small wooden logs or branches, to create a cohesive display.
Host a mini crafting day with friends where everyone can make their unique bouquet variations.
Storing or Reusing This Project
To keep your vibrant rainbow pinecone bouquet looking its best, store it in a cool, dry place away from direct sunlight to prevent the colors from fading. If you need a temporary space, you can disassemble the bouquet and store each piece until you’re ready to display it again. This approach promotes reusing the materials instead of discarding them, which is a sustainable practice you can teach your kids.
FAQs About Vibrant Rainbow Pinecone Bouquet for Home Decor
What if kids make a mess?
It’s perfectly normal for crafting to get a bit messy! Setting up a designated crafting area with protective coverings helps minimize this. Using washable paint also makes cleanup a breeze.
Can younger kids participate in this project?
Absolutely! With supervision, younger children can help with paint application and assembling the bouquet using non-toxic materials. It’s a great way for them to express their creativity.
What if I don’t have pinecones?
If pinecones are hard to find in your area, consider using other natural materials like twigs or branches as a base for your bouquet. There are always alternatives to work with!
Can we store the finished bouquet for next year?
Yes, with proper care, you can store your bouquet. Just ensure it’s in a safe place where it won’t be crushed or damaged.
What if I want to change the colors?
Feel free to repaint the pinecones if they need a refresh or if you’d like to change your decor style. It can be a fun seasonal activity!
A Final Helpful Note
Don’t be afraid to experiment and let creativity flow during this project. The beauty of crafting is that it doesn’t have to be perfect; what matters is the experience and the memories created along the way. Encourage everyone involved to be flexible, and remember that it’s okay if things turn out a little differently than planned.
Conclusion
Crafting the vibrant rainbow pinecone bouquet is a wonderful way to spend quality time with your family while creating something beautiful. For those looking to further explore creative florals, check out this stunning Pride Flower Arrangement. Additionally, if you are interested in exploring more projects, visit the Seasonal Cozy DIY page for delightful ideas that can inspire more creativity in your home. Happy crafting!
PrintVibrant Rainbow Pinecone Bouquet for Home Decor

A fun and colorful DIY project that transforms pinecones into a vibrant bouquet, perfect for home decor.
- Prep Time: 10 minutes
- Cook Time: 30 minutes
- Total Time: 40 minutes
- Yield: 1 vibrant bouquet
- Category: Craft
- Method: Crafting
- Cuisine: N/A
- Diet: N/A
Ingredients
- Pinecones (preferably large and open)
- Paint in vibrant colors (acrylic works best)
- Paintbrushes (various sizes)
- A hot glue gun (with supervision)
- Floral wire or sturdy twine
- Faux flowers or other decorations (optional)
Instructions
- Start by collecting pinecones from your backyard or a local park.
- Once you have your pinecones, clean them thoroughly to remove any dirt or debris.
- Set up your workspace by laying out some newspaper or a protective cover for the table.
- Choose your favorite colors and pour them onto plates or paint palettes.
- Using the paintbrushes, begin applying the paint to the pinecones.
- Allow the paint to dry completely.
- Once dry, you can add decorative touches like faux flowers or glitter.
- For a fuller bouquet, take wire or twine and bind several painted pinecones together at the base.
- Arrange the pinecone bouquet in a vase or pot, and display it where you can all admire the vibrant colors.
- Optionally, consider adding other decorative elements for added pizzazz.
Notes
This project is straightforward and encourages kids to express themselves creatively. Supervision is recommended when using a hot glue gun.
Nutrition
- Serving Size: N/A
- Calories: N/A
- Sugar: N/A
- Sodium: N/A
- Fat: N/A
- Saturated Fat: N/A
- Unsaturated Fat: N/A
- Trans Fat: N/A
- Carbohydrates: N/A
- Fiber: N/A
- Protein: N/A
- Cholesterol: N/A