

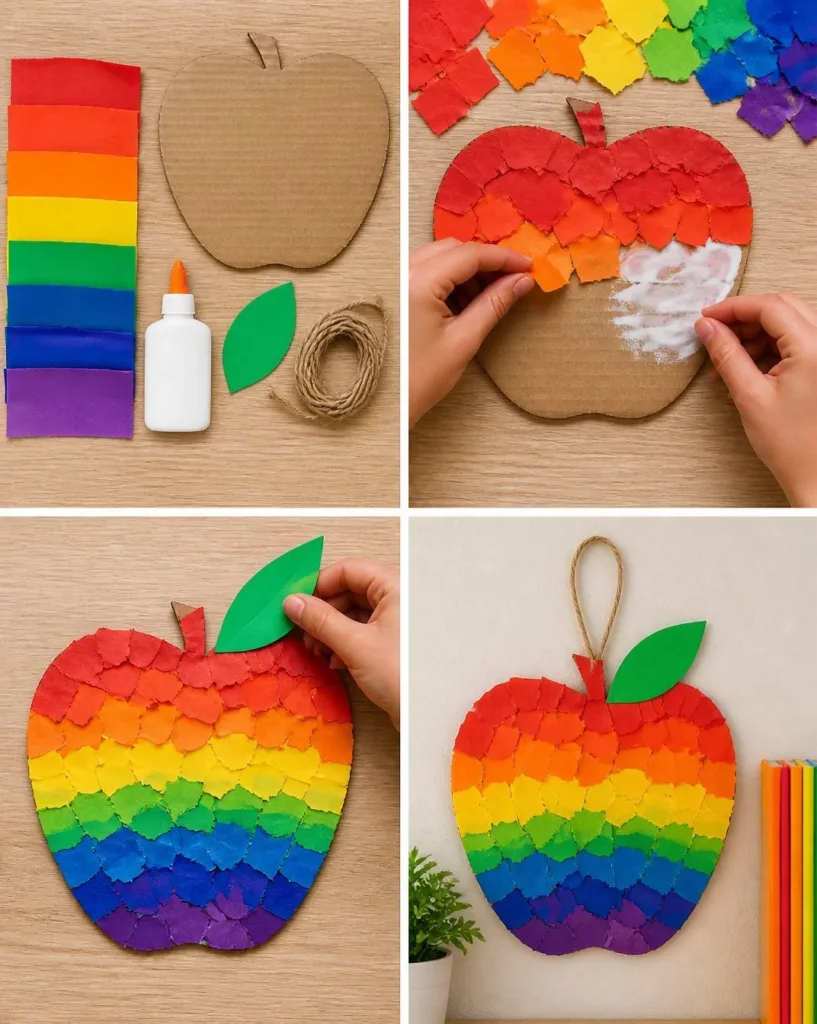
The kids have just finished eating lunch, and now they’re buzzing with excitement for an afternoon activity. Instead of scrolling through screens or sending them outside to run wild, how about diving into a fun project? The Back-to-School Rainbow Apple Mosaic can be the perfect way to engage their creativity while adding a splash of color to your home. This project is not only simple but also allows kids to express themselves through an art form they can see and be proud of. You may also find Diy Rainbow Pineapple Garland Summer Party Decor useful.
Why This Back-to-School Rainbow Apple Mosaic Works So Well
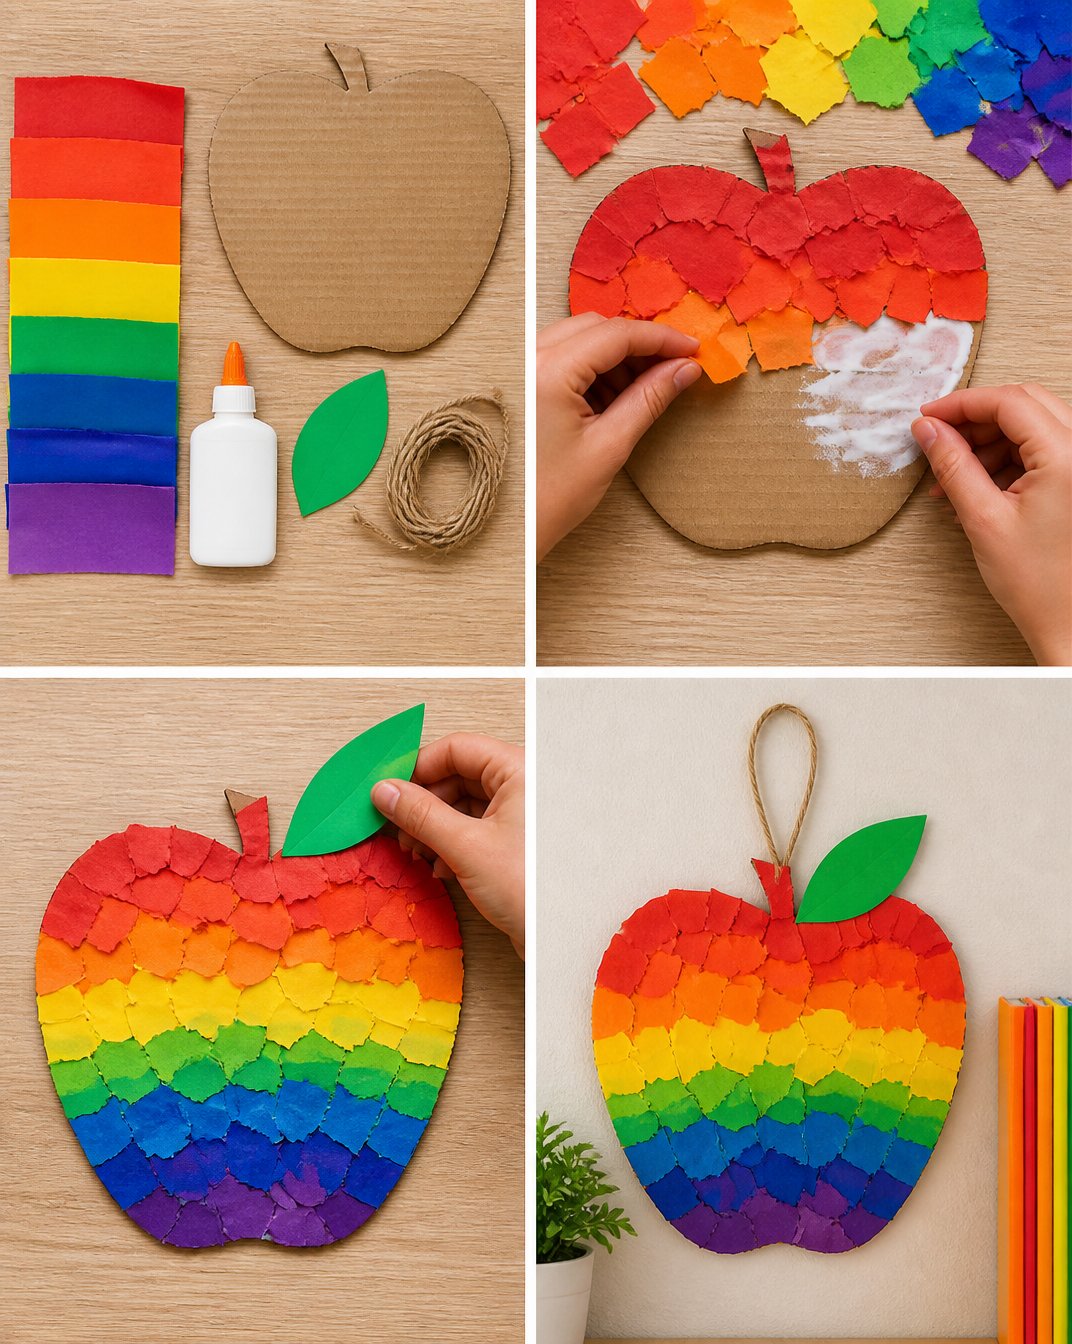
This project is low-prep and requires materials that most families have on hand. It’s an ideal way to keep children entertained without significant setup or clean-up time. You can easily transition from lunch to crafts with minimal fuss. Plus, the mosaic activity teaches kids the fundamentals of coloring, layering, and creating patterns. This process encourages them to plan their designs, offering a hands-on learning experience that connects with their school activities. If you’re looking for another fun art project, consider exploring creating a clear glue mosaic suncatcher.
A Quick Look Before You Begin
Creating the Back-to-School Rainbow Apple Mosaic is a straightforward process that doesn’t require extensive timing or preparation. Gather your materials, and you’ll find that getting set up takes only a few minutes. The mess level for this activity is also on the lighter side; the only worry is cutting paper and managing glue, which is typically manageable. You may also find Back To School Activity Binder Preschool useful.
Although adult involvement can help guide the kids, especially with cutting, this DIY can largely be done independently by older children. You’ll just need to keep an eye on those scissors and the glue, especially with the younger ones.
Materials You’ll Need
- Colored paper or card stock (a variety of colors)
- Scissors
- Clear glue or mosaic glue
- A sturdy base (like cardboard or wood)
- A pencil
- Optional: glitter or sequins
These materials are typically common household items, making it budget-friendly and convenient for a last-minute crafts session. Feel free to replace colored paper with old magazines or newspaper for a more eco-friendly approach!
Step-by-Step Directions
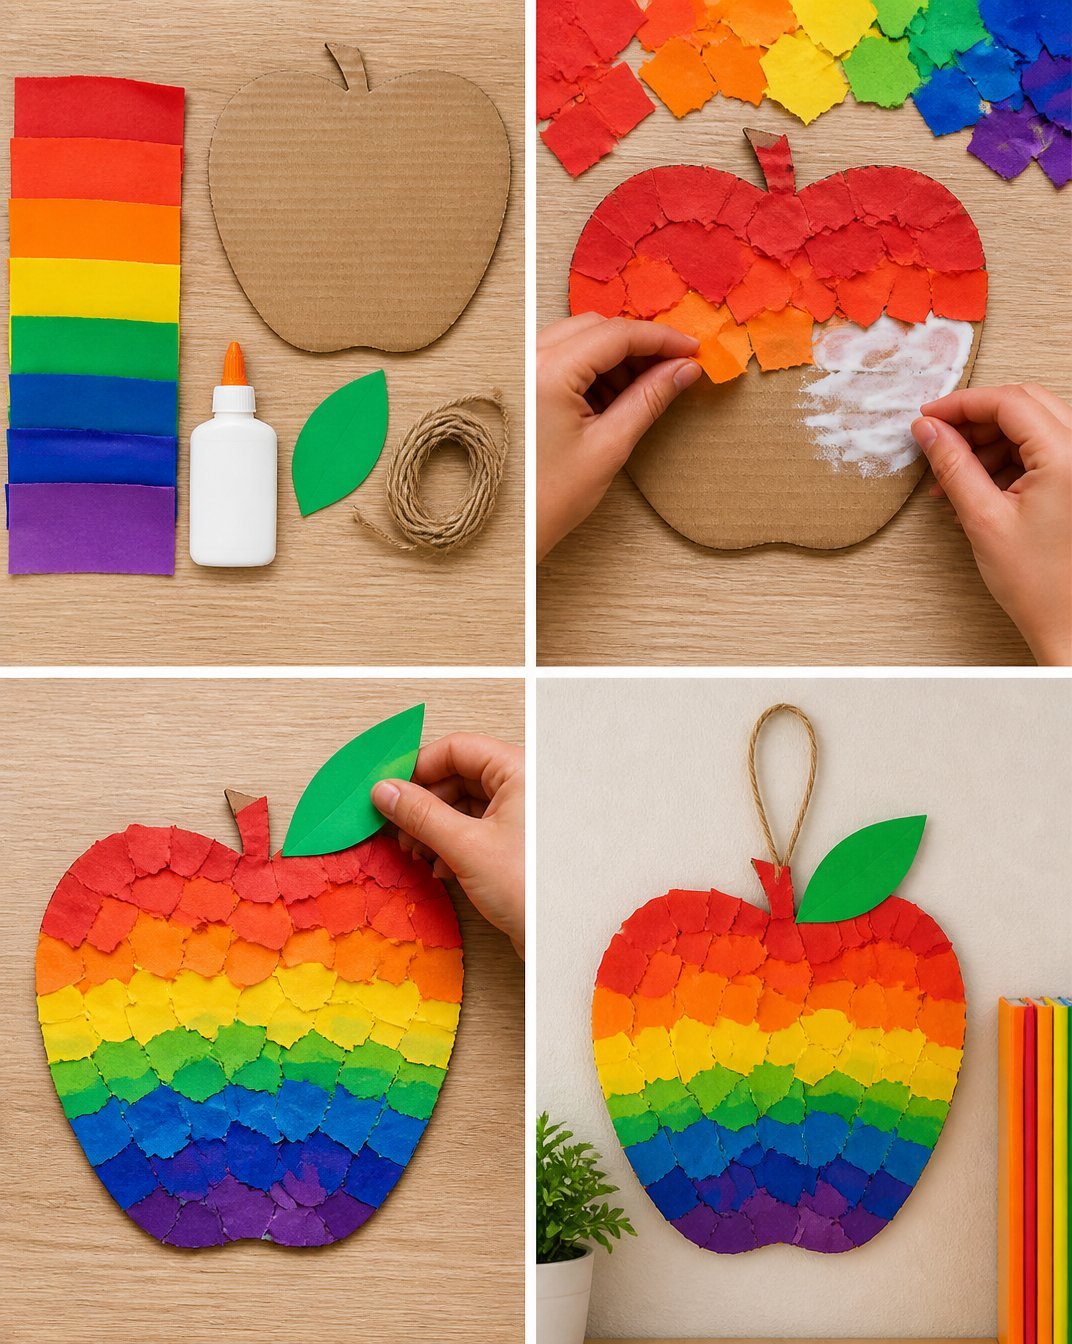
Draw the outline of an apple on your sturdy base to serve as the canvas. Start by sketching a simple apple shape. This can be a stylized version if you or your child want to have some fun with it.
Cut the colored paper into small pieces or shapes for filling the apple outline. Think about different shapes and sizes for texture. Small squares, triangles, and even strips can add visual interest to your artwork.
Layer your chosen colors inside the apple outline, focusing on texture and hue. Encourage your child to arrange the pieces in patterns or random orders, whichever they find more appealing.
Apply glue to the back of each paper piece and stick it down to the base. Make sure to apply enough glue to keep the paper in place, but not too much that it’s dripping. If you find this task challenging, you can look into options like baking soda projects for easier handling.
Allow the glue to dry fully before displaying your completed mosaic. Patience is essential here. The waiting can feel like a long time, but it’ll ensure your amazing artwork stays in one piece.
The Learning Behind This DIY
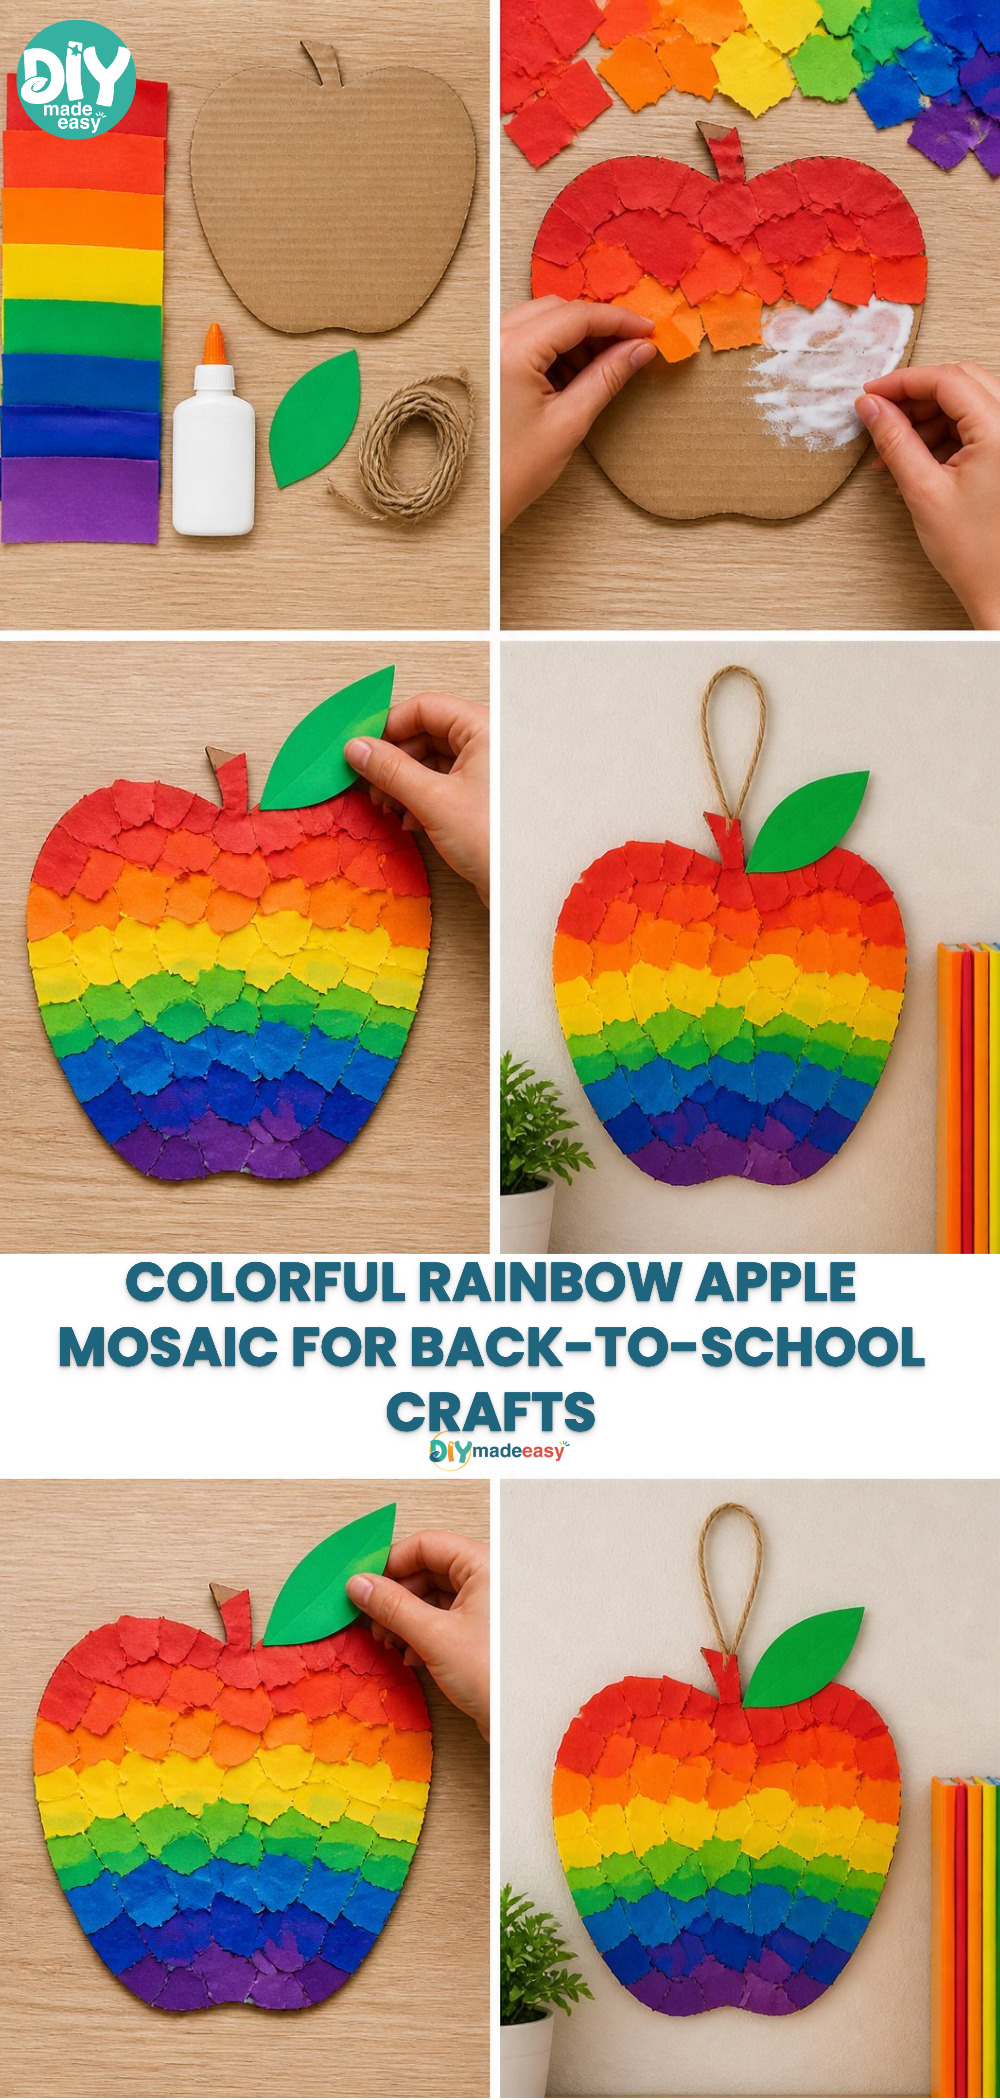
While making this Back-to-School Rainbow Apple Mosaic, children practice several skills. Fine motor skills evolve as they cut, glue, and arrange their pieces. This activity also boosts their hand-eye coordination as they line up colors and shapes. Additionally, engaging in this art project can teach them basic color theory and the importance of color contrast and harmony—essential building blocks for their future art endeavors.
Troubleshooting Common Issues
If something doesn’t go as planned during your apple mosaic adventure, don’t worry. Common issues might include papers curling up when glued or falling off. If this happens, just reapply glue, and press down firmly. Always check to ensure your kids have used enough glue without excess spilling out the sides. Safety comes first; keep scissors away from little hands, and supervise younger children during setup and clean-up to prevent any tiny accidents.
Easy Variations to Try
Looking to mix it up? Here are some simple ways to change this project:
- Use different fruit shapes. Instead of apples, try creating a rainbow banana or blueberry mosaic.
- Add texture. Incorporate natural elements like leaves or pebbles for added interest, or use glitter to give the mosaic a sparkle.
- Make it seasonal. Use fall colors for autumn or pastels for spring-themed mosaics.
- Age adaptations. For older children, consider using a more detailed design or incorporating more complex shapes.
Storing or Reusing This Project
It’s essential to consider how to preserve the masterpiece your child created. Store the mosaic in a cool, dry place to prevent damage, or frame it to showcase their work proudly. If mess has been a concern, try to clean up materials immediately after use. Old newspapers can work wonders for keeping surfaces clean during crafting and can be recycled after the project is completed.
FAQs About Back-to-School Rainbow Apple Mosaic
Will this project make a mess?
It may get a little sticky, but the mess is manageable. Prepare with old newspapers or tablecloths to catch any spills.
What age is this suitable for?
This activity is perfect for kids aged 4 and up. Younger children may need supervision with scissors and glue application.
Can I use different materials?
Absolutely! You can use newspaper or old magazines for the papers if colored paper isn’t available. Just ensure the glue holds everything together.
How do I clean up afterward?
Make sure to wash scissors and surfaces with water and soap immediately after use to prevent drying glue from sticking.
Conclusion
Conclusion
Creating the Back-to-School Rainbow Apple Mosaic is a fantastic way to spend quality time with your kids. Watching them engage in a creative activity is rewarding for both parents and children. If you’re looking for more inspiring projects, explore DIY Rainbow Crayons for an enjoyable crafting experience. Perhaps consider checking out Colorscape: Photo to Coloring for digital creativity when the crafts are all done. Enjoy making memories together!
PrintBack-to-School Rainbow Apple Mosaic
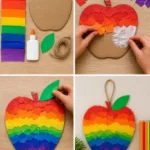
A fun and colorful DIY project where kids create a vibrant apple mosaic using colored paper, promoting creativity and fine motor skills.
- Prep Time: 5 minutes
- Cook Time: 0 minutes
- Total Time: 30 minutes
- Yield: 1 mosaic
- Category: Craft
- Method: DIY
- Cuisine: Art & Craft
- Diet: None
Ingredients
- Colored paper or card stock (variety of colors)
- Scissors
- Clear glue or mosaic glue
- A sturdy base (like cardboard or wood)
- A pencil
- Optional: glitter or sequins
Instructions
- Draw the outline of an apple on your sturdy base to serve as the canvas.
- Cut the colored paper into small pieces or shapes for filling the apple outline.
- Layer your chosen colors inside the apple outline, focusing on texture and hue.
- Apply glue to the back of each paper piece and stick it down to the base.
- Allow the glue to dry fully before displaying your completed mosaic.
Notes
Encourage kids to express their creativity and consider using eco-friendly materials.
Nutrition
- Serving Size: 1 artwork
- Calories: 0
- Sugar: 0g
- Sodium: 0mg
- Fat: 0g
- Saturated Fat: 0g
- Unsaturated Fat: 0g
- Trans Fat: 0g
- Carbohydrates: 0g
- Fiber: 0g
- Protein: 0g
- Cholesterol: 0mg