

Making a Colorful Bouncy Ball can be the perfect solution for a busy afternoon when kids suddenly want to create something fun. Imagine a moment in the middle of a chaotic weekend where the kids are asking for an activity. You want it to be engaging and memorable but don’t have the energy for an elaborate setup. This is where the Colorful Bouncy Ball fits in seamlessly. With just a few household items and simple steps, you can transform a quiet moment into a lively craft experience everyone will enjoy.
Why You’ll Love Making Colorful Bouncy Ball

This project is great because it requires minimal preparation and taps into materials you already have at home. No need to scour craft stores; the supplies are low-cost and easy to find. Even if you’re short on time, the Colorful Bouncy Ball can be whipped up in under an hour, allowing for creativity to flourish without overwhelming anyone involved. It’s a reliable activity that guarantees satisfaction without the stress of complicated instructions.
An additional benefit is that it naturally incorporates a bit of science, which adds an educational layer to the fun. It allows children to witness firsthand how certain ingredients interact to create a bouncy, colorful ball. This makes the activity not just enjoyable, but also a moment of learning.
A Quick Look Before You Begin
This DIY project is straightforward and manageable. You can gather materials and get started in about 10 minutes. The hands-on crafting process will take around 20 to 30 minutes, which is perfect for maintaining young attention spans.
When you set up, find a workspace that can handle some potential spills and splashes, as things can get a bit messy. A tray or towel works wonders for easy cleanup. Depending on the age of your kids, you might want to be nearby to lend a hand. This is a good opportunity for family bonding as you navigate through the steps together.
Discover Easy Kids Activities
Looking for simple, fun ideas for kids? Explore our Low Prep Kids Activities and find quick projects that spark creativity without long prep time.
Materials You’ll Need
To make your Colorful Bouncy Ball, you will need the following items:
- 1/4 cup white PVA school glue
- 1/4 cup warm water
- 1 tsp borax powder (optional)
- Food coloring or liquid dye
- Measuring spoons and cups
- Small mixing bowl
- Spoon or stir stick
- Baking cup liners or small molds (optional)
- Tray or towel for cleanup
- Gloves (optional)
Most of these items are common household necessities. The glue, water, and food coloring are usually in kitchens, making this a quick craft to plan. You may already have borax from laundry supplies, and if you don’t, it’s an optional ingredient that enhances the bounciness of the ball.
Step-By-Step Directions

- Begin by measuring one quarter cup of white glue into your mixing bowl. Use a spoon to stir slowly until the glue feels smooth and glossy. This will be the base of your bouncy ball.
- Next, add about one quarter cup of warm water to the bowl. Stir until the mixture is thin and even, which helps the components blend nicely.
- Now, drop one or two small drops of food coloring directly into the center of your glue mixture. This adds a personal touch and makes the ball visually appealing.
- Prepare a borax solution by dissolving one teaspoon of borax in one cup of warm water. If you decide to skip the borax, the ball will still be fun, just a bit less bouncy.
- Slowly add the borax solution to the glue mixture, one teaspoon at a time. Stir well after each addition, watching as the mixture begins to thicken.
- Once the mixture starts to pull away and forms a loose pellet, scoop it out with your hands. It should feel slightly sticky but pliable.
- Roll the pellet between your palms gently, applying slow pressure. This will form it into a nice, round shape.
- If you find that the ball is still sticky, sprinkle a small pinch of cornstarch over it and knead the ball gently to incorporate. This will help address the tackiness.
- Let the finished ball rest on a paper towel for about an hour. This resting time allows the ball to firm up, making it more durable.
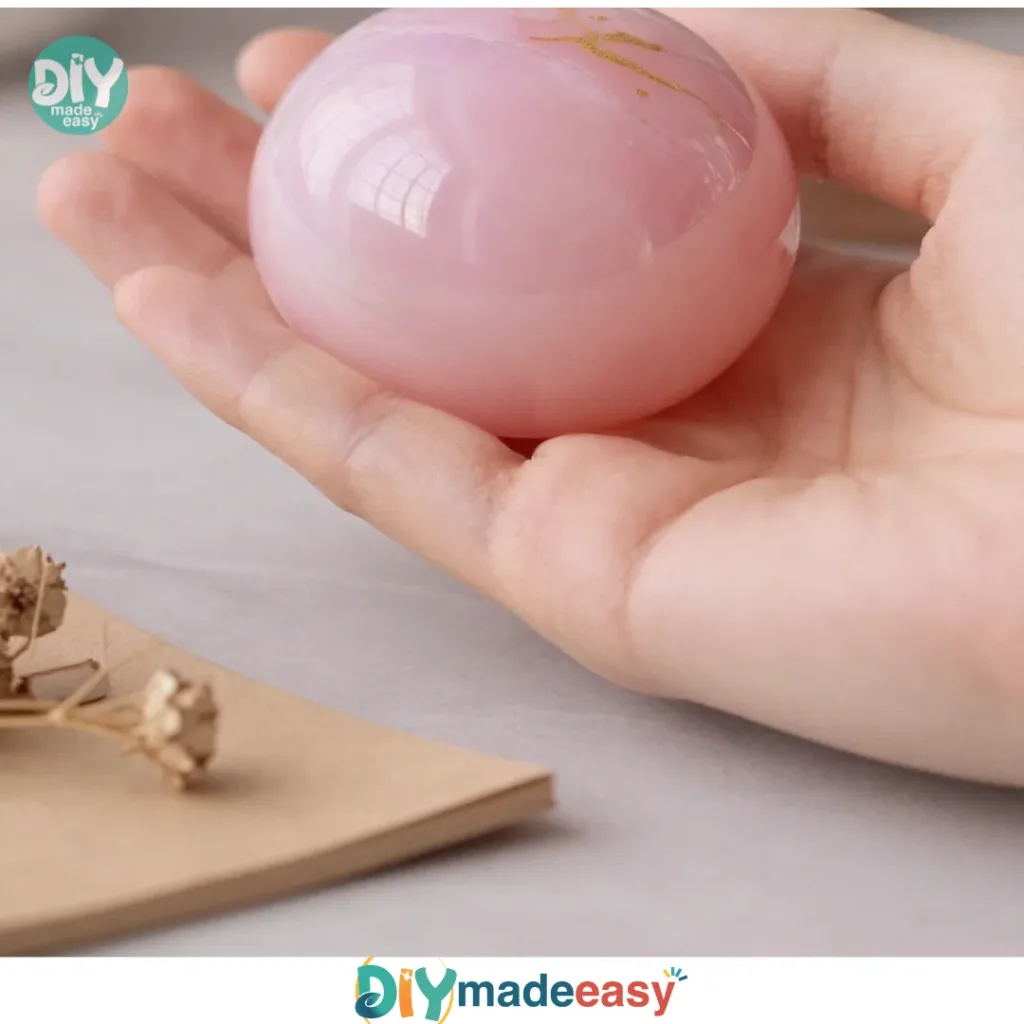
- To add some flair, roll the ball over dry pigments or press tiny beads into the surface for decoration. This step is optional but can make your ball uniquely yours.
The Simple Science or Skills at Work

While making your Colorful Bouncy Ball, kids can engage in fun learning about chemical reactions. When the glue and borax combine, they create a reaction that changes the consistency of the glue, turning it into something that can bounce instead of just being liquid. This is a great hands-on experience for understanding the basics of polymers and how different materials react to create new forms.
Moreover, the rolling and molding of the ball helps develop fine motor skills. Children practice coordination and control as they shape their creation, making it a sensory-rich experience. These small, deliberate movements strengthen dexterity, which is beneficial in a myriad of tasks as they grow.
Troubleshooting Common Issues
If something doesn’t go as planned, don’t worry. Mistakes are part of the learning process. One common issue is if the mixture is too runny. Simply try adding a little more borax solution one teaspoon at a time until it starts to form more solidly.
If the ball turns out too sticky after rolling it, adding cornstarch will help. You can also try letting it sit for a little longer on the paper towel before attempting to roll it. And remember, not every ball has to be perfect. Embrace the unique creations your kids make!
Easy Variations to Try
If you want to add a twist to the Colorful Bouncy Ball project, consider these variations:
- Glittery Balls: Add some glitter to the glue mixture before rolling it. Kids will love the sparkly effect.
- Scented Balls: A drop of essential oils or flavored extracts can give the ball a pleasant scent. Just a small amount will do.
- Multi-Colored Balls: Instead of one solid color, try swirling multiple drops of food coloring together for a tie-dye effect.
- Seasonal Themes: You can create balls themed around holidays by using specific colors and designs that match the celebrations.
- Size Variations: Adjust the proportions for different sizes make mini bouncy balls or larger ones by adjusting the glue and water amounts.
Storing or Reusing This Project
After crafting your Colorful Bouncy Ball, think about cleanup and storage. These DIY bouncy balls can be stored in a zip lock bag or an airtight container to prolong their lifespan. Keeping them away from extreme heat will also help maintain their shape.
If you decide to revisit the activity later on, you can reuse the same materials. Just remember that fresh ingredients can yield better results, so it’s good to have extra supplies on hand.
FAQs About Colorful Bouncy Ball
My kids want to make these colorful balls, but I’m concerned about cleanup. How messy is it really?
Cleanup is pretty manageable! Keep a towel or tray handy to catch any spills during mixing. Any glue that ends up on the table can be easily cleaned with a wet cloth. Just prepare for some sticky fingers, which can add to the fun!
What’s the right age for kids to participate in this?
This project is suitable for kids ages 5 and up, with some adult supervision. Younger children may need assistance with the mixing and rolling, but they’ll enjoy the hands-on aspects.
Can I substitute borax if I don’t have any?
Absolutely! If you don’t have borax, you can simply skip it. The bouncy ball will still form just fine, although it may not bounce as high.
How do I know if the color will turn out well?
Generally, the food coloring will show up nicely, but the final color can vary once the ball sets. Encourage kids to experiment with different colors to create unique looks!
Can leftover ingredients be stored for next time?
Yes! Store any leftover glue or borax solutions in airtight containers. Just be mindful that the glue may thicken over time, so mixing it with a bit of warm water before using again can help.
Conclusion
Creating Colorful Bouncy Balls provides a wonderful opportunity for creativity and playful learning. With a simple setup and easy steps, you can foster a joyful experience that also promotes curious minds. If you’re interested in exploring more bouncy ball options, you can find a variety of choices on Amazon. For additional bouncy ball formats, there’s also the option of checking out Target. Remember, the best part of this DIY activity is making memories together while creating something tangible and fun!
PrintColorful Bouncy Ball

A fun and engaging DIY project for kids to create colorful bouncy balls using simple household items.
- Prep Time: 10 minutes
- Cook Time: 30 minutes
- Total Time: 40 minutes
- Yield: 1 bouncy ball 1x
- Category: Craft
- Method: DIY
- Cuisine: N/A
- Diet: N/A
Ingredients
- 1/4 cup white PVA school glue
- 1/4 cup warm water
- 1 tsp borax powder (optional)
- Food coloring or liquid dye
- Measuring spoons and cups
- Small mixing bowl
- Spoon or stir stick
- Baking cup liners or small molds (optional)
- Tray or towel for cleanup
- Gloves (optional)
Instructions
- Measure one quarter cup of white glue into your mixing bowl. Use a spoon to stir slowly until the glue feels smooth and glossy.
- Add about one quarter cup of warm water to the bowl. Stir until the mixture is thin and even.
- Drop one or two small drops of food coloring into the center of your glue mixture.
- Prepare a borax solution by dissolving one teaspoon of borax in one cup of warm water.
- Slowly add the borax solution to the glue mixture, one teaspoon at a time, stirring well after each addition.
- Once the mixture begins to thicken, scoop it out with your hands.
- Roll the pellet between your palms gently to form it into a round shape.
- If sticky, sprinkle cornstarch over it and knead gently.
- Let the ball rest on a paper towel for about an hour.
- To add flair, roll the ball over dry pigments or press tiny beads into the surface.
Notes
Ensure to have a cleanup setup in place as the crafting can get a bit messy. This project is suitable for children ages 5 and up with adult supervision.
Nutrition
- Serving Size: 1 ball
- Calories: 50
- Sugar: 0g
- Sodium: 5mg
- Fat: 0g
- Saturated Fat: 0g
- Unsaturated Fat: 0g
- Trans Fat: 0g
- Carbohydrates: 12g
- Fiber: 0g
- Protein: 0g
- Cholesterol: 0mg