

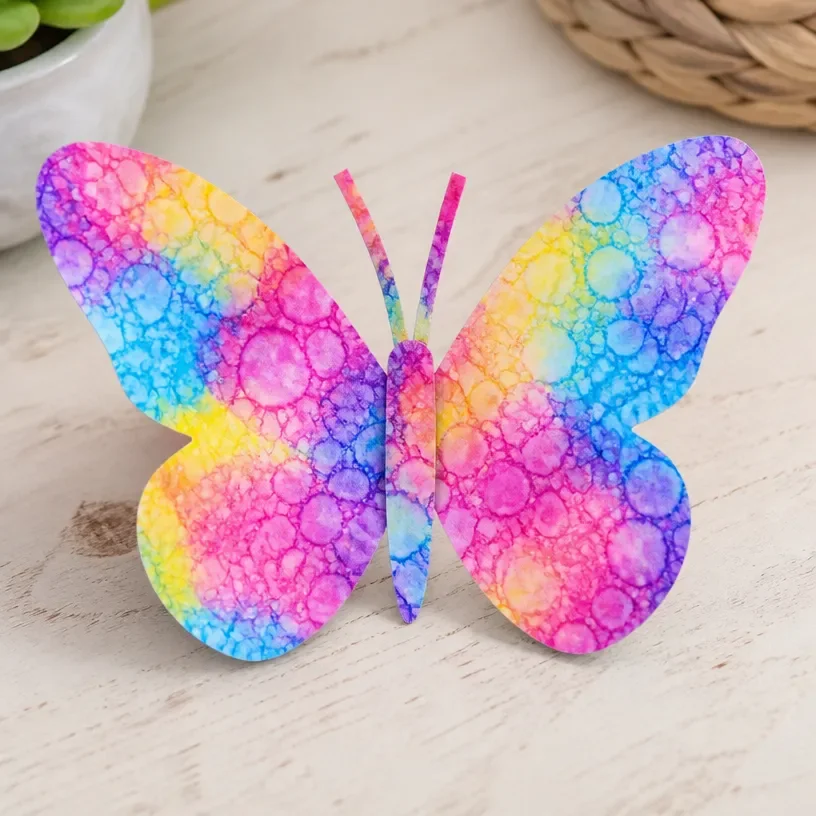
When a busy afternoon rolls in and the kids eagerly ask for a creative activity, finding something simple yet engaging can be a challenge. The Bubble Print Technique, transforming butterfly wings into art, is not only an exciting craft but also a delightful way to engage children’s creativity. This project harnesses the joy of bubbles and printing, resulting in vibrant designs that can spark the imagination. If you’re looking for a fun, easy project to keep little hands busy, this craft is a perfect fit. You may also find Diy Bubble Print Butterfly Wings Craft For Kids useful.
Why This Bubble Print Technique Transforms Butterfly Wings into Art Works So Well
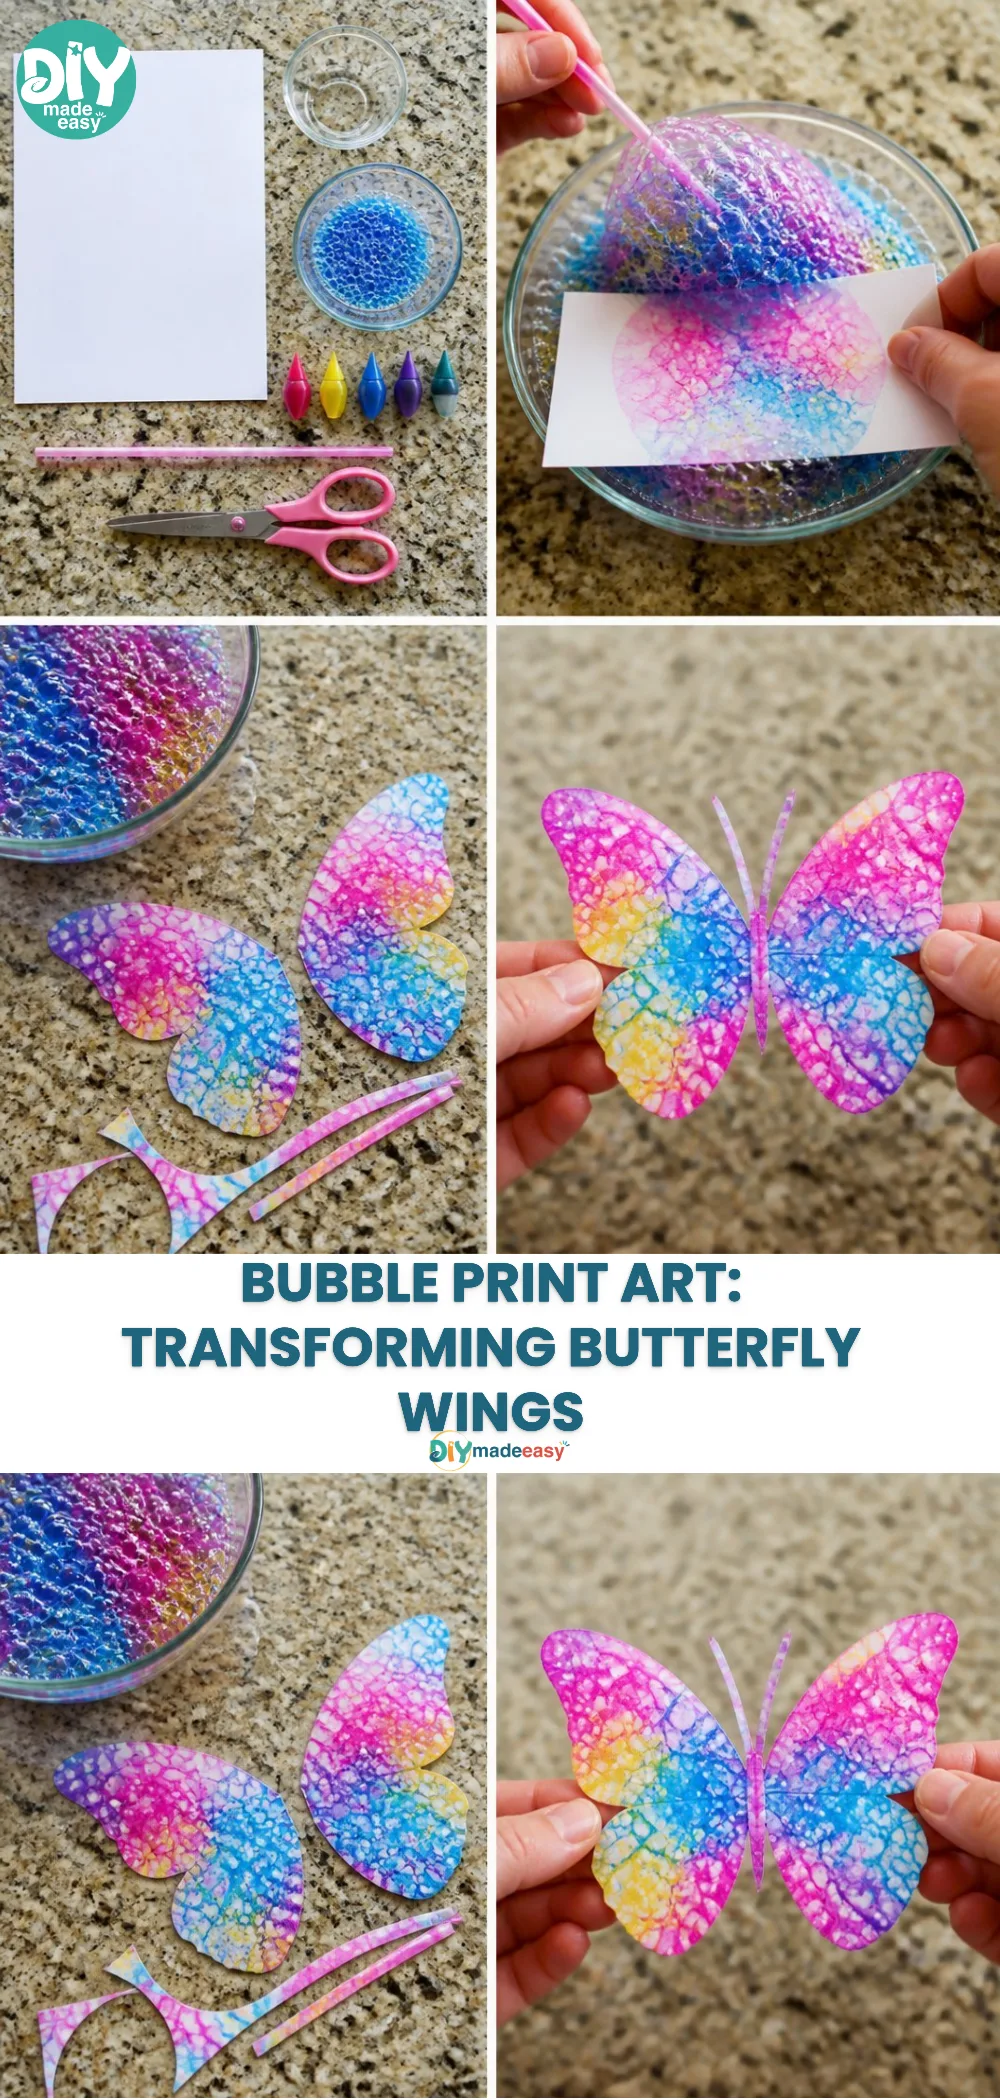
You may also find Baking Soda Crystals Transform Into Glassy Art useful.
Engaging in the Bubble Print Technique to create butterfly wings is low-prep and approachable. This means you can set it up quickly with items you likely already have at home, making it an accessible choice for a spontaneous indoor activity. The process is reliable, too. By following simple steps, you can ensure great results that delight both you and the kids. Real-life schedules fluctuate, but knowing there’s a straightforward project ready to go can alleviate stress on busy days. You may also find Bubble Firework Art useful.
A Quick Look Before You Begin
Before diving into the activity, let’s take a moment to overview what this project entails. On average, this craft takes about 30-40 minutes, giving you enough time to enjoy the process without feeling rushed. The setup is minimal, requiring just a few common household items. Usually, the mess level is quite manageable, as most spills can be cleaned up easily. Adult involvement is more about guiding than direct participation, allowing children to explore their creativity with your support. You may also find Create Rainbow Pencil Shavings Butterfly Art useful.
Materials You’ll Need
To create stunning bubble print butterfly wings, gather these materials:
- Paper: Any type will do, but thicker paper holds up better to the bubbling.
- Dish soap: A common household item that creates the bubbles.
- Food coloring: For vibrant colors; you can easily adjust the shades.
- Straws: Basic straws work perfectly for blowing bubbles.
- Plastic containers: Suitable for mixing the soap and water solution.
- Tray or surface protector: To minimize mess during the project.
With these supplies, you’ll be all set to make some beautiful art.
Step-by-Step Directions
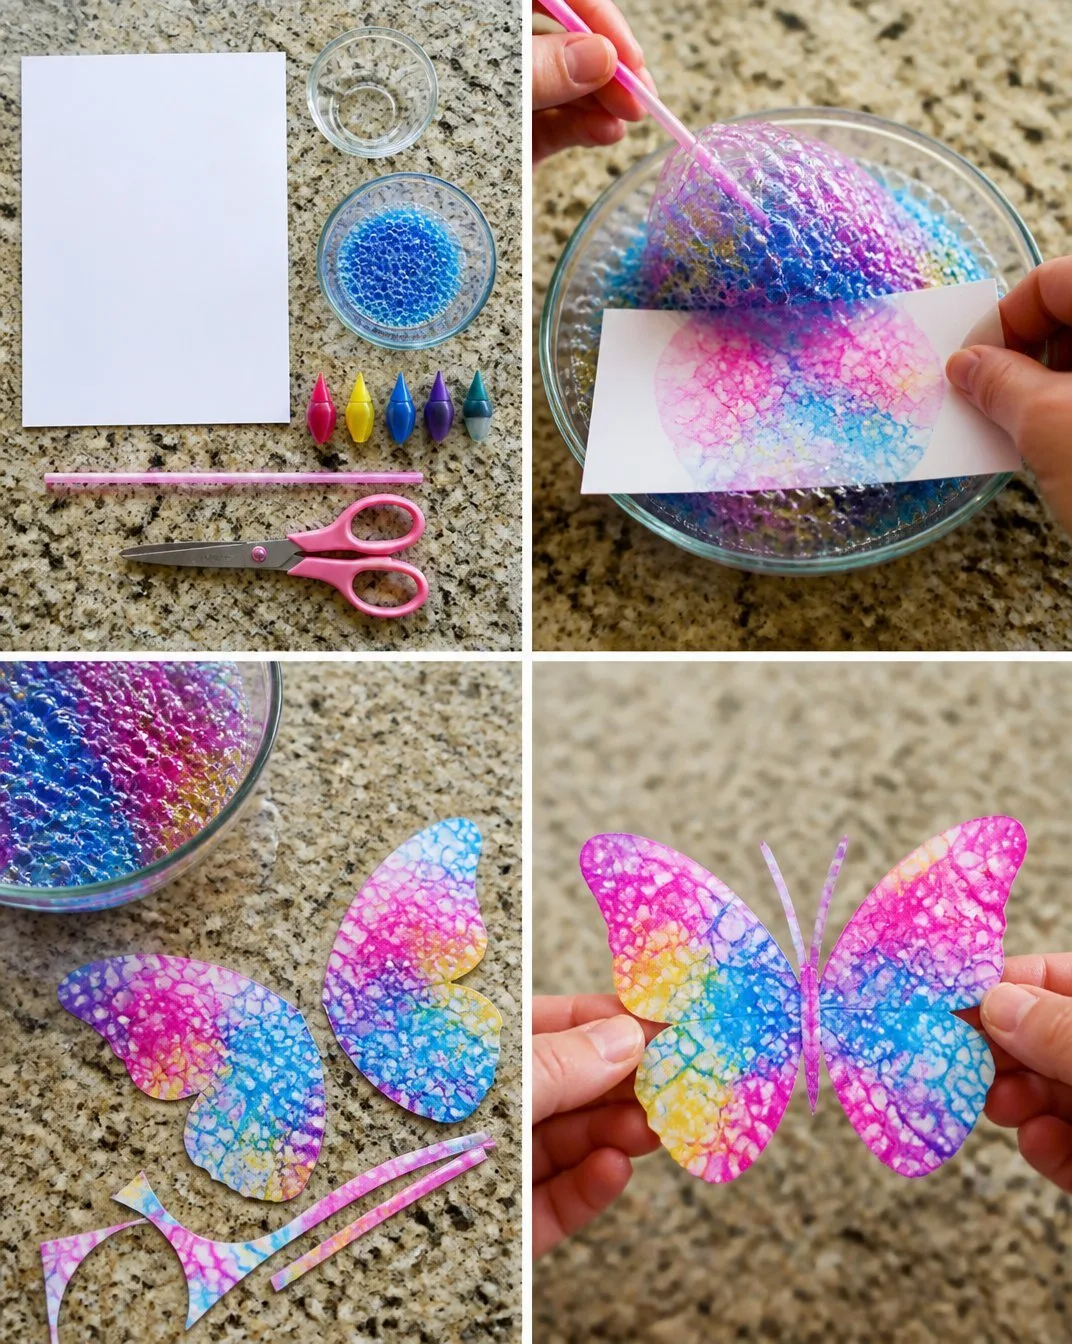
Prepare the bubble solution: In a plastic container, mix about 1/2 cup of water with a few tablespoons of dish soap. This creates the ideal mix for blowing bubbles.
Add color: Incorporate a few drops of food coloring into the bubble solution. Stir gently to avoid creating too many bubbles before you start printing. Adjust the color concentration to achieve your desired vibrancy.
Get your paper ready: Place a sheet of paper on your protected surface or tray. You want to make this easy to clean up afterward, so some protection can go a long way.
Blow the bubbles!: Using a straw, dip it into the mixture and blow softly to create bubbles. Remember to keep the straw just above the solution surface to avoid sucking it in.
Print your design: Carefully lift the bubbles from the container using the paper. Let the bubbles pop onto the paper, leaving vibrant marks. Encourage creativity with different angles and overlapping colors.
Dry your artwork: Once you are satisfied with the design, allow the paper to dry completely before displaying or using it for any further crafts.
The Learning Behind This DIY
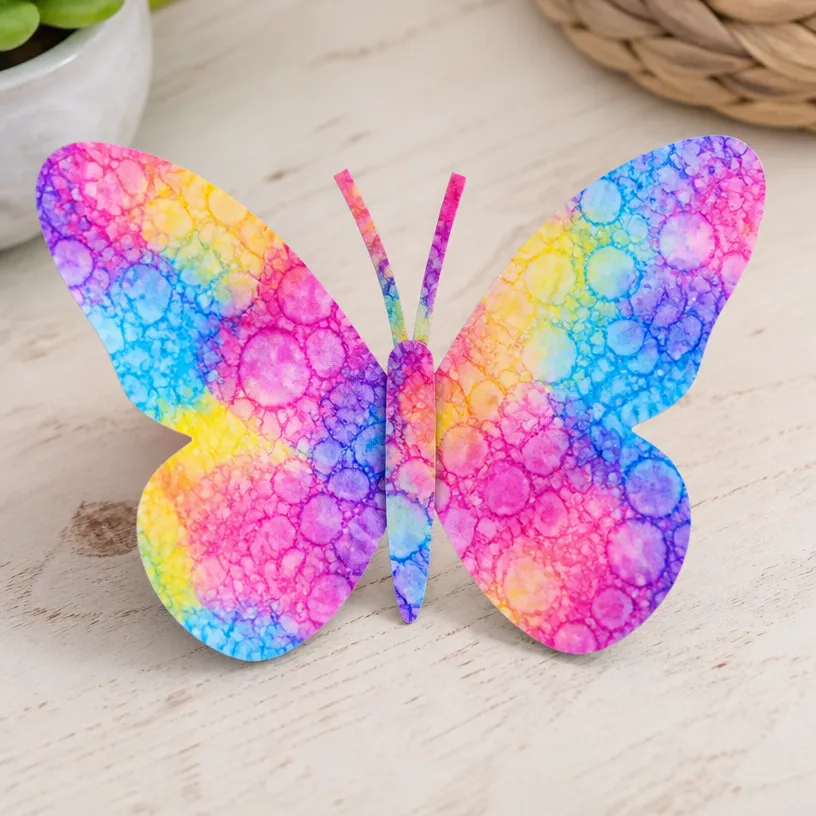
While creating beautiful butterfly wings, kids learn more than just craft skills. The project introduces basic scientific concepts related to bubbles, like surface tension and what happens when different liquids interact. Children practice fine motor skills as they blow bubbles and control their painting movements. This art project also teaches cause and effect what happens when you blow harder, or change the color ratio to keep their minds engaged throughout the process.
Troubleshooting Common Issues
If something doesn’t go as planned while making your bubble prints, don’t worry. Common hiccups, like bubbles not forming, often occur due to water being too cold or the soap concentration being off. A quick fix is to try adding a little more soap or ensuring the water is lukewarm. If your prints are too faint, simply add more food coloring to your solution next time.
Easy Variations to Try
To keep the creative juices flowing, consider trying these variations:
- Seasonal Colors: Change the color palette according to holidays or seasons for themed projects.
- Different Shapes: Instead of butterfly wings, experiment with other shapes, like hearts or stars.
- Layering: Use the prints as backgrounds and add hand-drawn designs on top for a mixed-media approach.
- Natural Dyes: Use natural juices or ingredients like beet juice to create your colors for a more organic look.
Storing or Reusing This Project
After you finish the project, you might wonder how to store or reuse the leftover materials. You can keep any remaining bubble solution in a sealed container for another day. However, once the art is finished, it’s usually best to let it dry completely and display it as unique decorations. Reinventing your paper by cutting it into shapes or using it in future crafts can also minimize waste.
FAQs About Bubble Print Technique Transforms Butterfly Wings into Art
Is this project messy?
While some mess is involved, using a protected surface and keeping the materials contained helps minimize it. Cleanup is straightforward as most spills wipe away easily.
What age is this activity suitable for?
This project is ideal for young children, usually ages 4 and up, with adult supervision recommended for younger ones to ensure safety with materials.
Can I substitute any ingredients?
Yes! If you don’t have food coloring, you can use juice or other natural colorants. Experimenting with alternatives can lead to interesting results.
How should I store the finished artwork?
Once completely dry, store the prints flat in a folder or frame them as keepsakes. Rolling them can cause damage.
Will the colors fade?
Depending on the materials you use, some fading may occur over time, especially if exposed to direct sunlight. Placing them in a shaded spot can help preserve their vibrancy longer.
Conclusion
Creating art through the Bubble Print Technique is a joyful way to foster creativity and exploration. Not only does it engage children in hands-on learning, but it also allows for countless variations and personalization. If you’re seeking further inspiration for kids’ crafts, consider browsing through resources like Kids & Family Crafts – DIY Craft Magic. For a deeper dive into artistic techniques and their histories, the Episode 62: Frankenthaler The Lonely Palette Podcast is a fascinating listen. Enjoy the fun of crafting and the transformative power of art!