

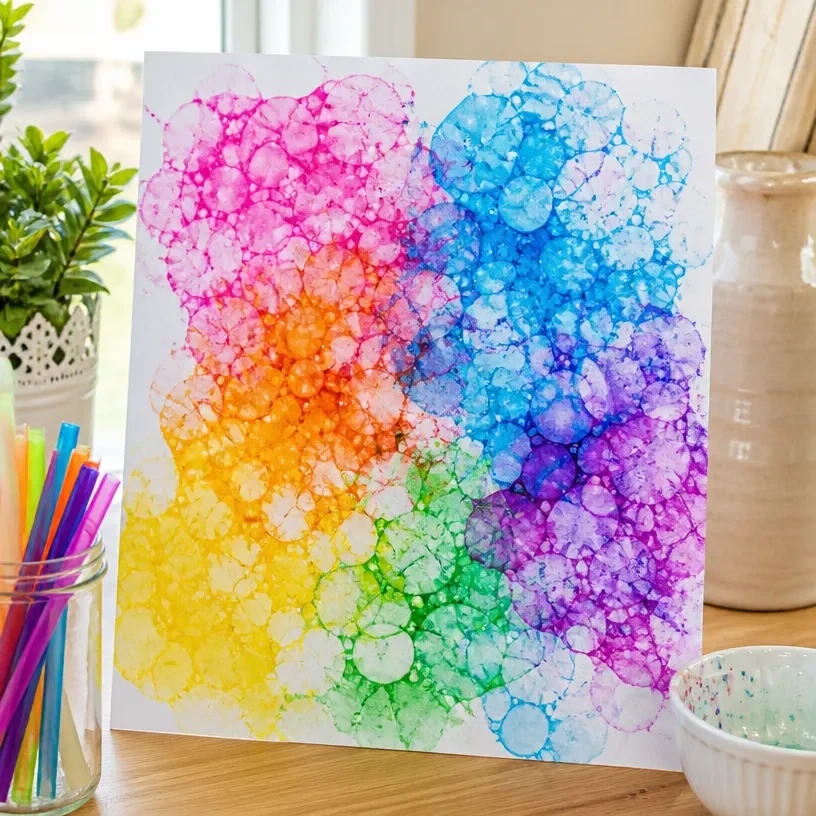
Creating arts and crafts can be a delightful way to spend a busy afternoon or fill a sudden need for a quick activity with the kids. If you’re looking for a fun project that combines creativity and a bit of science, then Bubble Firework Artistry: Creative Bubble Artwork for Explosive Displays is just the ticket. This project is engaging for all ages and offers a spectacular outcome that will surely impress children and adults alike. You may also find Bubble Firework Art useful.
Why This Bubble Firework Artistry: Creative Bubble Artwork for Explosive Displays Works So Well
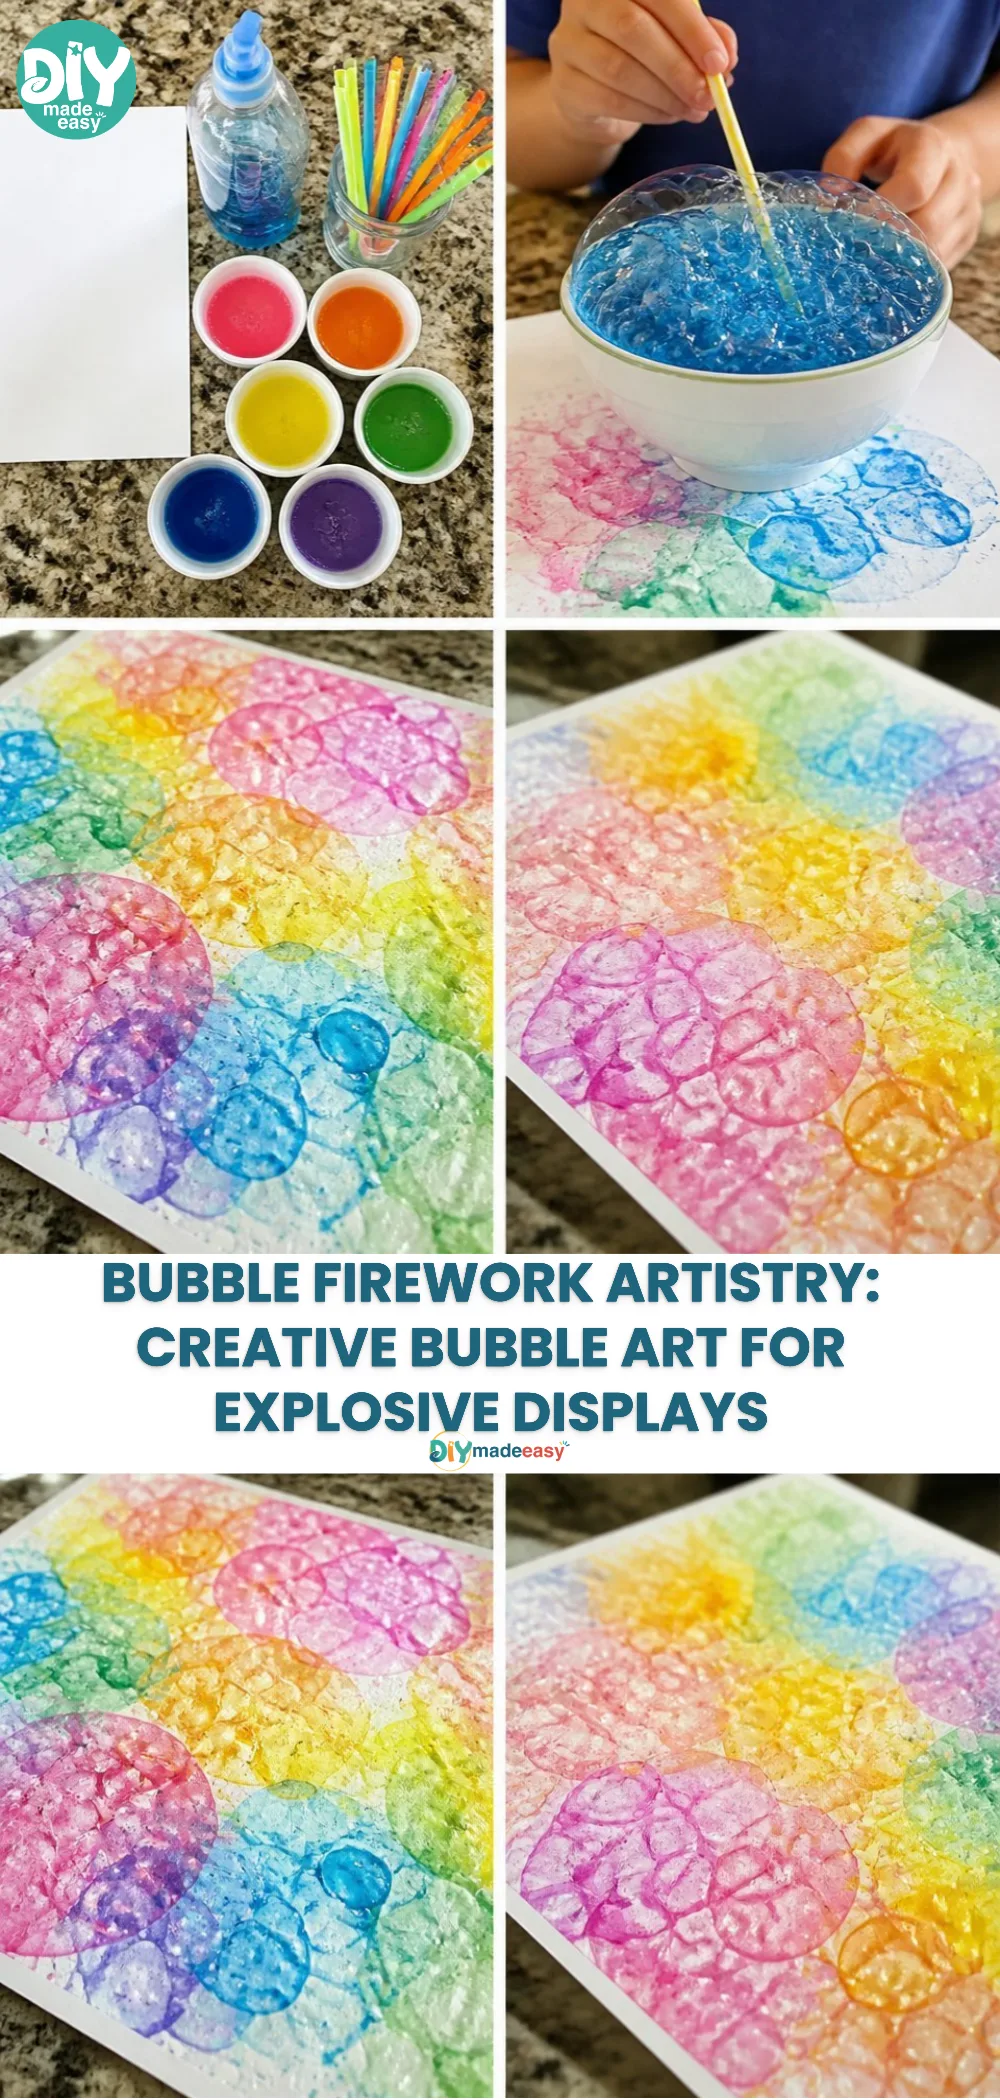
This project stands out for several reasons. Firstly, it’s low-prep, using everyday items that you likely already have at home. Bubble Firework Artistry encourages creativity while being incredibly approachable for kids and parents. The process of creating colorful bubble prints is both exciting and rewarding. With clear steps and simple materials, it fits perfectly into real-life schedules, making it easy to start even on days when time is tight. You may also find Bubble Wand Fireworks useful.
A Quick Look Before You Begin
This DIY project is manageable and allows for flexibility. Expect to spend about 30 to 60 minutes from setup to clean-up, depending on how elaborate you want your bubble artworks to be. The setup is straightforward, and while a little mess is involved, it can be contained easily. An adult’s involvement is recommended mainly during the mixing of ingredients and the preparation of the workspace, ensuring a safe and supervised environment for the kids. You may also find Creative Valentines Day Activities For Kids useful.
Materials You’ll Need
To create your stunning bubble artworks, gather the following supplies: You may also find Diy Bubble Print Butterfly Wings Craft For Kids useful.
- Bubble solution (store-bought or homemade)
- Food coloring
- Straw (medium-sized and sturdy)
- Paper, preferably heavy-weight or watercolor
- Shallow dish or tray (to hold the bubble solution)
- Optional: gloves for easy cleanup
Many of these are common household items, allowing you to dive into the creativity without the need for last-minute trips to the store.
Step-by-Step Directions
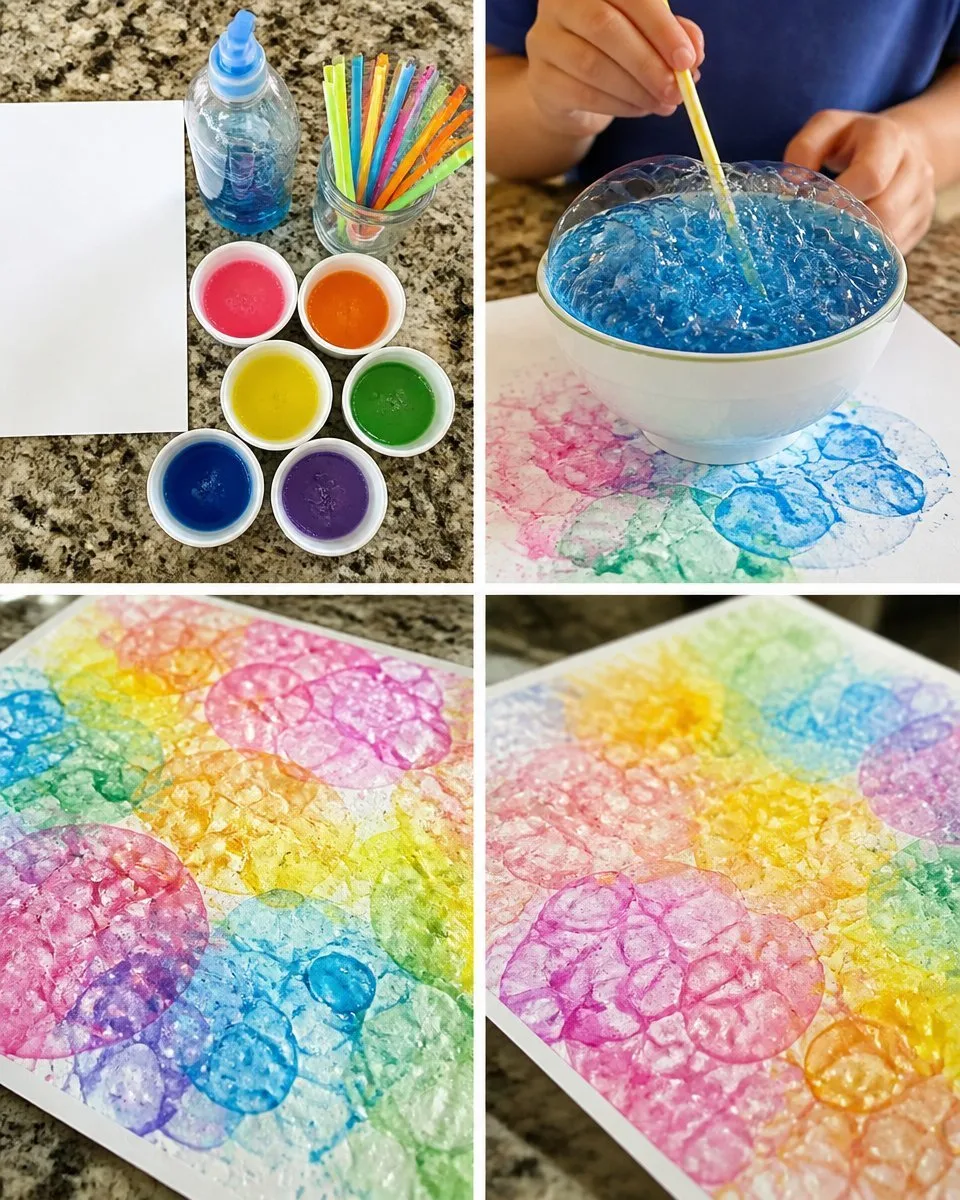
- Begin by preparing your bubble solution. If you’re making your own, mix one part dish soap with two parts water and a teaspoon of sugar to help stabilize the bubbles.
- Next, pour your bubble solution into a shallow dish or tray, ensuring there’s enough liquid to create bubbles.
- Add a few drops of food coloring to the mixture, swirling gently with a straw to avoid popping the bubbles.
- Place the straw into the bubble solution and blow gently to create bubbles. Aim for larger bubbles for a more dramatic effect.
- Carefully place the paper over the bubbles, allowing them to burst and leave colorful prints. Adjust the position of the paper for varying designs.
- Repeat the process until you’re pleased with your artworks, adding different colors as desired.
- Let the prints dry completely before displaying them.
The Learning Behind This DIY
While kids dive into Bubble Firework Artistry, they practice multiple skills. They learn about cause and effect as they see how blowing different amounts of air changes the size of the bubbles. This project fosters fine motor skills through the delicate act of blowing and positioning the paper. Additionally, it introduces basic science concepts regarding mixtures and reactions, setting a groundwork for future learning.
Troubleshooting Common Issues
If the bubbles aren’t forming well, it might be due to the soap concentration. Consider adjusting the solution by adding a little more dish soap. Also, if the colors don’t come out as vibrant as you’d hoped, try using more food coloring or ensure the bubbles don’t burst too early. Remember, a bit of experimentation is part of the fun!
Easy Variations to Try
Once you master the basics, feel free to mix things up! Here are a few ideas:
- Try adding glitter to the bubble solution for sparkling artworks.
- Use different types of paper, such as cardstock or canvas, for unique textures.
- Incorporate seasonal colors for a festive touch, like pastels for spring or warm hues for fall.
Storing or Reusing This Project
After creating your bubble artwork, consider how you might store it. The prints can be kept flat in a portfolio or hung up to dry. If you have leftover bubble solution, it can be stored in a sealed container for a couple of days. This project has the added benefit of reusability, allowing for fun exploration even on multiple occasions.
FAQs About Bubble Firework Artistry: Creative Bubble Artwork for Explosive Displays
How messy is this project?
While some spills can occur, keeping everything contained in a bright, open area makes cleanup easier. Just lay down an old tablecloth or newspaper for added protection.
Can we substitute ingredients?
Absolutely! You can use any liquid soap for the bubble solution, and if food coloring is not available, other edible dyes can work too.
Will the colors fade?
Once the prints are dry, they should retain their vibrant colors. However, storing them in direct sunlight might make the colors lighter over time.
How do we clean up?
Most of the mess will be soap and water, which makes cleanup straightforward. Just wipe down surfaces and wash your hands after the activity.
A Final Helpful Note
Before you dive into this project, remember to enjoy the process. Bubble Firework Artistry is all about exploration and creativity, so be flexible. There’s no right or wrong way to create; only stunning results waiting to be discovered.
Conclusion
To wrap up your day of fun, you might want to explore additional creative activities. Check out
this articlewhich delves into the imaginative world of artistry and its impact during challenging times. If you're nearby, don't miss the local festivities by visiting
the official Geneva events page, where you can find more fun activities for the family. Your journey through art and creativity is just beginning!