

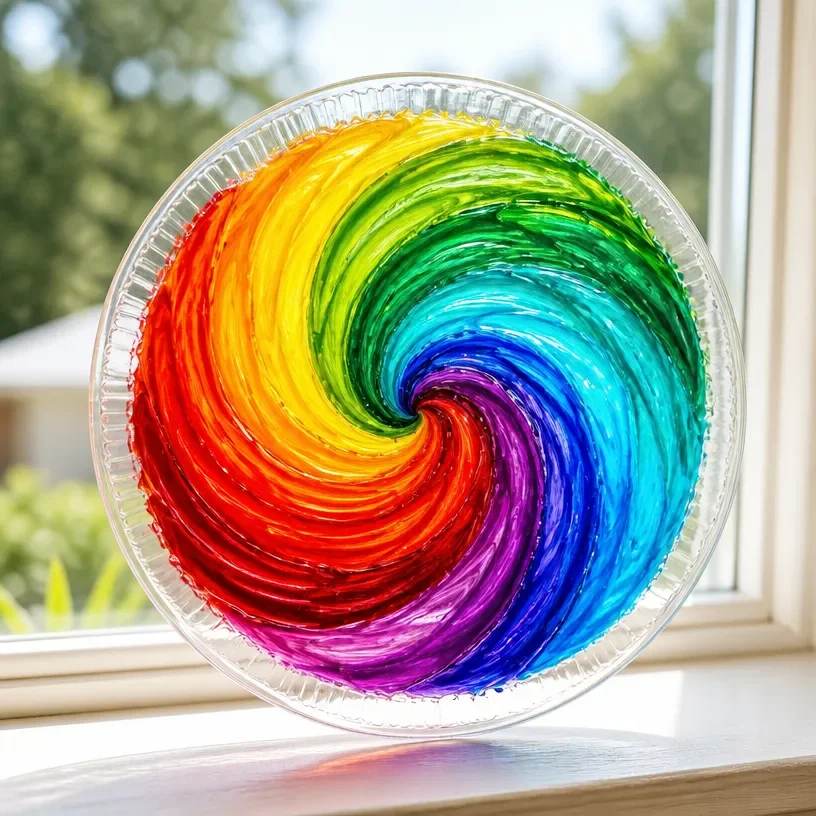
DIY Stained Glass Window Art with Glue is an ideal project for those busy afternoons when kids feel the creative urge to make something special. Imagine being in the kitchen, trying to prepare dinner, while your little ones are begging to craft. Thankfully, this project is both engaging and simple, allowing children to explore their artistic side with just a few materials. By using clear glue, they can create beautiful stained glass art, making an impactful decoration for your home. You may also find Diy Flower Hearts Craft Clear Glue useful.
Why This DIY Stained Glass Window Art with Glue Works So Well
You may also find Diy Glass Bead Heart Suncatcher useful.
This project is an excellent choice for families because it requires minimal prep time, making it incredibly approachable. Children can start with just a little guidance, allowing their imagination to run free as they decide on colors and patterns. As you work together, the glue provides a sensory experience; its smooth texture is easy to manipulate. Plus, the materials are often already at home, which makes this a reliable choice for spontaneous creativity. You may also find Diy Glue Suncatchers Easy Window Decor useful.
A Quick Look Before You Begin
Before diving into DIY Stained Glass Window Art with Glue, it helps to have an overview. The entire project can be completed in about an hour, with most of that time spent on the creative process. While some adult supervision is necessary, especially with younger kids, the mess is usually contained to a small workspace. You can easily set up a table with protection like newspaper or old sheets, making cleanup a breeze. Knowing these aspects ahead of time helps to ease any anxiety about potential messes. You may also find Fake Stained Glass Heart useful.
Materials You’ll Need
- Clear glue: This acts as the primary binding agent and is a common household item.
- Food coloring: Easily creates a vibrant effect and adds a fun twist.
- Cardstock or thick paper: Ideal surfaces for the project; easy to cut and shape.
- Scissors: Used for cutting the cardstock into desired shapes.
- Wax paper: Helps in the drying process and prevents sticking.
These materials are budget-friendly and can often be substituted if needed. If you don’t have food coloring, you can also use paints or markers for added variety in your designs.
Step-by-Step Directions
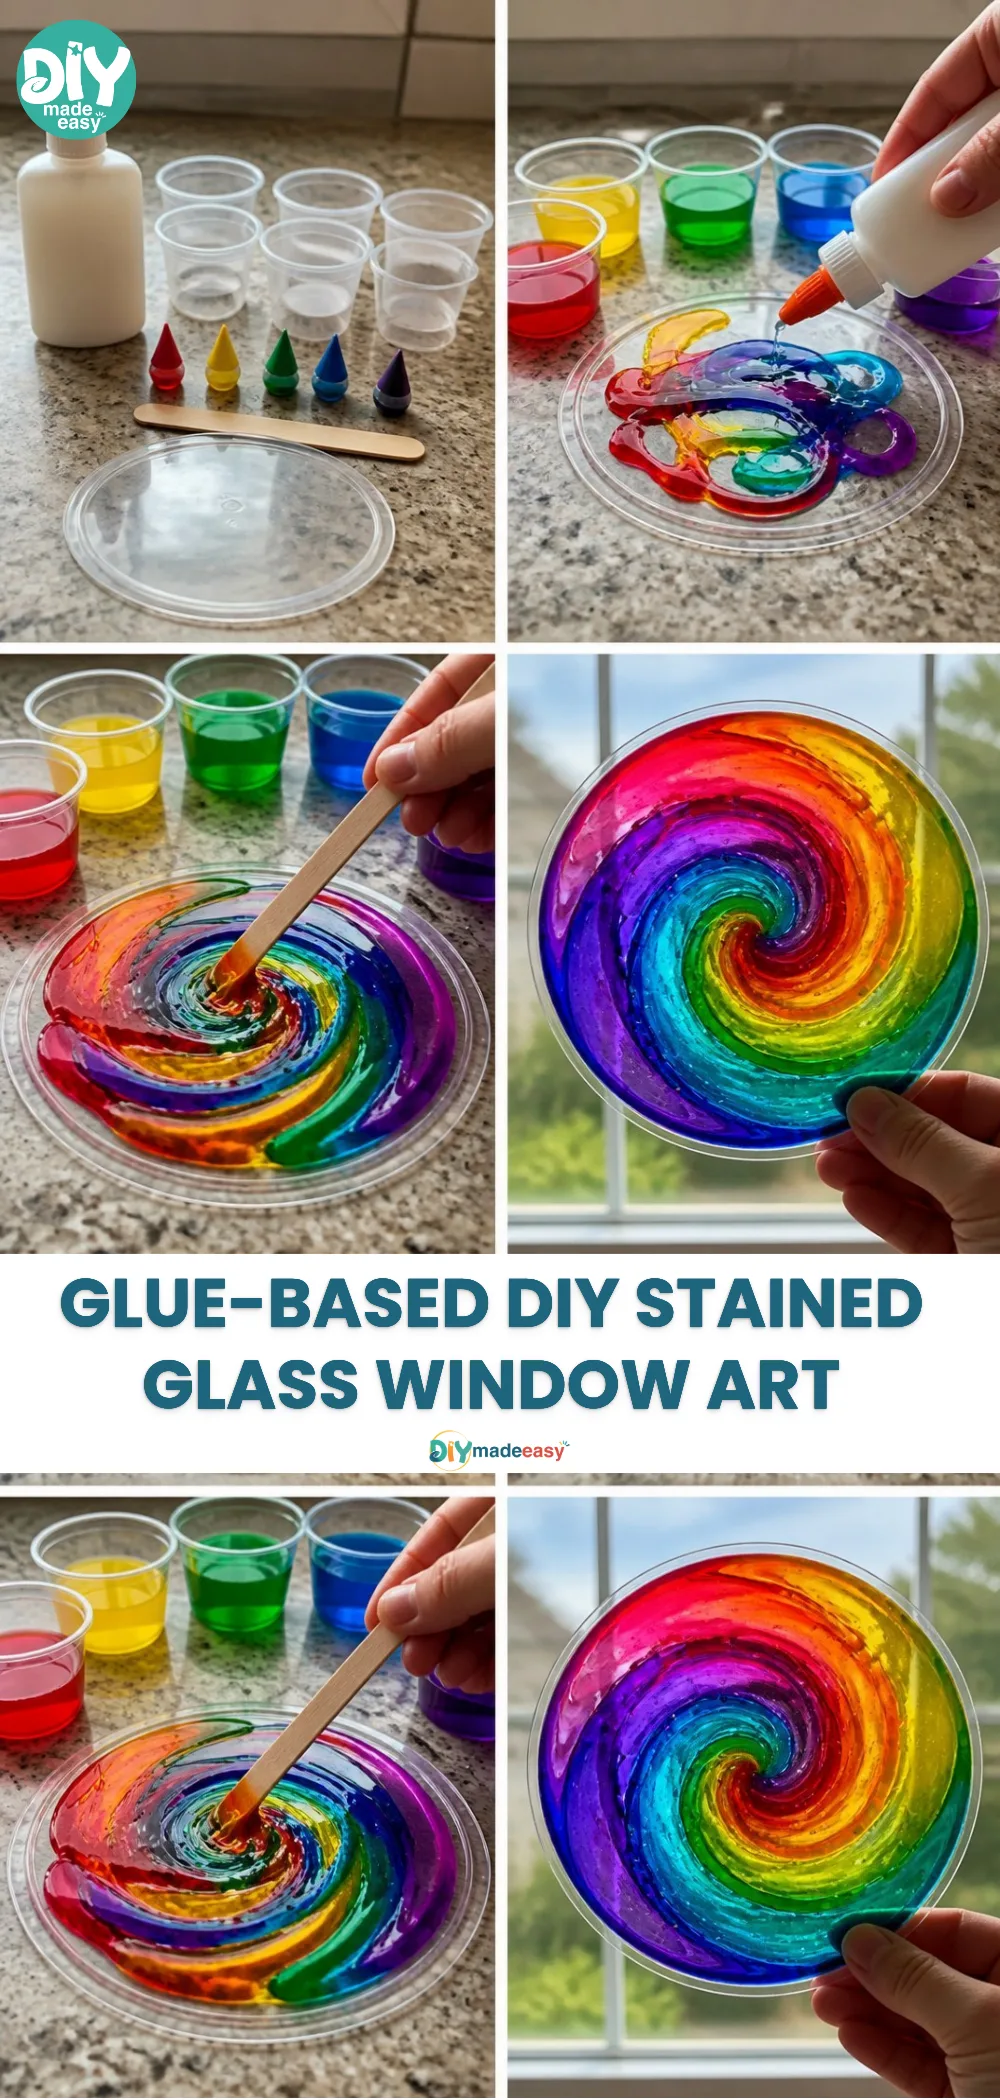
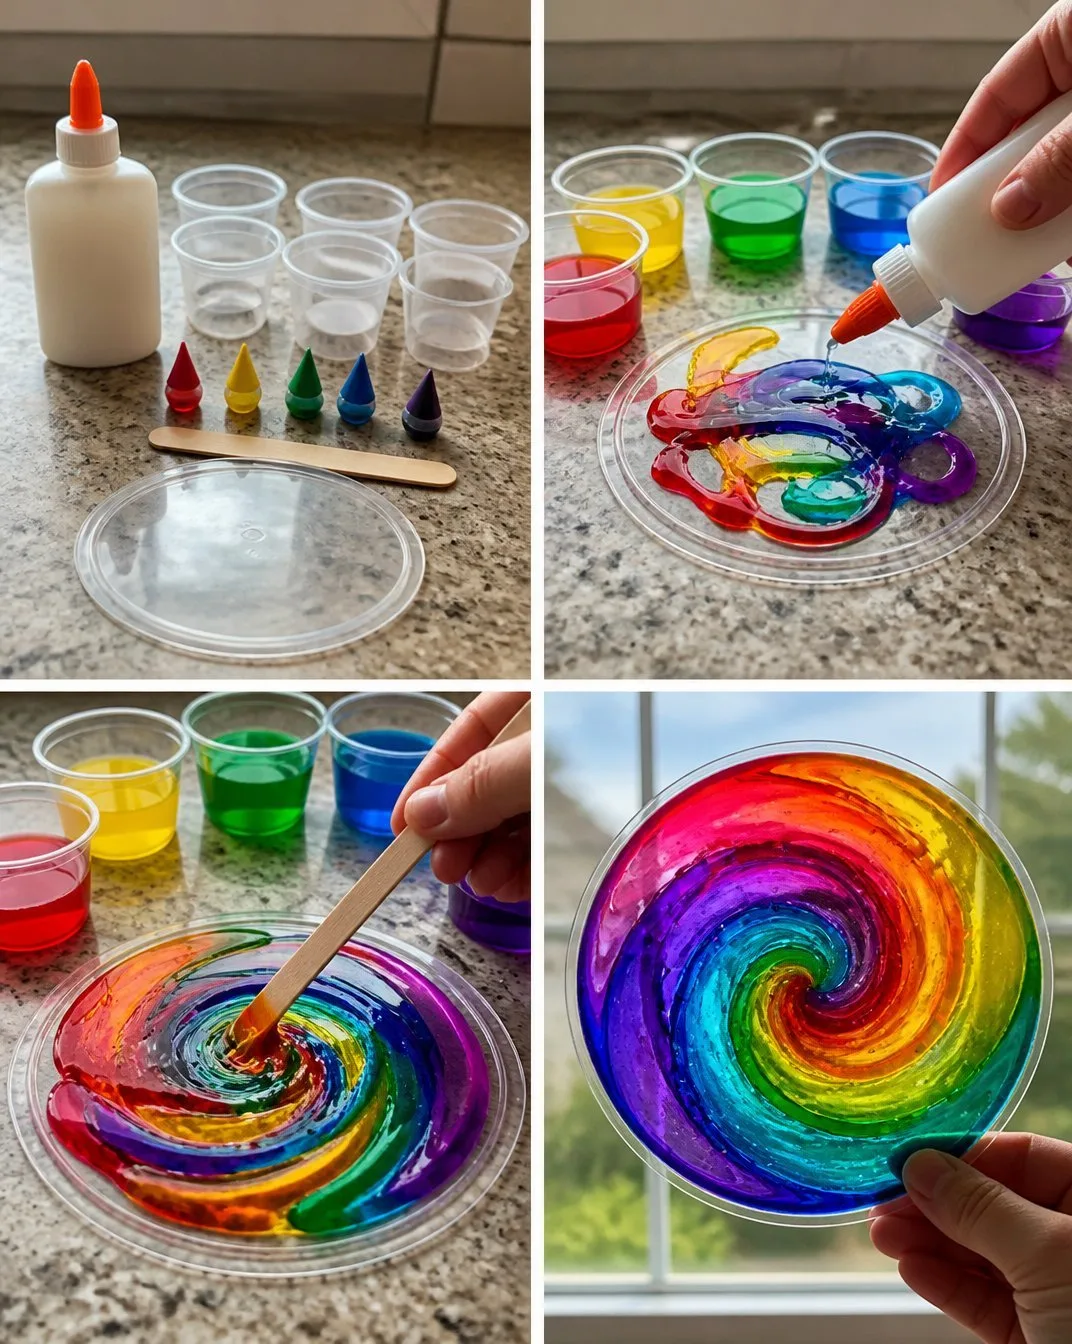
- Begin by cutting the cardstock into various shapes, such as hearts or stars, depending on your vision for the window art.
- Place a piece of wax paper on a flat surface as your working area. This will protect your table and help with cleanup later.
- Squeeze clear glue onto the wax paper in the shape of the cut cardstock. Create a border that will hold the food coloring or paint.
- While the glue is still wet, add food coloring into the center, mixing colors if you wish. Use a toothpick or fine brush to stir the colors gently.
- Allow the mixture to dry completely. This could take anywhere from 30 minutes to a couple of hours, depending on the thickness of the glue.
- Once dry, carefully peel the dried art off the wax paper and secure it to a window using another layer of glue or tape.
Each step provides visual satisfaction as colors blend and transform, encouraging cooperation and joy among participants.
The Learning Behind This DIY
During the creation of DIY Stained Glass Window Art with Glue, children practice various skills without even realizing it. They engage in fine motor activities as they manipulate glue and food coloring, which supports their coordination and dexterity. The project also introduces basic color theory; mixing colors stimulates creative thinking and visual awareness. Additionally, kids can observe how different materials react, which subtly introduces them to science concepts like viscosity and absorption.
Troubleshooting Common Issues
If the glue doesn’t set properly or becomes too milky, it may have been too thick in some areas. Encouraging a thinner application can help with even drying. If colors seem muted or mix undesirably, reinforce that experimentation is part of the fun the process may yield entirely new results. If something doesn’t go as planned, reassure your child that creativity comes from trying different approaches, and every attempt is a learning moment.
Easy Variations to Try
- Seasonal Themes: Create fall leaves, winter snowflakes, or summer sun shapes to reflect different seasons.
- Layers of Colors: Experiment with adding multiple layers of colored glue for a more dimensional effect.
- Add Texture: Use small beads or sequins in conjunction with the glue to add sparkle and additional tactile experiences.
- Outline with Black Glue: Drawing outlines in black glue can mimic the look of traditional stained glass.
These variations allow for endless creativity and can also adapt the project for different age groups, making it versatile.
Storing or Reusing This Project
Once your beautiful stained glass window art is complete, consider displaying it prominently in your home. If you plan to clean up, carefully store any leftover supplies, like glue or food coloring, in sealed containers. The wax paper can be discarded or recycled. To reuse the project later, consider making new designs for different seasons or events, engaging the family in new arts and crafts sessions down the line.
FAQs About DIY Stained Glass Window Art with Glue
Will this project create a lot of mess?
While any creative project brings a bit of mess, using wax paper helps keep surfaces clean. Just have some paper towels or wipes nearby for quick cleanup.
Is this safe for younger children?
Yes! The materials used are generally safe, but it’s a good idea to supervise younger kids with scissors and ensure they don’t ingest any glue.
What can I do if I run out of food coloring?
If you don’t have any on hand, consider using paint or even markers for a different effect. Just note that the final look may vary.
How can I store the finished pieces?
Keep them in a flat and safe location, such as in a cardboard box or wrapped in bubble wrap if you plan to store them for a while.
Will the colors fade over time?
If placed in direct sunlight for extended periods, colors can fade. It’s best to display them in light but out of direct rays.
Conclusion
Creating DIY Stained Glass Window Art with Glue is an enriching experience for children and parents alike. This hands-on project not only reveals beautiful visual outcomes but also fosters valuable skills and family bonding. If you’re curious about other techniques, check out this guide on how to make faux stained glass with acrylic paint and glue or learn how to make stunning faux stained glass with just glue and paint. Embrace the chance to create something beautiful while making lasting memories!
PrintDIY Stained Glass Window Art with Glue
An engaging and simple project that allows children to explore their creativity by creating beautiful stained glass art using clear glue and food coloring.
- Prep Time: 10 minutes
- Cook Time: 30 minutes
- Total Time: 40 minutes
- Yield: 1 project
- Category: Craft
- Method: Crafting
- Diet: None
Ingredients
- Clear glue
- Food coloring
- Cardstock or thick paper
- Scissors
- Wax paper
Instructions
- Begin by cutting the cardstock into various shapes, such as hearts or stars, depending on your vision for the window art.
- Place a piece of wax paper on a flat surface as your working area.
- Squeeze clear glue onto the wax paper in the shape of the cut cardstock.
- While the glue is still wet, add food coloring into the center, mixing colors if you wish.
- Allow the mixture to dry completely. This could take anywhere from 30 minutes to a couple of hours.
- Once dry, carefully peel the dried art off the wax paper and secure it to a window using another layer of glue or tape.
Notes
Consider using paints or markers if food coloring is unavailable. Cleanup can be easy with wax paper, and supervision is recommended for younger kids.