

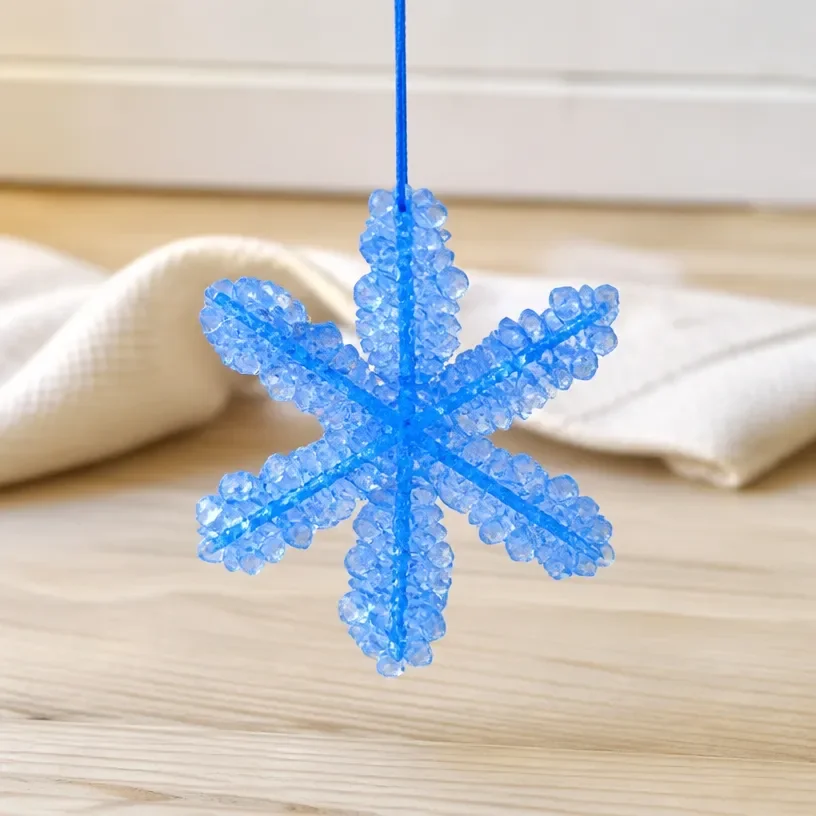
The busy afternoons can often be a challenge, especially when kids want to create something special right away. If you find yourself in this situation, a great solution is to start with How to Grow a Crystal Star at Home (DIY). This easy, interactive project not only sparks curiosity but also fits perfectly into those moments when you need a quick and fun activity that requires minimal setup. You may also find How To Create A Crystal Star At Home Diy Guide useful.
Why This How to Grow a Crystal Star at Home (DIY) Works So Well
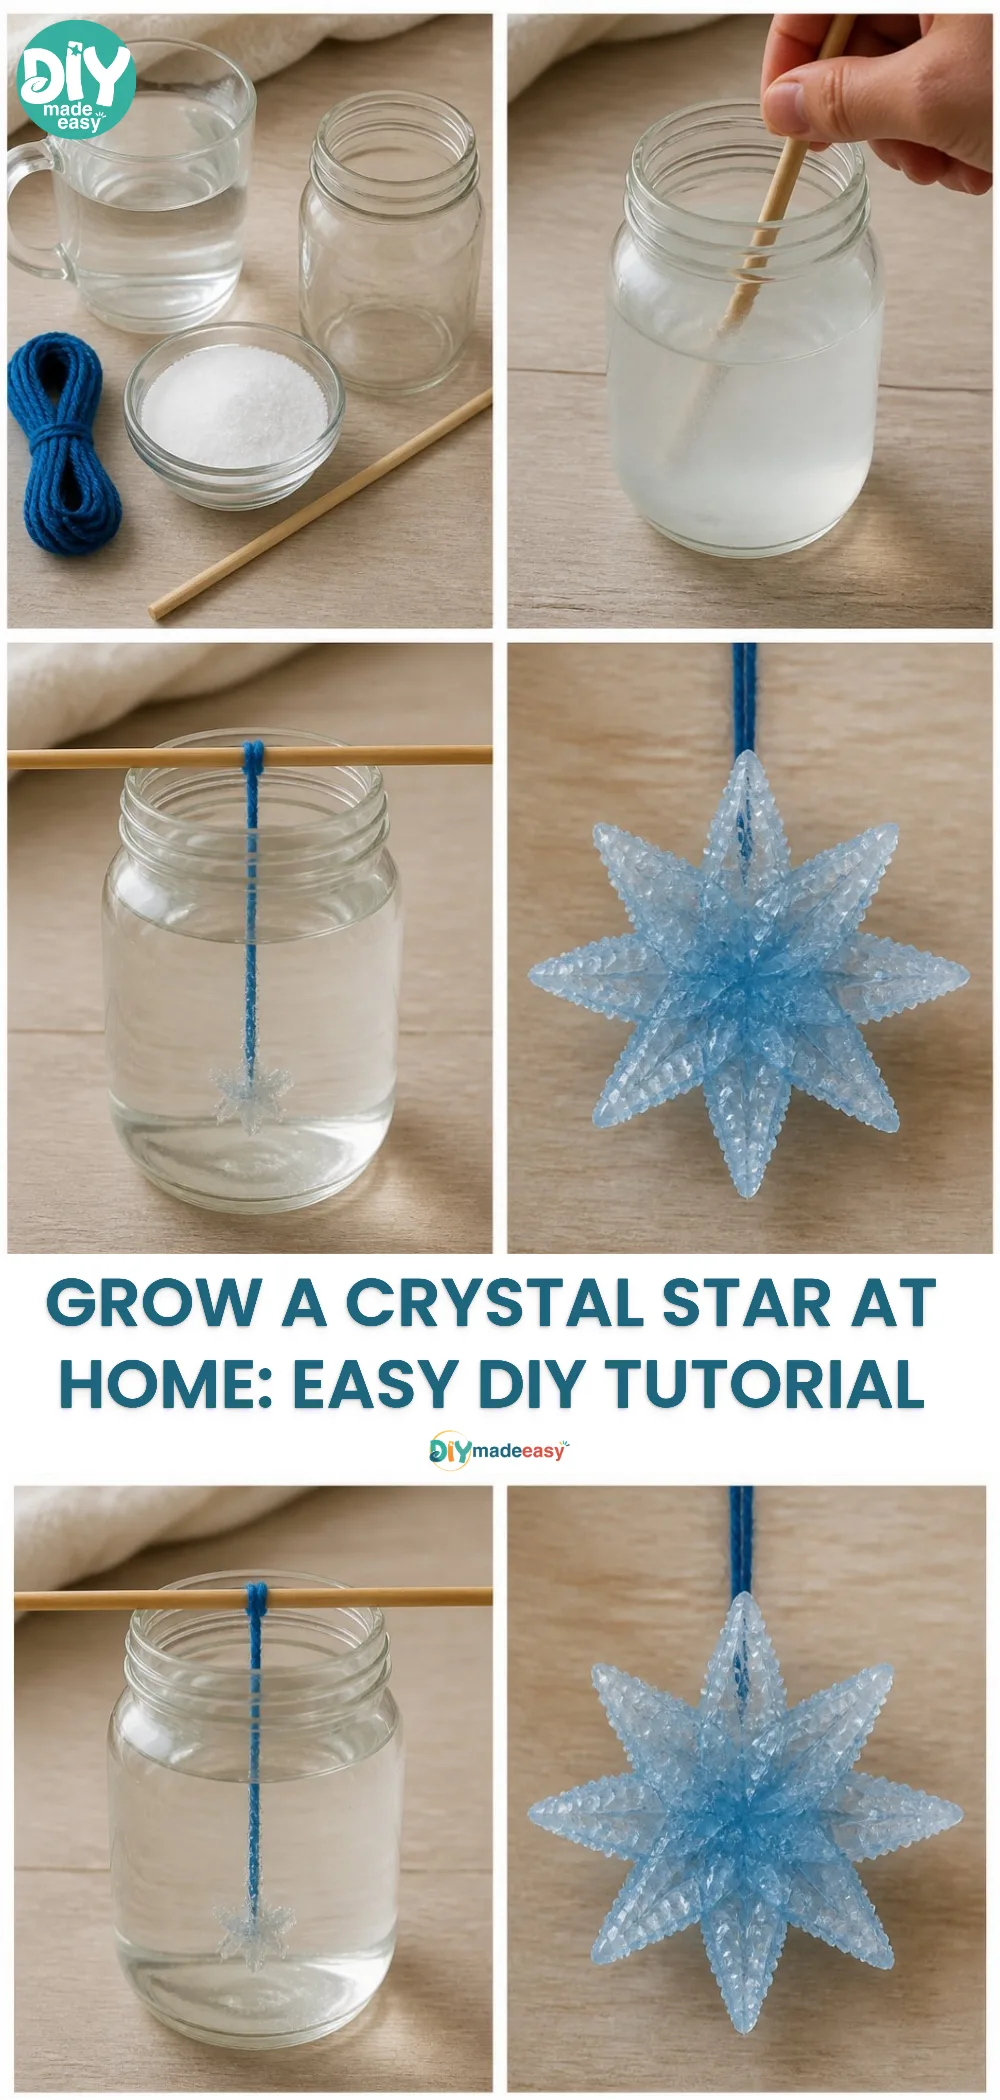
You may also find How To Create A Rainbow Baking Soda Crystal Forest useful.
This project is excellent for many reasons. First, it requires little prep time, allowing you to dive right in without much hassle. Second, gathering the materials is achievable; most items can be found around the house, making this a low-cost adventure. Each step is clear and approachable, meaning you’ll feel confident moving through the process, even if you’re juggling multiple responsibilities. You may also find How To Create Faux Glass Rainbow Arch Home Decor useful.
A Quick Look Before You Begin
Setting up for this DIY involves just a few steps, leaving you with plenty of time to enjoy the experience. Most of the materials needed are common household items, which keeps it accessible. There’s minimal risk of a big mess, making this a practical choice for busy parents or teachers. You’ll find that adult involvement is mainly in guiding the kids through the steps, while they enjoy being hands-on.
Materials You’ll Need
- Borax (common household item)
- Water (easy to find)
- String (budget-friendly)
- Pencil (common tool)
- A jar (recycling an old one is an option)
- Food coloring (optional for colorful crystals)
These materials can all be sourced easily, ensuring that your project runs smoothly without unnecessary stress.
Step-by-Step Directions
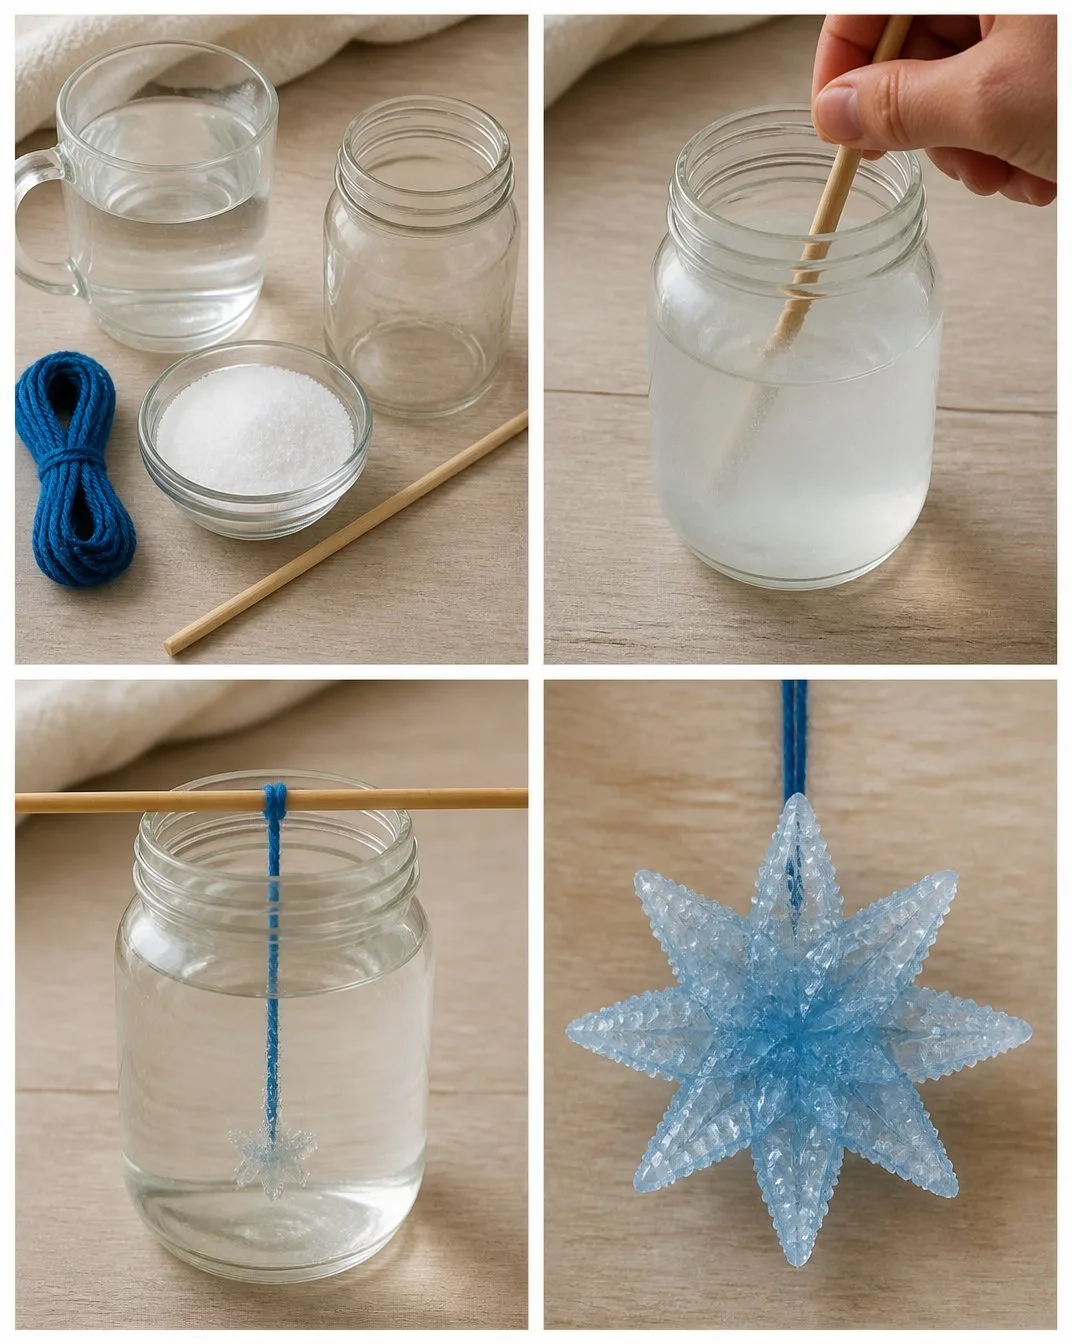
Prepare Your Workspace: Begin by selecting a clean, flat area where your crystal star will grow. Make sure it’s accessible and safe from curious pets or small children.
Mix the Solution: In a jar, combine three tablespoons of Borax with one cup of hot water. Stir thoroughly until the powder dissolves completely. You might notice some texture changes, which is just the Borax responding to the heat.
Add Color (Optional): If you want colorful crystals, mix in a few drops of food coloring. This adds a fun touch and makes the crystals visually exciting!
Attach the String: Tie a piece of string to a pencil and place the pencil across the mouth of the jar so that the string dangles into the solution but doesn’t touch the bottom. The string will serve as the base for your crystal star.
Let It Sit: Leave the jar undisturbed in a safe spot for several hours or overnight. During this time, observe how the crystals form on the string. You can sneak a peek, but remember, no stirring!
Check Your Progress: After about 6 hours, you can check to see how your crystal star is shaping up. If you want more intense crystals, leaving it longer is perfectly fine.
Remove and Dry: Once you’re satisfied, carefully take the string out and allow it to dry. You’ll have created a beautiful crystal star that you can display proudly.
Display Your Creation: Finally, find a nice spot to show off your new crystal creation. It’s a great conversation starter and a wonderful reminder of your DIY adventure.
The Learning Behind This DIY
While making crystal stars, kids can learn about various scientific concepts like saturation and crystallization. They’ll see firsthand how solids can form from solutions as the Borax cools and solidifies on the string. This project also helps develop fine motor skills as they measure, pour, and tie strings. It’s a delightful blend of play and learning that cultivates natural curiosity.
Troubleshooting Common Issues
Sometimes, things might not go as planned. If your crystals look sparse, it might be due to not enough Borax in the solution or not allowing enough time for growth. You can easily fix this: make a new batch and ensure the solution is more concentrated next time. Crystals that clump together might indicate the string is too thick, so consider using a thinner string or adjusting its placement in the solution.
Easy Variations to Try
To keep things exciting, try these fun variations on the crystal star project:
- Different Shapes: Instead of stars, attempt other shapes like hearts or flowers using different templates or molds.
- Glittery Crystals: Add some sparkle by mixing in glitter for a dazzling effect.
- Colored Layers: Create layers of different colors by letting one color grow for a while before adding another. It’s visually engaging and fun!
Storing or Reusing This Project
Once your crystal star is complete, you may wonder what to do next. If it gets dusty, simply wipe it clean. You can also melt the crystals back down in hot water to reuse the Borax, enabling you to create more stars or even tackle a different DIY project, like transparent cornstarch heart charms.
FAQs About How to Grow a Crystal Star at Home (DIY)
What if my crystals don’t form properly?
Not to worry! Sometimes, crystals need more time or a stronger solution. You can try again by adjusting your measurements.
Is it safe for little kids?
Yes, with adult supervision, this project is safe. Just ensure that kids don’t ingest the Borax, as it is not edible.
Can I substitute Borax with something else?
Borax is the most effective option for this project, but you can research alternatives for different types of crystals if you’re feeling adventurous.
Will this project make a mess?
With careful preparation and setup, the mess should be minimal. It’s a good idea to cover your work area just in case.
How can I store leftover materials?
Keep leftover Borax in a sealed container in a cool, dry place for future projects.
Conclusion
In conclusion, this DIY project offers a unique combination of fun and learning, perfect for any busy household. Whether you’re looking to entertain kids or spark their curiosity about science, growing crystal stars is a rewarding challenge. If you’re interested in similar projects, check out How to Make Crystal Stars | Borax Crystal Ornaments for more creative ideas. For additional scientific fun, explore the Borax Star Ornaments: Christmas Science Project, which also brings elements of crafting together with education.
PrintHow to Grow a Crystal Star at Home (DIY)
An engaging DIY project that teaches kids about crystallization while making beautiful crystal stars.
- Prep Time: 10 minutes
- Cook Time: 0 minutes
- Total Time: 6 hours 10 minutes
- Yield: 1 crystal star
- Category: Craft
- Method: DIY
- Cuisine: N/A
- Diet: N/A
Ingredients
- Borax
- Water
- String
- Pencil
- A jar
- Food coloring (optional)
Instructions
- Prepare your workspace: Begin by selecting a clean, flat area where your crystal star will grow.
- Mix the solution: In a jar, combine three tablespoons of Borax with one cup of hot water and stir until dissolved.
- Add color (optional): Mix in a few drops of food coloring for colorful crystals.
- Attach the string: Tie a piece of string to a pencil and place it across the jar’s mouth to dangle into the solution.
- Let it sit: Leave the jar undisturbed in a safe spot for several hours or overnight.
- Check your progress: After about 6 hours, check how your crystal star is forming.
- Remove and dry: Carefully take the string out and allow it to dry.
- Display your creation: Find a nice spot to show off your crystal star.
Notes
Kids will learn about scientific concepts like saturation and crystallization while developing fine motor skills.
Nutrition
- Serving Size: 1 crystal star
- Calories: N/A
- Sugar: N/A
- Sodium: N/A
- Fat: N/A
- Saturated Fat: N/A
- Unsaturated Fat: N/A
- Trans Fat: N/A
- Carbohydrates: N/A
- Fiber: N/A
- Protein: N/A
- Cholesterol: N/A