

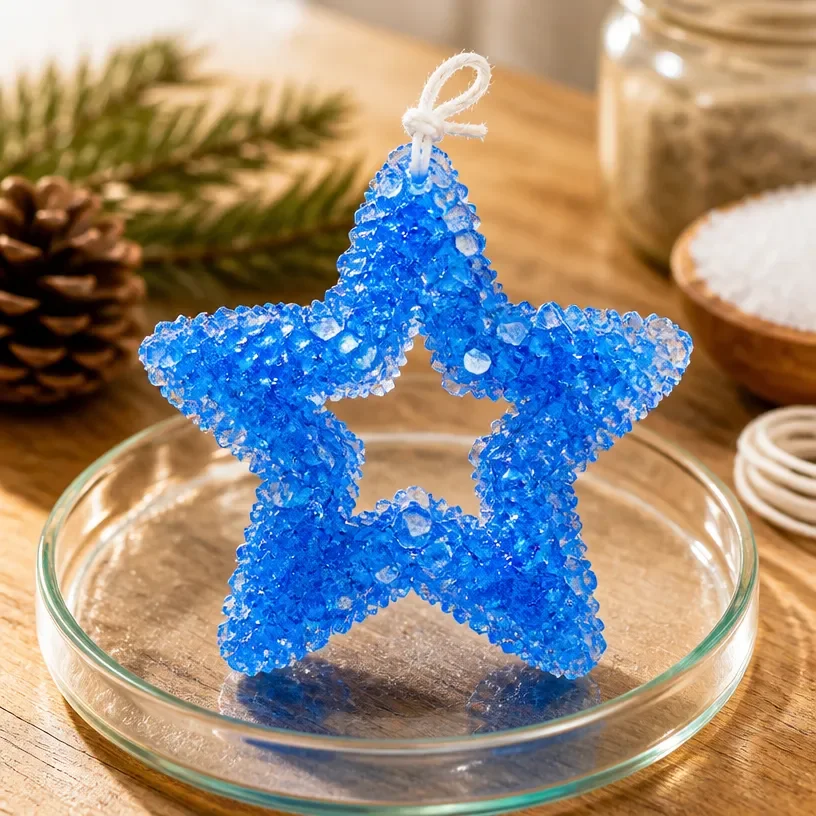
It was a busy afternoon, and the kids were eager to create something imaginative and fun. With a little planning, you can turn that energy into a delightful project with the Crystal Growing Star: DIY At-Home Crystal Craft Tutorial. This activity doesn’t just keep them engaged; it also teaches them about crystals and science in an enjoyable way. Imagine the joy when they get to see their efforts transform into sparkling star shapes over time! You may also find Diy Coffee Filter Jellyfish Craft Tutorial useful.
Why This Crystal Growing Star: DIY At-Home Crystal Craft Tutorial Works So Well
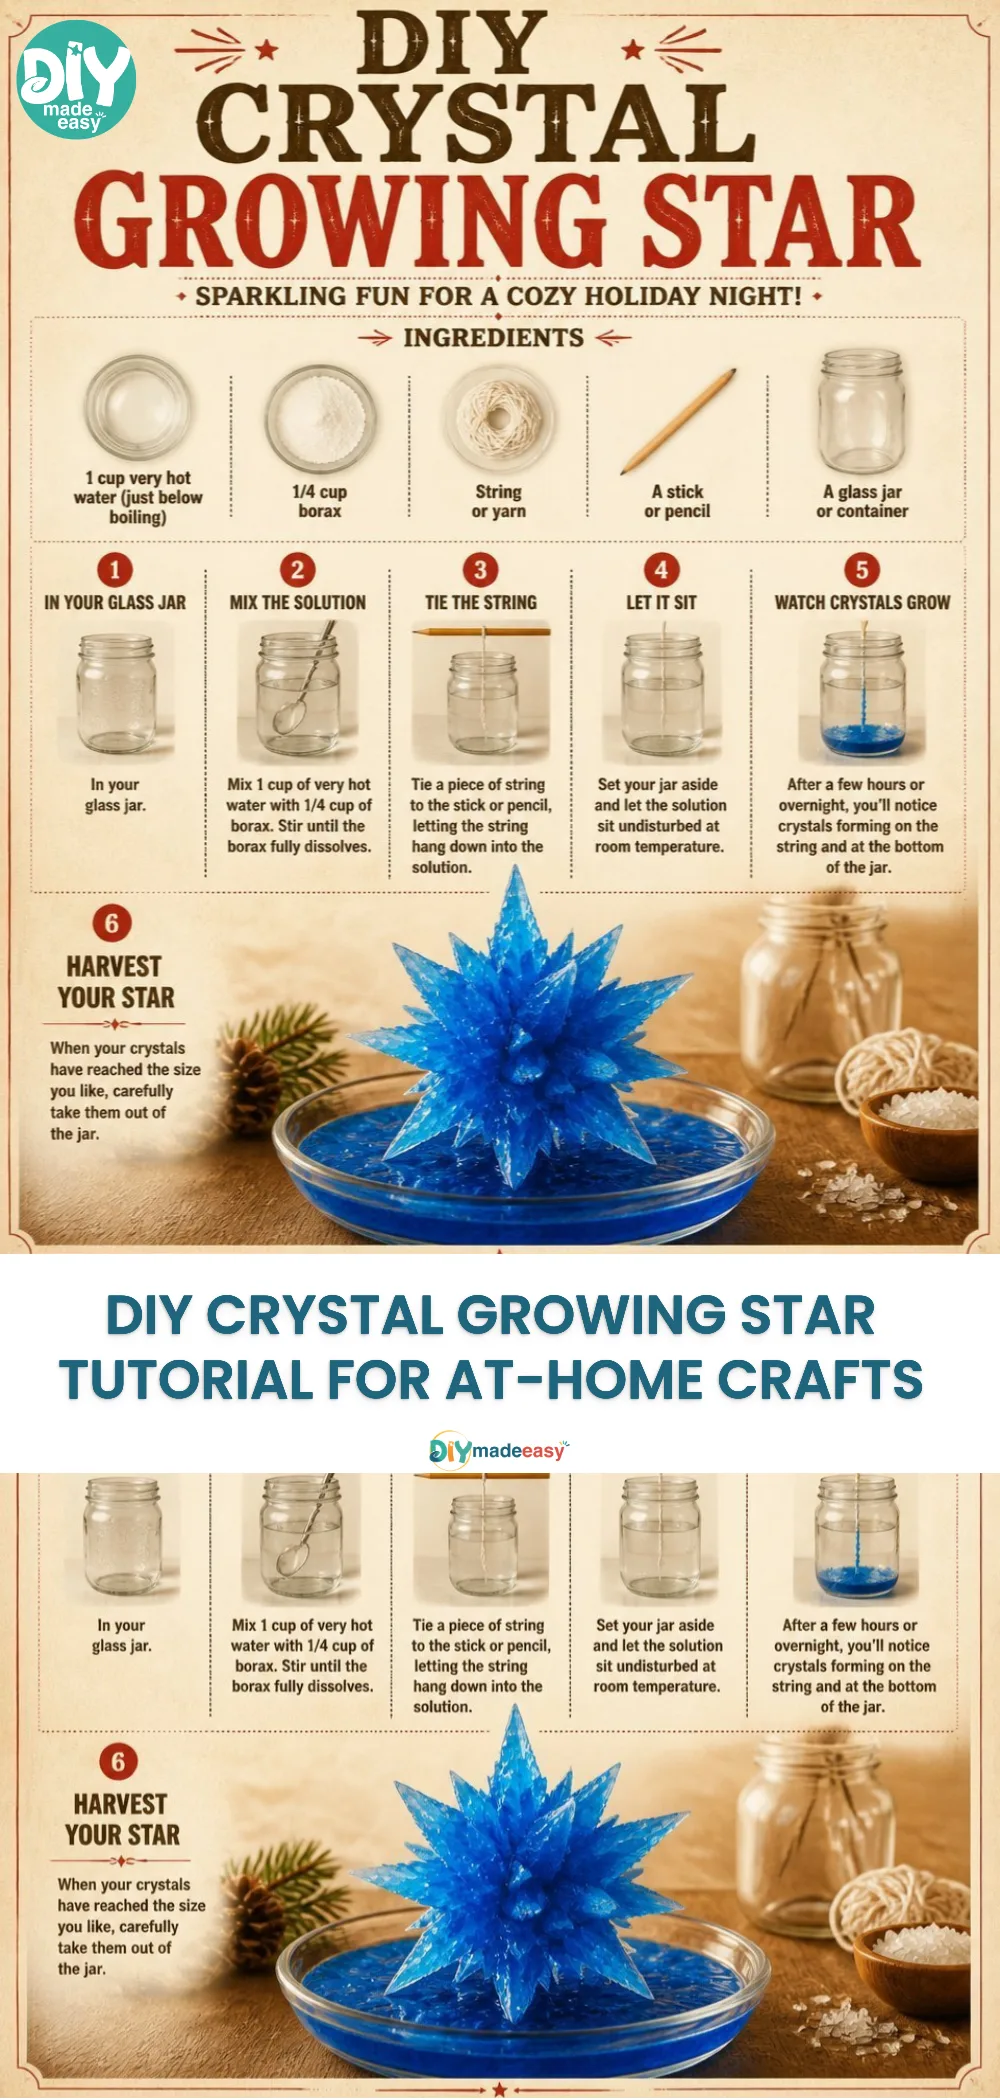
You may also find Diy Crystal Growing Star useful.
This project stands out for several reasons. First, it’s incredibly low-prep; you likely already have most of the materials at home. This makes it easy to jump right into the fun without a lengthy setup. It’s also an approachable craft that yields reliable results. Parents appreciate that kids can see tangible results without needing advanced skills or equipment. You may also find Diy Handprint Paper Lilies Craft Tutorial useful.
Moreover, it seamlessly fits into real-life schedules, requiring only a few minutes to set up. The waiting period for the crystals to form allows for that moment of anticipation without overwhelming time commitments. It’s a perfect blend of simplicity and discovery, ideal for busy afternoons. You may also find Diy Rainbow Pom Pom Caterpillar Garden Craft Tutorial useful.
A Quick Look Before You Begin
Before you get started, it’s good to know how this DIY project flows. The entire process is relatively straightforward, allowing kids to take the lead while adults supervise. Expect around an hour for the initial setup, with the crystal growth taking several hours or even overnight. The level of mess is minimal, primarily involving measuring and mixing, so cleanup will be quick and easy. This project presents a fantastic way to experience hands-on science with the kids while maintaining a manageable environment.
Materials You’ll Need
You will need a few simple supplies to create your crystal star. Here’s what you will use for this DIY:
- Borax powder – This is the star ingredient for your crystals.
- Water – You’ll need it to create the solution.
- Star-shaped cookie cutter – This will help shape your crystals.
- String – To hang your crystals.
- A container (like a jar) – Where the solution will sit and form the crystals.
- Stirring stick – For mixing the borax solution.
- Optional: Food coloring – To personalize your crystals.
These materials are readily available at home or easily found in stores, making this craft budget-friendly and accessible for everyone.
Step-by-Step Directions
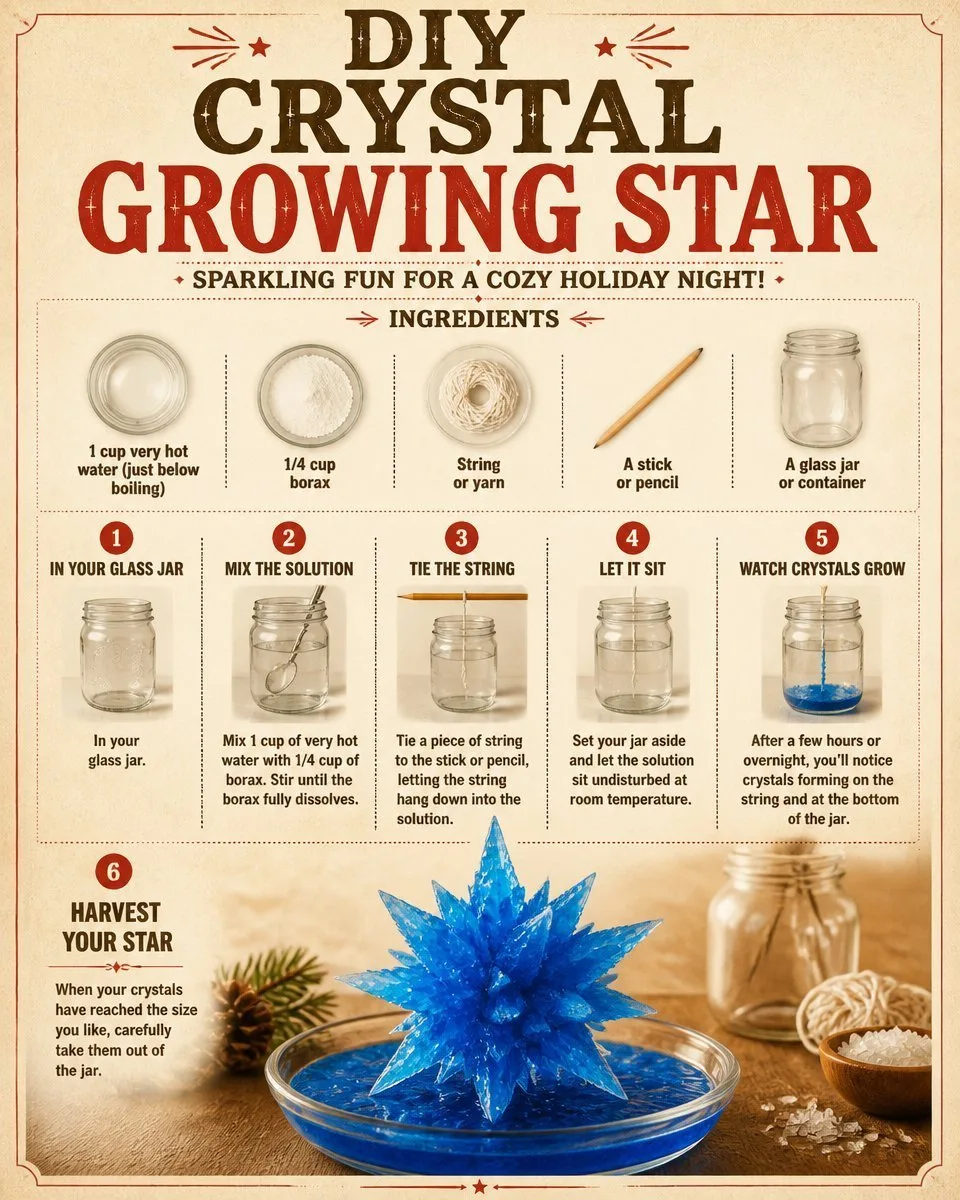
Start by boiling 2 cups of water in a pot. This step is crucial because hot water helps dissolve borax more effectively.
Gradually mix in 6 tablespoons of borax powder while stirring continuously until it is completely dissolved. You want a clear solution, so be patient during this step.
Attach a piece of string to your star-shaped cookie cutter. Make sure the cutter is fully submerged when you suspend it in the jar.
Pour the borax solution into your container. Leave enough space at the top to avoid spills as the crystals grow.
Carefully place the cookie cutter into the container, ensuring it hangs freely and doesn’t touch the bottom.
Allow the container to sit undisturbed in a cool area. Over the next few hours, watch as your crystals begin to form on the cutter.
After about six hours, check your stars to see how they’re developing. For fuller stars, you might want to leave them overnight.
When you’re satisfied with the crystal growth, gently remove the cookie cutter from the solution and let the stars dry on a paper towel.
You can admire and display your beautiful crystal stars, sharing the dazzling results of your hard work!
The Learning Behind This DIY
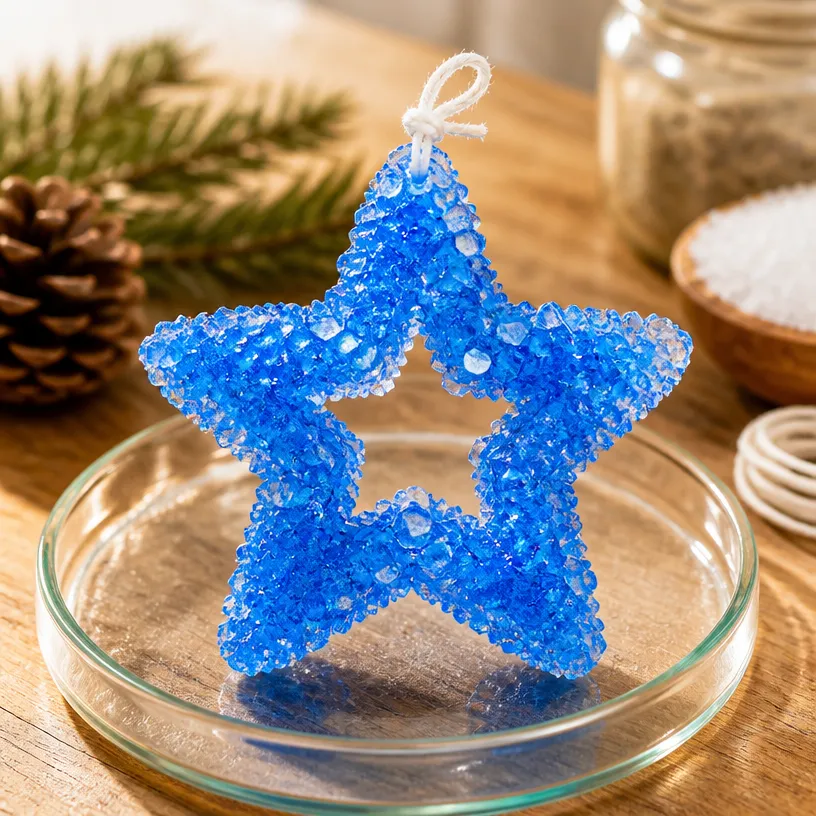
While creating these stunning stars, kids practice essential skills like fine motor coordination and patience. This project encourages them to observe cause and effect as they witness the borax crystallizing over time. They learn about the science of crystal growth in a hands-on way, enhancing their understanding of basic chemistry concepts. It’s an engaging way to blend learning with creativity while making memories together.
Troubleshooting Common Issues
If the crystals don’t form as expected, don’t worry here are some common issues and easy solutions. Sometimes, if you didn’t dissolve the borax completely, the growth might be less impressive. Just ensure the solution is clear before adding it to the container. If the crystals look dull or fragile, try allowing them to grow longer. Patience is key!
Easy Variations to Try
For families seeking to make this activity even more fun, there are several easy variations. Consider adding food coloring to the borax solution to create colorful crystals. You can also experiment with different shapes by using other cookie cutters. Another twist is to use a mix of different sizes of containers, which can lead to variation in crystal size.
Storing or Reusing This Project
After you create your crystal stars, consider how to reuse or store the materials. The leftover borax solution can be kept in a sealed container for any future crystal projects. If you want to keep your stars, store them in a dry place to prevent moisture from damaging them. This project encourages reducing waste through recycling materials and creatively cleaning up.
FAQs About Crystal Growing Star: DIY At-Home Crystal Craft Tutorial
What if the project gets too messy?
Mess can be easily managed with a quick cleanup right after the project. Spread newspaper or plastic sheets on the workspace beforehand to minimize the mess.
Are there age limits for this activity?
This project is great for kids aged 5 and up, with adult supervision. The boiling water requires extra caution when little hands are involved.
Can I substitute the borax?
While borax is recommended for optimal results, some alternative ingredients, like sugar or salt, can create simple crystals, but the results may vary.
How can I store my crystals?
Keep your finished stars in a dry, cool place. Avoid direct sunlight to prevent them from fading and ensure they last longer as decorative pieces.
Conclusion
Creating your crystal stars at home is not only an entertaining project but also an educational experience that fosters a sense of achievement. If you want to dive deeper into the world of crystals, you can check out this resource on How to Make Crystal Stars or learn about broader techniques with Growing Crystals: How to Make Beautiful Crystals at Home. Embrace the joy of creativity and watch as your kids develop new skills while crafting these stunning pieces. Remember, the most important part is to enjoy the journey together!
PrintCrystal Growing Star: DIY At-Home Crystal Craft Tutorial
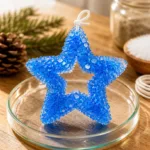
Create stunning crystal star shapes at home with this fun and educational DIY project. Perfect for kids aged 5 and up with adult supervision.
- Prep Time: 15 minutes
- Cook Time: 360 minutes
- Total Time: 375 minutes
- Yield: 1 craft
- Category: Craft
- Method: DIY Crafting
- Cuisine: N/A
- Diet: N/A
Ingredients
- Borax powder
- Water
- Star-shaped cookie cutter
- String
- A container (like a jar)
- Stirring stick
- Optional: Food coloring
Instructions
- Start by boiling 2 cups of water in a pot.
- Gradually mix in 6 tablespoons of borax powder while stirring continuously until it is completely dissolved.
- Attach a piece of string to your star-shaped cookie cutter.
- Pour the borax solution into your container.
- Carefully place the cookie cutter into the container.
- Allow the container to sit undisturbed in a cool area.
- After about six hours, check your stars.
- When satisfied, gently remove the cookie cutter from the solution and let the stars dry on a paper towel.
Notes
Consider adding food coloring for colorful crystals and using different shapes for variety. Store crystals in a dry place to maintain their appearance.
Nutrition
- Serving Size: 1 craft
- Calories: N/A
- Sugar: N/A
- Sodium: N/A
- Fat: N/A
- Saturated Fat: N/A
- Unsaturated Fat: N/A
- Trans Fat: N/A
- Carbohydrates: N/A
- Fiber: N/A
- Protein: N/A
- Cholesterol: N/A