

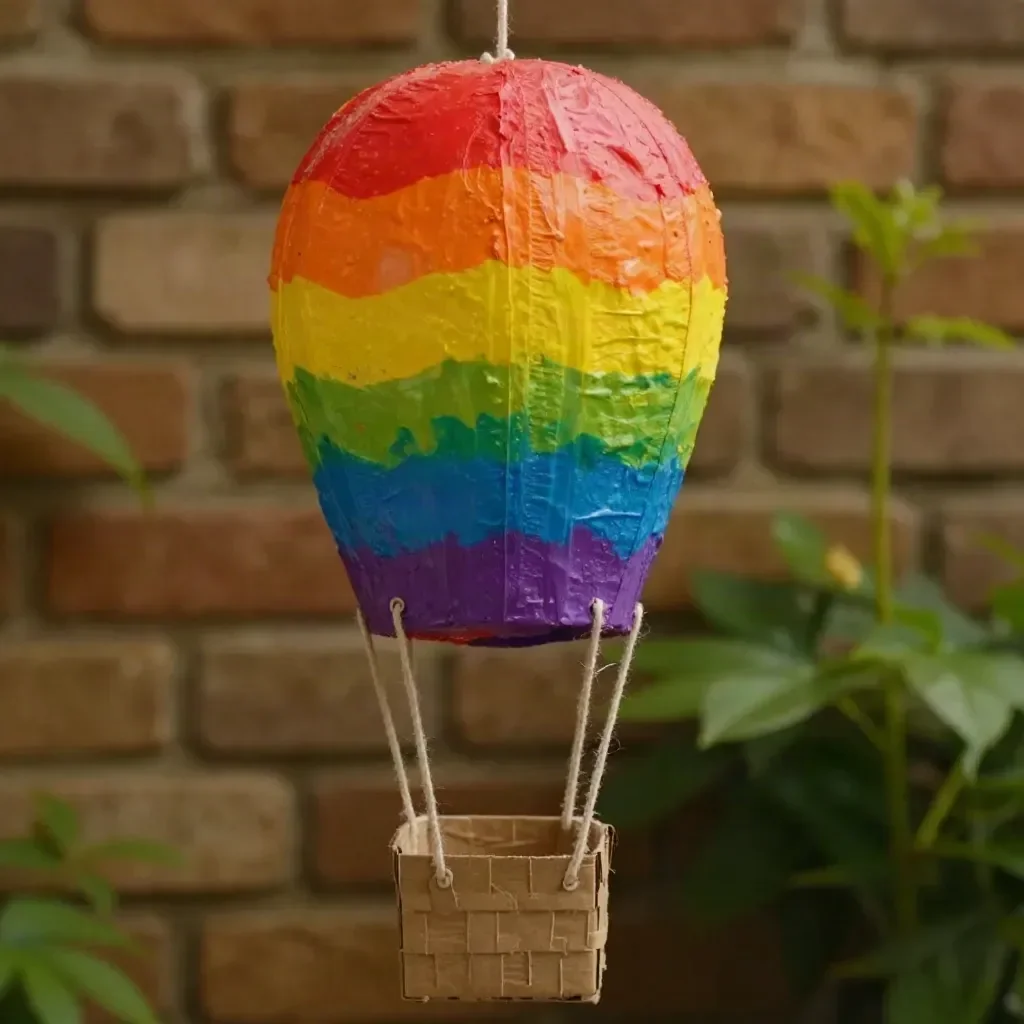
Creating a craft can often turn a busy afternoon into a memorable family experience. When your kids are eager to create something fun, a Rainbow Tissue Paper Hot Air Balloon Craft may just be the answer. This craft not only provides a creative outlet, but it also adds a dash of color and joy to your home. Using simple materials found around the house, you can create a delightful decoration that uplifts spirits and enhances your space. Plus, it’s an opportunity to connect with your children and let their creativity shine. You may also find Diy Butterfly Craft Rainbow Magic useful.
Why This Rainbow Tissue Paper Hot Air Balloon Craft Works So Well
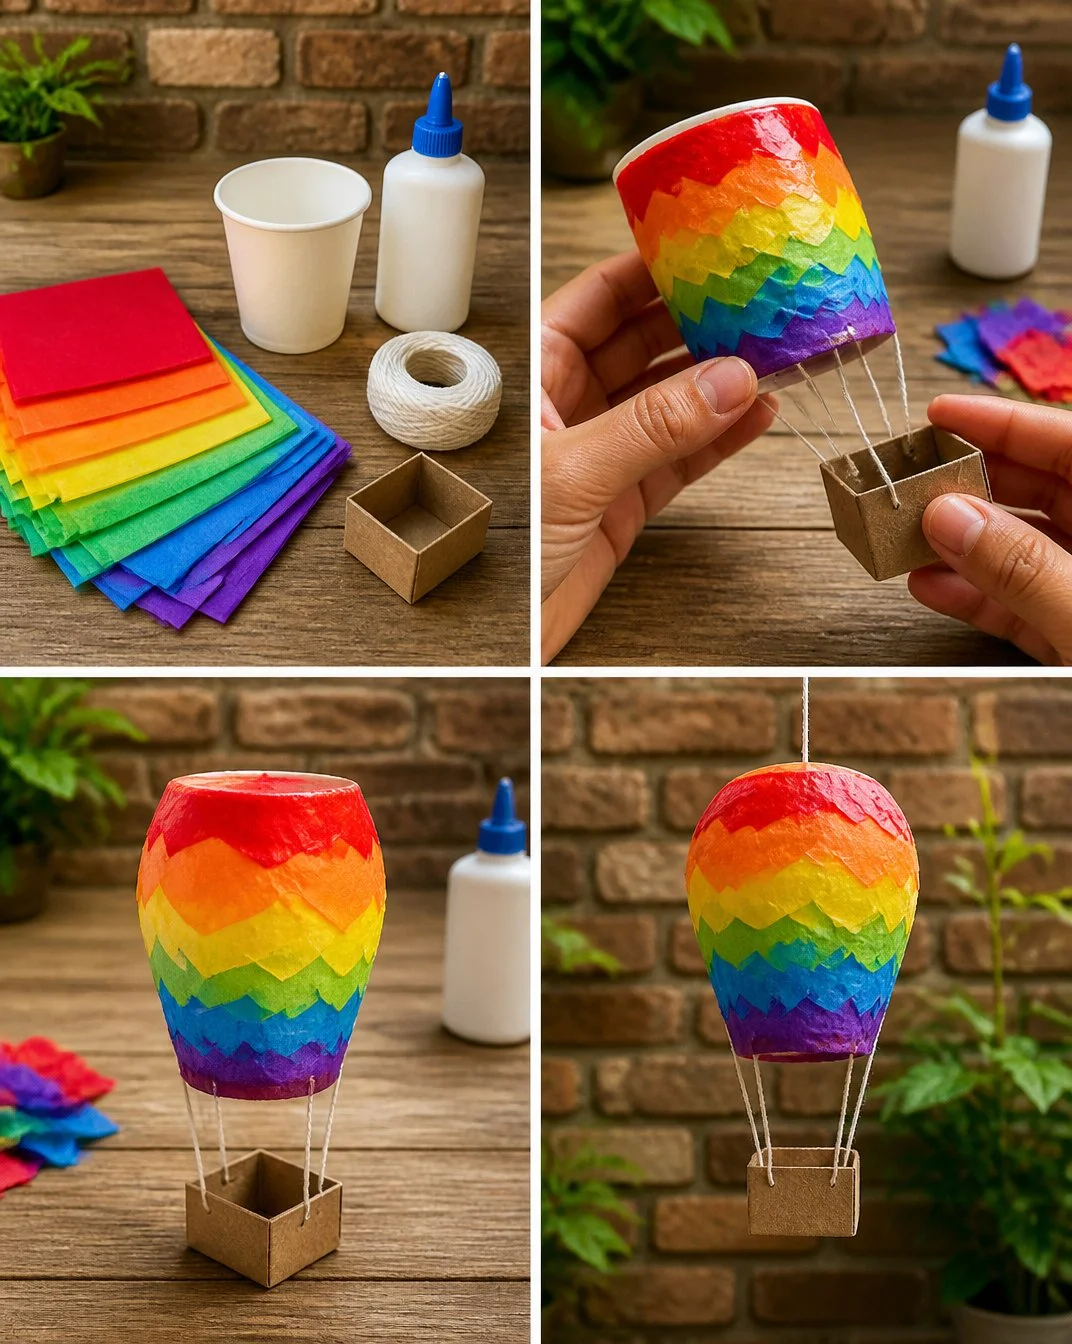
The charm of this craft lies in its simplicity. The Rainbow Tissue Paper Hot Air Balloon Craft is designed to be low-prep, which means you can dive into the project without a lot of fuss. Moreover, the process is highly approachable for kids and parents alike. With basic materials such as a small paper cup and some colorful tissue paper, it’s easy to get started without a lengthy supply run. The reliable steps ensure that even if you have a hectic schedule, you can still squeeze in some creativity. You may also find Diy Handprint Paper Lilies Craft Tutorial useful.
This craft also offers great results without the need for intricate skills. As your children layer the tissue, they develop fine motor skills and practice artistic expression. It’s fulfilling to watch as their unique hot air balloons come to life, each one a different vision of color and joy. You may also find How To Make A Butterfly Craft From Paper Plates useful.
A Quick Look Before You Begin
Creating this vibrant craft doesn’t require much time or setup. You can expect to spend around 30 to 60 minutes on the entire process, depending on your child’s focus and enthusiasm. The mess level is manageable, which means that while there may be some glue and bits of tissue paper scattered about, it’s nothing that can’t be handled easily with a quick cleanup. You might want to set up a workspace that’s easy to clean, perhaps on a table covered with newspaper or an old tablecloth.
It might be helpful for adults to be involved, especially when it comes to using scissors or handling glue. However, kids can definitely take the reins and run with their ideas! This blend of collaboration and independence makes the craft enjoyable for both kids and parents.
Materials You’ll Need
To create your Rainbow Tissue Paper Hot Air Balloon Craft, gather these materials:
- Small paper cup — a common household item.
- Tissue paper — vibrant colors work best.
- White glue — easy to find.
- String — for attaching the balloon to the basket.
- Cardboard basket — a tiny, lightweight structure.
You can also let your creativity shine by using different materials you have at home. For example, any small container could potentially serve as a basket, making this a versatile project.
Step-by-Step Directions
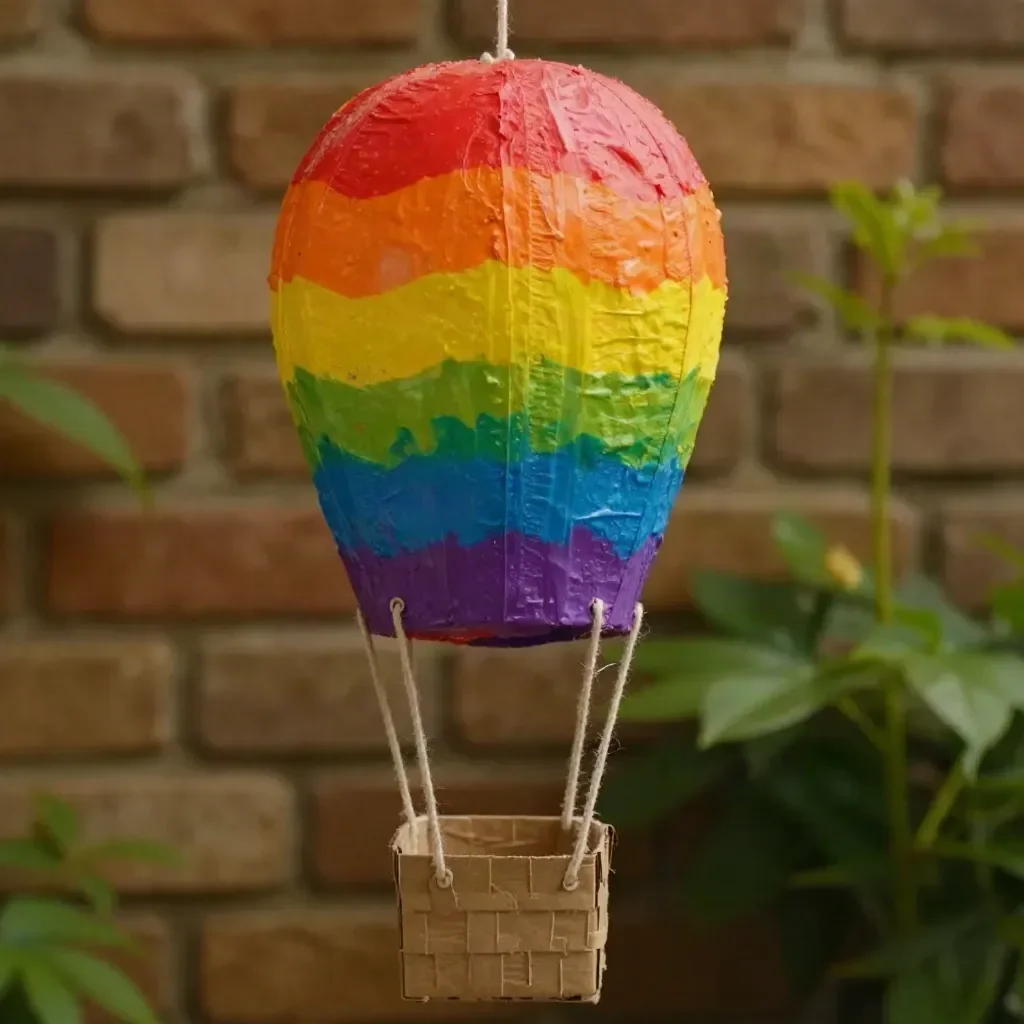
Cover the Cup: Start by taking your small paper cup and covering it with overlapping pieces of rainbow tissue paper. Use white glue to secure the tissue paper, allowing the colors to blend and layer delightfully. This part is where your child’s creativity will really shine, as they can choose how to arrange the colors. Encourage them to think about their favorite parts of the rainbow!
Attach the Strings: Next, take a piece of string and attach it to a tiny cardboard basket. Ensure the string is securely tied, as this will allow the hot air balloon to look like it’s floating in the air.
Let Everything Dry: Once you’ve covered the cup and attached the strings to the basket, it’s time for everything to dry. You can place your crafts on a clean surface and let the glue set. This waiting time is a great moment to talk about colors, shapes, and even a little bit of light science, explaining how we see colors through light! If you’re looking for fun craft ideas in the meantime, consider checking out related projects, like creative science crafts.
Hang for a Cheerful Floating Reveal: Once everything has dried fully, you can display your hot air balloons. Hang them near a window where they can catch the light and become part of the room’s atmosphere. You might find that these colorful creations bring smiles whenever they’re seen.
The Learning Behind This DIY

While creating the Rainbow Tissue Paper Hot Air Balloon Craft, kids practice a variety of important skills. Working with the tissue paper helps improve their fine motor skills as they tear and glue, an excellent way to promote hand-eye coordination. When layering the tissue, they experiment with colors and understand how different hues can combine or contrast, providing a valuable lesson in color theory.
Additionally, this craft introduces kids to cause and effect. They notice how glue holds things together, how colors behave in light, and even how to balance their balloon by adjusting the string length. Each moment spent crafting is a chance for scientific inquiry, and the joy of making will surely enhance their learning experience.
Troubleshooting Common Issues
If you find that something doesn’t go as planned while crafting, don’t worry. Common problems might include the tissue paper tearing too much or failing to hold onto the cup. If the tissue tears, encourage your child to use smaller pieces to cover the gaps, allowing for a creative fix that adds character to their balloon.
If the structure begins to sag, you might need to adjust the string or find a different way to support it until the glue dries. A solid base or a bit of tape can quickly resolve this issue. Remember, it’s all part of the learning experience!
Easy Variations to Try
To keep the creative juices flowing, consider these fun variations:
Themed Balloons: Encourage kids to create balloons based on seasons or holidays. For instance, they could make autumn-themed balloons using orange and yellow tissue paper.
Glow in the Dark: Use glow-in-the-dark paint or stickers on the balloon, making it a fun night-time decor piece.
Added Decorations: Let kids embellish their balloons with sequins or stickers, turning a simple design into a sparkling masterpiece.
Different Shapes: Instead of a round balloon, why not try a square or heart shape? This could add an interesting twist to the project!
Community Display: Create a bunch of hot air balloons to display together, representing friends or family members.
Storing or Reusing This Project
After you’ve created the hot air balloon, consider how to best store or display it. If you want to keep your masterpieces intact, choose a spot away from direct sunlight to avoid fading colors, and store them gently in a box. Alternatively, if you opt for displaying, you could hang them in a child’s room, letting them be a vibrant part of decor.
Cleaning up after crafting is also a breeze. You can gather any stray bits of tissue paper easily and save them for future crafts. Emphasizing the reuse of materials is a wonderful way to teach kids about sustainability as well.
FAQs About Rainbow Tissue Paper Hot Air Balloon Craft
Q: Will this project be messy?
A: While there may be some glue and bits of tissue left behind, it’s a manageable mess. Just have some wipes or a damp cloth nearby for quick cleanups.
Q: What age is this craft suitable for?
A: This craft is perfect for ages 4 and up, but even younger kids can help with supervision. Just be cautious with scissors and glue.
Q: Can we substitute materials if we don’t have everything?
A: Absolutely! If you don’t have tissue paper, you can use wrapping paper or even magazines to achieve similar results.
Q: How long does the project take?
A: Expect to spend about 30 to 60 minutes on the entire process, giving plenty of time for creativity without rushing.
Q: What should I do if my balloon looks droopy?
A: Ensure the glue is fully dry and check if the string needs adjusting or support. Kids can learn to problem-solve by figuring out why it’s not holding up as expected.
Conclusion
Conclusion
Making a Rainbow Tissue Paper Hot Air Balloon Craft is a delightful and fulfilling way to spend an afternoon with your kids. The simple materials and approachable steps make this project accessible to families, encouraging creativity and exploration. If you’re looking for more craft inspiration, check out the Hot Air Balloon Suncatcher Craft for ideas that tie beautifully into your hot air balloon theme. Additionally, the Rainbow Canvas Tissue Paper Craft for Kids offers another approach to inviting vibrant colors and learning into your home. Happy crafting!
PrintRainbow Tissue Paper Hot Air Balloon Craft
Create a vibrant and colorful hot air balloon using simple materials at home. Perfect for kids to enhance their creativity and fine motor skills.
- Prep Time: 15 minutes
- Cook Time: 45 minutes
- Total Time: 60 minutes
- Yield: 1 craft
- Category: Craft
- Method: Crafting
- Cuisine: N/A
- Diet: N/A
Ingredients
- Small paper cup
- Tissue paper (vibrant colors)
- White glue
- String
- Cardboard basket
Instructions
- Cover the cup with overlapping pieces of rainbow tissue paper using white glue.
- Attach a piece of string to a tiny cardboard basket.
- Let everything dry on a clean surface.
- Hang them near a window for a cheerful display.
Notes
Encourage creativity in arranging colors and let children take the lead. Supervision is recommended for younger kids, especially with glue and scissors.
Nutrition
- Serving Size: 1 craft
- Calories: 0
- Sugar: 0g
- Sodium: 0mg
- Fat: 0g
- Saturated Fat: 0g
- Unsaturated Fat: 0g
- Trans Fat: 0g
- Carbohydrates: 0g
- Fiber: 0g
- Protein: 0g
- Cholesterol: 0mg