

A cramped kitchen table, a pile of eager kids asking for something to do, and twenty minutes before the next snack request. That is the kind of moment when Homemade Sugar Bubble Gum feels like magic. It uses a few pantry staples and a small bit of heat, and it turns into a hands-on snack-sized craft that kids can watch form and shape. I have mixed this recipe while juggling a homework question and a pantry rescue lunch, and the process fits cleanly into a busy afternoon without drama.
If you like projects that feel like play and food at once, this is a great pick. For a different kind of bubbly kitchen experiment you can try later, I often pair it with our playful cornstarch bubble dough project to extend the fun: cornstarch bubble dough.
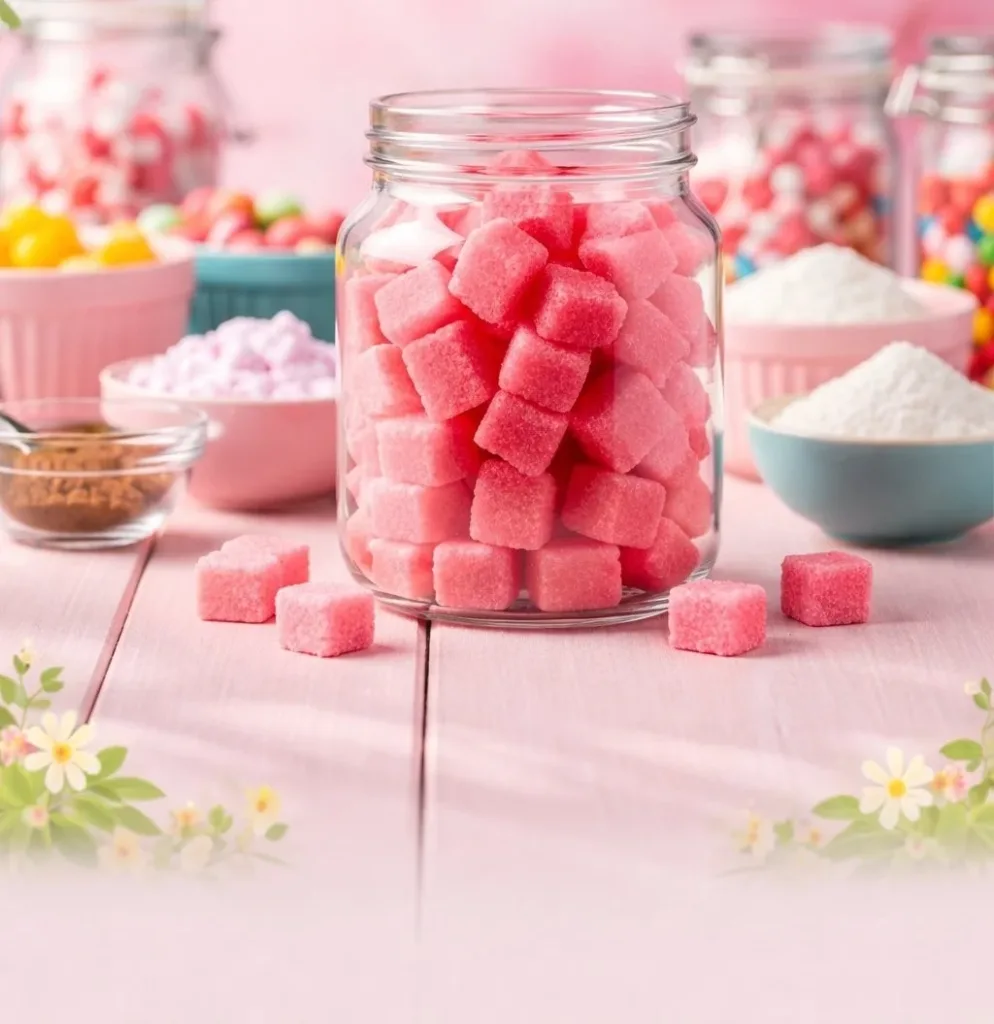
Why You’ll Love Making Homemade Sugar Bubble Gum

This recipe works so well because it keeps things small, simple, and predictable. You use two cups of sugar, a little corn syrup, and a few familiar ingredients. The whole batch fits into a small saucepan and a couple of plates, so you will not turn the kitchen into a full-blown baking zone.
It stays approachable because the steps follow the same gentle pattern as candy making. You dissolve, heat to a soft stage, and then fold in the gum base. There is no complicated equipment and no long rise times. That makes it reliable for weekdays or weekend afternoons.
The project fits real-life schedules. The active part takes about 20 to 30 minutes, and then the gum rests. You can involve kids in measuring, mixing, and kneading while you keep a steady hand on the pan. It makes something edible and tactile without a large time commitment.
What You’ll Notice Most is the texture transition. The syrup moves from clear and thin to a softly tacky mass. That is satisfying and easy to feel, and it gives quick feedback so you know if you are on track.
A Quick Look Before You Begin
This recipe takes roughly 30 to 90 minutes total. Expect 20 to 30 minutes of active work for the heating, mixing, and kneading. Then plan a couple of hours of rest time at room temperature so the pieces firm up.
Setup stays minimal. Line one small plate with powdered sugar and set a clean silicone mat or a sheet of parchment nearby. Keep a wooden spoon, a small saucepan, and a pair of lightly oiled hands ready. A candy thermometer helps, but you can use texture cues if you do not have one.
The mess level is manageable. The sticky syrup can drip, and your hands will get tacky while kneading. A jar of oil and a damp cloth make cleanup quick. Expect some powdered sugar dust on counters and a few sticky spots in the pan. It cleans easier if you soak the pan in warm water right after use.
Adult supervision matters during the heating stage. Kids can help measure, stir before the syrup gets hot, and knead once the mixture cools enough. I also recommend keeping a small bowl of cold water nearby for quick cooling if a spill happens. For an extra activity later, you can pair this with other simple experiments like our sugar explosion treat: fireworks rainbow sugar explosion.
Materials You’ll Need
2 cups granulated sugar
- Common pantry sugar, easy to measure.
1 cup light corn syrup
- Found in most supermarkets, keeps the gum soft.
1/2 cup water
- Plain tap water works for dissolving sugar.
1/2 cup gum base or natural chicle
- You can buy gum base online; chicle is the natural option.
1/4 cup powdered sugar (for dusting)
- For dusting and to prevent sticking; a small plate works well.
Food-grade flavoring oil (mint, strawberry, or bubble gum flavor – optional)
- Use a few drops; very concentrated so add slowly.
Food coloring (optional)
- A tiny drop makes bright candy-like pieces.
Step-by-Step Directions

- Prepare your workspace and tools by lining a small plate with powdered sugar. Keep a clean silicone mat or parchment ready.
Have everything within reach. Put the powdered sugar plate where you will finish the gum. - Combine sugar, corn syrup, and water in a small saucepan. Stir gently until the sugar crystals dissolve.
Stir only enough to combine. Stop when the mixture looks smooth and clear. - Heat the mixture slowly on medium-low heat until it reaches a low boil, ensuring even heating. If using a thermometer, aim for the soft-ball stage.
Watch for a steady small boil and some steam. If you have a thermometer, shoot for about 235 to 240 degrees F. - Remove the pan from heat and let it cool slightly.
Let the bubbling settle and the syrup stop rising. Give it a minute so it will not scorch the gum base. - Add the gum base to the warm syrup in small pieces, stirring and pressing until blended. If the mixture resists melting, return to low heat briefly.
Work quickly but carefully. Press the gum base into the warm syrup with your spoon until it softens and blends. - Begin kneading the mixture gently with a spoon, then switch to using lightly oiled hands once mixed.
Use a small amount of neutral oil on your palms to keep the gum from sticking. Knead until the mass feels smooth and cohesive. - Add flavor and color gradually as you knead, tasting occasionally.
A drop of flavor oil goes a long way. Mix in a tiny amount of food coloring until you reach the shade you like. - Roll the gum into ribbons or a log, dusting with powdered sugar to prevent sticking.
Use light, frequent dusting so the sugar does not make the gum gritty. Keep the surface even as you roll. - Cut into small pieces with a cookie cutter or knife, then let them rest at room temperature for several hours to firm up.
Place the pieces on the powdered sugar plate or parchment so they do not stick. They need time to grab texture and become chewable. - Store the finished pieces in an airtight container with a light dusting of powdered sugar to avoid sticking. Enjoy mindfully!
Keep the gum in a cool, dry place. If pieces still feel tacky, add a little more powdered sugar and wait another hour.
The Simple Science or Skills at Work

Making gum teaches small science ideas without needing big words. You watch sugar change state when heated and then cool into a different texture. Sugar syrup behaves like a liquid until you remove heat, and then it sets more firmly as it cools.
Kids practice fine motor skills when they knead, roll, and cut the gum. Pinching little pieces and pressing patterns helps finger strength and hand-eye coordination.
The recipe also shows cause and effect. If the syrup heats too long, the final gum will feel brittle. If you do not knead enough, the texture stays grainy. Those are useful lessons you can notice by touch and sight.
Troubleshooting Common Issues
If the syrup crystallizes while heating, it can form gritty bits. This happens when sugar recrystallizes on the sides of the pan or when stirred too vigorously late in heating. To fix it, gently warm the pan and brush down the sides with a wet pastry brush. A tiny bit of corn syrup helps stop crystals from forming.
If the gum base refuses to blend, the syrup may be too cool. Return the pan to very low heat for a short time and stir until the base softens. Be careful not to overheat the syrup or it will go past the soft-ball stage.
If the final pieces feel too sticky, they need more rest or a touch more powdered sugar. Dust the pieces lightly and let them sit longer. If they taste overly sweet or the flavor seems weak, adjust the next batch by adding less sugar melt time or slightly more flavor oil, a few drops at a time.
If the texture turns hard and brittle, you heated the syrup too long. That usually means the mixture passed the soft-ball stage. For future batches, pull the pan off heat earlier or use a candy thermometer for a more precise cue.
Easy Variations to Try
Try mint flavor with a pale green tint for a classic favorite. Add only a drop or two of mint oil so the flavor does not overwhelm the sweetness.
Make tiny gum balls instead of ribbons. After kneading, roll small pea-sized pieces and dust them well with powdered sugar. They become bite-sized treats ideal for party favors.
Color it for the season. Use pastel dyes for spring or deep red for a holiday twist. Add color a drop at a time and keep kneading so the shade blends evenly.
Swap textures by making thin strips and twisting two colors together. The twist looks fun and gives a striped gum piece without extra tools.
Seasonal mix-ins like a light dusting of citric acid powder can make a sour top note, but use sparingly. A tiny dusting on the outside gives a tangy contrast to the sweet gum.
Storing or Reusing This Project
Store your gum in an airtight container to keep it fresh and to avoid drying out. Line the container with a small dusting of powdered sugar and separate layers with waxed paper if you stack pieces.
If a batch gets too sticky, let it rest longer at room temperature. If you still have tacky areas, dust them lightly with powdered sugar and give the pieces another hour.
Reuse leftover powdered sugar by sifting it back into a jar if it stays clean. If it picks up moisture or tiny pieces, discard and use fresh sugar for best results.
Clean your pan with warm water and a little dish soap after it cools. Soak briefly to loosen sticky residue. Avoid scraping aggressively when the pan is hot; wait until it cools so you do not warp or damage the cookware.
For leftover gum base scraps, store them separately in an airtight bag so you can soften and reuse them in the next small batch.
FAQs About Homemade Sugar Bubble Gum
Will this be safe for little kids? I usually recommend adult supervision for the heating part and letting children start kneading only when the mixture is comfortably cool. Kids can measure and stir early on, and then switch to hands-on kneading when the mix cools. That way they stay safe and still get the fun parts.
What about messy counters and clothes? Expect some powdered sugar dust and a bit of sticky residue. Keep a damp cloth and a little oil nearby for quick cleanup. I often have kids wear aprons or an oversized T-shirt while kneading, and clean hands with warm soapy water afterward. It keeps cleanup fast and stress-free.
Can I skip the gum base or use something else? The gum base gives chew and bounce. I do not recommend skipping it because the result will not have the same texture. If a natural option is important, look for natural chicle where possible and follow the recipe the same way. If you must modify, be honest: the result may be more like a sugar chew than traditional gum.
How long will the homemade gum last? Stored in an airtight container at room temperature, expect a few days to a couple of weeks depending on humidity. If you live somewhere humid, use a tightly sealed container and a little powdered sugar between layers to keep pieces from sticking.
What if my pieces taste too sweet or not like store-bought gum? Homemade gum will taste sweeter and different than mass-produced gum. Try adding flavor oil a drop at a time and give it a few chews before deciding. If the flavor seems weak, add one more very small drop on a fresh batch rather than a lot at once.
A Final Helpful Note
You do not need perfect tools to make this. A small saucepan, a plate with powdered sugar, and a willing pair of hands will do most of the work. Expect a little mess and some trial and error the first time, and know that each batch teaches a useful cue about texture and timing.
If something feels off, pause and check temperature cues and texture. Small fixes usually bring the process back on track. Making gum at home rewards patience and a light touch, and it gives kids a chance to see how simple ingredients become something new.
Conclusion
If you want a classic reference for a similar homemade gum approach, Imperial Sugar keeps a straightforward recipe that complements the ideas here at Homemade Bubble Gum – Recipes – Imperial Sugar. For a science-forward explanation and other classroom-friendly gum activities, Science World provides a useful guide at Make Your Own Chewing Gum – Science World.
Thanks for trying this easy kitchen craft. With simple steps, a little care, and a comfy afternoon, you can make a chewy batch that feels like a small celebration.
PrintHomemade Sugar Bubble Gum

A fun and simple project for kids to make homemade bubble gum using pantry staples and minimal equipment.
- Prep Time: 20 minutes
- Cook Time: 30 minutes
- Total Time: 90 minutes
- Yield: 20 pieces 1x
- Category: Snack
- Method: Cooking
- Cuisine: American
- Diet: Vegetarian
Ingredients
- 2 cups granulated sugar
- 1 cup light corn syrup
- 1/2 cup water
- 1/2 cup gum base or natural chicle
- 1/4 cup powdered sugar (for dusting)
- Food-grade flavoring oil (mint, strawberry, or bubble gum flavor – optional)
- Food coloring (optional)
Instructions
- Prepare your workspace and tools by lining a small plate with powdered sugar.
- Combine sugar, corn syrup, and water in a small saucepan. Stir gently until the sugar crystals dissolve.
- Heat the mixture slowly on medium-low heat until it reaches a low boil.
- Remove the pan from heat and let it cool slightly.
- Add the gum base to the warm syrup in small pieces, stirring and pressing until blended.
- Begin kneading the mixture gently with a spoon, then switch to using lightly oiled hands.
- Add flavor and color gradually as you knead, tasting occasionally.
- Roll the gum into ribbons or a log, dusting with powdered sugar to prevent sticking.
- Cut into small pieces with a cookie cutter or knife and let them rest at room temperature for several hours to firm up.
- Store the finished pieces in an airtight container with a light dusting of powdered sugar.
Notes
Adult supervision is recommended during the heating stage. Keep clean-up supplies handy for easy maintenance.
Nutrition
- Serving Size: 1 piece
- Calories: 80
- Sugar: 15g
- Sodium: 5mg
- Fat: 0g
- Saturated Fat: 0g
- Unsaturated Fat: 0g
- Trans Fat: 0g
- Carbohydrates: 22g
- Fiber: 0g
- Protein: 0g
- Cholesterol: 0mg