

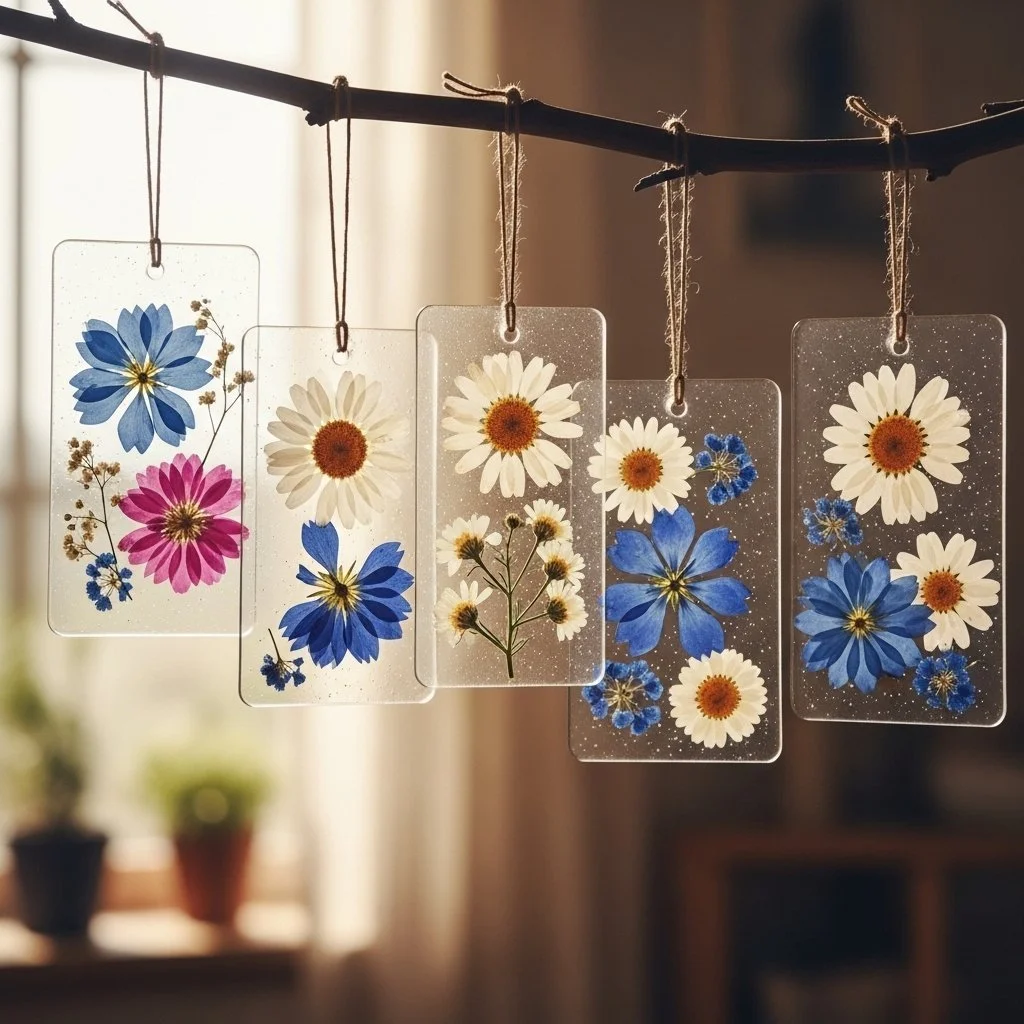
A loud, busy afternoon in our kitchen turned calm with a tiny, messy project. Kids asked for something to make right now, and I pulled together a few pantry staples to try The Quiet Joy of Making Cornstarch Flower Charms. We cleared a small corner of the counter, set out a shallow tray and a little bowl of warm water, and watched the simple dough come together. The room softened as we rolled thin petals and pressed veins with toothpicks, and the whole mess felt perfectly manageable. If you enjoyed the quiet, sticky fun of a clear glue suncatcher, this is the same gentle, hands-on kind of craft that fits into a busy day.
Why You’ll Love Making The Quiet Joy of Making Cornstarch Flower Charms

This project works because it uses things you already have and asks for a little time, not a lot of fuss. You mix cornstarch and glue, add warm water, and soon you have a dough that behaves like clay but dries light and smooth. It feels familiar to kids who have played with playdough, and it gives adults a quick, tidy craft that actually finishes with a sweet little charm.
You do not need a long setup. The dough is predictable if you follow the mix, and it tolerates small mistakes. If you press a petal too hard, you can lift and reshape it before it dries. If you want a project that spreads calm and gives a small, beautiful result you can keep or gift, this one fits the bill.
This craft also pairs well with other gentle projects. Right after we finished our charms, my neighbor dropped by showing off her latest shells from the galaxy crystal seashells project, and we compared drying tips. It made the whole afternoon feel like a little craft club, easy to step into and easy to leave.
A Quick Look Before You Begin
This takes about 30 to 60 minutes of hands-on time, depending on how many charms you make. Drying time takes longer; expect air-dry overnight or a few hours in a low oven. You can keep kids busy with shaping and decorating while an adult watches the oven time.
Setup is small: a bowl, a rolling surface, cutters, and a baking sheet. Mess level stays low if you keep a shallow tray for scraps and a soft cloth for hands. Most steps are child-friendly, but plan adult help for oven drying and any small hardware like jump rings.
You do not rush the dough. A little waiting while it rests or dries makes a big difference. That pause helps you avoid sticky frustration and keeps the shapes crisp and charming.
Materials You’ll Need
- 1 cup cornstarch common pantry item, makes the dough smooth and matte.
- 1/2 cup white glue (PVA craft glue; or clear glue) craft glue gives structure; you can use clear glue for glossy edges.
- a few tablespoons warm water warm helps the glue and cornstarch blend more easily.
- optional: food coloring or powdered pigment easy way to tint the dough; start small.
- fine sandpaper or a nail file smooths edges after drying for a professional look.
- small rolling pin or smooth bottle household substitute works fine for rolling.
- small leaf or flower cutter spoon or craft knife also works for shapes.
- toothpicks or small sculpting tools for veins, holes, and detailing.
- baking sheet and parchment paper for drying and clean cleanup.
- thin twine, jump rings, or ribbon to hang or turn into jewelry.
- clear sealant or matte varnish (optional) protects finished charms and deepens color slightly.
- soft cloth and small container for water for wiping sticky fingers and tools.
- a shallow tray or shallow bowl to hold scraps or rest tools without making a mess.
- I like to keep the soft cloth and small tray within reach. For color, a tiny pinch of powdered pigment goes farther than liquid food coloring and keeps drying times steady. If you want ideas for other simple color experiments later, check out the turquoise crystal heart project for inspiration at turquoise crystal heart.
Step-by-Step Directions

- Mix cornstarch and glue in a bowl until it forms a smooth paste.
Stir with a spoon in steady circles until you see no streaks of glue; it should look glossy and even. - Gradually add warm water, stirring until it thickens into a malleable dough.
Add just a tablespoon at a time and stop when the mix pulls together into a soft ball. - Knead gently on a cornstarch-dusted surface.
Press and fold the dough for a minute or two until it feels smooth and springy but not sticky. - If sticky, let the dough rest covered for 10-15 minutes.
Cover with a damp cloth or plastic wrap; resting lets moisture redistribute and reduces tackiness. - Roll the dough thin and cut shapes with a spoon or cutter.
Aim for a thickness like a coin; thin edges dry faster and look delicate once finished. - Shape petals and add texture using a toothpick.
Pinch petal edges slightly, draw gentle veins, and poke a small hole near the base for twine. - Dry on a baking sheet, either air-drying overnight or in a low oven at 175°F for several hours.
Turn once if needed and watch the first pieces; smaller pieces will dry sooner than thicker ones. - Sand and smooth edges after drying.
Use fine sandpaper or a nail file to gently remove bumps and crisp the silhouette. - Optional: seal with clear sealant and string or attach twine to hang the charms.
A light spray or brush-on varnish adds protection and gives the charm a finished look.
What Kids Practice While Making This

Kids practice a lot without even realizing it. They learn to measure simply by eye and by cup, and they follow a short sequence of steps that gives them a sense of accomplishment. Working with the dough strengthens small muscles in fingers, which helps with writing and buttoning later on.
They also practice patience. The waiting parts, like resting the dough or letting a charm dry, teach cause and effect. They see how thin shapes dry faster, and they learn to adjust pressure when rolling or cutting. Simple sensory moments cool cornstarch dust, sticky glue, warm water help children name textures and build vocabulary.
This craft offers gentle problem solving. Kids decide when a petal needs a little more edge, or when a hole is big enough for twine. Each small decision builds confidence in making and fixing things.
Troubleshooting Common Issues
If the dough feels crumbly and dry, it needs a very small splash more water. Add water a half teaspoon at a time and knead until it holds together. You do not need much; the dough looks a bit like soft clay when it’s right.
If it stays sticky after kneading, cover and rest for 10 to 15 minutes. Sticky dough often calms down as the cornstarch absorbs moisture. If it still clings, dust your surface lightly with cornstarch and knead again.
If shapes warp while drying, they probably dried unevenly or were too thick. Flip them partway through drying or press them flat between parchment and a light weight until they firm. For very delicate petals, let them dry on a flat surface and avoid moving them until they feel hard under a fingertip.
If colors look faint after drying, sealing can deepen them slightly. Use a clear sealant sparingly; glossy finishes show colors more vividly, while matte keeps a soft, natural look. For more ideas on playful color experiments that stay gentle and household-friendly, take a look at our chromatography butterflies activity at colorful chromatography coffee butterflies.
Easy Variations to Try
Try tinting the dough lightly with powdered pigment for soft, even color. A tiny pinch mixes further than a few drops of liquid and keeps drying times steady.
Make layered flowers by pressing a small disc at the center of a larger petal shape before drying. You can stack two or three thin layers for a small 3D bloom. Attach with a dab of glue after drying if you prefer to build later.
Turn pieces into tiny magnets by gluing a flat magnet on the back after sealing. These make sweet gifts or fridge art that hold up with daily use.
Seasonal idea: press small dried herbs or thin leaves into the clay before it dries to add texture and scent. Run a test piece first, as some botanicals release oils that affect drying.
For younger children, skip small jump rings and use a thicker ribbon looped through a larger punched hole. That keeps things safe and still looks pretty.
Storing or Reusing This Project
Keep leftover dough wrapped in plastic and stored in an airtight container in the fridge for a few days. Bring it to room temperature before using and knead gently to restore pliability. If it dries out in storage, a tiny pinch of warm water can revive it.
Store finished charms in a shallow box lined with tissue paper. Keep them flat and separated so edges do not rub. If you used a sealant, charms stand up well to light handling; unsealed pieces need gentler care.
Clean tools and your rolling surface right after use. Warm soapy water removes glue and cornstarch easily. A quick wipe of the rolling pin while the dough is soft prevents buildup and keeps the next project smooth.
Think about reuse: any leftover small scraps can be pressed together and re-rolled, but color mixes will create mottled hues. Save very small leftover bits in a tray for tiny accents on future charms.
FAQs About The Quiet Joy of Making Cornstarch Flower Charms
Can a toddler help with this, or is it messy and unsafe?
Toddlers can join parts of this project. Let them press, pat, and decorate larger shapes while an adult handles the mixing and oven time. Keep small items like jump rings and scissors out of reach. I often give my child a bowl of dough to squish and a safe tool for poking; it keeps them engaged and the mess contained.
How long will these charms last?
With light use they hold up well. Sealed charms resist moisture and stay smooth for years if you avoid dropping them repeatedly. Unsealed pieces are more fragile and can chip if banged. I tell parents to treat them as keepsakes, not toys for rough play.
What if I do not have powdered pigment can I use food coloring?
Yes, you can use food coloring, but add it sparingly. Liquid color can change the dough’s moisture a bit, so start with one drop and mix well. I prefer powdered pigment for subtle, even color and less change to drying time.
What if my pieces crack while drying?
Cracks usually mean the piece dried too quickly or was too thick. Try drying at the lower end of the oven temperature range and turn pieces occasionally. For air-drying, keep them in a room with steady temperature and out of direct sun. If a crack appears, you can glue the piece and sand gently after repair.
Are these charms washable?
They tolerate light wiping if sealed. Unsealed charms will absorb water and become soft, so avoid soaking them. A light brush with a damp cloth after sealing usually cleans them well.
A Final Helpful Note
Take your time and enjoy the small rhythms of this craft. The best results come from steady hands and small pauses letting dough rest, watching pieces dry, sanding just a little at a time. If things go sideways, that is part of making. I often get the prettiest, most characterful charms from pieces that started imperfect and got fixed with a gentle touch.
You do not need perfect tools or perfect timing. A smooth bottle works as well as a rolling pin, and a teaspoon makes a reliable cutter in a pinch. Most of all, keep the setup simple so the project fits into real-life afternoons and turns crafting into a quiet, satisfying habit.
Conclusion
If you want a companion activity that uses pantry staples and gives small keepsakes, this corn starch charm project pairs nicely with classic, no-heat crafts like Easy No-bake Flour Beads, which use similar hands-on, low-mess steps.
After a calm crafting session, treat yourself with a cozy kitchen reward like this Apple Cinnamon Texas Sheet Cake; it makes a lovely finish to an afternoon of making.
The Quiet Joy of Making Cornstarch Flower Charms

A simple and calming craft project for making charming cornstarch flower decorations using pantry staples.
- Prep Time: 10 minutes
- Cook Time: 120 minutes
- Total Time: 130 minutes
- Yield: 4–6 charms 1x
- Category: Craft
- Method: Crafting
- Cuisine: American
- Diet: Non-Vegetarian
Ingredients
- 1 cup cornstarch
- 1/2 cup white glue (PVA or clear glue)
- a few tablespoons warm water
- optional: food coloring or powdered pigment
- fine sandpaper or nail file
- small rolling pin or smooth bottle
- small leaf or flower cutter
- toothpicks or small sculpting tools
- baking sheet and parchment paper
- thin twine, jump rings, or ribbon
- clear sealant or matte varnish (optional)
- soft cloth
- a shallow tray or shallow bowl
Instructions
- Mix cornstarch and glue in a bowl until it forms a smooth paste.
- Gradually add warm water, stirring until it thickens into a malleable dough.
- Knead gently on a cornstarch-dusted surface.
- If sticky, let the dough rest covered for 10-15 minutes.
- Roll the dough thin and cut shapes with a spoon or cutter.
- Shape petals and add texture using a toothpick.
- Dry on a baking sheet, either air-drying overnight or in a low oven at 175°F for several hours.
- Sand and smooth edges after drying.
- Optional: seal with clear sealant and string or attach twine to hang the charms.
Notes
Keep leftover dough wrapped in plastic and stored in an airtight container in the fridge. This project is excellent for kids to practice measuring, patience, and small motor skills.
Nutrition
- Serving Size: 1 charm
- Calories: 50
- Sugar: 0g
- Sodium: 10mg
- Fat: 0g
- Saturated Fat: 0g
- Unsaturated Fat: 0g
- Trans Fat: 0g
- Carbohydrates: 12g
- Fiber: 1g
- Protein: 0g
- Cholesterol: 0mg