

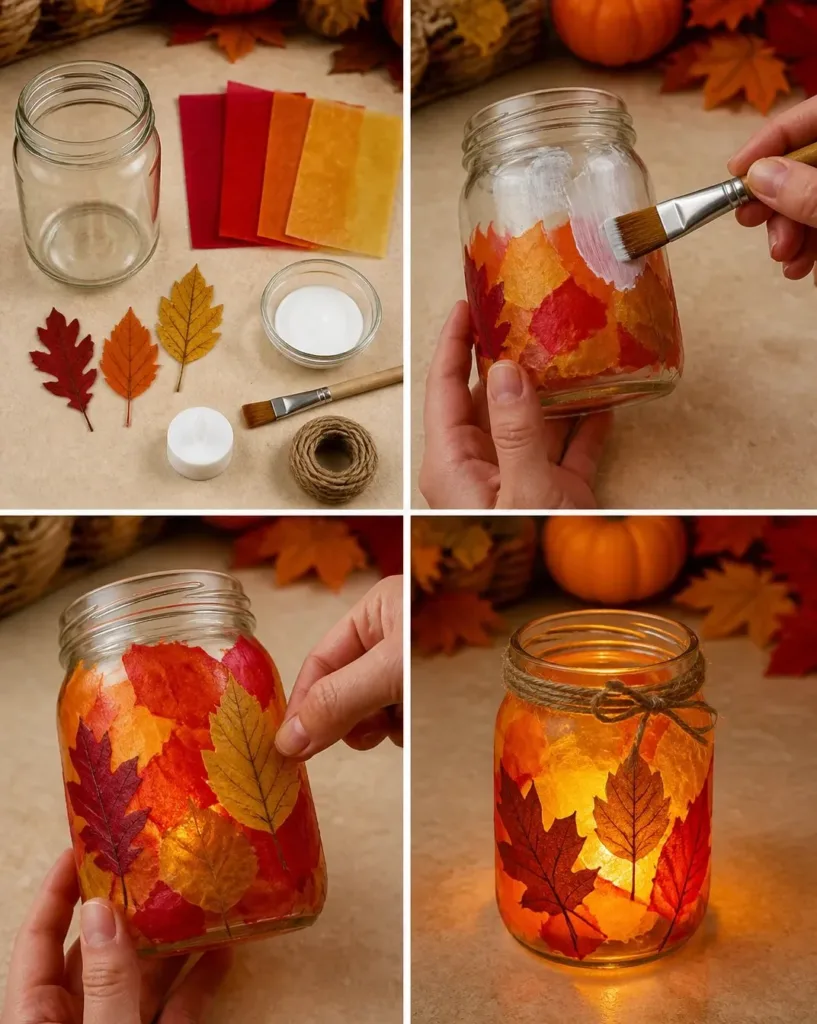
Creating a fun craft project can often transform a busy afternoon into a delightful family activity. If you’ve found yourself scrambling for ideas and your kids are eager to dive into something creative, consider the Stained Glass Leaf Lantern with Heritage-Inspired Design. This charming project perfectly blends artistic expression and natural elements, making it an engaging way to spruce up your home decor. Using just a glass jar, some rich tissue paper, and pressed leaves, this DIY not only captures the beauty of the changing seasons but serves as a cozy illumination piece for your space. You may also find Diy Spooky Glass Bottle Lanterns Halloween useful.
Why You’ll Love Making Stained Glass Leaf Lantern with Heritage-Inspired Design
You may also find Diy Stained Glass Mushroom Art Tutorial useful.
The Stained Glass Leaf Lantern is an exceptional project for several reasons. First, it requires minimal preparation, making it ideal for families with busy schedules. You won’t need to hunt for complicated materials or spend hours getting everything ready. This project invites creativity while allowing you to stay calm in the process. Furthermore, it can yield impressive results even if you or your kids are not seasoned crafters. The ease of using tissue paper to create that stained-glass illusion is a reliable technique that most people can master right away. Plus, it’s an exciting way to bond with your kids over a shared creative experience without added stress.
A Quick Look Before You Begin
Jumping into a craft project can sometimes feel daunting, particularly if you’re unsure about timing or even the mess factor involved. Rest assured, this DIY project is straightforward and manageable. Within about an hour, you can assemble your stained glass lantern from start to finish, including drying time. Setting up is also quick; you just need a clear workspace and your materials at hand. Cleanup is simple, leaving hardly any residue behind. If younger children are involved, a bit of adult supervision can keep everything running smoothly while allowing them to enjoy the process.
Materials You’ll Need
Here’s a simple list of the materials required for your Stained Glass Leaf Lantern:
- 1 glass jar
- Red tissue paper (common household item)
- Amber tissue paper (budget-friendly)
- Golden tissue paper (easy substitute)
- 3 pressed leaves (optional if you don’t have them)
- 2 tbsp decoupage glue
- Jute cord
- Battery tea light
All these items are easy to find and should not pose a financial strain.
Step-by-Step Directions
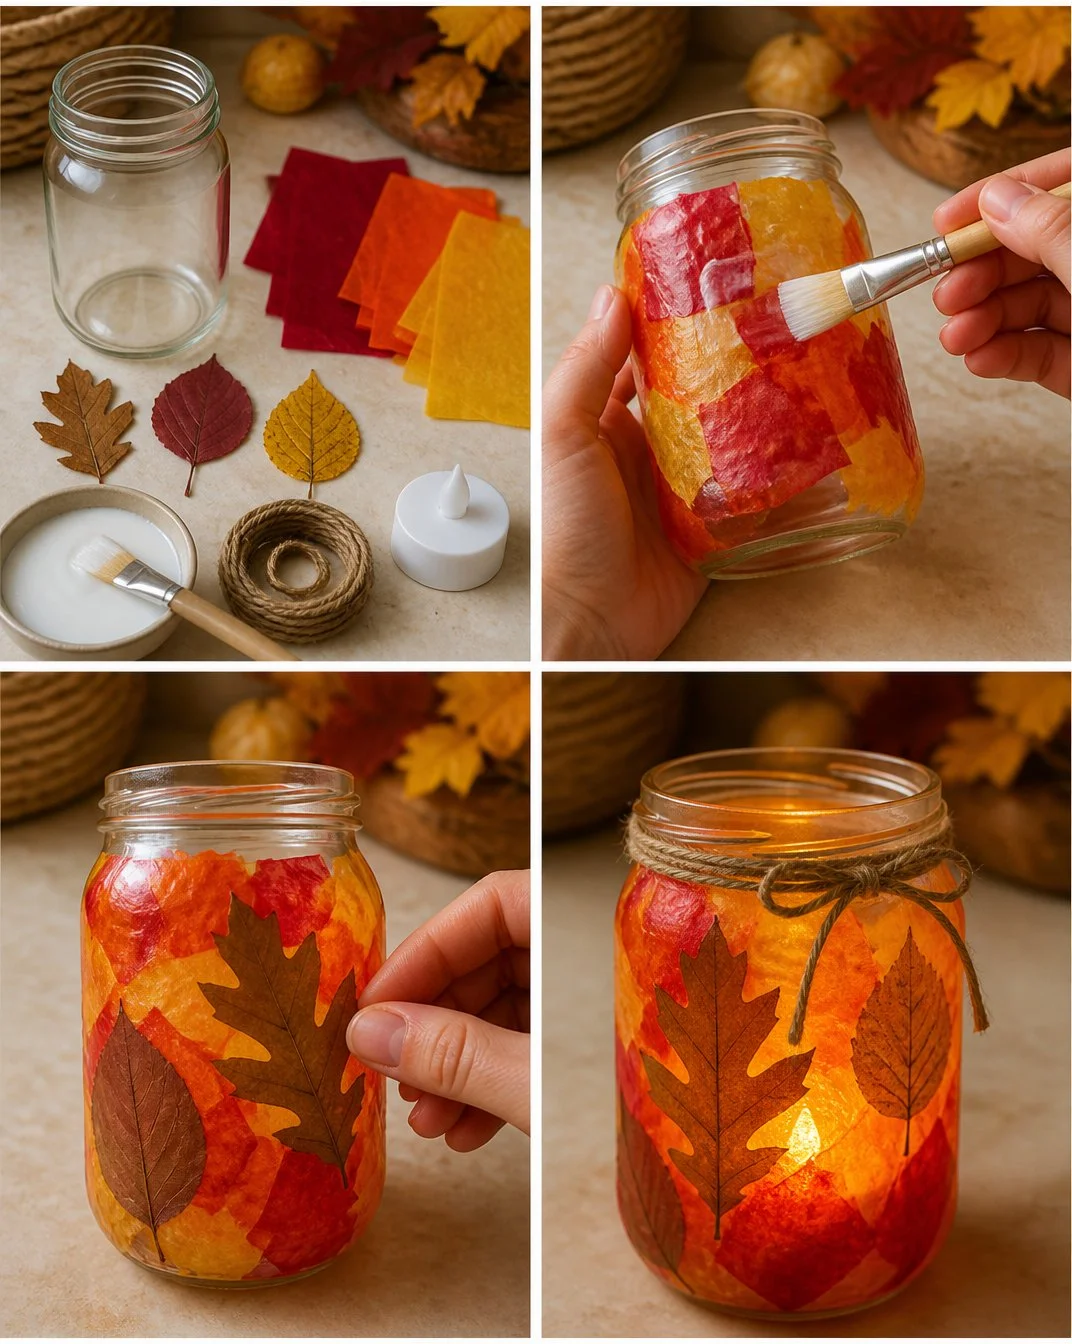
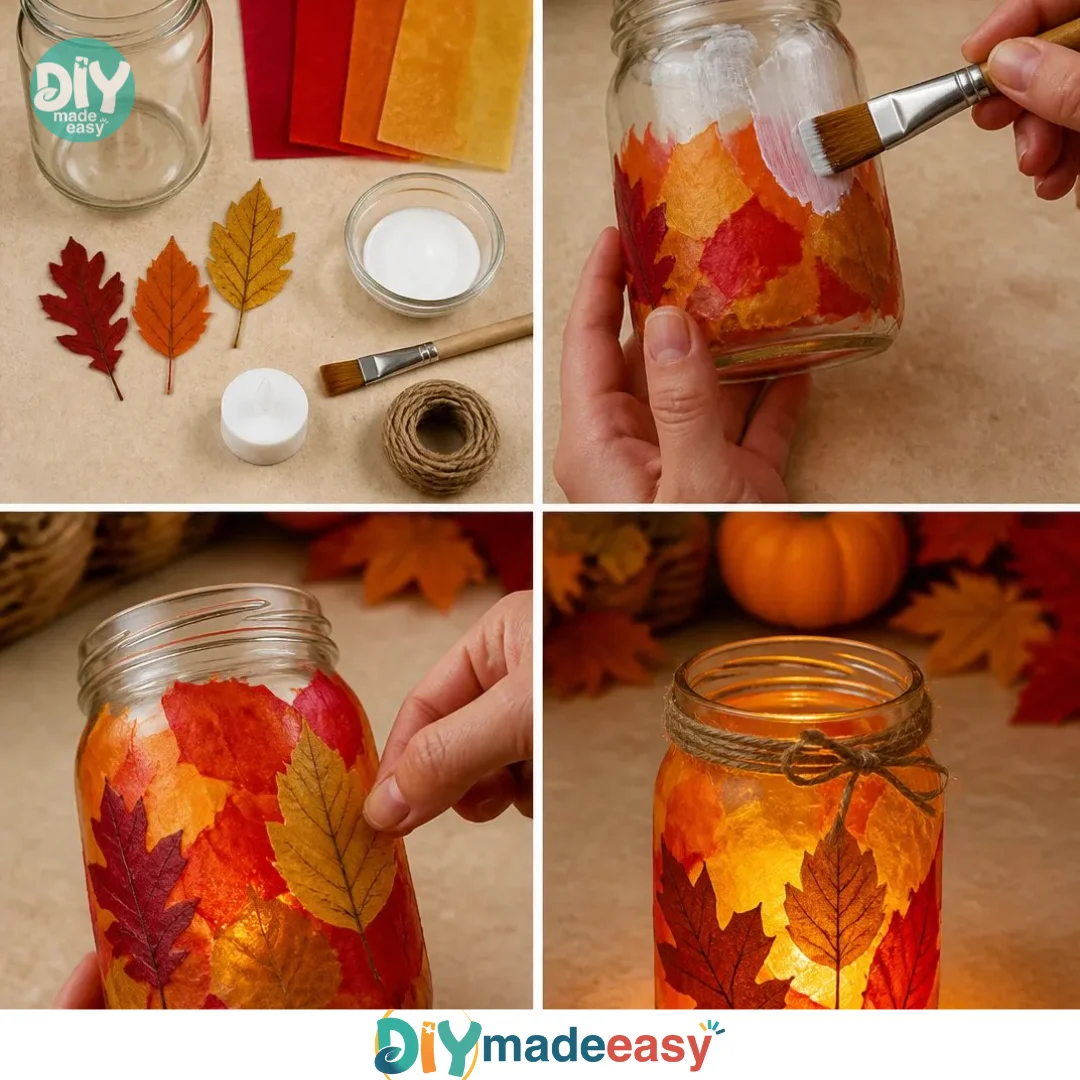
Tear Tissue Paper: Start by tearing the red, amber, and golden tissue paper into small pieces. Aim for sizes that can easily fit around the jar without being too small.
Apply Decoupage Glue: Brush a thin layer of decoupage glue on the outside of the glass jar. This layer helps the tissue paper stick but also provides a protective coating.
Attach Tissue Paper: Begin overlapping the torn tissue-paper pieces around the jar to create a stained-glass effect. The colors will mix beautifully, so don’t hesitate to layer them.
Add Pressed Leaves: Position the pressed leaves over your colored sections, ensuring each leaf is gently smoothed into place. This adds a natural touch to your lantern.
Seal the Lantern: Once all the tissue paper and leaves are in place, seal everything with a final thin coat of decoupage glue. This will protect your artwork and enhance the shine.
Let It Dry: Allow the jar to dry completely. Depending on the humidity, this could take anywhere from 30 minutes to an hour.
Finish with Jute Cord: Once dry, tie jute cord around the rim of the jar. This adds a rustic finish.
Insert the Tea Light: Finally, place a battery tea light inside the jar. Turn it on, and watch the light filter through the colored tissue paper, illuminating your artwork beautifully.
The Learning Behind This DIY
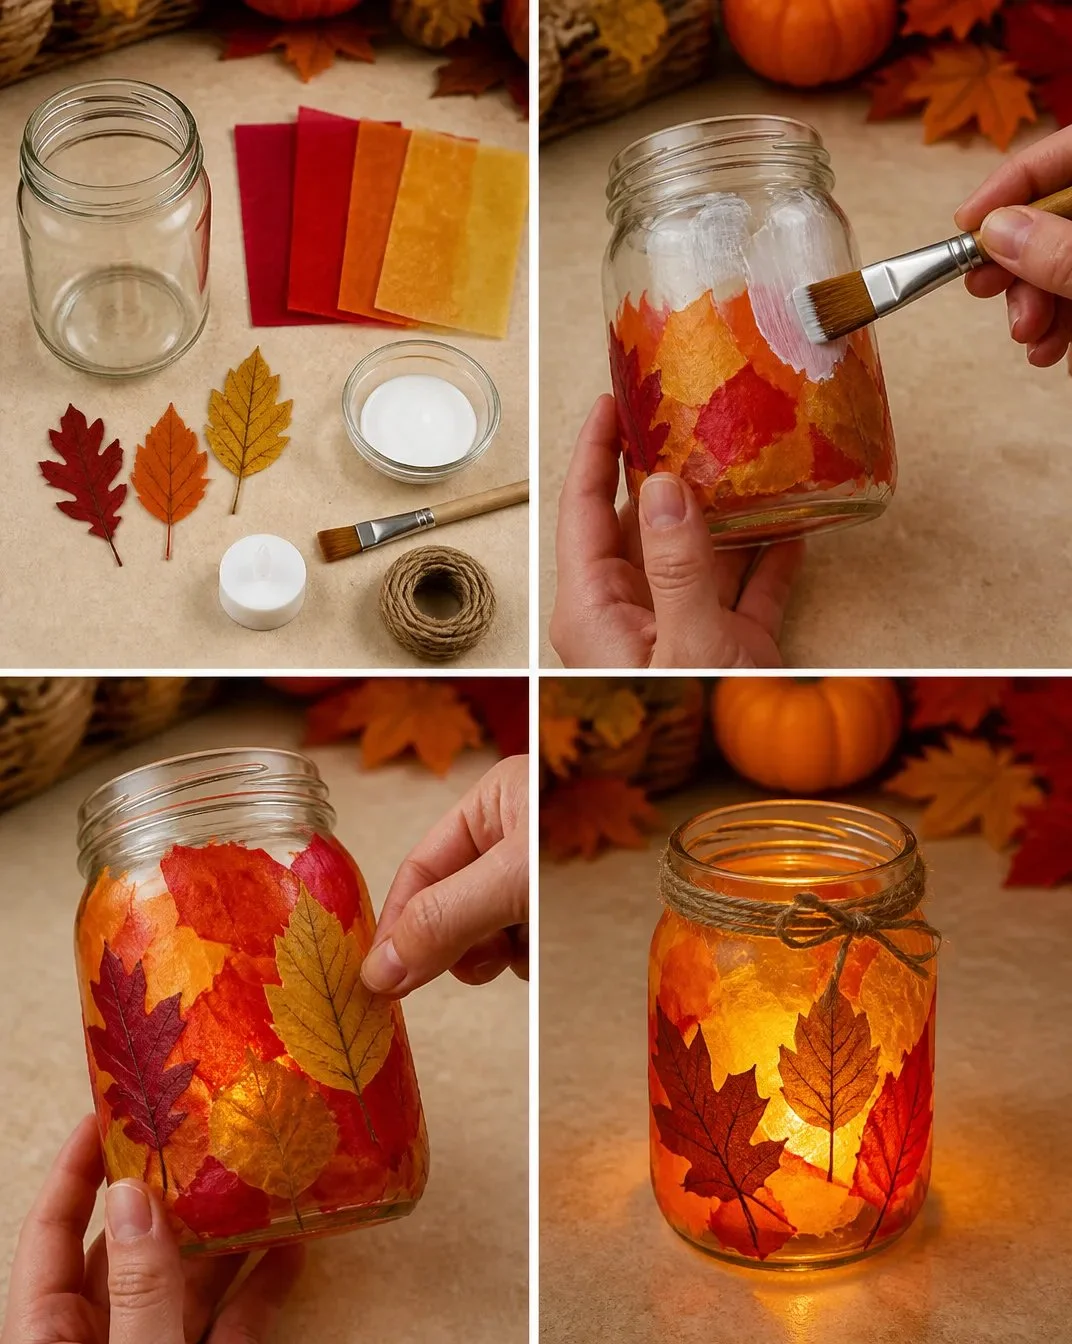
Crafting a Stained Glass Leaf Lantern offers various educational elements for children. As they cut, tear, and glue, they develop fine motor skills that are essential for their growth. They also practice coordination, particularly when positioning the delicate pressed leaves. This project showcases basic science concepts, such as color mixing and light reflection, which can be fun discussion points while working together.
Troubleshooting Common Issues
If you encounter any hiccups during your crafting session, don’t worry! One common issue is the tissue paper tearing too easily. If this happens, simply overlap more pieces to mask any tears. If the glue starts to dry before you press the leaves, add a little more glue. You can also dab moderately with your paintbrush if some sections have too much glue.
Easy Variations to Try
To keep things fresh or adjust based on seasons, consider the following ideas:
Seasonal Themes: Switch out the leaves with seasonal foliage, such as pine needles in winter or blossoms in spring.
Color Choices: Experiment with different colors of tissue paper. Create a rainbow effect or a monochromatic design using shades of blue or green.
Different Shapes: Instead of a traditional jar, use mason jars or other glass containers you have at home. Each shape provides a unique look.
Storing or Reusing This Project
Once you have made your lantern, you may want to think about how to store it or repurpose the materials later. This project is easily reusable. Just remove the decoupage glue and paper, and you can start fresh next time. As for the glass jar, consider using it for other decorative crafts or simply put it back into your kitchen for general storage.
FAQs About Stained Glass Leaf Lantern with Heritage-Inspired Design
Is this project suitable for younger children?
Yes! The project is perfect for varying age ranges, though younger kids may need some adult assistance, especially when applying glue.
Can I use different materials?
Absolutely! If you don’t have tissue paper, consider magazine cutouts or colored paper to achieve a similar effect.
What if the lantern doesn’t look perfect?
Remember that crafting is about enjoyment, not perfection. Each lantern will have its unique charm. Focus on the fun, and don’t stress over minor imperfections.
Can I store the lantern after the season?
You can keep your lantern for future celebrations or simply as decor. This encourages recycling and helps minimize waste.
Conclusion
Creating a Stained Glass Leaf Lantern is not only a fun activity but also a lovely way to bring a bit of nature indoors. It allows your family to express creativity while making something functional. If you are looking to expand your crafting horizons, you might want to explore various DIY Halloween glass bottle lanterns for seasonal celebrations or try your hand at fake stained glass heart crafts. Crafting can foster connections within your family and is an easy way to brighten up your home with handmade touches. If you’re interested in more decorative options, visit artscape for window films to complement your creations, or check out local craft inspiration for seasonal ideas. Start crafting today!
PrintStained Glass Leaf Lantern with Heritage-Inspired Design
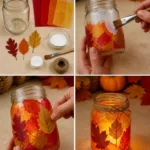
A delightful DIY project that transforms a simple glass jar into a stunning stained glass lantern using tissue paper and pressed leaves.
- Prep Time: 15 minutes
- Cook Time: 45 minutes
- Total Time: 60 minutes
- Yield: 1 lantern 1x
- Category: Crafts
- Method: DIY
- Cuisine: N/A
- Diet: N/A
Ingredients
- 1 glass jar
- Red tissue paper
- Amber tissue paper
- Golden tissue paper
- 3 pressed leaves (optional)
- 2 tbsp decoupage glue
- Jute cord
- Battery tea light
Instructions
- Tear tissue paper into small pieces.
- Apply a thin layer of decoupage glue on the outside of the glass jar.
- Attach the torn tissue-paper pieces around the jar.
- Add the pressed leaves over the colored sections.
- Seal everything with a final thin coat of decoupage glue.
- Let it dry completely for 30-60 minutes.
- Finish with jute cord around the rim.
- Insert the battery tea light inside the jar.
Notes
Encourage creativity by experimenting with different colors and seasonal themes. Supervision may be needed for younger children.
Nutrition
- Serving Size: 1 lantern
- Calories: 0
- Sugar: 0g
- Sodium: 0mg
- Fat: 0g
- Saturated Fat: 0g
- Unsaturated Fat: 0g
- Trans Fat: 0g
- Carbohydrates: 0g
- Fiber: 0g
- Protein: 0g
- Cholesterol: 0mg