

A busy afternoon can turn into a small, colorful science moment in under an hour. Maybe the kids burst through the door and ask for something to make right now, or you need a calm, hands-on activity while dinner cooks. Rainbow Crystals are a perfect fit: simple setup, bright results, and a clear payoff that feels like a little kitchen magic. If you want more projects that turn ordinary ingredients into a light show, check out our guide to a gentle at-home rainbow light show for kids with extra ideas for soft science play rainbow light show.
Why You’ll Love Making Rainbow Crystals

This project asks for only a few things from your pantry and takes small pockets of time that fit family life. You do a little prep, watch quietly, and then enjoy a big reveal. The materials are familiar and cheap, and the steps follow a calm, repeatable pattern.
It works well when you want a low-prep activity that still feels special. You can run it while dinner simmers, or set it up as a weekend craft and let the crystals grow overnight. The process gives quick feedback. You stir, you see the solution change clarity, and then, after waiting, you lift out real, sparkly crystals.
It stays approachable for kids because grown-up help is close but not constant. You handle the hot water and mixing. Kids can choose colors, dip skewers, and watch growth. It fits real life: not too long, not too messy, and reliably pretty.
A Quick Look Before You Begin
Start-to-finish, plan on about 20 minutes of hands-on time and 12 to 24 hours of quiet growing time. Most of the work happens at the start: boil water, dissolve borax, and color small bowls. After that, you mostly wait while the crystals do the work.
Setup is low-mess if you use a tray and a towel under your jars. Expect a few drops where you pour solutions. You can keep the jars on the tray to catch stray drips and to move them easily to a quiet shelf.
Adult involvement is important early and when removing the crystals. Kids will enjoy choosing colors and watching the slow change. If you need a truly hands-off version, set it up in the morning and check in at bedtime.
Materials You’ll Need
Clear glass or heatproof jars, cups, or molds
- Common household jars work well; heatproof options let you pour hot water safely.
Boiling water
- Use freshly boiled water from the kettle or stove for best dissolution.
Borax powder
- The main crystal-forming ingredient. Common and inexpensive.
White sugar or table salt (optional)
- Optional for texture and slower growth; use only small amounts.
Food coloring (several colors)
- Any basic liquid food colors create bright crystals.
Wooden skewers or string
- Skewers make crystal ridges stand out; string works for hanging shapes.
Small bowls or measuring cups
- For dividing the solution into colors and pouring carefully.
A stirring spoon
- Use a dedicated spoon for mixing the borax solution.
A fine mesh strainer or funnel (optional)
- Helpful if you notice undissolved bits when pouring.
Gloves and safety glasses
- For safe handling of hot water and borax; wear while mixing and pouring.
A tray or towel
- To catch spills and keep the workspace tidy.
Labels and small jars (for storing finished crystals)
- For keeping colors separate or making little gifts.
Essential oil or dried flower petals (optional)
- Add a gentle scent or a floral touch after the crystals dry.
Step-by-Step Directions

- Prepare your workspace with gloves and glasses. Lay a towel and place jars on a tray.
Put everything near the stove and within reach. Make sure jars sit steady on the tray. - Heat water to a gentle boil and dissolve about 3-4 tablespoons of borax per cup of hot water.
Pour hot water into a heatproof measuring cup, add borax, and stir until mostly clear. You will see tiny white particles at first, then the solution will go clearer. - Optionally add sugar for texture and slower growth.
If you use sugar or salt, add a teaspoon or two now and stir until it blends. Sugar can change the shape and slow how fast the crystals form. - Divide the solution into bowls and add food coloring for rainbow effect.
Scoop the hot solution into small bowls or cups and stir in a few drops of color. Watch how the color spreads; warm solution mixes quickly. - Prepare skewers by dipping them in the solution, then secure across the jars.
Dip each wooden skewer in plain solution and let a thin layer dry for a minute. This gives crystals a place to start and helps growth attach. - Lower the skewers into the solutions and ensure they hang freely.
Balance the skewers across the jars so they do not touch the sides. If using string, tie it to a pencil and rest that across the jar. - Cover jars with a paper towel and let them sit undisturbed for 12-24 hours.
Find a quiet shelf and leave the jars alone. You may see small crystals start in a few hours; fuller growth happens overnight. - Rinse the formed crystals under cool water, allow to dry, and optionally add scent or a finish.
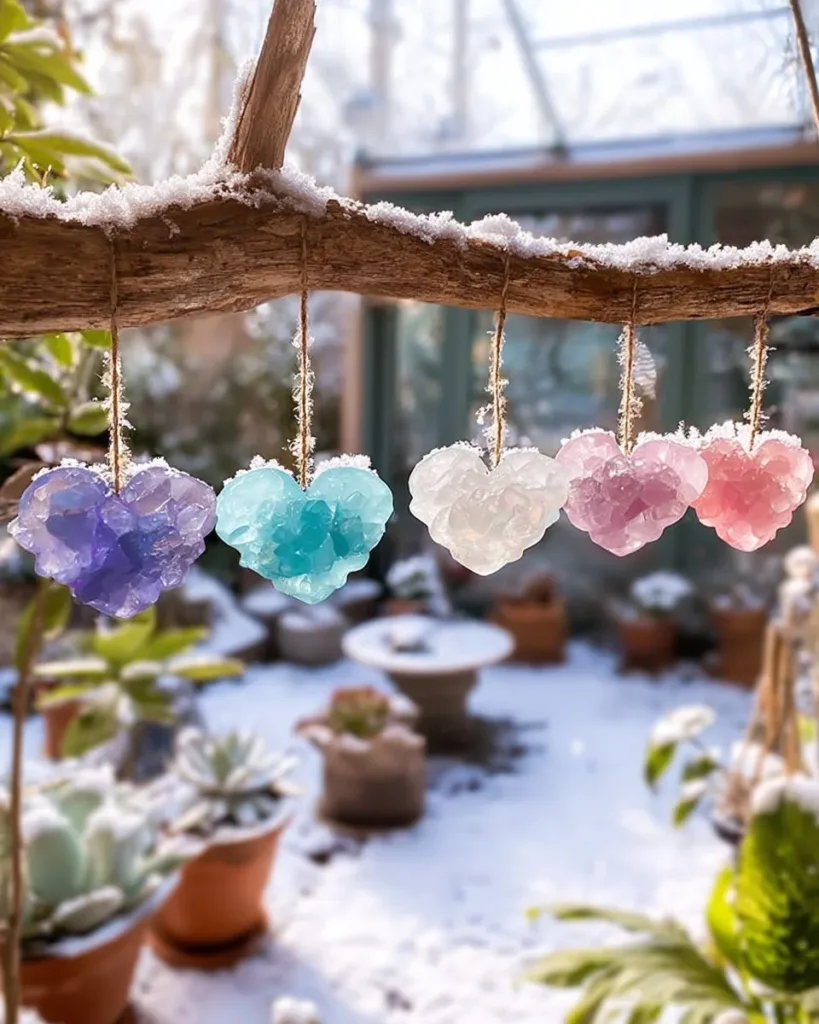
Gently lift skewers and rinse the crystals under cool running water to remove loose powder. Let them dry on a towel, then add a drop of essential oil or press a dried petal near the base if you like. - Arrange crystals in jars or bowls for display.
Place finished pieces in labeled jars or on a small dish. Hand them out as gifts or use them as a colorful tabletop accent.
The Simple Science or Skills at Work

Growing Rainbow Crystals turns a clear idea into an easy, hands-on science moment. When borax dissolves in hot water, it floats as individual molecules. As the water cools, those molecules like to meet and stick in a repeating pattern. That pattern becomes the tiny faces and edges you see as a crystal.
Kids practice observing cause and effect. They measure a scoop of borax and watch how more or less changes the result. They learn patience as crystals grow slowly, and they notice texture and color differences between bowls.
The activity also builds fine motor skills. Tying a string, balancing a skewer, or pouring colored solution into a jar helps hand control. Those small actions feel simple but matter when you want neat, clear crystals to form.
Troubleshooting Common Issues
If your solution looks cloudy or gritty after mixing, it probably needs more stirring or slightly hotter water.
Add a little more borax and stir until it fades. Use a strainer when you pour if you see bits.
No crystals after 24 hours often means the solution did not saturate enough or jars moved during the wait.
Try reheating a bit of the solution, add more borax, and redip a new skewer. Keep the jars on a stable shelf away from drafts.
If crystals form on the jar sides instead of the skewer, they had a place to start.
That is normal. You can gently scrape crystals into a jar or start again with skewers that do not touch the glass.
Crystals that look small and chalky often grew too fast or from impurities.
Rinse them gently and let them dry fully. Next time, try a slightly cooler setup and strain the solution before pouring.
If color bleeds between jars, the colors mixed when you moved the tray or when the jars sat too close.
Keep jars separated and use small lids or paper towel covers to reduce splashes.
Easy Variations to Try
Make a color gradient by pouring slightly different color concentrations into adjacent jars and watching how shades change.
This keeps the same materials but makes a pretty display when you line jars on a windowsill.
Try hanging a shape with string instead of skewers for a different look.
Tie the string to a small object or a pipe cleaner shape and suspend it in the solution.
Add a subtle scent after drying by rubbing a drop of essential oil into the base of the crystals.
This gives a gentle, grown-up touch if you plan to use crystals as small jar gifts.
Mix sugar with borax for chunkier, textured crystals that take a little longer to form.
This only uses ingredients on hand and changes how the crystals feel and look.
If you want a showier result, pair this with a sugar show you already love for different effects; try combining color ideas from a DIY rainbow sugar experiment to vary patterns and ideas rainbow sugar fireworks.
Storing or Reusing This Project
Store finished crystals in dry labeled jars to keep colors separate and prevent breakage.
Place a small piece of tissue between fragile clusters. Labels help you remember the scent or color.
You can reuse jars and skewers after a good rinse and drying.
Soak glassware in warm soapy water to remove borax residue. Wooden skewers may need replacing if they split.
If you want to reuse the solution, heat it again and add more borax until it dissolves.
Strain before pouring. Reheating helps dissolve any settled bits and gives you one more try with fresh colors.
Dispose of leftover solution down a sink with plenty of water.
Borax is not a food item, so avoid pouring concentrated amounts into drinking water sources. Rinse your tray and towel and launder any cloths used.
FAQs About Rainbow Crystals
Will this make a big mess in my kitchen?
It usually stays tidy if you use a tray and towel under the jars. Expect a few drops and a little powder on the skewer. Wipe up spills while the solution is still wet for easiest cleanup. Plastics and wood can stain slightly if you use deep food coloring, so rinse tools right away.
Is this safe for my child to do alone?
No. Borax and hot water need adult handling. Kids do well with the coloring and setting up skewers under supervision. Wear gloves and safety glasses for mixing, and keep children away from the stove and hot solution.
Can I use something else if I do not have borax?
You will get different results with other ingredients. Sugar or salt can make crystals, but they behave differently. If you use sugar or salt, expect slower, softer growth and slightly different textures. Be honest about the results: they will not always match a pure borax crystal.
How long will the crystals last?
Crystals keep shape for a long time if they stay dry and out of direct sunlight. If they get wet, they dissolve back into the solution. Store them in small labeled jars or on a shelf inside a sealed container for best longevity.
What if my crystals are small and dull instead of bright and clear?
Small or dull crystals often mean they grew quickly or the solution had impurities. Try reheating and re-mixing with fresh hot water and add the borax slowly until the solution clears. Use strained water if you see flecks settling at the bottom.
A Final Helpful Note
You will get different shapes and sizes each time, and that is part of the fun. The project rewards gentle care and a little patience. If things do not look perfect, try one small change next time: a slightly hotter solution, a steadier shelf, or a different skewer.
Treat the first batch as practice and enjoy the bright colors and small victories. Keep the tone light, make cleanup part of the activity, and celebrate the moment when everyone gathers to see a little sparkling result.
Conclusion
If you want step-by-step inspiration and photos that follow this exact idea, the Little Bins guide helps you grow your own crystals and shows how the colors come alive, which is a handy companion to this project: Grow Your Own Rainbow Crystals.
For ready-made kits, supplies, or a quick shopping option to compare items, see the selection on Amazon for Rainbow Crystals to find shapes and kits that match your next plan: Rainbow Crystals – Amazon.com.
Rainbow Crystals

Create colorful crystals using common household ingredients for a fun science project with kids.
- Prep Time: 20 minutes
- Cook Time: 720 minutes
- Total Time: 740 minutes
- Yield: Varies
- Category: Science Activity
- Method: Crystal Growth
Ingredients
- Clear glass or heatproof jars, cups, or molds
- Boiling water
- 3–4 tablespoons of borax per cup of hot water
- White sugar or table salt (optional)
- Food coloring (several colors)
- Wooden skewers or string
- Small bowls or measuring cups
- A stirring spoon
- A fine mesh strainer or funnel (optional)
- Gloves and safety glasses
- A tray or towel
- Labels and small jars (for storing finished crystals)
- Essential oil or dried flower petals (optional)
Instructions
- Prepare your workspace with gloves and glasses. Lay a towel and place jars on a tray.
- Heat water to a gentle boil and dissolve borax in it.
- Optionally add sugar for texture and slower growth.
- Divide the solution into small bowls and add food coloring.
- Prepare skewers by dipping them in the solution and secure across the jars.
- Lower the skewers into the solutions and ensure they hang freely.
- Cover jars with a paper towel and let them sit undisturbed for 12-24 hours.
- Rinse the formed crystals under cool water and allow to dry.
- Arrange crystals in jars or bowls for display.
Notes
This project is a great hands-on science activity for kids and teaches them about cause and effect.
Nutrition
- Serving Size: 1 project
- Calories: 0
- Sugar: 0g
- Sodium: 0mg
- Fat: 0g
- Saturated Fat: 0g
- Unsaturated Fat: 0g
- Trans Fat: 0g
- Carbohydrates: 0g
- Fiber: 0g
- Protein: 0g
- Cholesterol: 0mg