

A busy afternoon, a last-minute need for a quiet activity, or a chorus of kids saying they want to make something now those are the moments I plan for with Ecoart Project. I clear a small kitchen corner, lay out newspaper, and watch the rest fall into place. This Ecoart Project turns backyard finds into colorful prints with almost no fuss and a lot of pride. If you want quick, kid-friendly art that uses things you already have, this is a perfect pick. For more easy kids’ ideas to pair with this project, try our round-up of fun projects for kids that work just as well when time runs short.
Why You’ll Love Making Ecoart Project

This activity stays low-prep because it uses paper or recycled cardboard and leaves you find outside. You do not need fancy supplies. You gather a few brushes, a bit of paint, and simple household glue. That makes starting fast and realistic when the afternoon runs short.
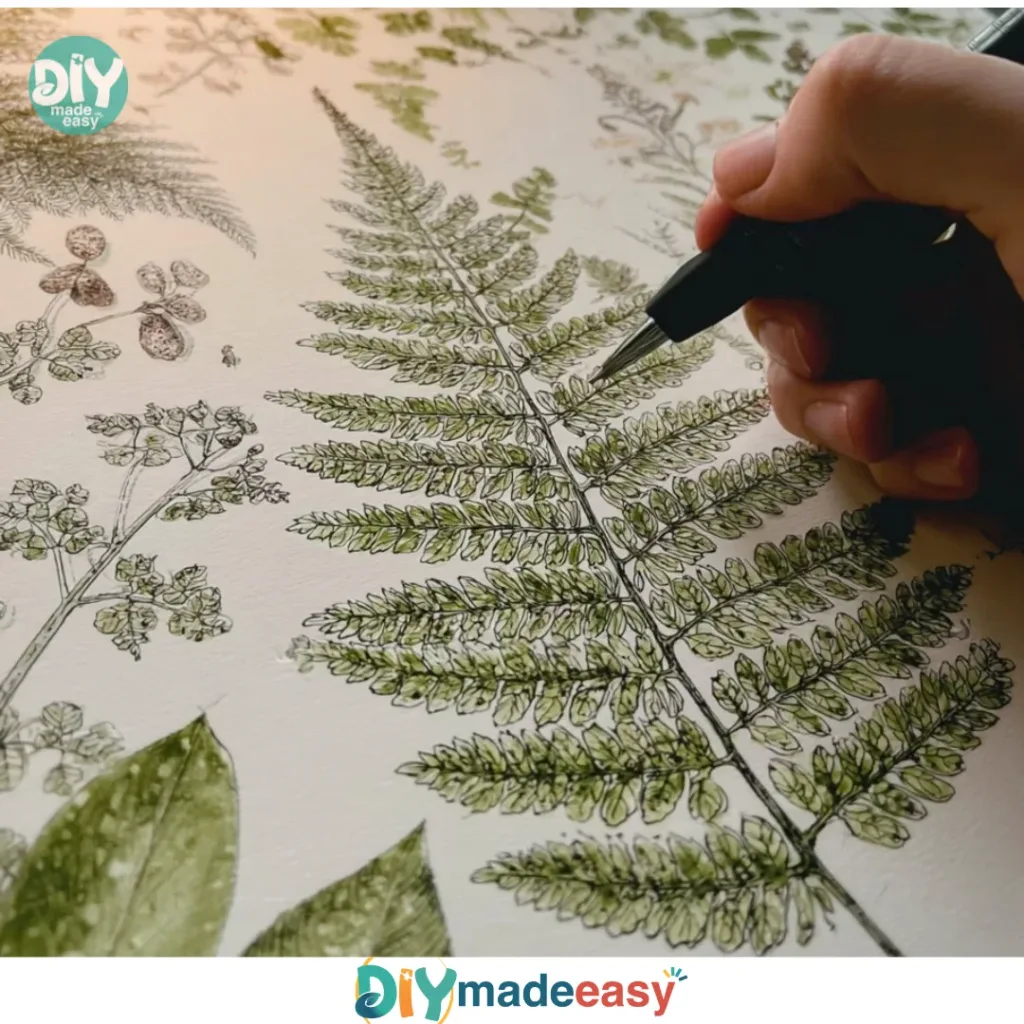
It feels approachable because children of many ages can take part. Younger kids enjoy smearing paint and pressing leaves. Older kids experiment with layering colors and textures. The process gives reliable results: leaf veins and edges show up clearly most of the time, and when they do not, you learn a small trick or two for the next try.
This craft fits real schedules. You can set it up for a 15-minute burst or stretch it into a longer, quiet hour. Cleanup stays easy. A damp cloth and some newspaper remove most mess. The final pieces dry quickly, and you can press them under a book to flatten while you tidy up.
A Quick Look Before You Begin
This project takes about 20 to 40 minutes from start to tidy, with extra drying time if you add layers. Setup takes five minutes. Expect a low to medium mess level. Paint will transfer to hands and the occasional sleeve, but the newspaper protects surfaces and a damp cloth handles most spills.
Adult help matters for little hands. A grown-up can handle scissors, manage paint amounts, and help press fragile leaves. For older kids, step back and let them explore while you stay nearby to help with glue and trimming.
Keep paint choices simple. Acrylic or washable tempera works fine. Acrylic gives brighter colors and faster drying. Tempera cleans up easier and feels softer for children. Either one will give satisfying leaf prints.
Materials You’ll Need
Paper or recycled cardboard
common household item; sturdy base for prints
Leaves, twigs, or flat nature finds
collect a variety of sizes and shapes; flatter is easier to print
Acrylic paint or washable tempera paint
bright colors work well; tempera is easier to wash from clothes
Glue stick or white craft glue
glue stick for fabric scraps; white glue for stronger hold
Paintbrushes or foam brushes
brushes to spread paint thinly; foam brushes work for quick coverage
Scissors
for trimming edges or cutting fabric scraps
Paper plates or a palette for paint
easy mixing and single-use cleanup
Scraps of fabric, old magazine pieces, or ribbon (optional)
small pieces add texture and interest
Something flat for pressing (a book or baking tray)
presses the artwork flat while drying
A damp cloth for cleanup
wipes hands and keeps the table tidy
STEP-BY-STEP DIRECTIONS

- Lay out your work surface with newspaper and arrange all materials.
Cover the table well so paint does not reach the surface.
Set paints on paper plates and place leaves and glue within easy reach. - Pick a base piece of paper or recycled cardboard and choose a few leaves.
Test different leaves for size and texture next to the paper.
Pick a clean, flat spot on each leaf to paint for best prints. - Brush a thin layer of paint on the leaf side you want to print.
Use a light, even coat so details show through.
If paint pools, dab the excess on the plate. - Press the painted leaf onto the paper and lift to reveal the print.
Place the leaf paint-side down and press gently with fingers or the flat of your hand.
Lift straight up to avoid smudging and study the print you made. - Repeat with different colors for a collage.
Let each print sit a minute before adding another on top.
Overlap edges for depth and try contrasting colors for bold results. - Add backgrounds and glue fabric scraps for interest.
Paint a simple wash or dots around prints to frame them.
Use a glue stick or white glue to attach small fabric or magazine pieces. - Press the piece flat under a book for 10-20 minutes.
Slide the artwork between two clean sheets of paper first.
Weigh the book down and leave it while you wash brushes. - Trim edges or mount it on a clean sheet of paper.
Use scissors to tidy ragged edges or create a neat border.
Mounting on a new sheet gives a polished look for gifting. - Sign and date the artwork, and display it or gift it.
Have children sign with a marker or pencil so the date stays clear.
Lean it on a shelf, add a ribbon loop, or tuck it into a frame for a simple gift.
The Learning Behind This DIY

This project supports observation and fine motor control. Children learn to hold a leaf steady and judge how much paint to use. They practice pressing gently and lifting in a straight motion to keep prints crisp.
You also get simple cause and effect. Too much paint blurs the veins. A thin coat reveals them. Trying again shows how changes affect results. That feedback loop builds confidence and curiosity.
On a simple science level, the leaf acts as a stencil and stamp. Paint transfers more easily from raised veins and edges. Drying time teaches patience. When you press under a book, you notice how the paper flattens and the glue secures scraps. Those small observations add to learning without any pressure.
Troubleshooting Common Issues
If prints look faint, you probably used too little paint or pressed too lightly.
Add a slightly thicker coat next time and press with a steady hand.
Try folding a clean scrap of paper over the leaf and rubbing to increase transfer.
If prints blur, you applied too much paint or you moved the leaf while lifting.
Let excess paint drip back to the plate and wipe the leaf edge before pressing.
Hold the leaf down in the center and lift straight up to avoid dragging.
If the leaf curls and does not make full contact, press it flat on the tabletop first.
Use the heel of your hand or a clean cloth to flatten it gently before painting.
You can also paint the leaf against the plate and lay the paper on it for a reverse transfer.
If fabric scraps lift or bubble after drying, use a little more glue under the edges.
White craft glue works better for heavier fabric than a glue stick.
Press the area under a book again to bond the pieces completely.
Easy Variations to Try
Try seasonal color themes such as warm oranges and browns for fall or pastels for spring.
Limit your palette to two or three colors to create a cohesive collage.
Use twig silhouettes for a minimalist look.
Paint a wash background in pale blue and press small twigs for a calm nature scene.
Create a layered cityscape by printing leaves for trees and adding cut magazine pieces for buildings.
Glue the magazine pieces first, then print the leaves on top for depth.
Invite older kids to sketch simple outlines with pencil and use leaf prints as textured fills.
They practice planning and composition while still enjoying the easy print process.
Storing or Reusing This Project
Keep leftover paint covered and refrigerated briefly if labeled and sealed properly.
A damp cloth cleans brushes right after use so paint does not dry in the bristles.
Save interesting leaves in a zip bag with a damp paper towel if you plan to use them again soon.
For longer storage, press and dry leaves between paper towels in a heavy book for 24 hours.
Turn smaller prints into gift tags or bookmarks by trimming them into rectangles.
Mount multiple small prints on a single sheet to make a nature collage poster.
FAQs About Ecoart Project
Will this make a big mess?
I worry about paint on clothes and the table.
I understand that worry. This activity uses washable tempera when possible, and newspaper protects surfaces well.
Have children wear an old shirt or apron and keep a damp cloth handy to wipe hands and spills quickly.
Is this safe for young kids?
My toddler is eager but unpredictable.
This project works for toddlers with close supervision. I help with the paint application and handle scissors and glue.
Tempera paint reduces cleanup stress. Watch for small leaves or twigs that could be mouthed and remove anything risky.
What if we do not have many leaves or the season is wrong?
You can use flat nature finds like thin bits of bark, pressed flowers, or large grass blades. If you want more ideas by season, see our seasonal DIY suggestions at seasonal DIY projects for related activities that work year round.
My prints did not show the veins. Did we waste time?
You did not waste time. Often the issue comes from paint that is too thick or a leaf that is too wet. Try a lighter coat of paint and a flatter leaf next time. Even abstract smears and shapes make beautiful art.
How long will the piece last if I want to gift it later?
With basic white glue and a clean mount, pieces last well as keepsakes. If you want extra durability, place the finished work in a plastic sleeve or frame behind glass.
A Final Helpful Note
Take the pressure off perfection and celebrate exploration. This project rewards curiosity more than precision. Expect some messy hands, a few imperfect prints, and bright, surprising combinations you did not plan. If a leaf print does not look like the picture in your head, add a few fabric scraps or a bold background wash and it will feel finished.
Work in short bursts and clean brushes before they dry. Let kids help with pressing and trimming to build ownership. Keep the tone upbeat and flexible. The goal is a shared creative moment, not a museum piece.
Conclusion
If you want more ideas from groups that celebrate nature and art, explore the broader EcoArt Project resources at EcoArt Project for inspiration and community projects. For a local take on combining stormwater education with public art, see the Ripple Stormwater EcoArt Project page for Martin County at Ripple Stormwater EcoArt Project | Martin County Florida.
PrintEcoart Project: Leaf Printing

A fun and easy leaf printing activity using natural materials, perfect for kids of all ages.
- Prep Time: 5 minutes
- Cook Time: 20 minutes
- Total Time: 40 minutes
- Yield: 1 artwork piece
- Category: Crafts
- Method: Art/Craft
- Cuisine: N/A
- Diet: N/A
Ingredients
- Paper or recycled cardboard
- Leaves, twigs, or flat nature finds
- Acrylic paint or washable tempera paint
- Glue stick or white craft glue
- Paintbrushes or foam brushes
- Scissors
- Paper plates or a palette for paint
- Scraps of fabric, old magazine pieces, or ribbon (optional)
- Something flat for pressing (a book or baking tray)
- A damp cloth for cleanup
Instructions
- Lay out your work surface with newspaper and arrange all materials.
- Pick a base piece of paper or recycled cardboard and choose a few leaves. Test different leaves for size and texture next to the paper.
- Brush a thin layer of paint on the leaf side you want to print.
- Press the painted leaf onto the paper and lift to reveal the print.
- Repeat with different colors for a collage.
- Add backgrounds and glue fabric scraps for interest.
- Press the piece flat under a book for 10-20 minutes.
- Trim edges or mount it on a clean sheet of paper.
- Sign and date the artwork, and display it or gift it.
Notes
Adult help is recommended for younger children, especially with scissors and paint management.
Nutrition
- Serving Size: 1 project
- Calories: 0
- Sugar: 0g
- Sodium: 0mg
- Fat: 0g
- Saturated Fat: 0g
- Unsaturated Fat: 0g
- Trans Fat: 0g
- Carbohydrates: 0g
- Fiber: 0g
- Protein: 0g
- Cholesterol: 0mg