

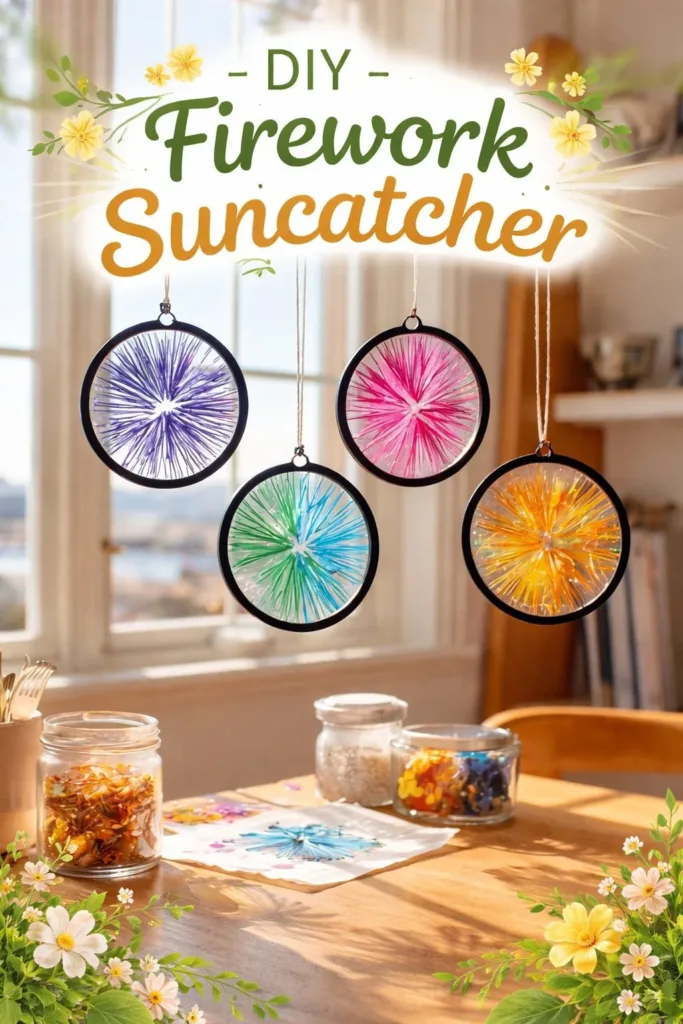
A busy afternoon, a family that needs a calm, creative break, and a pile of everyday bits on the kitchen table. That is how I first tried this DIY Firework Suncatcher on a rainy day when the kids wanted something bright and quick to make. With thin clear bioplastic sheets or clear shrink film, a handful of sequins, beads, and a scrap of metallic foil, we set up in minutes and made something that caught the light for days. This project works well when you want a low-prep craft that still looks special, and it fits easily into a short window of free time or a last-minute activity request.
Why You’ll Love Making DIY Firework Suncatcher

This craft stays simple without feeling plain. You pick a clear sheet, add small sparkling pieces, and heat or shrink it until everything flattens into a single shimmering piece. It takes little prep. You can sit kids at the table while you supervise the heating step. You do not need fancy tools or a big budget.
This suncatcher gives you consistent results. The materials behave predictably: sequins flatten but keep shine, foil pieces hold shimmer, and the sheet becomes sturdy and glasslike when heated right. If the day runs short, you can stop after step 6 and pick up again later. If you have more time, add a dab of paint or ink for a colored burst.
This project fits real schedules. It works for quick after-school crafting, a rainy weekend, or a calm hour before dinner. The finish dries and cools fast. You hang it in a window the same day and enjoy the sparkle. That simplicity makes it a go-to when kids say, “Let’s make something now.”
How This DIY Comes Together
Start-to-finish, plan for about 45 minutes to an hour, with most of that time hands-off while the piece heats and cools. Setup takes five minutes. Laying out the design takes ten to twenty minutes, depending on how detailed you get. Heating takes a few minutes in the oven or seconds with a heat gun. Cooling needs ten minutes or more on a flat surface.
The mess level stays low. Work on a non-stick baking sheet or silicone mat and use parchment paper to keep sparkles contained. A small tray for sequins and beads cuts down on spills. You will sweep up a few stray bits, but cleanup takes minutes.
Adult involvement matters most during the heating step. If kids help shape the design, they can place pieces with tweezers while an adult handles the oven or heat gun. Let the kids choose colors and placement. You only step in for heat and to trim the final shape.
Explore Visual Creative Crafts
Get inspired by eye-catching projects. Browse our Visual DIY Creative Crafts and bring your creative ideas to life with simple, visual guides.
Materials You’ll Need
Thin clear bioplastic sheets or clear shrink film
Small sequins
Beads
Metallic foil pieces
Acrylic paints or alcohol inks (optional)
Fine-point marker or pencil (optional)
Non-stick baking sheet or silicone mat
Scissors
Tweezers
Parchment paper
Low-heat oven or heat gun
Thin ribbon or fishing line
Small suction cups or a curtain hook
Notes: Most of these are common household items or quick craft-store buys. Acrylic paints or alcohol inks are optional for a wash of color. Use a fine-point marker only if you want a faint guide. Tweezers help with small pieces. The low-heat oven method works well for beginners.
Step-by-Step Directions

- Prepare your workspace with a non-stick baking sheet and arrange materials.
Set the baking sheet or silicone mat on a flat counter and gather sequins, beads, foil, tweezers, scissors, and parchment.
Make a small tray or bowl for tiny pieces so you do not chase them across the table. - Cut the bioplastic sheet larger than the planned size of the suncatcher.
Leave extra around the edge so you can trim cleanly after heating.
A couple of centimeters of margin makes shaping easier and prevents accidental holes. - Sketch a burst pattern to guide the placement of your materials.
Use a fine-point marker or pencil very lightly on the protective side of the sheet if you want a guide.
Keep lines faint so they do not show through or interfere with the shine. - Use tweezers to place the first piece at the center and add others radiating outward.
Start with a focal sequin or bead in the middle, then place pieces in spokes like a firework.
Work from center to edge so you can adjust spacing as you go. - Introduce metallic bits for sparkle.
Tuck small foil pieces between sequins and beads for flashes of light.
A little metallic goes a long way; scatter them for sparkle without covering the whole piece. - Sandwich the layout between sheets of parchment paper and press lightly.
Place a clean sheet of parchment over the design and press with flat palms so nothing shifts.
Pressing secures pieces for the heating step and keeps the design flat. - Heat it following material instructions until it flattens.
Preheat your oven to the low temperature recommended for your shrink film or follow the bioplastic directions.
Bake briefly, watching closely, or use a heat gun in short sweeps until the sheet relaxes and flattens. - Let cool fully on a flat surface.
Set the warmed piece on plain parchment on a flat counter and leave it completely still.
Cooling takes several minutes; moving it too soon can warp the edges. - Trim any uneven edges.
Use scissors to neaten the outline once the piece is room temperature and firm to the touch.
Cut slowly and follow any natural curve to keep the look organic. - Create a hanging hole and attach ribbon or line for display.
Make a small hole near the top with a sharp tool or scissors, then thread thin ribbon or fishing line through it.
Use a small suction cup or curtain hook to hang the suncatcher in a sunny window.
The Simple Science or Skills at Work

This craft teaches cause and effect in a friendly way. When heat hits the bioplastic or shrink film, the plastic relaxes and softens, letting little pieces settle in. As it cools, the material hardens again and locks everything in place.
Kids practice fine motor skills when they pick up tiny sequins with tweezers and place them carefully. Counting beads, choosing colors, and arranging spokes all exercise planning and hand-eye coordination. Pressing the parchment sandwich shows a simple way to control movement and keep a design flat.
You also get a tactile lesson in texture. Metallic foil feels different from flat sequins; beads add slight bumps before shrinking. Observing how the sheet changes under heat gives a clear physical cue that a process has happened. It is a gentle, hands-on way to introduce materials and reactions without complex words or tests.
Troubleshooting Common Issues
If pieces shift during heating, the layout likely moved when you placed the parchment top. Press more firmly next time and consider tacking a few larger pieces with a dab of repositionable glue before covering.
If the sheet bubbles, the oven was too hot or you heated too long.
Stop heating, let it cool, and try a lower temperature in short bursts. With shrink film, bubbles often smooth out if you heat gently.
If edges curl after cooling, you may have removed the piece too early. Lay it flat on a smooth surface and weigh it with a cool, flat object until it flattens. If curling persists, trim the edges and reheat briefly between parchment sheets.
If the metallic bits discolor or smear, they may not handle high heat well. Use smaller pieces or place them mostly on top of sequins where they get less direct heat. For sensitive foil, try the heat gun method in short bursts instead of an oven.
If the hole for hanging tears, make the hole slightly smaller or reinforce it with a small punched circle of parchment glued over the spot before reheating. A reinforced edge holds ribbon better.
Easy Variations to Try
Add a painted wash. Thin acrylic paint or alcohol ink gives soft color without hiding sparkle. Apply sparingly and let it dry a few minutes before arranging pieces.
Make a layered look. Cut two slightly different-sized circles and stack them after heating. Tie them together with ribbon through matching holes for a tiered suncatcher.
Try a theme.
Use only cool colors for a winter window or warm tones for autumn. Switch beads for small buttons or sequins for tiny pressed flowers for seasonal flair.
Scale it up or down. Use a bigger sheet for a large statement piece or small scraps for a cluster of tiny suncatchers to hang together.
Turn one into a gift tag. Make a small suncatcher, hole-punch it, and write a name on the back with a fine-point marker. It doubles as a keepsake ribbon.
Storing or Reusing This Project
Store finished suncatchers flat between sheets of parchment in a shallow box or drawer to avoid scratches. They stack well if you separate each with a bit of paper.
Save leftover sequins, beads, and foil in small jars or zip bags. Label them so you reuse them for the next project. Small containers keep little bits ready and reduce waste.
If a suncatcher gets dusty, wipe it gently with a soft, dry cloth. Avoid solvents or spray cleaners; they can dull the shine. If it needs a gentle clean, a slightly damp cloth followed by immediate drying works fine.
Reuse partial sheets of bioplastic by cutting new shapes. Smaller offcuts make lovely little accents or tags. Think of every leftover as the start of a new tiny craft.
When you plan seasonal rotations, keep a hanger and suction cup with the suncatcher so you do not hunt for hardware each year.
FAQs About DIY Firework Suncatcher
Who can do this craft, and how much adult help will kids need?
This activity works well for school-age kids with some supervision. An adult should handle heating with the oven or heat gun. Younger children can place sequins, paint, or choose colors while an adult does the hot steps. That way kids stay in charge of the creative part and adults manage the safety moments.
How messy will it get, and how do I keep supplies under control?
The mess stays small if you work over a baking sheet or silicone mat and use small bowls for bits. Expect a few dropped sequins and a quick sweep afterward. If you worry about tiny pieces, do the layout on a tray with a lip so nothing rolls away. Cleanup usually takes less than five minutes.
What if I do not have the exact materials, like alcohol inks or metallic foil?
You do not need every optional item. Acrylic paint gives a nice color wash instead of alcohol ink. Small foil bits add sparkle, but glitter or shiny sticker pieces can work in a pinch. Keep the main focus on the clear sheet, sequins, and beads; optional items only change the look.
Will the suncatcher break or warp over time?
When you follow the heat instructions and let the piece cool flat, it becomes sturdy like a thin plastic ornament. It can scratch if you stack it with hard objects, so store it flat between parchment. It will not shatter like glass, but treat it gently to keep the shine.
Can I fix it if the center looks dull or the pieces moved?
Yes. If the center flattens poorly, you can reheat the whole piece briefly between parchment sheets and press flat again. If pieces moved too much, you can cut away the problem area and smooth the edge, or place a small loop of ribbon to cover a flaw and turn it into a decorative top.
A Final Helpful Note
You do not have to aim for perfection. The charm of these suncatchers comes from small imperfections and the way light catches different bits. Let kids choose boldly and try not to rearrange every placement. If a piece slips, laugh, adjust, and keep going.
Work at a calm pace. A relaxed setup, a small tray for bits, and a clear role for the adult make the whole project smoother. Keep safety clear and simple: adults handle heat, kids handle design. That balance keeps it fun and successful.
Celebrate the result even if it looks simple. Hang it where the light hits it most and take a moment to notice how the family made something together.
Conclusion
If you want ideas for adding custom decals or colorful accents to other projects, see this guide on Let’s Make Custom Decals! – Rainbow Symphony to spark more decorating ideas. For seasonal inspiration and ways to pair your suncatcher with outdoor fun, check out Flipflops & Fireworks – The Rustic Rhode for a fresh take on summer craft themes.
Clear steps. Simple materials. Real results. Made easy.
PrintDIY Firework Suncatcher

Create a beautiful DIY Firework Suncatcher with simple materials for a bright and colorful decoration that catches the light.
- Prep Time: 5 minutes
- Cook Time: 3 minutes
- Total Time: 45 minutes
- Yield: 1 suncatcher
- Category: Craft
- Method: Crafting
- Cuisine: N/A
- Diet: N/A
Ingredients
- Thin clear bioplastic sheets or clear shrink film
- Small sequins
- Beads
- Metallic foil pieces
- Acrylic paints or alcohol inks (optional)
- Fine-point marker or pencil (optional)
- Non-stick baking sheet or silicone mat
- Scissors
- Tweezers
- Parchment paper
- Low-heat oven or heat gun
- Thin ribbon or fishing line
- Small suction cups or curtain hook
Instructions
- Prepare your workspace with a non-stick baking sheet and arrange materials.
- Gather sequins, beads, foil, tweezers, scissors, and parchment.
- Make a small tray or bowl for tiny pieces.
- Cut the bioplastic sheet larger than the planned size of the suncatcher.
- Sketch a burst pattern lightly on the protective side of the sheet.
- Use tweezers to place pieces, starting from the center and working outward.
- Introduce metallic bits for added sparkle.
- Sandwich the layout between sheets of parchment paper and press lightly.
- Heat until it flattens, watching closely.
- Let cool fully on a flat surface.
- Trim any uneven edges.
- Create a hanging hole and attach ribbon or line for display.
Notes
This project is suitable for school-age children with adult supervision during the heating step.
Nutrition
- Serving Size: 1 suncatcher
- Calories: 0
- Sugar: 0g
- Sodium: 0mg
- Fat: 0g
- Saturated Fat: 0g
- Unsaturated Fat: 0g
- Trans Fat: 0g
- Carbohydrates: 0g
- Fiber: 0g
- Protein: 0g
- Cholesterol: 0mg