

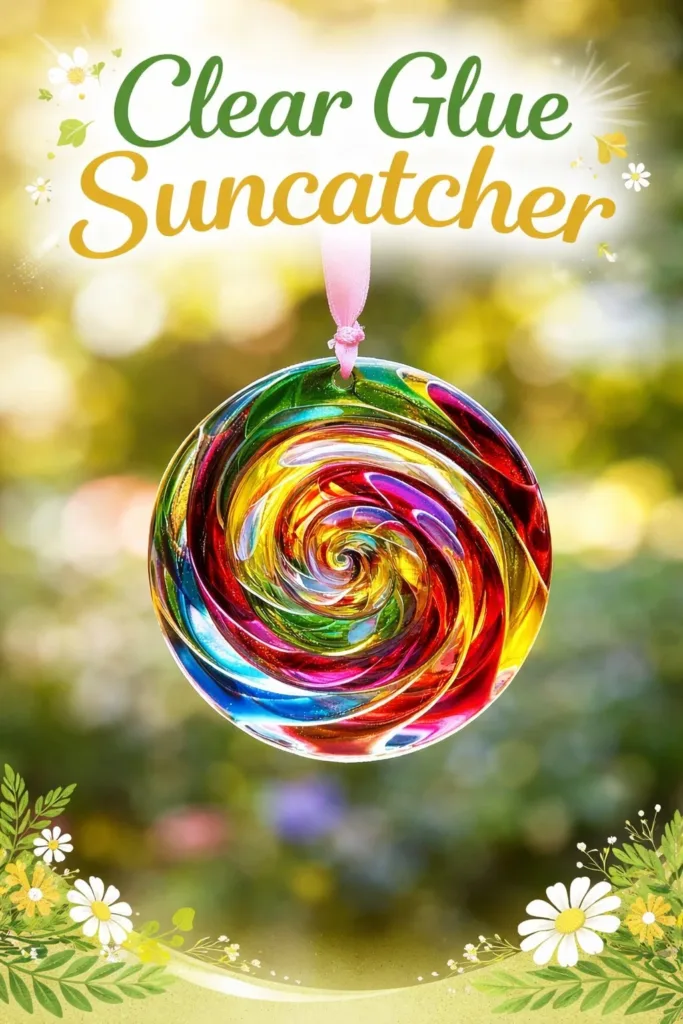
A sudden rainstorm changed our plans on a busy afternoon. The kids wanted something hands on right now, and I needed a calm, quick project that would keep them near the kitchen table without turning the house upside down. That is how we tried The Quiet Joy of Making Clear Glue Suncatcher.
It took minutes to set up, used things from the craft bin and the pantry, and gave everyone a tidy, beautiful object they could hang in a sunny window that same day. The process felt gentle and slow in a good way. We watched glue settle into a glossy pool, nudged a tiny pressed flower into place, and waited for light to make color and shimmer. Making this suncatcher turned a handful of simple materials into something that brightened a corner of the house and stretched a short stretch of time into a small family ritual.
Why You’ll Love Making The Quiet Joy of Making Clear Glue Suncatcher

This project works because it asks for very little to begin with and rewards you with something pretty and real. The glue itself does most of the heavy lifting. It self-levels, holds whatever you nestle into it, and dries clear enough to catch sun and color.
You do not need a perfect work area. A small, protected tray and a window make the whole activity feel like a tiny studio. The steps fit into a snack break or a short afternoon when you want kids close but not underfoot.
The low-prep nature means you can start in ten minutes. Keep things near a window to test light as you go. That small detail makes the final piece feel more intentional and helps kids see how their choices change the result.
This project also stays calm. There are small tasks kids can do and small adult tasks to guide. That balance keeps everyone involved without pushing anyone to feel rushed.
Discover Easy Kids Activities
Looking for simple, fun ideas for kids? Explore our Low Prep Kids Activities and find quick projects that spark creativity without long prep time.
A Quick Look Before You Begin
This suncatcher takes under an hour of active time, plus a few hours to fully cure depending on temperature. The setup stays tidy if you line a tray and keep materials confined.
Expect light spills and sticky fingers if little ones join. That is normal. A small mess cleans up easily with warm, soapy water while the glue is still wet.
You will want a warm, still spot for drying. If air moves around the glue too much, dust can settle. A window ledge works, but avoid places with drafts.
Adult help is most useful for pouring glue and for unmolding. Older kids can handle many of the steps on their own with gentle guidance.
Materials You’ll Need
Clear craft glue (thick, clear-drying glue)
common household craft glue that dries clear and stays thick
Disposable shallow dishes or silicone molds
disposable dishes make cleanup easy; silicone molds work great and release well
Stir sticks or wooden skewers
for moving glue and nudging pieces gently into place
Food coloring or liquid watercolors (optional)
a tiny drop adds a soft tint; liquid watercolors blend well
Small pressed flowers, sequins, or translucent beads (optional)
pressed flowers and translucent beads catch light best
Clear packing tape or wax paper
clear tape flattens the surface; wax paper protects your work surface
A sheet of cardboard or a protected tray
keeps the table safe and makes carrying pieces easier
Gloves (optional)
good if you prefer not to get glue on your hands
A pipette or small squeeze bottle (optional)
helps place tiny drops of color without a mess
A small brush or toothpick
for nudging items and popping small bubbles
STEP-BY-STEP DIRECTIONS

- Prepare your surface and molds by lining a tray or table with wax paper.
Keep everything near a window for testing light.
Wear gloves if desired. - Pour a small pool of clear glue into a shallow mold, allowing the glue to settle without ripples.
Notice the glossy surface and let it calm for a moment.
Aim for an even pool that will set flat. - Add a drop or two of liquid watercolor if you want color, using a pipette for small, delicate drops.
Let the color spread slowly without stirring aggressively.
Less is more when you want soft, glasslike color. - Place pressed flowers, beads, or glitter onto the glue gently and nudge them into place with a toothpick.
Work from the middle outward to avoid moving other pieces.
Keep elements shallow so they sit near the glue surface. - Remove air bubbles using a toothpick or by gentle tapping.
Tap the mold once or twice on the tray to coax bubbles up.
Small bubbles can be charming and do not harm the piece. - If desired, cover with clear packing tape for a flat finish, laying it gently to avoid new air pockets.
Lay the tape slowly from one edge to the other to push air out.
Press gently with your fingers to secure the tape. - Let the piece cure in a warm, still spot for several hours, avoiding movement.
Check after a few hours but resist moving it until it feels firm.
Cool or drafty spots slow the curing process. - Unmold carefully, peeling from the edge and lifting slowly, allowing extra drying time if it resists.
If the piece bends, give it more time to harden before trying again.
Use slow, steady motion to avoid snapping delicate edges. - Once finished, hang the suncatcher in a window to enjoy its changing beauty.
Watch how light brings out tiny details and colors.
Rotate placements to see different effects through the day.
The Simple Science or Skills at Work

This activity quietly teaches a few useful things while it entertains. The glue levels because of surface tension. That same property helps small weights, like a pressed petal, float and stay near the surface without sinking.
Kids learn cause and effect while watching color spread in the glue. A single drop of liquid watercolor moves slowly, and they can see how much a little color changes the whole piece. That is a gentle lesson in how small decisions make visible differences.
Fine motor skills improve when children use a toothpick or a pipette to place tiny items. They practice steady hands and small, careful movements. Those same motions help with handwriting and other crafts later.
The project also builds patience. The waiting time for curing is short but important. Children get a real sense that making includes both doing and waiting. That balance feels satisfying and helpful.
If you mention the words glue drying or curing, keep it simple. The glue changes from wet to firm as the water evaporates. Warm air helps, drafts slow things, and touching early can leave prints or fingerprints.
Troubleshooting Common Issues
If the glue looks cloudy after drying, it probably trapped dust or was poured in a draft.
Try a new pour in a quieter spot and cover lightly with a clean container while it cures.
Small dust flecks often stay, but choosing a still area helps a lot.
If pieces sink or tilt, they might be too heavy or placed too deep.
Nudge items gently so they sit close to the surface, or use smaller pieces next time.
Thin pressed flowers and translucent beads tend to stay put best.
If bubbles collect after you place items, tap lightly on the tray and use a toothpick to coax bubbles out.
Work slowly when placing items to avoid trapping pockets of air.
Some tiny bubbles look pretty in the sun, so you can decide if they bother you.
If unmolding rips the edge, the piece may not be fully cured or the mold needs more release.
Wait longer or try a flexible silicone mold that peels away easily.
If it still sticks, trim gently with scissors once it firms up.
If the surface feels tacky after hours, give it more time in a warm spot.
Avoid hot spots that could warp the piece.
If you need it sooner, a sunlit window will speed curing without harsh heat.
Easy Variations to Try
Try layering thin designs by pouring a small amount, letting it firm slightly, then adding more glue and elements.
This creates depth and lets you fix placement in stages.
It takes more time but looks special in the window.
Make simple shapes like circles, hearts, or stars with silicone molds.
Use translucent beads or tiny sequins for a stained glass look.
Keep elements flat so they sit neatly in the glue.
Use one consistent color across several pieces for a themed set.
A soft wash of blue or pink looks calm and cohesive when hung together.
These sets make sweet handmade gifts or a small mobile.
Adapt the project for older kids by letting them design a series with different placements of the same pressed flower.
They practice planning and see how small shifts change the final look.
This works well for quiet school projects or rainy day challenges.
Try a seasonally themed piece: tiny leaf bits for fall, translucent stars for winter, pastel washes for spring, or small shells for summer.
Use the same steps and switch materials for a fresh result.
These small swaps keep the project interesting through the year.
Storing or Reusing This Project
If you want to keep the suncatcher for a long time, avoid hanging it in direct, intense sun all day.
That strong light can fade delicate pressed flowers over months.
Rotate it to a different window occasionally to spread the exposure.
Store extra items like unused beads, small flowers, or leftover glue in a labeled box for future sessions.
Clear containers help you see what you have without spilling.
Keep the glue capped tightly and in a cool place to extend its life.
When you have scrap pieces, turn them into small gift tags by punching a hole and tying with twine.
They add a personal touch and make good use of leftovers.
If a piece gets dusty, wipe it gently with a soft, dry cloth.
To minimize waste, use disposable dishes for the pour and peel them away for easy discard.
Silicone molds last longer and need only a quick wash.
Reuse packing tape by keeping short strips on a card for future flattening tasks.
FAQs About The Quiet Joy of Making Clear Glue Suncatcher
Will this get very messy if my child helps? I worry about glue all over the table.
It can stay pretty tidy if you line a tray with wax paper and give each child a small work area.
Sticky fingers happen, but the glue cleans up with warm, soapy water while it is wet, and a little sticky residue usually comes off with a damp cloth later.
Is this safe for young kids to do on their own?
This project works well for several ages, but I recommend adult help for pouring and unmolding.
Older kids can handle placement and bubbles with supervision. Gloves are optional if you prefer not to touch glue.
What if I do not have pressed flowers? Can I use other items?
Yes. Translucent beads, small sequins, or thin ribbons work nicely and still catch light.
Avoid very heavy or thick items because they may sink or make an uneven surface.
How long will it take to dry enough to hang?
You can expect the suncatcher to firm up in a few hours if it dries in a warm, still spot.
For best results, let it cure longer until it feels firm and not tacky. If it bends when you try to lift it, give it more time.
You say covering with clear packing tape gives a flatter finish. Is that necessary?
It is not necessary but it helps if you want a very smooth top surface with no texture.
Lay the tape carefully to avoid new air pockets. If you like the glossy, slightly curved look of the glue, leave it uncovered.
A Final Helpful Note
This project rewards small, calm moments more than perfection. If something does not look exactly like you imagined, it still catches light and gives a gentle pleasure when you hang it in a window. Keep your expectations relaxed and focus on the act of making together. The materials are simple, the steps are forgiving, and the results are quietly satisfying. Trust the glue, take your time with placement, and enjoy the slow change as light moves through your piece.
Conclusion
If you enjoy projects that mix quiet making with learning, you might also appreciate other creative ideas that spark play and discovery. For inspiration on crafts that pair fun with learning, see this collection of clever crafts that spark learning with kids. If you are working with older adults or want ideas for inclusive crafts, this guide to DIY crafts for seniors and dementia offers thoughtful, adaptable projects. Enjoy the making, and remember small, simple steps often lead to the most peaceful results.
PrintClear Glue Suncatcher

A fun, hands-on project creating beautiful suncatchers using clear glue and pressed flowers, perfect for kids and families.
- Prep Time: 10 minutes
- Cook Time: 0 minutes
- Total Time: 240 minutes
- Yield: 1 suncatcher
- Category: Craft
- Method: Crafting
- Cuisine: N/A
- Diet: N/A
Ingredients
- Clear craft glue (thick, clear-drying glue)
- Disposable shallow dishes or silicone molds
- Stir sticks or wooden skewers
- Food coloring or liquid watercolors (optional)
- Small pressed flowers, sequins, or translucent beads (optional)
- Clear packing tape or wax paper
- A sheet of cardboard or a protected tray
- Gloves (optional)
- A pipette or small squeeze bottle (optional)
- A small brush or toothpick
Instructions
- Prepare your surface and molds by lining a tray or table with wax paper.
- Keep everything near a window for testing light.
- Pour a small pool of clear glue into a shallow mold, allowing the glue to settle without ripples.
- Add a drop or two of liquid watercolor if desired.
- Gently place pressed flowers, beads, or glitter onto the glue.
- Remove air bubbles using a toothpick or by gentle tapping.
- If desired, cover with clear packing tape for a flat finish.
- Let the piece cure in a warm, still spot for several hours.
- Unmold carefully by peeling from the edge.
- Once finished, hang the suncatcher in a window to enjoy its beauty.
Notes
Encourage kids to experiment with color and placement for interesting effects. Utilize warm soapy water to clean up any messy spills while the glue is still wet.
Nutrition
- Serving Size: N/A
- Calories: 0
- Sugar: 0g
- Sodium: 0mg
- Fat: 0g
- Saturated Fat: 0g
- Unsaturated Fat: 0g
- Trans Fat: 0g
- Carbohydrates: 0g
- Fiber: 0g
- Protein: 0g
- Cholesterol: 0mg