

A busy afternoon, a clear table, and two kids asking to make something right now is a familiar scene at my house. Birdseed Ornaments step in as the perfect fix: they use simple pantry items, take little hands through an easy, satisfying process, and give you something real to hang outside and watch birds enjoy. Set up takes moments, the mixing is pleasantly messy, and the drying time gives you a reason to slow down and sip tea while the ornaments firm up. If you want a low-prep, make-it-today activity that ends in a cheerful, wildlife-friendly result, these ornaments fit the bill.
Why You’ll Love Making Birdseed Ornaments

This project works because it keeps everything simple and practical. You do not need fancy tools or special skill. A bowl, binder, seeds, and cookie cutters give you shapes that look good and hold together. That low-prep setup matters when afternoons are short or you need a quick activity to keep kids busy.
The method is approachable because the binder (gelatin or agar) does the heavy lifting. It melts into warm water and, when mixed into the seeds, makes a tacky mix that presses into molds. You can see and feel when the mixture is ready: it holds shape when pressed, it looks glossy before drying, and it firms up as it cools. Those sensory cues make it easy for kids to help and for adults to check the result quickly.
This idea is reliable for real-life schedules. Hands-on time is short. After the brief mixing and pressing, you walk away and let the ornaments dry for 24 to 48 hours. That drying window works well with nap time, errands, or a movie. The outcome is predictable: compact ornaments that birds will peck at and that look cheerful on a branch or hook.
The materials are household-friendly and budget-wise. You can use plain birdseed or a mixed blend you already have. The binder options give flexibility for families who prefer vegetarian choices. Extras like dried cranberries, raisins, or small amounts of herb petals add color and scent without complicating the method. Overall, the project feels doable on a weekday and fun on a weekend.
A Quick Look Before You Begin
This activity takes about 10 to 20 minutes of supervised prep and pressing. Plan for 24 to 48 hours of drying time after that. The mess level is low to moderate: seeds will spill occasionally, and a sticky bowl needs washing, but most cleanup is straightforward with warm, soapy water.
Set aside a small tray or cookie sheet and lay down parchment paper or a silicone mat. Use cookie cutters for tidy shapes or shallow molds if you prefer free-form discs. Adults will want to handle the warm binder step, while kids can measure seeds, stir, and press the mixture into molds.
You will use only a few items: seeds, a binder, warm water, and string for hanging. Optional extras add color or scent, but they are not required. The biggest timing factor is drying: find a warm, airy spot and be patient. That patience pays off with ornaments that hold together and attract birds.
Materials You’ll Need
Birdseed mix (plain or mixed) – common household item; whatever you already feed birds.
Plain gelatin or vegetarian binder (like agar) – gelatin is easy; agar works for vegetarian households.
Warm water – tap water warmed, not boiling, for dissolving the binder.
Dried cranberries – natural bird food and colorful; use unsweetened if possible.
Raisins – another sweet treat for birds; check size for small birds.
Chopped unsalted nuts (optional) – optional; use small amounts and unsalted to be safe.
Dried herbs (like rosemary or marigold petals, optional) – optional for scent and color; keep petals coarse so birds can peck.
Non-toxic glitter or food coloring (optional) – optional for decoration; choose non-toxic products only.
Twine, ribbon, or natural jute for hanging – common household cord; avoid anything that could tangle birds.
Parchment paper or silicone mat – lining for easy cleanup and nonstick drying.
Small baking tray – holds your shapes and makes carrying them easy.
Create with the Seasons
Celebrate every time of year with hands-on ideas. Explore our Seasonal DIY Projects and enjoy creative crafts perfect for holidays and seasonal moments.
Step-by-Step Directions

- Prepare your workspace with parchment paper and a tray, and lay out cookie cutters or molds.
Set the tray on a stable surface and arrange cutters on the parchment so they do not slide.
This makes moving them in and out simple and keeps your table clean. - Measure the birdseed into a bowl, stir gently and enjoy the sensory experience.
Let kids feel the seeds and notice the different sizes and colors.
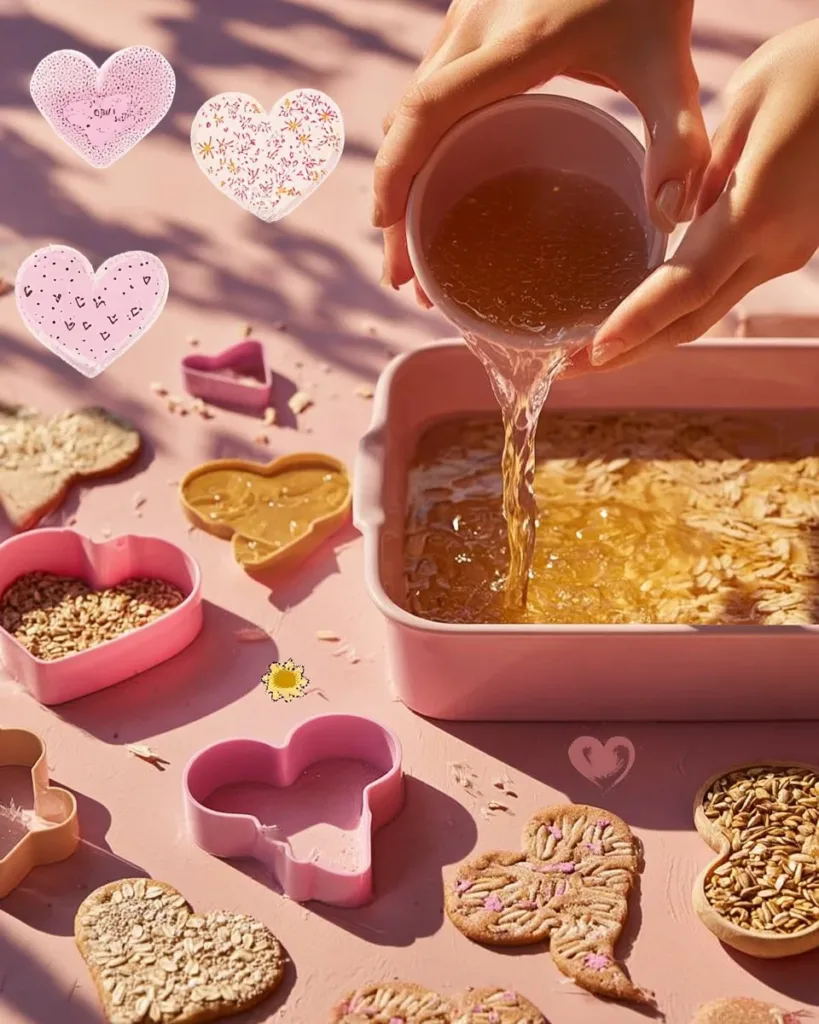
Stirring calms fidgety hands and shows how seeds move together. - Dissolve the binder in warm water according to package directions.
Heat water until warm, then add gelatin or agar and stir until fully dissolved.
An adult should handle this step to avoid hot spills. - Pour the binder into the seed bowl gradually, mixing slowly until it holds together.
Add a little liquid at a time and fold the seeds so everything gets coated.
Stop when the mix feels tacky and clumps when pressed in your hand. - Spoon the mixture into cookie cutters or molds and press down firmly to compact.
Fill each mold a bit over the top and press with the back of a spoon or your palm.
Compact ornaments hold together better once dry, so press firmly here. - Use a skewer to make a small hole for hanging before the mixture dries.
Push the skewer straight through near the top so the hole stays open as it dries.
Keep the hole big enough for your twine or ribbon but not too large to weaken the shape. - Leave the ornaments to dry on a tray in a warm, airy spot for 24 to 48 hours.
Place the tray somewhere out of direct wind and rain but with good airflow.
Flip only if edges need drying; usually leaving them undisturbed works best. - Once dry, carefully remove from the molds and thread twine through the holes.
Gently loosen edges with a butter knife if needed, then ease shapes out of cutters.
Thread twine, tie a secure knot, and trim excess for neat hanging loops. - Hang your ornaments in a safe spot for birds and enjoy observing them.
Choose a branch away from predators and not too close to windows to avoid collisions.
Watch quietly and note who visits; this is part of the joy.
The Learning Behind This DIY

Making birdseed ornaments brings simple science and skill practice together. Kids see cause and effect when a loose heap of seeds turns into a firm shape. The binder acts like glue: the warm liquid coats seeds and, as it cools and dries, it holds them together. Explaining that in plain terms helps children connect what they did with a visible result.
Fine motor skills get a workout here. Measuring seeds, stirring, pressing into molds, and threading twine all help steady small hands and improve coordination. Those small actions build patience as kids learn to press just hard enough or make a hole that is not too big.
There is also sensory learning. Seeds vary in texture, weight, and sound. The warm binder feels different from dry seeds. Drying time teaches patience and the value of waiting for a good result. When birds come to feed, children can tie this back to what they made and how their work supports wildlife, which encourages empathy and curiosity.
Keep explanations simple when you talk about the science. Say that the binder is like sticky water that turns firm when it cools, or that drying removes the wetness so the seeds stay together. Those short descriptions match kids’ attention spans and help them remember what to do next time.
Troubleshooting Common Issues
If the mixture looks too dry and falls apart when pressed, you probably did not add enough binder. Warm a small amount of water, dissolve a little more gelatin or agar, and mix in a tablespoon at a time until the mix clumps under pressure. Avoid adding too much at once. You want tacky, not soupy.
If the mix feels too wet and oozes out of the molds, you added too much liquid. Scoop off excess with a spoon and press again. If many shapes already runny, let the mixture rest 10 minutes so the binder starts to set, then press again. For future batches, add binder more slowly and test a small pinch before filling molds.
Ornaments that crack during drying often dried too fast or were pressed unevenly. Thin spots dry quicker and may split. To fix a cracked ornament, gently press seeds back into the crack with a dab of warm, dissolved binder and let it dry again. Avoid direct sunlight or high heat during drying; a steady, warm room is best.
If seeds fall out after drying, the mix probably did not compact enough. For a remake, press more firmly into molds and use a small cup bottom or tamper to get extra compacting. Sometimes a second thin coat of dissolved binder brushed on the surface helps seal loose grains. Keep this light so birds can still peck at the ornament.
Holes that close up can happen if you wait too long to poke them or if the binder is very liquid. Make the hanging hole before the mix begins to set and check it again after a few hours to keep it open. If it closes, re-poke it with a skewer and widen slightly, then let finish drying.
If you worry about mold during drying or after hanging, use dryer conditions and avoid overly humid spots. If an ornament smells off, discard it and make a fresh one. Use clean, dry seeds and store finished ornaments in a dry place before hanging if humidity is high.
Safety hiccups include small hands near warm water, so always have an adult mix the hot binder. If you include nuts, keep in mind small children or friends with allergies; mark ornaments that contain nuts. For birds, use unsalted nuts and avoid sticky sweet coatings that could harm wildlife.
Easy Variations to Try
- Seasonal Color Accents
Mix a few dried cranberries or marigold petals into the surface layer for pops of color. Press these gently so they show without covering the seeds. Kids enjoy arranging patterns like stripes or dots. - Shape Mixing for Smaller Hands
Use smaller cookie cutters or bottle caps to make mini ornaments that little fingers can lift. These produce quicker drying times and make a neat garland when strung together. - Scented Herb Layer
Add a thin sprinkle of dried rosemary or marigold petals to the top of the mold for a subtle scent. Keep herbs coarse and in small amounts so birds can still eat safely. - Vegetarian Option
If you prefer not to use gelatin, use agar dissolved according to package directions. Agar sets firmer and needs a slightly different dissolving technique, so have an adult do that step and watch the mix for setting cues. - Glitter or Color for Display
If you like a festive look, use a tiny pinch of non-toxic glitter or a drop of food coloring mixed into the binder before combining with seeds. Use sparingly and only products labeled non-toxic to avoid hazards to birds.
Treat these as gentle ideas, not strict rules. Try one or combine two depending on how much help kids need and what you already have at home.
Storing or Reusing This Project
If you do not hang everything immediately, store finished ornaments in a cool, dry place on a tray or shelf. Avoid stacking them while they are still a bit soft. For longer storage, keep them wrapped in breathable paper rather than plastic so moisture cannot collect.
Leftover dry seeds and small crumb pieces can go back into bird feeders or into the garden as birds do not mind mixed seeds. If you used nuts or sticky bits, separate them if you can; otherwise, use the leftovers in a compost pile if you compost.
Clean up is easy: wipe parchment paper or dispose of it, sweep up stray seeds, and wash bowls and spoons in warm, soapy water. Gelatin or agar residue comes off with warm water; soak if needed. Keep a small handheld vacuum or broom nearby to speed seed cleanup.
If an ornament becomes very weathered or moldy after hanging, remove it and discard responsibly. Make a fresh batch and hang in a slightly different spot to avoid places where rain pools or humidity stays high.
Reuse ideas include using sturdy ornaments as seasonal decorations indoors if you do not mind a natural, rustic look. You can also break older ornaments into pieces to mix into new batches if seeds are still dry and clean. That reduces waste and stretches supplies.
FAQs About Birdseed Ornaments
Will this make a big mess?
I have limited cleanup time. You will get a little spill of seeds and a sticky bowl, but nothing dramatic. Lining your tray with parchment keeps seeds contained and makes moving shapes simple. Have a damp cloth handy and sweep stray seeds into a pan. Washing the bowl right after you finish prevents glue from hardening on utensils, and the whole clean up usually takes less than ten minutes.
Is this safe for toddlers and young kids?
This activity works well for preschoolers with close supervision. Young children can measure seeds, stir, and press the mix. An adult should handle the warm binder and any cutting tools. Watch for small pieces that could be a choking risk for very young children and skip nuts if anyone has allergies. Keep the hanging string and small bits out of reach until you know each child can handle them safely.
Can I skip gelatin and still make ornaments?
Yes. Agar works as a vegetarian alternative and sets firm once dissolved in warm water. It needs adult handling because it requires proper dissolving. If you use agar, follow package instructions for dissolving and test the mix so it binds well. Either binder will work as long as you get the right tacky consistency.
How realistic are the results on the first try?
You will likely get good-looking ornaments on the first try, but they may need practice for perfect edges or consistently sized holes. Expect small cracks or loose grains occasionally; those are easy to fix with a touch more binder or a gentle press. The first batch often teaches you how firmly to press and how much binder to add.
How long do the ornaments last outside?
Under dry conditions, they can last several weeks or longer, depending on weather and how much birds peck at them. Rain and high humidity shorten their life. If you want them to last longer, hang in a sheltered spot or bring them inside during storms. If an ornament becomes soft or moldy, replace it.
A Final Helpful Note
Take a relaxed approach to the process. The goal is a pleasant time making something simple and watching birds enjoy it later. Expect small imperfections; they do not ruin the fun. If kids get impatient, make a few mini ornaments that dry faster. Celebrate each little success, and use this as a recurring activity through the season. You will find a rhythm: quick prep, quiet waiting, and the small delight of birds visiting the things you made together.
Conclusion
If you want another take on the basic method or a different set of ideas, this clear guide from Birdseed Ornaments – Fountain Avenue Kitchen is a handy reference. For more step-by-step photos and tips, see the tutorial at How to Make Birdseed Ornaments – One Little Project.
PrintBirdseed Ornaments

A fun and simple DIY project to make birdseed ornaments using pantry items, perfect for kids and attracting birds!
- Prep Time: 20 minutes
- Cook Time: 0 minutes
- Total Time: 2880 minutes
- Yield: 10 ornaments
- Category: DIY
- Method: DIY
- Cuisine: N/A
- Diet: Vegetarian
Ingredients
- Birdseed mix (plain or mixed)
- Plain gelatin or vegetarian binder (like agar)
- Warm water
- Dried cranberries (optional)
- Raisins (optional)
- Chopped unsalted nuts (optional)
- Dried herbs (like rosemary or marigold petals, optional)
- Non-toxic glitter or food coloring (optional)
- Twine, ribbon, or natural jute for hanging
- Parchment paper or silicone mat
- Small baking tray
Instructions
- Prepare your workspace with parchment paper and a tray, and lay out cookie cutters or molds.
- Measure the birdseed into a bowl, stir gently and enjoy the sensory experience.
- Dissolve the binder in warm water according to package directions.
- Pour the binder into the seed bowl gradually, mixing slowly until it holds together.
- Spoon the mixture into cookie cutters or molds and press down firmly to compact.
- Use a skewer to make a small hole for hanging before the mixture dries.
- Leave the ornaments to dry on a tray in a warm, airy spot for 24 to 48 hours.
- Once dry, carefully remove from the molds and thread twine through the holes.
- Hang your ornaments in a safe spot for birds and enjoy observing them.
Notes
Keep explanations and instructions simple for kids. Expect small messes, but cleanup is easy with warm soapy water. Be patient while ornaments dry.
Nutrition
- Serving Size: 1 ornament
- Calories: 50
- Sugar: 5g
- Sodium: 0mg
- Fat: 1g
- Saturated Fat: 0g
- Unsaturated Fat: 1g
- Trans Fat: 0g
- Carbohydrates: 10g
- Fiber: 1g
- Protein: 2g
- Cholesterol: 0mg