

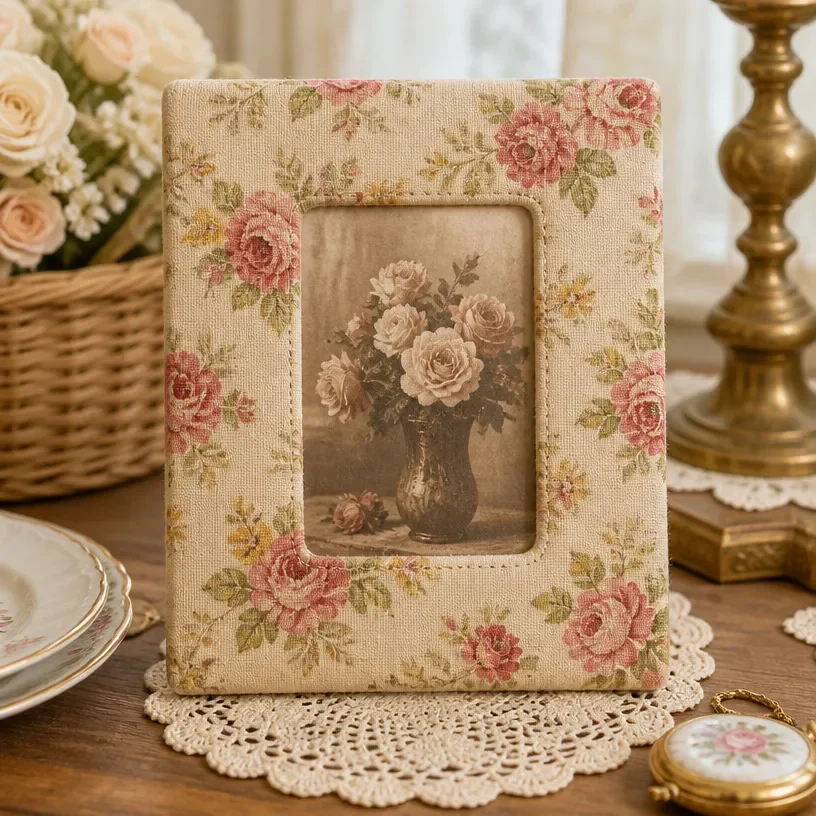
Creating a Vintage-Inspired Fabric-Wrapped Photo Frame for Retro Decor can be a delightful activity, especially when you’re looking for a fun and engaging project on a busy afternoon. Picture a moment when the kids are eager to make something new, and you need a quick and easy craft idea. This project not only satisfies that creative itch but also produces a charming piece of decor that can bring a sense of nostalgia into your home. With just a few simple materials and steps, you can create a lovely frame that displays cherished memories beautifully. You may also find Baking Soda Crystals Transform Into Glassy Art useful.
Why You’ll Love Making Vintage-Inspired Fabric-Wrapped Photo Frame for Retro Decor
You may also find Baking Soda Rainbow Crystal Forest useful.
This project stands out for its simplicity and low-prep nature. You don’t need fancy tools or extensive supplies; most of what you need is likely already in your home. The fabric-wrapped photo frame is both approachable and reliable, making it a perfect choice for busy families. Rather than worrying about precise measurements or complicated techniques, this DIY allows for creativity and expression. You can easily adapt it to suit your style, making it work with any decor while creating a special keepsake. You may also find Big Rainbow Pinwheel Garden Stake Outdoor Yard Decor useful.
A Quick Look Before You Begin
Before diving into this enjoyable craft, it’s good to have an overview of what to expect. The entire process can be completed in under an hour, and cleanup is minimal, making it perfect for a quick afternoon project. Depending on the age and skill level of your kids, adult supervision may be beneficial, particularly during the cutting phase. Gather everyone around the table, lay out your materials, and create a warm and inviting atmosphere for your crafting session. You may also find Build Heart Stem Challenge Affordable useful.
Materials You’ll Need
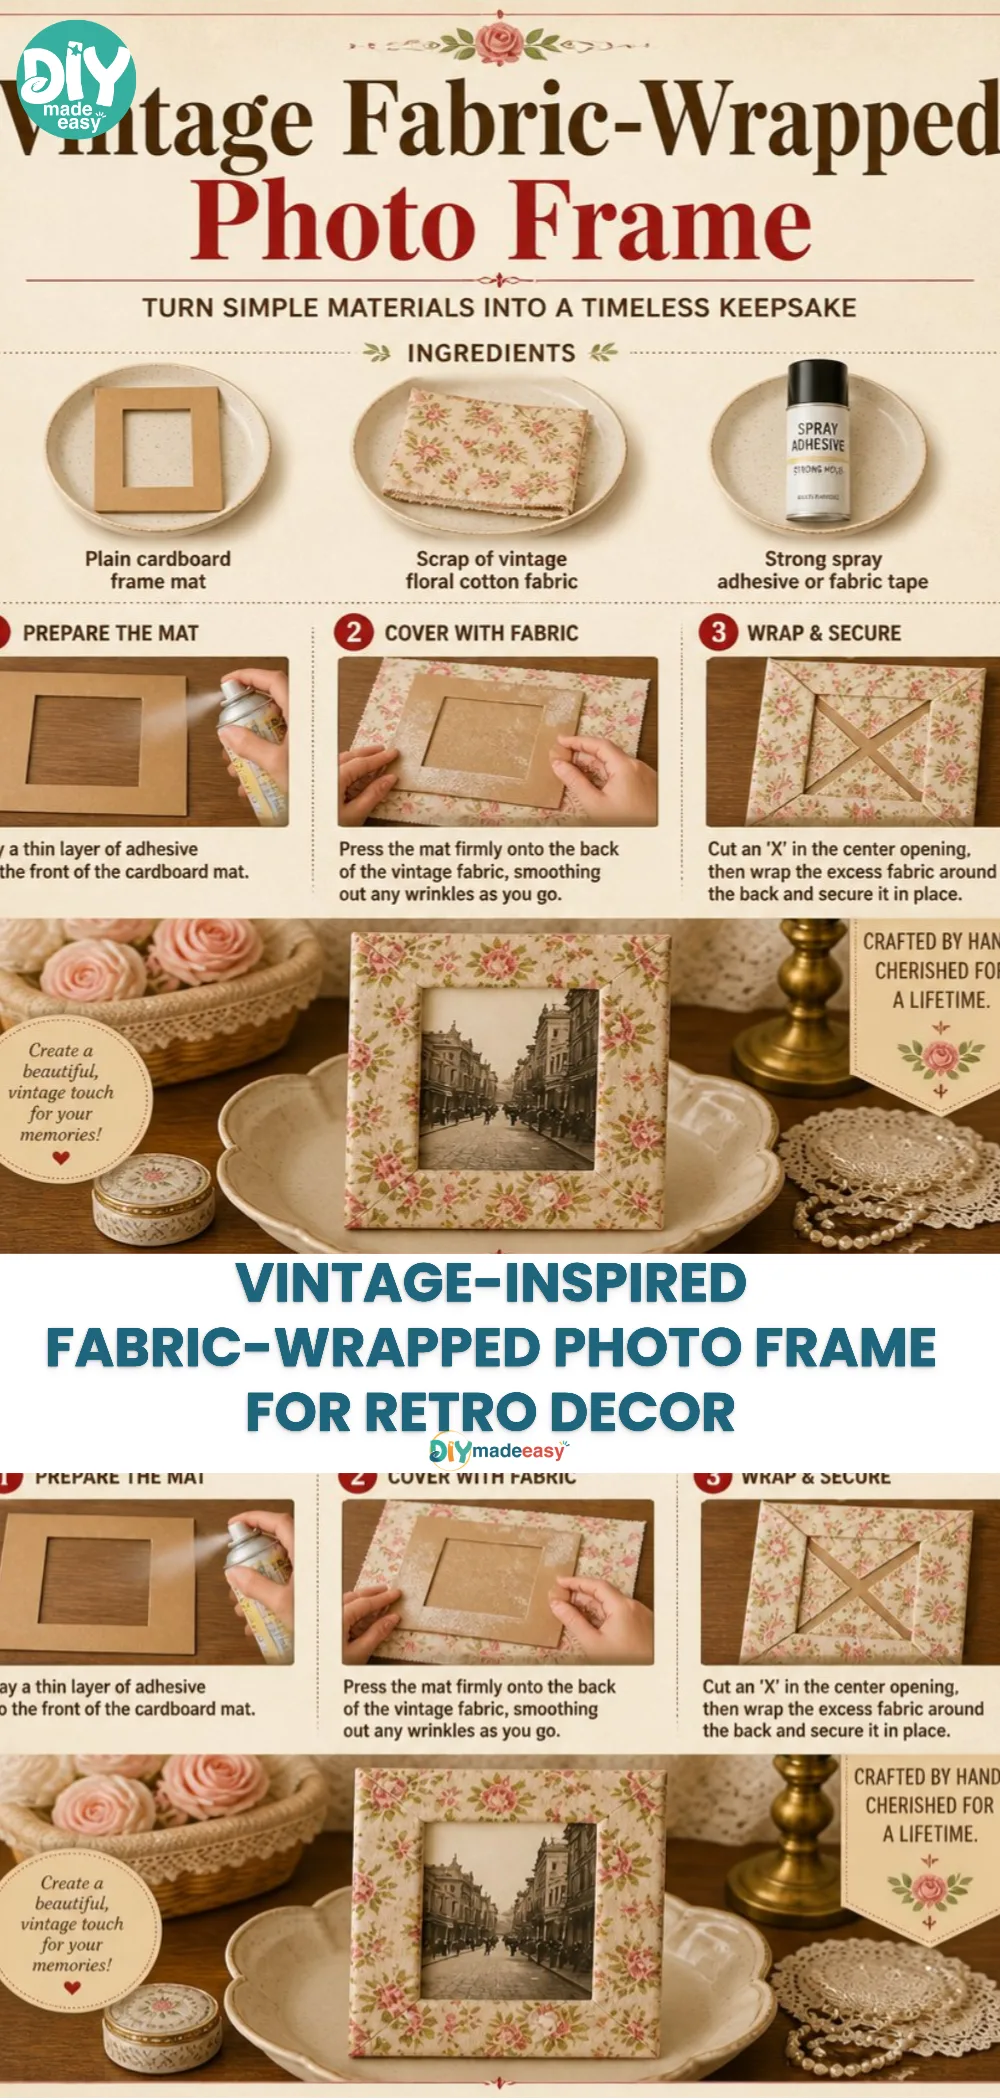
To create your Vintage-Inspired Fabric-Wrapped Photo Frame, you will need the following materials:
- A plain wooden or cardboard photo frame (common household item)
- Fabric scraps (you can use old clothes or remnants)
- Craft glue or a hot glue gun (adult supervision recommended)
- Scissors (use caution)
- Optional: embellishments like ribbons or buttons for extra flair
This list provides everything you’ll need to get started. You’ll find that most of the materials are budget-friendly and easily accessible, making this project a great choice for a range of DIY enthusiasts.
Step-by-Step Directions
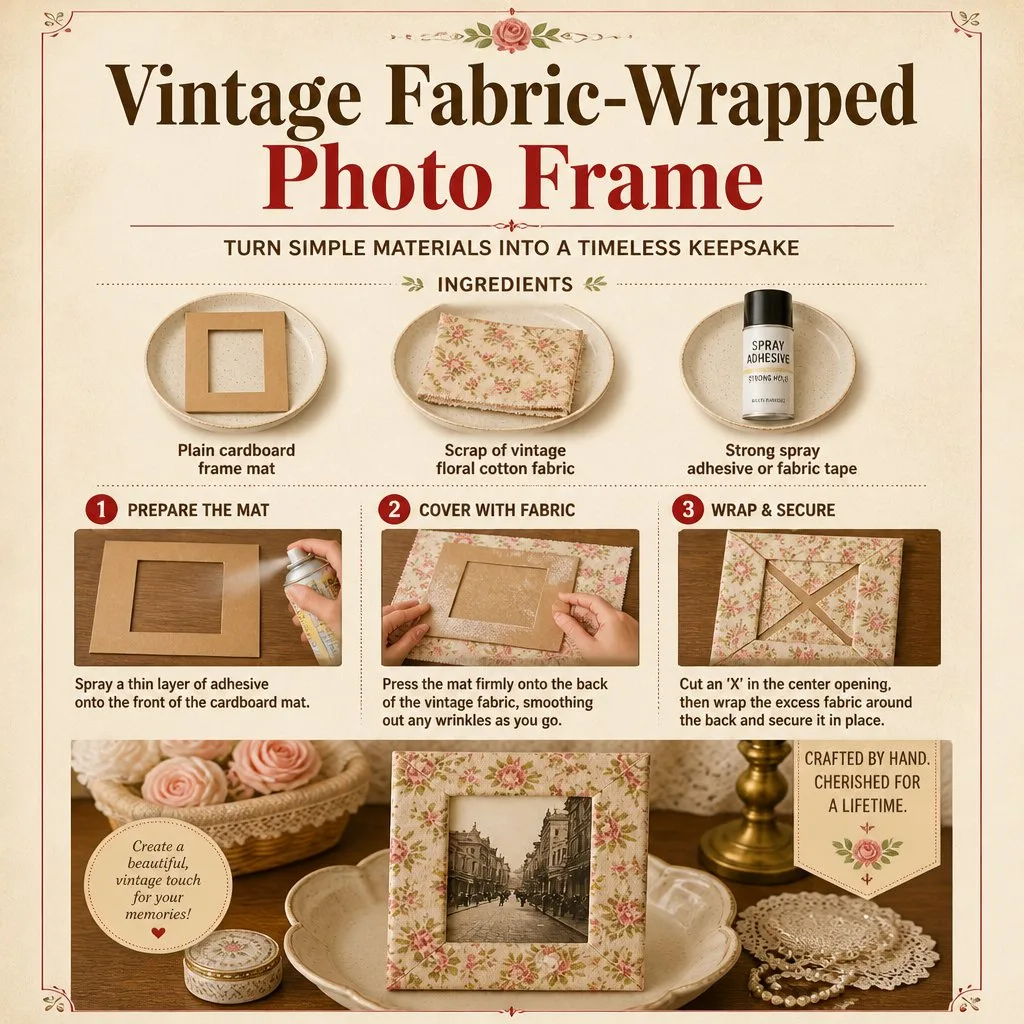
Begin by preparing your frame. If using a wooden frame, make sure it’s clean and dry. For cardboard frames, ensure there are no rough edges that could cause injury.
Cut your fabric scraps into strips. Aim for about 1 to 2 inches wide, but feel free to experiment with widths for a varied look.
Apply glue to the edge of the frame. Start at one corner and press the fabric strip into the glue, wrapping it around the edge of the frame.
Continue wrapping the fabric around the frame, adding glue as needed. Overlap the fabric slightly for full coverage and a textured appearance.
Once the frame is fully wrapped, secure the end of the fabric with a bit more glue. Allow it to dry completely.
If using embellishments, feel free to add them now. Ribbons can be tied around the frame for dimension, while buttons can be glued at the corners for a personalized touch.
Insert your favorite photo into the frame and find the perfect spot to display your creation.
Enjoy the satisfaction of your handiwork. Not only do you have a beautiful new decor piece, but you’ve also shared a meaningful activity with your kids.
The Learning Behind This DIY
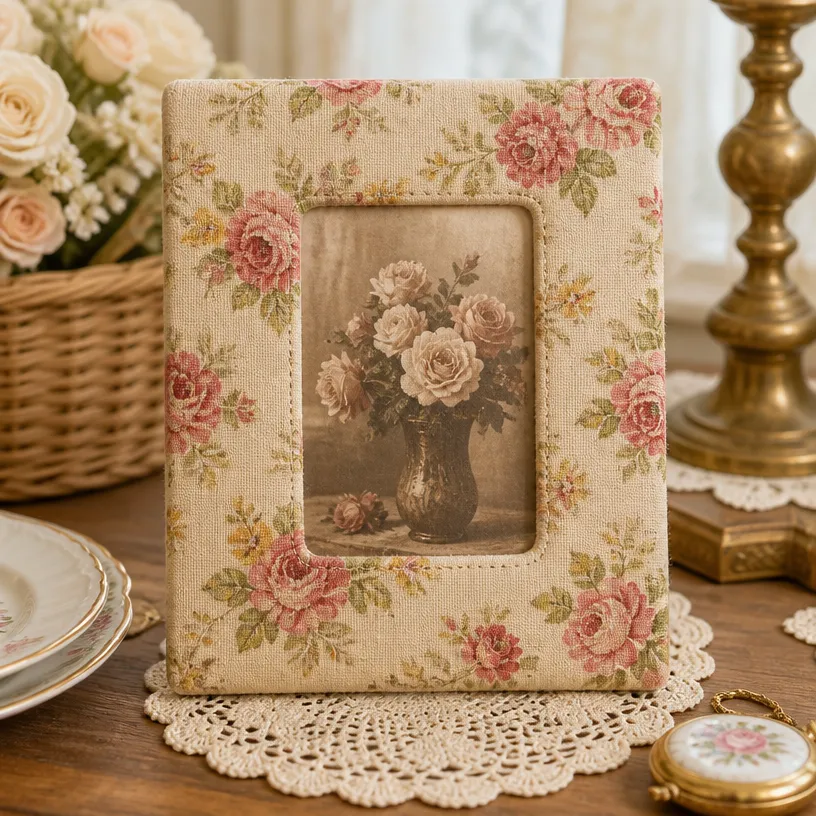
While crafting the Vintage-Inspired Fabric-Wrapped Photo Frame, kids practice valuable skills without even realizing it. This activity encourages creativity and fine motor skills through cutting and gluing. Additionally, they learn about design and color coordination as they choose fabrics and embellishments. It promotes coordination as they manipulate the strips around the frame and stay aware of their positioning. All these skills contribute to their overall development and enhance critical-thinking abilities as they decide on the layout of their design.
Troubleshooting Common Issues
If you find that things aren’t going as smoothly as planned, don’t worry; it happens to everyone. Common hiccups may include fabric slipping or not sticking properly. If situations like these arise, simply apply more glue and hold the fabric in place for a few seconds. For messy glue residue, a damp cloth can help clean up without damaging your project. Remember, the goal is to enjoy the process it’s okay if everything doesn’t look perfect.
Easy Variations to Try
You can easily add your twist to this project. Here are some ideas to consider:
- Instead of using plain fabric, try using patterned or metallic materials to add a modern flair.
- Incorporate seasonal themes with fabric that matches holidays or changes in the seasons.
- Paint the frame with a fun color before wrapping it in fabric for an extra pop.
- Allow older kids to design their frame by incorporating their favorite quotes or personal artwork into the layout.
Storing or Reusing This Project
After completing this project, think about how you can store or reuse the frame. If you wish to change the picture often, consider using double-sided tape instead of glue to secure the fabric, allowing for easy removal. When not in use, keep the frame in a safe, dry place to prevent damage. If the materials are still in good condition after use, consider using them for future craft projects.
FAQs About Vintage-Inspired Fabric-Wrapped Photo Frame for Retro Decor
One common concern parents have is about mess and cleanup. Rest assured, while there may be some minor spills, this craft is relatively tidy, and keeping a damp cloth handy can help manage small accidents.
Another question often arises regarding appropriate ages for this activity. Children aged six and older typically enjoy this project, especially with guidance on using scissors and glue.
If you’re wondering about ingredient substitutions, consider using different textures of fabric for unique effects. You can even experiment with recycled materials to make it an eco-friendly project.
Finally, many parents ask about the realistic results they can expect from their kids. Keep in mind that each creation will be unique and showcase individuality, which is part of the charm.
Conclusion
Creating a Vintage-Inspired Fabric-Wrapped Photo Frame for Retro Decor is an excellent way to spend quality time while fostering creativity in your children. As you embark on this project, remember it’s about enjoying the process, making memories, and appreciating the beauty of handmade items. If you’re interested in exploring more decorative options, you might consider checking out a blue fabric frame on Etsy or the Vicenpal 3 Pcs Scalloped Picture Frame on Amazon. Enjoy the process and have fun crafting together!
PrintVintage-Inspired Fabric-Wrapped Photo Frame for Retro Decor

Create a charming vintage-inspired fabric-wrapped photo frame using simple materials for a delightful craft project.
- Prep Time: 10 minutes
- Cook Time: 30 minutes
- Total Time: 40 minutes
- Yield: 1 photo frame
- Category: Craft
- Method: Crafting
- Cuisine: N/A
- Diet: N/A
Ingredients
- A plain wooden or cardboard photo frame
- Fabric scraps (old clothes or remnants)
- Craft glue or a hot glue gun
- Scissors
- Optional: embellishments like ribbons or buttons
Instructions
- Prepare your frame. Ensure wooden frames are clean and dry; for cardboard, make sure there are no rough edges.
- Cut your fabric scraps into strips about 1 to 2 inches wide.
- Apply glue to the edge of the frame, starting at one corner, and press the fabric strip into the glue.
- Continue wrapping the fabric around the frame, adding glue as needed and overlapping slightly for full coverage.
- Secure the end of the fabric with more glue and allow it to dry completely.
- Add embellishments if desired, like ribbons or buttons.
- Insert your favorite photo and display your creation.
- Enjoy your handiwork and the memories you’ve created.
Notes
Keep a damp cloth handy for minor spills. Adult supervision is recommended for younger children, especially during cutting.
Nutrition
- Serving Size: 1 frame
- Calories: 0
- Sugar: 0g
- Sodium: 0mg
- Fat: 0g
- Saturated Fat: 0g
- Unsaturated Fat: 0g
- Trans Fat: 0g
- Carbohydrates: 0g
- Fiber: 0g
- Protein: 0g
- Cholesterol: 0mg