

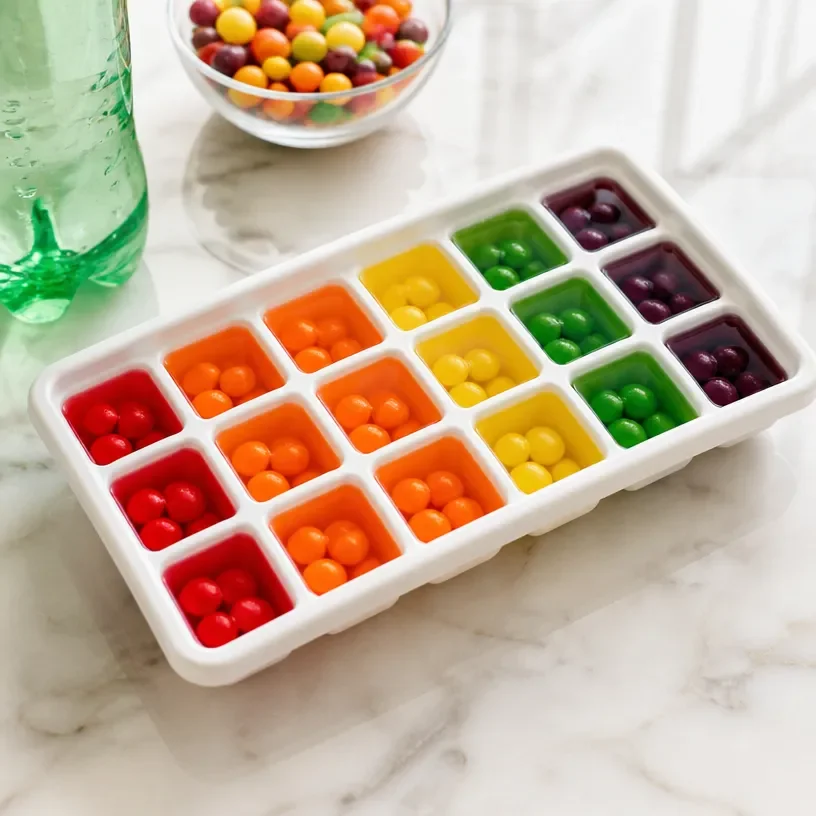
When kids are restless on a busy afternoon, finding a quick and engaging activity to keep them entertained can feel like a challenge. You might want to introduce them to a fun and colorful project that combines creativity with a bit of science. The DIY Rainbow Color-Bleed with Sprite and Skittles is a perfect option, as it offers vibrant results with minimal prep. It’s not just a visually stunning activity; it also provides an opportunity for kids to learn about color mixing and the scientific principles behind the process. You may also find Diy Rainbow Coffee Filter Dahlia Garland useful.
Why This DIY Rainbow Color-Bleed with Sprite and Skittles Works So Well
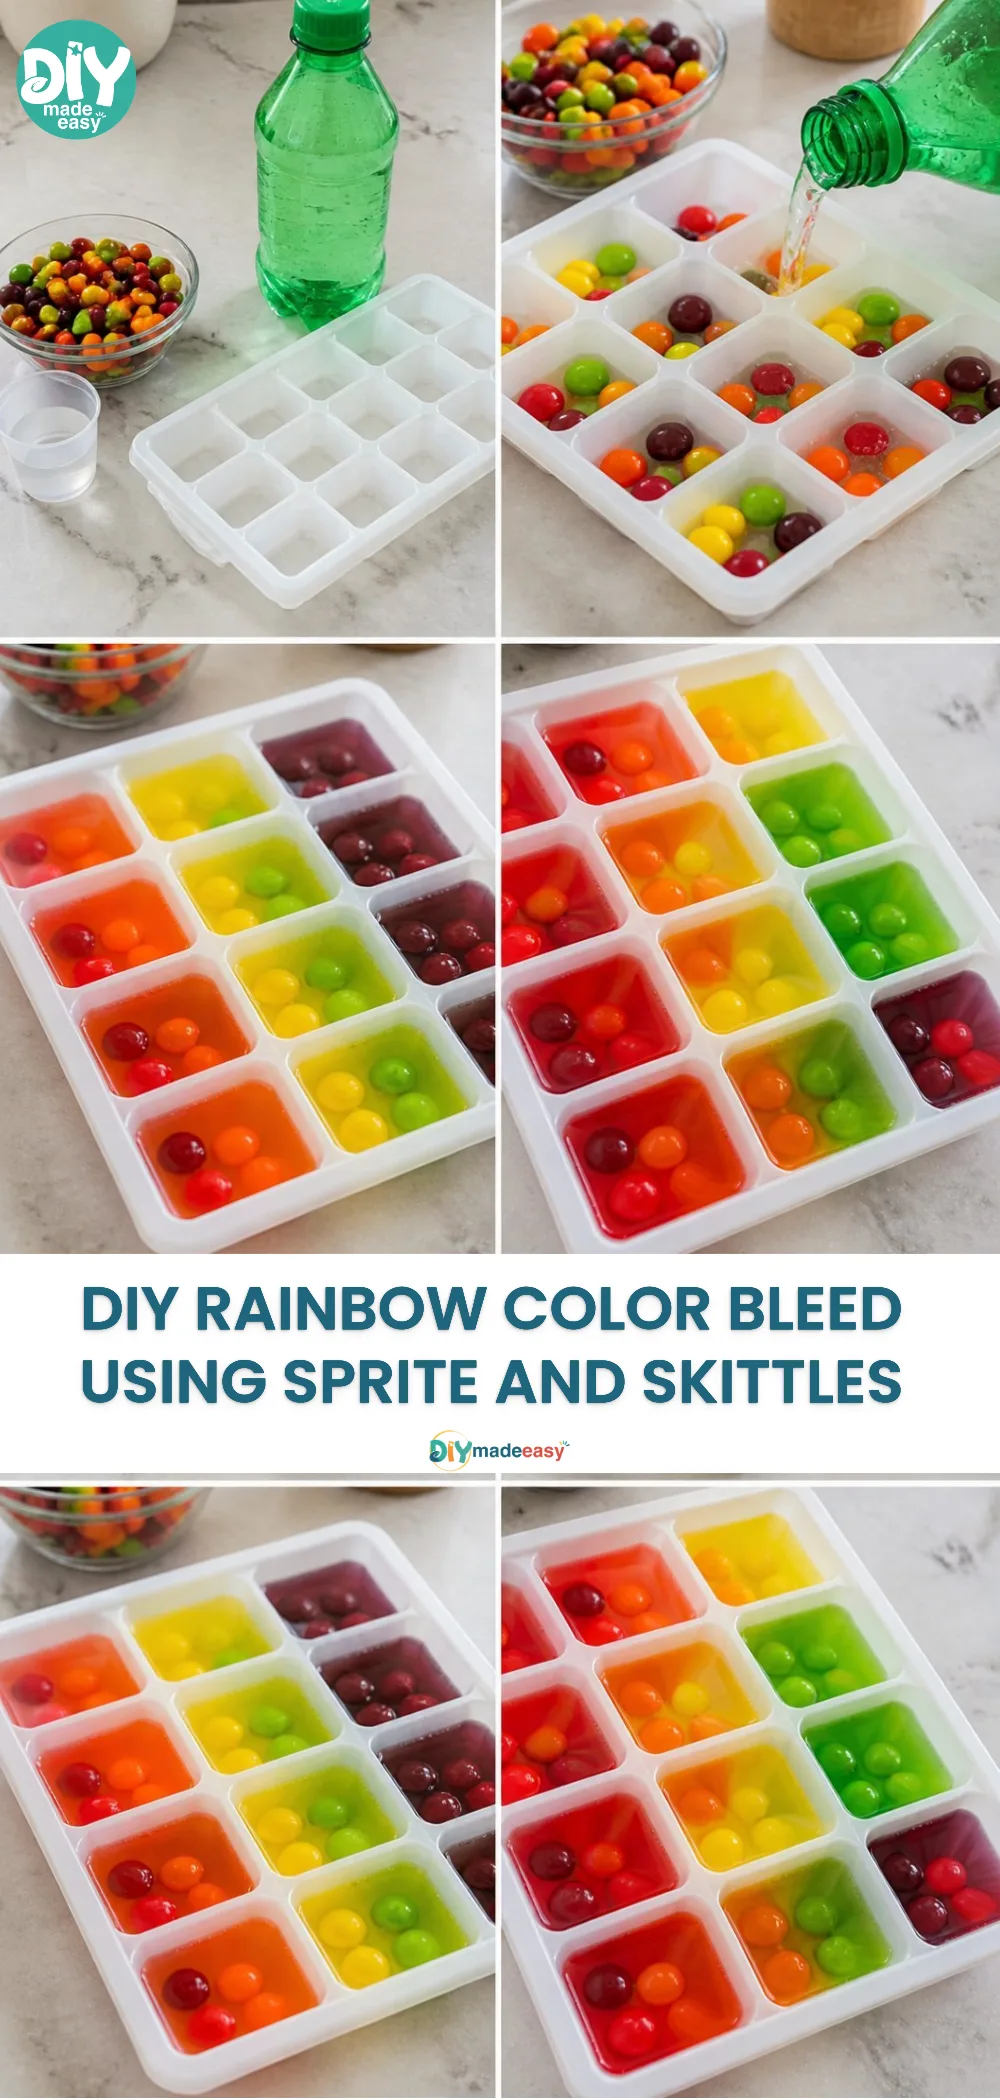
You may also find Diy Rainbow Coffee Filter Ghost Garland Halloween Decor useful.
This project is incredibly approachable for parents and kids alike, making it a great choice for those low-prep moments. With only a few materials that can often be found in your kitchen, it’s an activity that doesn’t require a lot of planning or setup. This DIY project allows kids to unleash their creativity while also learning a bit about science. The colorful transformation that occurs as the colors bleed makes for a captivating visual experience, keeping their focus without overwhelming you with mess or complexity. You may also find Diy Rainbow Ghost Cupcake Liner Garland Party Decor useful.
A Quick Look Before You Begin
Before diving into this fun project, it’s helpful to know what you’re getting into. The DIY Rainbow Color-Bleed with Sprite and Skittles typically takes about 30 minutes from start to finish, including setup and cleanup. Because this project involves liquid, it is advisable to lay down a few paper towels to catch any spills. An adult may need to help pour the Sprite, but otherwise, kids can take the lead in adding the Skittles and watching the colors mix together. You may also find Diy Rainbow Pineapple Garland Summer Party Decor useful.
Materials You’ll Need
To successfully complete the DIY Rainbow Color-Bleed with Sprite and Skittles, gather the following materials:
- Skittles candy (a common treat)
- Sprite soda (or any clear soda)
- Small shallow dishes (to hold the Skittles)
- Paper towels (for easy cleanup)
- Optional: a large tray (to contain any spills)
These items are easily accessible, and most households will likely have them on hand, making this project budget-friendly and straightforward.
Step-by-Step Directions
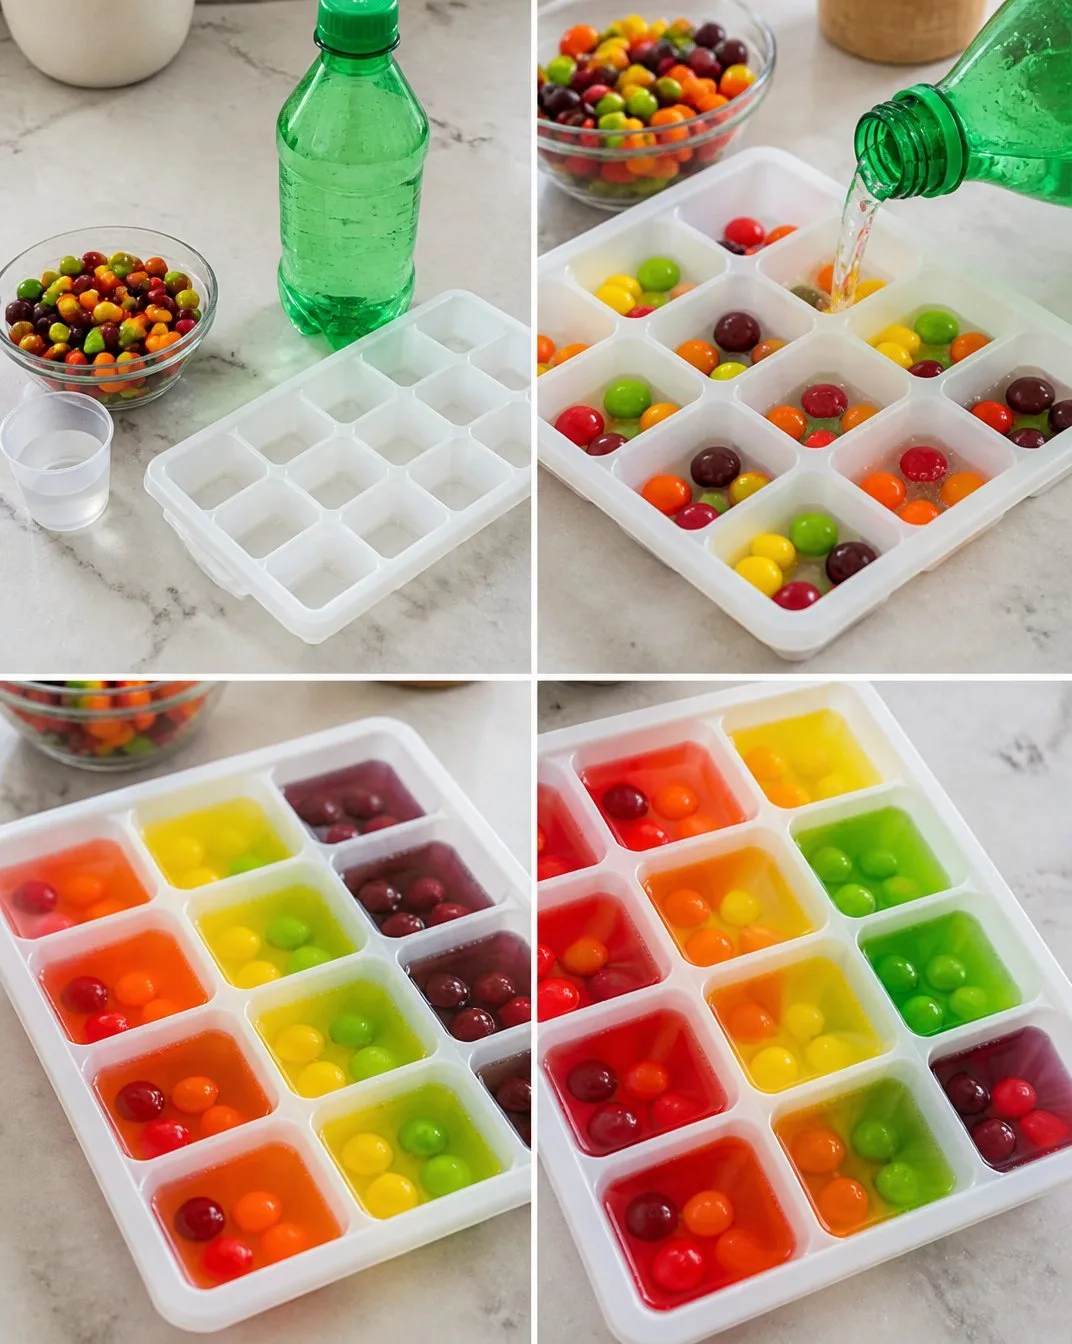
Prepare Your Workspace
Clear a flat surface and place paper towels or a tray underneath your dishes.Arrange the Skittles
Place a few Skittles in each dish. Feel free to create patterns or use different colors in separate dishes for a more varied effect.Pour the Sprite
Carefully pour Sprite into each dish, just enough to cover the Skittles completely. Be sure to let the kids help with this step!Observe the Color Bleed
Quickly step back and watch what happens. The colors will start to bleed out into the soda almost immediately, creating a beautiful rainbow effect.Document the Results
Capture the moment by taking photos or videos. This is especially fun if you combine it with a discussion about what is happening how the colors mix, what dissolves fastest, etc.Finish the Experiment
After a few minutes, the color will continue to bleed into the Sprite. Once you’re satisfied with the results, you can discuss what you’ve noticed together.Cleanup
Once the activity is complete, clean the area with the paper towels, and enjoy a sweet treat together with the leftover Skittles!
The Learning Behind This DIY
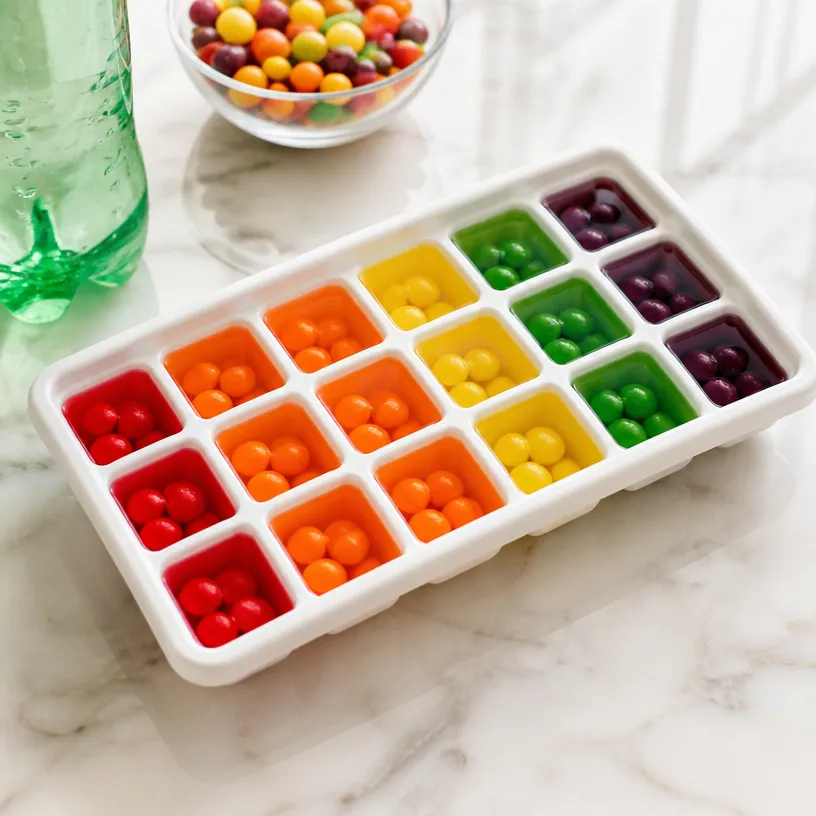
While creating a rainbow is fun, kids will also practice valuable skills during this DIY project. They’ll engage in scientific observation as they note how different colors dissolve and interact with the Sprite. Learning about primary colors and how they mix to form new colors also illustrates basic principles of color theory.
Moreover, fine motor skills are engaged as children pour the Sprite and arrange the Skittles, promoting coordination. This project wonderfully combines sensory activities with education, making success accessible for all age levels.
Troubleshooting Common Issues
Sometimes, things may not go exactly as planned. If the Skittles don’t seem to bleed much, consider the following solutions.
Firstly, ensure you have enough Sprite to cover the candies completely. If there was not enough liquid, this may hinder the color exit. Also, make sure you are using fresh Skittles, as older ones may not dissolve effectively. With a little adjustment, you’ll achieve the beautiful rainbow effect you aim for!
Easy Variations to Try
Don’t be afraid to add your own twist to this project! Here are a few fun suggestions:
- Different Candies: Try using other types of colorful candies gummy bears or M&M’s can offer different results.
- Create Patterns: Arrange the Skittles in fun patterns before pouring the Sprite to see how the color bleeding changes.
- Add a Science Element: Incorporate a discussion about how temperature affects the dissolving process warm soda versus cold soda could yield different results.
- Use Different Soda: Experiment with flavored sodas, such as lemon-lime or fruit punch, for unique color effects.
Storing or Reusing This Project
After your DIY Rainbow Color-Bleed with Sprite and Skittles, you might be wondering what to do next. While this specific project is designed for one-time enjoyment due to the nature of the materials, the dishes can be cleaned and reused for other colorful activities. Make sure to dispose of any leftover soda responsibly to keep it eco-friendly.
FAQs About DIY Rainbow Color-Bleed with Sprite and Skittles
Will it make a big mess?
While some spills may occur, laying down paper towels helps contain it. The process is visually engaging, and with a little preparation, cleanup can be quick and easy.What age range is this suitable for? Children of various ages can participate. Older kids can manage the pouring and candy arranging, while younger ones might still enjoy observing the colors. Always supervise younger children when handling liquids.
Can I substitute the Skittles?
Yes, any colorful candies work! Just keep in mind they might not produce the exact same results.
What about storage?
There isn’t much in the way of leftover materials post-experiment, but you could save the dishes for future activities. Just clean them well before reusing.
A Final Helpful Note
Remember, engaging in creative DIY activities like the Rainbow Color-Bleed with Sprite and Skittles should be a fun and flexible experience. It’s all about exploring, learning, and enjoying the moment together. So grab your materials and let the rainbow-making begin!
Conclusion
After experiencing the vibrant fun of the DIY Rainbow Color-Bleed with Sprite and Skittles, you may want to explore similar activities. Check out this
candy science experimentto continue the colorful learning at home. For a delightful treat to enjoy afterwards, you can also try this
Funfetti cake recipewhich is perfect for celebrating your creative project.