

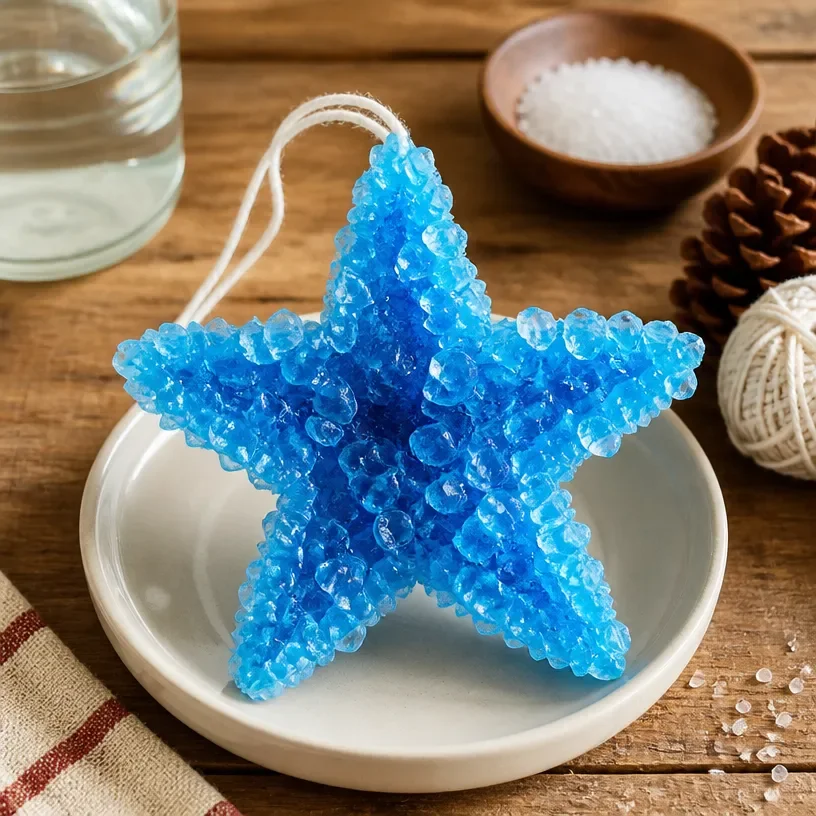
As children dart around the kitchen, excitement bubbling over like a pot of water on the stove, you might find yourself scrambling for a last-minute creative activity. One option that nearly guarantees sparkling results is the DIY Crystal Growing Star Tutorial. It’s a project that not only captures attention but also leaves room for exploration and scientific fun. With just a few household items, you can transform a regular afternoon into an adventure filled with beautiful crystal formations, making it a perfect fit for busy families looking to infuse some wonder into their day. You may also find Diy Crystal Growing Star useful.
Why This DIY Crystal Growing Star Tutorial Works So Well
You may also find How To Create Transparent Cornstarch Heart Charms Diy Tutorial useful.
This DIY project is low-prep, relying on simple materials and straightforward procedures that can easily fit into a packed schedule. With minimal setup required, you can engage your kids quickly, ensuring that the process is relaxed and enjoyable. Plus, the gratifying outcome of vibrant, sparkling stars means the results are both satisfying and tangible. What makes this project particularly appealing is that it instills a sense of scientific curiosity in children, as they watch their creations take shape over time. Whether you’re embracing an impromptu crafting session or looking for something educational, this crystal growing project is a brilliant choice. You may also find Crystal Growing Experiment useful.
A Quick Look Before You Begin
As you prepare to dive into this creative endeavor, take a moment to gather your thoughts and materials. Expect the project to take a few hours in total, with most of the time dedicated to watching the crystals grow. There’s minimal mess involved, so you can relax without worrying about a chaotic cleanup afterward. Adult supervision is beneficial, not only for safety but also to guide the process and enhance the learning experience. Overall, this project can easily fit into a busy afternoon or a weekend, making it quite practical. You may also find Crystal Growing Flower useful.
Materials You’ll Need
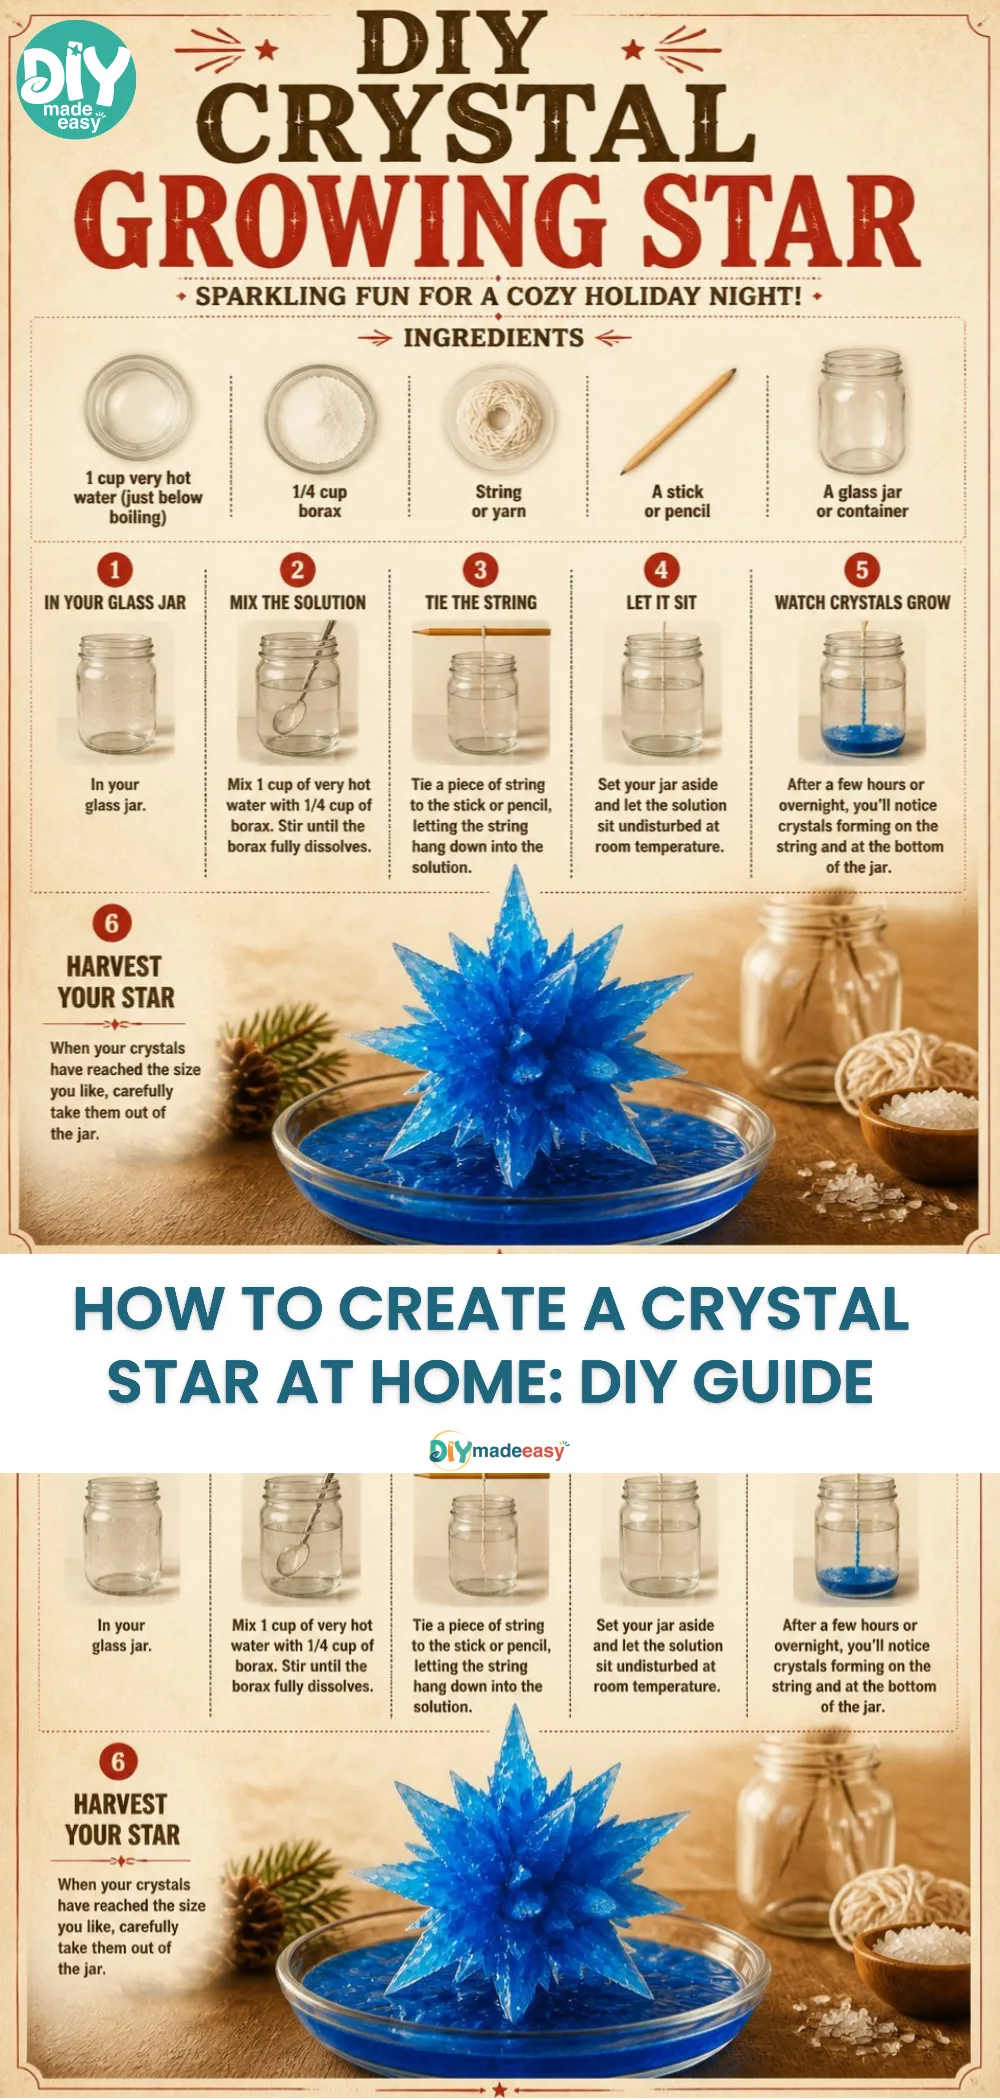
For the crystal growing stars, you’ll need the following materials:
- Borax – a common household item that serves as the base for crystal growth
- Water – hot water is necessary for dissolving borax effectively
- String – to hang the star shapes while the crystals form
- Pencils – to suspend your stars in the borax solution
- Star-shaped cookie cutters – to create star molds
These materials are easy to find and budget-friendly, allowing you to get started without a trip to the craft store.
Step-by-Step Directions
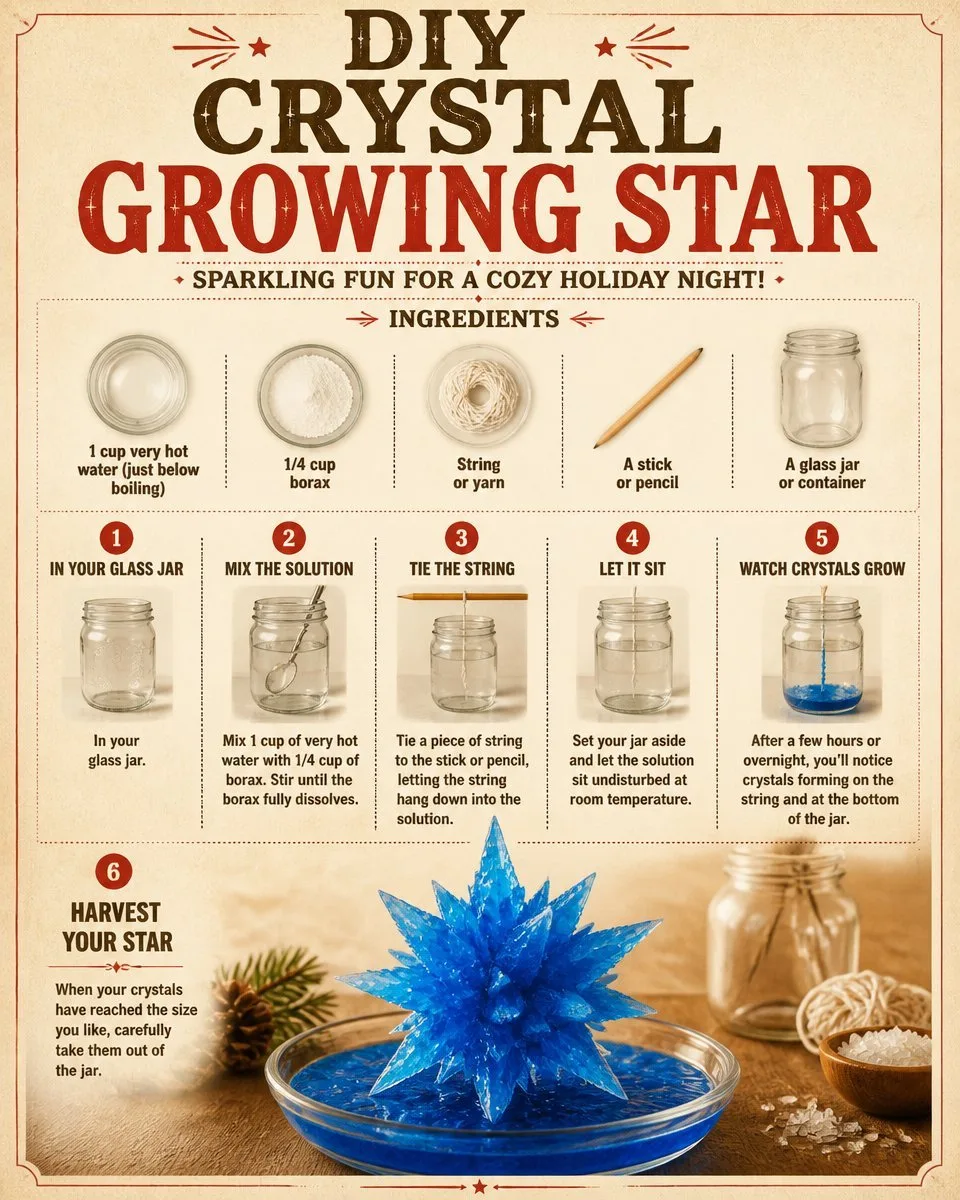
- Begin by boiling water in a pot, ensuring you have a safe place to handle it when it’s hot.
- In a separate container, mix about 3 tablespoons of borax for every cup of boiling water.
- Stir the mixture thoroughly until the borax completely dissolves to avoid any clumping.
- Tie a piece of string around the center of your star-shaped mold, making sure it’s secure.
- Lower your star shape into the solution, resting the pencil across the top of the container to keep it suspended.
- Allow the setup to sit undisturbed in a space where it can cool and crystallize.
- After a few hours, check on your crystals. With a bit of patience, they will grow into beautiful, glittering shapes.
The Learning Behind This DIY
As your children engage in the crystal growing process, they’ll naturally practice essential science concepts such as cause and effect. Observing how the borax dissolves and then crystallizes as it cools provides a hands-on understanding of solubility and crystallization. They’ll also hone fine motor skills and develop coordination as they interact with the string and molds. This DIY project not only fosters creativity but also serves as an educational touchpoint, instilling a deeper curiosity about how the world works.
Troubleshooting Common Issues
Sometimes, things might not go as planned. If your crystals seem to be growing poorly, it could be due to a few common issues. One possibility is that the water wasn’t hot enough to fully dissolve the borax. If you notice your crystals looking blurry or not setting properly, make sure you’re using boiling water. Another common issue is the disturbance of the solution; ensure that the setup sits undisturbed while the crystals form. If you encounter any clumping in the mixture, simply reheat the solution, add more borax, and stir until clarified.
Easy Variations to Try
Once you’ve mastered the star shapes, why not try altering the project a bit? Here are a few simple variations:
- Different Shapes: Use cookie cutters in various shapes hearts, flowers, or even holiday-themed designs. Each shape will result in wonderfully unique crystals.
- Colored Crystals: Add a few drops of food coloring to your borax solution for a colorful twist, allowing your kids to create vibrant and eye-catching designs.
- Layered Crystals: Experiment with different colors and layer them in the mold. Pour a little of one color, let it set, and then pour another on top for a striking effect.
Storing or Reusing This Project
Once your crystals have formed, you’ll need to decide what to do with them. As they are beautiful displays, consider keeping them for permanent decoration in your home. If you prefer to clean up, place the crystals gently back into their containers to avoid breakage. You can also let them dry out completely and store them in an airtight bag if you want to reuse the materials for another project down the line.
FAQs About DIY Crystal Growing Star Tutorial
What if my crystals don’t form properly?
It’s possible that the solution wasn’t hot enough, or it may have been disturbed. Reheat the mixture, ensuring that the borax fully dissolves, and try again.
Is this project messy?
Generally, this project is low-mess. As long as you handle materials carefully, spills can be avoided with a simple wipe after the activity.
What age range is this project suitable for?
This project can be enjoyed by kids as young as 5 with adult supervision. It offers a great introduction to scientific principles while being fun and engaging.
Can I use other materials besides borax?
While borax is ideal for this project, you might also explore other crystallizing agents. Just be sure to research any alternatives to ensure they are kid-friendly.
Conclusion
Incorporating the DIY Crystal Growing Star Tutorial into your afternoon plans can spark joy and creativity for you and your kids. Not only will you produce stunning crystallized stars, but you’ll also create a shared learning experience. If you want to explore additional crystal projects or variations, check out resources like How to Make Crystal Stars | Borax Crystal Ornaments for more ideas. Additionally, consider diving deeper into the fascinating world of crystal growth with insights from Growing Crystals: How to Make Beautiful Crystals at Home.
PrintDIY Crystal Growing Star Tutorial
An engaging DIY project that allows children to create beautiful crystal stars while exploring scientific principles.
- Prep Time: 15 minutes
- Cook Time: 180 minutes
- Total Time: 195 minutes
- Yield: Multiple crystals
- Category: Crafts
- Method: DIY
- Cuisine: N/A
- Diet: N/A
Ingredients
- Borax
- Water
- String
- Pencils
- Star-shaped cookie cutters
Instructions
- Begin by boiling water in a pot.
- In a separate container, mix about 3 tablespoons of borax for every cup of boiling water.
- Stir the mixture thoroughly until the borax completely dissolves.
- Tie a piece of string around the center of your star-shaped mold.
- Lower your star shape into the solution, resting the pencil across the top of the container.
- Allow the setup to sit undisturbed for a few hours.
- Check on your crystals after a few hours and enjoy the results.
Notes
Ensure that the solution is undisturbed while the crystals grow for best results. Adult supervision is recommended.
Nutrition
- Serving Size: 1 craft
- Calories: N/A
- Sugar: 0g
- Sodium: 0mg
- Fat: 0g
- Saturated Fat: 0g
- Unsaturated Fat: 0g
- Trans Fat: 0g
- Carbohydrates: 0g
- Fiber: 0g
- Protein: 0g
- Cholesterol: 0mg